Table of Contents
Advertisement
深圳市神牛摄影器材有限公司
GODOX Photo Equipment Co., Ltd
地址/Add: 深圳市宝安区福永镇福洲大道西新和村华发工业园A4栋
Building A4, Xinhe Huafa Industrial Zone, Fuzhou RD West, Fuyong
Town, Baoan District, Shenzhen 518103, China
电话/Tel: +86-755-29609320(8062)
传真/Fax: +86-755-25723423
邮箱/E-mail: godox@godox.com
705-X1TF00-00
Made In China
TTL
无线引闪器
TTL Wireless Flash Trigger
For FUJIFILM
Instruction Manual
说
明
手
册
Chinese English Bilingual
中英文双语
Advertisement
Table of Contents

Summary of Contents for Godox X1T-F
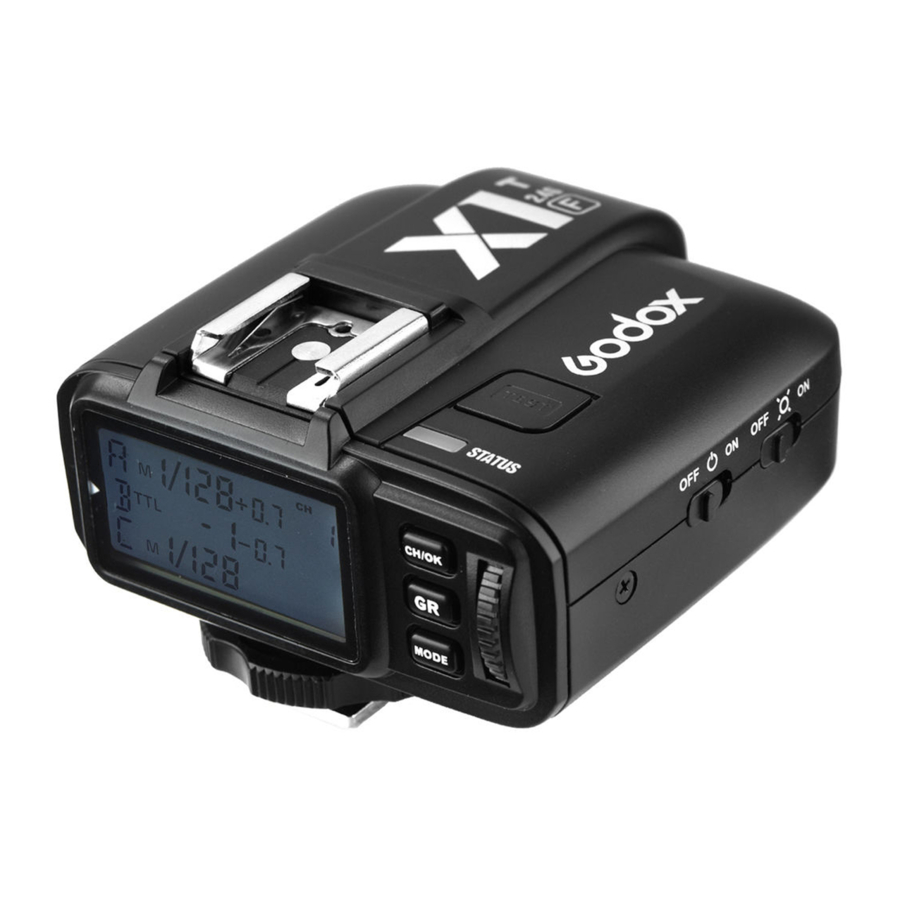
- Page 1 无线引闪器 TTL Wireless Flash Trigger For FUJIFILM 深圳市神牛摄影器材有限公司 GODOX Photo Equipment Co., Ltd 地址/Add: 深圳市宝安区福永镇福洲大道西新和村华发工业园A4栋 Building A4, Xinhe Huafa Industrial Zone, Fuzhou RD West, Fuyong Town, Baoan District, Shenzhen 518103, China 电话/Tel: +86-755-29609320(8062) 传真/Fax: +86-755-25723423 邮箱/E-mail: godox@godox.com Instruction Manual 说...
-
Page 2: Table Of Contents
Installing Batteries Multi Flash Group ON/OFF Settings and control over their strobist setups. X1T-F can also connect to the cameras which have Low Battery Level Indication Multi Flash Parameter Setting PC sync sockets. -
Page 3: Warning
Names of Parts Warning Do not disassemble. Should repairs become necessary, this product must be Body sent to an authorized maintenance center. Transmitter TEST Trigger Button Always keep this product dry. Do not use in rain or in damp conditions. Keep out of reach of children. -
Page 4: Transmitter Panel
Names of Parts Using the Flash Trigger Transmitter Panel Note: To set ZOOM functions, please open the ZOOM functions on the camera flash. The flash trigger features the following functions: 1. As a Wireless Flash Trigger 1.1 Mount the transmitter on camera hotshoe and turn it on before turning on the camera. -
Page 5: Setting The Transmitter
Setting the Transmitter Setting the Transmitter Power Switch Mode Settings 1. Short press the <GR> Button and the Slide the Power Switch to ON, and the device is on and Status Indicator Lamp will not selected group will blink. Click to choose blink. -
Page 6: Multi Flash Group On/Off Settings
The minimum power output value is 1/128 and cannot be set to 1/256 for most of camera flashes. parameter setting menu. However, the value can change to 1/256 when using in combination with Godox strong power flashes 3. Then, P (output value), T (flash times) and H e.g. -
Page 7: Test Flash
Setting the Transmitter Setting the Transmitter Automatically Enter Power Saving Mode group’s setting turns to the maximum(1/1) or the minimum(Min.). If the current group is in the TTL mode, all the other groups which are in the M mode will change their 1. -
Page 8: Setting The Camera
Forcibly send the setting values before firing even though Setting the Camera the values has not been changed. To trigger X1T-F, please set camera's flash mode to TTL flash. The transmitter is in the master mode, which can set the C.Fn-10 APP mode receiver's mode and output on the transmitter end. - Page 9 ■ SHOE MOUNT FLASH Sync: Control flash timing. The following options are available • (1ST CURTAIN): The flash fires immediately after the shutter opens (generally when an optional shoe-mounted the best choice). flash unit is attached and turned on. • (2ND CURTAIN): The flash fires immediately before the shutter closes.
-
Page 10: Selecting The Operation Method
Press the <CH/OK> Button for 5 seconds to switch the operation methods (Method Button Operation Function 1/Method 2). Short press (under normal status) Enter CH settings; X1T-F Operation Method 1(by default) (under settings) Confirm and back to normal status TTL/M Mode CH/OK Double-click Control the ON/OFF of modeling flash Button... - Page 11 Setting the Transmitter Setting the Transmitter X1T-F Operation Method 2 Multi Mode (C.FN-04-on) TTL/M Mode Button Operation Function Button Operation Function Short press (under normal status) Enter CH settings; Short press (under normal status) Enter CH settings; (under settings) Confirm and back to normal status...
-
Page 12: Attentions
Technical Data 1. Unable to trigger flash or camera shutter. Make sure batteries are installed correctly and Model X1T-F Power Switch is turned on. Check if the transmitter and the receiver are set to the same Compatible Cameras FUJIFILM cameras channel, if the hotshoe mount or connection cable is well connected, or if the flash Support for the cameras that have PC sync socket. -
Page 13: Compatible Camera Models
Compatible camera models & functions support: Technical Data Model X1T-F Function TTL/M Flash Stroboscopic Model X1T-F Flash AF-assist Beam Others Standard REAR HSS(FP) Standard √ √ √ √ √ Synchronization delay set Yes (0~10ms,use 100us as the unit) √ √...


Need help?
Do you have a question about the X1T-F and is the answer not in the manual?
Questions and answers