Table of Contents
Advertisement
Quick Links
Advertisement
Table of Contents

Related Manuals for Pulsar FLOWPULSE


Summary of Contents for Pulsar FLOWPULSE
- Page 1 ULSE Instruction Manual...
- Page 3 ARRANTY AND IABILITY Pulsar Process Measurement Limited guarantee for a period of 2 years from the date of delivery that it will either exchange or repair any part of this product returned to Pulsar Process Measurement Limited if it is found to be defective in material or workmanship, subject to the defect not being due to unfair wear and tear, misuse, modification or alteration, accident, misapplication or negligence.
-
Page 5: Table Of Contents
Preparation for Operation ............................12 Maintenance ................................13 Setting-Up Flow Pulse ........................... 14 Chapter 3 Interface ................................. 14 Using FlowPulse PC ............................. 14 Pipe Internal Diameter ..........................14 Flow Tab ................................17 Signal Strength .............................. 17 Stability ................................18 Flow Record Tab ..............................18 Trace Tab ................................ - Page 6 Tools Menu ................................31 About Flow Pulse Menu ............................31 Chapter 4 RS 485 Parameter Guide ........................32 Parameter System ..............................32 Parameter Access ..............................32 Output Parameters ..............................33 Flow Rate (P20 and P21) ..........................33 Signal Strength (P22) ............................ 33 Stability (P23)..............................
-
Page 7: Chapter 1 Introduction
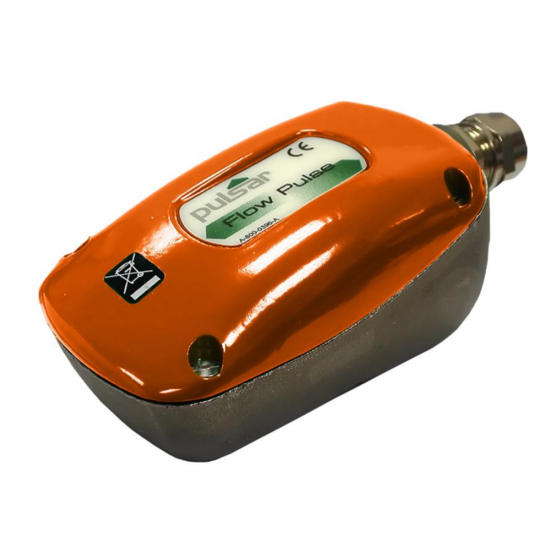
Chapter 1 Introduction Congratulations on your purchase of a Pulsar . This quality Flow Pulse system has been developed over many years and represents the latest in non- invasive ultrasonic flow monitoring. It has been designed to give you years of trouble free performance, and a few minutes spent reading this operating manual will ensure that your installation is as simple as possible. -
Page 8: About The Flow Pulse
About the Flow Pul s e is an ultrasonic non-invasive flow monitor designed for use Flow Pulse on most industrial liquid flow applications. uses a novel spread Flow Pulse spectrum analysis technique never before used in flow monitoring. It introduces a radical new Digital Signal Processing approach for exceptional repeatability. -
Page 9: Functional Description
RS-232 serial port is fully supported by the PC software, which FlowPulse can be used for setting up and operating the device. In addition, there is a RS-485 with Modbus RTU communication protocol to Pulsar’s optional controllers which are listed that interfaces Flow Pulse below: •... -
Page 10: Product Specification
Supply Power supply 18 - 28V DC Power Consumption 2.4W @ 24V typical, 3W @24V maximum Pulsar Process Measurement Limited operates a policy of constant development and improvement and reserve the right to amend technical details as necessary. Page 4... - Page 11 Page...
-
Page 12: Eu Declaration Of Conformity
EU Declaration of Conformity Page 6... -
Page 13: Chapter 2 Installation
If there is any shortage or obvious shipping damage to the equipment, report it immediately to Pulsar Process Measurement Limited. Power Supply Requirements requires a DC 18-28V power supply. -
Page 14: Dimensions
If using RS485 then connect terminal 8 (RS485 SCR) to the Modbus return. The power supply ground on must not be earthed or connected to the Flow Pulse cable screen. Dimensions Cable Entry It is recommended that you use the cable gland that comes with the Flow to ensure that the ingress rating is maintained. - Page 15 Wiring The IP68 version of the Flow Pulse is designed to work with Pulsar’s Flow Monitor wall unit, utilising the RS485. But it is also available on its own for connection to existing Modbus or other devices to monitor RS485, mA output and/or relay behaviour.
-
Page 16: Terminal Connections
RS232 Serial Interface The RS232 interface is available on the RJ-11 socket for setting up and operating the using the FlowPulse PC software. Flow Pulse It is recommended that the serial cable does not exceed 10 metres in length. RS485 Serial Interface with Modbus It is recommended that a screened cable is used, and the cable screen is connected to the screen terminal of the RS485 terminals. -
Page 17: Flow Pulse Installation Procedures
Installation Procedures Flow Pulse All electronic products are susceptible to electrostatic shock, so follow proper grounding procedures during installation. • Before installation, ensure that the necessary cabling has been fitted and that the device is not being powered. • must be mounted on the external, dry surface of the pipe. Flow Pulse The device should not be submerged in liquid. -
Page 18: Flow Pulse Pc Installation
Flow Pulse PC Installation Flow Pulse The FlowPulse PC software is supported on Win 7, Win 8 and Win 10 (32 and 64 bit). The .Net Framework 4.0 is required to run the program. This is free for download online. -
Page 19: Maintenance
RS232. Click the “Tick” icon to connect. • When connection is established, the current parameters stored on the will be extracted by FlowPulse PC. The “Device” bulb on the Flow Pulse top right corner of the program will light up to indicate a successful connection. -
Page 20: Chapter 3 Setting-Up Flow Pulse
Choose “Parameters” tab, enter the pipe internal diameter in units of mm in the “Pipe I.D.” field, then click the “SAVE” button. Return to the “Flow” tab to monitor flow, the “Record” tab shows a time-plot of flow. Figure 4 shows the main window of the FlowPulse PC software: Page 14... - Page 21 Figure 4: The flow information window of FlowPulse PC. Connect: click to attempt connection to the Flow device. Pulse • Set the baud rate to 57600 (Setup>Serial Port) with RS232 or to 19200 with RS485 Disconnect: appears after connection is established.
- Page 22 Flow Pulse have a site name, a site name will be requested. FlowPulse PC 1.2.3 and lower do not require a site name. • A .flg file is then generated, named with the “FlowPulse-” prefix followed by the site name and the current date &...
-
Page 23: Flow Tab
Exit: click to exit program Flow Tab The default screen of FlowPulse PC is the Flow tab. The dial on the left displays the linear flow velocity, while the numerical display on the right shows the volumetric flow rate. The default volumetric unit is litres per second, and is configurable on the Parameters tab. -
Page 24: Stability
Stability The stability level is an indication of the consistency of flow reading, as derived from the combination of signal strength and statistical fluctuations of the flow reading. A high level of stability would point to a low-noise environment, clean and optimum acoustic pipe conditions, and a relatively laminar liquid flow within the pipe. -
Page 25: Trace Tab
Note When the save data to file function is being used, flow information and traces will be written to file at the fixed interval selected via Setup- >Recording Interval. (See Record to file function in “Using FlowPulse PC”. Trace Tab This calls and displays diagnostic traces when the Trace button is activated. -
Page 26: Parameters Tab
RS232 via Flow Pulse FlowPulse PC and RS485 via Modbus interface, the values on the Parameter tab will not be instantly updated on FlowPulse PC if a parameter change is instructed via the RS485 Modbus. Page 20... -
Page 27: Pipe Internal Diameter
Pipe Internal Diameter The pipe internal diameter is the only parameter that must be entered after every installation. Flow Pulse The default unit is millimetres (mm), with the option for unit of inches. Calibration Factor The calibration factor can be used to internally scale the flow reading by a multiplication factor. -
Page 28: Damping
It is recommended that the sensitivity be set as high as possible subject to the constraint of false flow indication under no-flow condition. • Good for low flow or poor pipe condition with weak signal strength. • If set very high, watch for false indication of flow when the pump is not High Sensitivity... -
Page 29: Volumetric Unit And Time Unit
Volumetric Unit and Time Unit The flow measurement on the is performed in terms of Flow Pulse volumetric flow rate. The defaults are litres for the volumetric unit and seconds for the time unit, giving flow rate in units of litres per second. This can be modified to give the desired units of flow rate. -
Page 30: Step Response
Step Response The step response allows to temporarily bypass damping and Flow Pulse track any sudden change in flow commonly encountered during the beginning and end of a pumping cycles. This function is on by default. Step Response Threshold The step response threshold is the change in flow required for the normal damping to be bypassed. -
Page 31: Ma Output
mA Output mA Low, mA High, Flow Low, Flow High The mA output has a range of 4 to 20 mA by default. This is scaled to the flow range set by the Flow Low and Flow High parameters. The following figure illustrates this: mA Output mA High limit... -
Page 32: Ma Output: Ma Trim
As an example, in an application with low flow through a 100 mm Pipe I.D., the user can choose to scale the mA output from 4 to 20 to correspond to a flow range of 0 to 15 litres/sec instead of the full flow range of 0 to 31 litres/sec. -
Page 33: Relay/Alarm
Relay/Alarm The Relay/Alarm parameters allow the set points and switching mode to be configured. Figure 6 shows the alarm zones defined by the low and high set points, and the function of the different alarm modes. Flow Rate Zone High High Setpoint Zone... -
Page 34: Rs-485
The default Modbus Slave ID is 126. The chapter on Parameter Guide provides more details on Modbus register addresses and valid values. The RS-485 port can also be used to interface with the FlowPulse PC software, by selecting the PC-485 mode. Please ensure that you have a USB... -
Page 35: Manual Setting
Manual Setting There is an option for manually setting the parameters using the Manual Setting terminal on the Parameter tab, as illustrated in the following figure. Figure 7: The manual setting window on the Parameter tab. Every parameter on is identified by a unique Address, and the Flow Pulse content is the parameter Value. -
Page 36: Setup Menu
This menu enables setting up of the RS232 port. The default setting when interfacing using FlowPulse PC is 57600 Baud 8bits-No Parity-1Stop bit. There is normally no need to change this as FlowPulse PC should automatically detect a connected however a specific comport can Flow Pulse be selected in the ‘Serial Port’... -
Page 37: Tools Menu
Tools Menu This menu is available in FlowPulse PC 1.2.4 and newer, it provides the following actions: Export Data This is used to convert a log file to CSV format. Flow Pulse This provides a more readable format for the data that can... -
Page 38: Chapter 4 Rs 485 Parameter Guide
The parameters tab on FlowPulse PC (RS232 or RS485) b) The manual setting terminal on FlowPulse PC (RS232 or RS485) c) Modbus communication protocol (RS485) It is recommended that only one method of access is used at any point in time. -
Page 39: Output Parameters
Output Parameters Flow Rate (P20 and P21) The current flow rate can be read from register 20 and 21, in the following format: 12.36 Register [20] = 12 Register [21] = 360 P20 contains the whole number part of the flow reading, while P21 contains the fractional part of the flow reading. -
Page 40: Configuration Parameters
Base-0 addressing protocol (i.e. there is no offset of 1) Parameter Addr Options Def. Notes ASCII mode not fully supported yet. The PC-485 mode enables FlowPulse PC 0 = Not in use Modbus interface using 1 = RTU Mode RS485. Modbus 2 = N/A protocol turned off 3 = PC-485 while using PC-485. -
Page 41: Rs232 Communication
Addr Options Def. Notes 0 = 1200 1 = 2400 Baud rate for RS 232 3 = 9600 FlowPulse PC/debug Baud Rate 4 = 19200 /reflash port. 5 = 38400 6 = 57600 7 = 115200 0 = No parity... -
Page 42: Processing Parameters
Processing Parameters The following are parameters that relate to the detection and processing of the flow signal. Parameter Addr Options Def. Notes Magnitude A higher number gives Threshold 1200 - 3000 1600 lower sensitivity. (Sensitivity) A higher number gives Damping 10 - 40 more damping. - Page 43 2300, then the Minimum Flow 250 – 4000 corresponding flow Cut-off index would be 100, and the FlowPulse will not report any flow unless the red(flow) indicator exceeds 100 on the flow index. StepChangeLimit is the limit on any sudden...
-
Page 44: Ma Output Parameters
Parameter Addr Options Def. Notes Adjustment factor to compensate for the type of pipe material: Pipe Type 0 – 2 0-Iron (No change) 1-Stainless Steel (x1.8) 2-Hard Plastic (x1.1) This parameter is sued to set up the type of material being measured in the pipe: 0-Very Low (water Density... - Page 45 650 would give +150 µA offset. This differs from the method of directly entering -100 or +150 on the FlowPulse PC parameter tab. In units of µA, it applies an offset to the lower end of the mA output range. The...
- Page 46 Parameter Addr Options Def. Notes P176 contains the whole number part of Flow Low Flow Low limit, while 0 - 65535 (Integer part) P177 contains the fractional part of Flow Low limit. The P177 is stored as whole number from 0-999 (allowing a fractional representation from 0.001 to 0.999)
-
Page 47: Alarm/Relay Parameters
Alarm/Relay Parameters Please refer to the diagrams in Chapter 3 – Relay/Alarm section before setting the Alarm/Relay parameters manually or over Modbus. Parameter Addr Options Def. Notes 0 = Low alarm 1 = High alarm 2 = Out of range Alarm Mode alarm 3 = In range... - Page 48 Parameter Addr Options Def. Notes Low limit. P208 is stored as a whole number from 0-999 (allowing a fractional Low Set Point 0 - 1000 representation from (Fractional part) 0.001 to 0.999). Note: The flow value is in units of the current volumetric flow rate.
-
Page 49: Flow Unit Parameters
Flow Unit Parameters The table below lists the valid combination of volumetric and time units: Valid Volume Per Time • Litres Second • Minute • Cubic Metres Minute • Hour • Cubic Feet Second • Minute • Imperial Gallons Second •... -
Page 50: Device Information Parameters
Device Information Parameters These parameters are read-only, and are usually only updated by the device. Parameter Addr Notes Registers 240 and 241 form a 32-bit number. Register 240 => Most Serial Number & significant 16-bit Register 241 => Least significant 16-bit A number associated with Firmware ID the version of firmware. -
Page 51: Device Control Parameters
Device Control Parameters These parameters are for controlling the device or to perform a system action. Parameter Addr Notes Write the necessary access code to this register in order to gain associated access level. No access code is required for user-level access. - Page 52 Parameter Addr Notes Writing integer 9 to this register will reset the device into Bootloader mode. Device will remain in Bootloader mode for around Reset to Bootloader 35 seconds. If no Bootloader software is connected to the device after 35 seconds, device will resume normal operation if a valid firmware is already present.
-
Page 53: Chapter 5 Optimisation And Diagnostic
Chapter 5 Optimisation and Diagnostic Interpreting Diagnostic Trace Figure 8: Example of traces for no-flow (top) and 2.0 m/s flow (bottom). The vertical axis is related to the signal strength, while the horizontal axis is related to detected flow. The top chart in Figure 8 shows the trace under no-flow condition. When there is no flow, the trace should be relatively flat and rest on signal index=90. -
Page 54: Pc-Over-Rs485
3) Remove the USB to RS232 converter, and connect the USB to RS485 converter to Flow Pulse To restore, set RS485 mode to Off or Modbus RTU (register 51 to 0 or 1). Set the baud rate on FlowPulse PC back to 57600 when using the RS232 port. Page 48... -
Page 55: Quick-Response Setup
Flow Pulse to give a minimum response time of approximately 1 second. Please follow these steps to setup Quick Response: 1) Establish connection using FlowPulse PC 2) Slide Sensitivity to the lowest setting. 3) Slide Damping to the lowest setting. -
Page 56: Simulated Flow
(use Info->Data Folder Path to see the folder location). The filename is prefixed by “ParamFlowPulse-” followed by the date and time. 3) Connect FlowPulse PC to the second device on which to load the parameters. Select System->Load Parameters to Device, then choose the parameter file to load. -
Page 57: Firmware Upgrade
RS485 port. You need the firmware file, and the COM port number on the PC. 2) Put the device into Bootloader mode by connecting FlowPulse PC and select System->Switch Device into Bootloader. 3) Select System->Bootloader Control on FlowPulse PC, this will launch... -
Page 58: High Noise Environment
7) When “Verification successful” message is displayed, click Run Application then click Disconnect. 8) Close the Bootloader Interface program, and reconnect to the device using FlowPulse PC. When the device is in Bootloader mode, the Red led flashes continuously and the Green led is off. -
Page 59: Chapter 6 Common Questions And Answers
Chapter 6 Common Questions and Answers Will mechanical vibration affect flow measurement? Typical mechanical vibration sources such as pumps are much lower in frequency compared to the ultrasonic signal of the . However, in Flow Pulse situations where the signal strength is weak (less than 70% with maximum sensitivity) the accuracy may be affected or there could be readings under no-flow conditions. -
Page 60: Can Flow Pulse Be Operated In A Wet Environment
be operated in a wet environment? Flow Pulse enclosure is rated at IP68 to give maximum electrical safety Flow Pulse in the event of accidental or temporary contact with liquid. Operation in an environment that frequently exposes the device to liquid is not recommended. -
Page 61: Chapter 7 Troubleshooting
Device not powered, or if powered, a critical fault has developed. Fault Registers and Log File The registers 270-279 can be queried (via FlowPulse PC or Modbus) to check for fault codes: 1: Retrieved parameter exceeded valid range. 2: Parameter value entered by user exceeded valid range. -
Page 62: Flow Measurement Is Significantly Different From Expectation
Flow measurement is significantly different from expectation POSSIBLE CAUSES ACTION Calibration Error Verify Pipe Internal Diameter setting Actual flow rate is indeed Check pump and valves, verify flow different from what is expected using other methods. Check clamping is not loose and coupling compound is applied. -
Page 63: Flow Reading Under No-Flow Condition
Flow reading under no-flow condition POSSIBLE CAUSES ACTION Reduce the “Sensitivity” setting. Strong vibration on pipe Reinstall away from vibration source. Ensure screen cable is used, and the screen is not connected to the ground of the power supply or mA output. The cable screen should be connected to the enclosure using the cable entry gland and Local electrical noise... -
Page 64: Flow Reading Fluctuates Or Erratic
Flow reading fluctuates or erratic POSSIBLE CAUSES ACTION Reinstall further away if possible. Increase the “Damping” setting on the Device installed too close to device. Turn “Step Response” off if necessary. valve, pump, tees or elbows. Use a smaller “Step Limit” if fluctuation Non-return valves can produce strong knocking. -
Page 65: Appendix: Parameter Record
Appendix: Parameter Record Parameter Details Entered Values Description Default Pipe Internal Diameter Calibration Factor` Volumetric Units 1 (litre) Time Unit 1 (second) mA Low mA High 20mA mA Trim Flow Low Flow High Alarm Mode 0 (Low) Low Set High Set Relay Mode Low Persist High Persist...
Need help?
Do you have a question about the FLOWPULSE and is the answer not in the manual?
Questions and answers