Table of Contents
Advertisement
Advertisement
Table of Contents

Related Manuals for Bose FreeSpace DXA 2120


Summary of Contents for Bose FreeSpace DXA 2120
- Page 1 FreeSpace® DXA 2120 Digital Mixer/Amplifier Installation and Operation Guide Guía de instalación y funcionamiento Guide d’installation et d’utilisation Installations- und Bedienungsanleitung Manuale di installazione e funzionamento Installatie- en bedieningshandleiding...
- Page 2 WARNINGS: • All Bose products must be used in accordance with local, state, federal and industry regulations. It is the installer’s responsibility to ensure installation of the product is performed in accordance with all applicable codes, including local building codes and regulations.
- Page 3 Important Safety Instructions pro.Bose.com Read these instructions. 2. Keep these instructions. 3. Heed all warnings. 4. Follow all instructions. 5. Do not use this apparatus near water. 6. Clean only with a dry cloth. 7. Do not block any ventilation openings. Install in accordance with the manufacturer’s instructions.
- Page 4 Lea este documento antes de comenzar con su instalación. ADVERTENCIA: • Todos los productos Bose deben instalarse conforme a las leyes locales, estatales, federales y del sector. Es responsabilidad del instalador asegurarse de que la instalación del producto se realice conforme a las normas legales correspondientes, incluidas las normas de construcción locales.
- Page 5 18. No se deben colocar fuentes de llamas expuestas, tales como velas encendidas, encima del aparato. Este producto cumple los requisitos de todas las Directivas de la UE aplicables legalmente. Encontrará la declaración de conformidad completa en www.Bose.com/compliance. Información sobre productos que generan ruido eléctrico (Nota de homologación FCC para EE UU) Nota: Este equipo se ha probado y ha demostrado que cumple con los límites para dispositivos digitales de clase B, de acuerdo con...
- Page 6 AVERTISSEMENTS: • Tous les produits Bose doivent être installés dans le respect des réglementations locales et nationales. L’installateur est responsable du respect de tous les codes et règlements locaux et nationaux en vigueur applicables à l’installation du produit.
- Page 7 18. Ne placez jamais aucune source de flamme nue, comme des bougies allumées, sur l’appareil. Ce produit est conforme à toutes les directives de la Communauté Européenne qui s’y appliquent. L’attestation complète de conformité est disponible à l’adresse www.Bose.com/compliance. Informations sur les produits générateurs de bruit électrique (Notice de conformité FCC pour les USA) Remarque : ce matériel a fait l’objet de tests prouvant sa conformité...
- Page 8 Dokument vor der Installation durch. WARNUNG: • Alle Produkte von Bose müssen gemäß den örtlichen und staatlichen Vorschriften sowie gemäß allen Branchenbestimmungen verwendet werden. Der Monteur ist dafür verantwortlich, sicherzustellen, dass die Installation des Produkts gemäß allen geltenden Vorschriften durchgeführt wird, einschließlich örtlicher Bauvorschriften und Bestimmungen.
- Page 9 Wichtige Sicherheitshinweise pro.Bose.com Lesen Sie die folgenden Anweisungen. 2. Bewahren Sie die Anweisungen auf. 3. Beachten Sie alle Warn- und Sicherheitshinweise. 4. Befolgen Sie alle Anweisungen. 5. Verwenden Sie dieses Gerät nicht in der Nähe von Wasser. 6. Reinigen Sie das Gerät nur mit einem sauberen, trockenen Tuch.
- Page 10 Leggere attentamente il documento prima di procedere all’installazione. AVVERTENZA: • Tutti i prodotti Bose devono essere installati in conformità con gli standard locali, statali, federali e di settore. È responsabilità dell’installatore assicurare che l’installazione del prodotto sia eseguita in conformità con tutte le normative vigenti, compresi i regolamenti edilizi locali.
- Page 11 18. Non collocare sull’apparecchio candele accese o altre sorgenti di fiamme libere. Questo prodotto è conforme a tutte le direttive EU prescritte dalla legge. La dichiarazione di conformità completa è disponibile all’indirizzo www.Bose.com/compliance. Informazioni sui prodotti che generano interferenze elettriche (avviso di conformità FCC per gli Stati Uniti) Nota: Questa apparecchiatura è...
- Page 12 WAARSCHUWINGEN: • Alle Bose-producten moeten worden geïnstalleerd volgens de plaatselijke en landelijke voorschriften en industrienormen. Het is de verantwoordelijkheid van de installateur om ervoor te zorgen dat de installatie van het product wordt uitgevoerd volgens alle van toepassing zijnde voorschriften, inclusief plaatselijke bouwvoorschriften.
- Page 13 18. Er mogen geen open vlammen, zoals brandende kaarsen, op de apparatuur worden geplaatst. Dit product voldoet aan alle vereisten van de EU-richtlijnen, zoals wettelijk vereist. De volledige conformiteitsverklaring kunt u vinden op www.Bose.com/compliance. Informatie over producten die elektrische ruis genereren (FCC Compliance Notice voor de VS) Opmerking: Dit apparaat is getest waarbij is vastgesteld dat het voldoet aan de limieten voor een digitaal apparaat van klasse A, volgens deel 15 van de FCC-voorschriften.
-
Page 15: Table Of Contents
Contents pro.Bose.com Introduction Product Overview ..................................16 Product Features ................................... 16 Included Accessories .................................. 17 Additional Accessories ................................17 Front and Rear Panels Front Panel ...................................... 18 Rear Panel ......................................19 Installation and Operation Operation Mode Options ................................20 Mixer Mode .....................................20 Stereo Select Mode ................................ -
Page 16: Product Overview
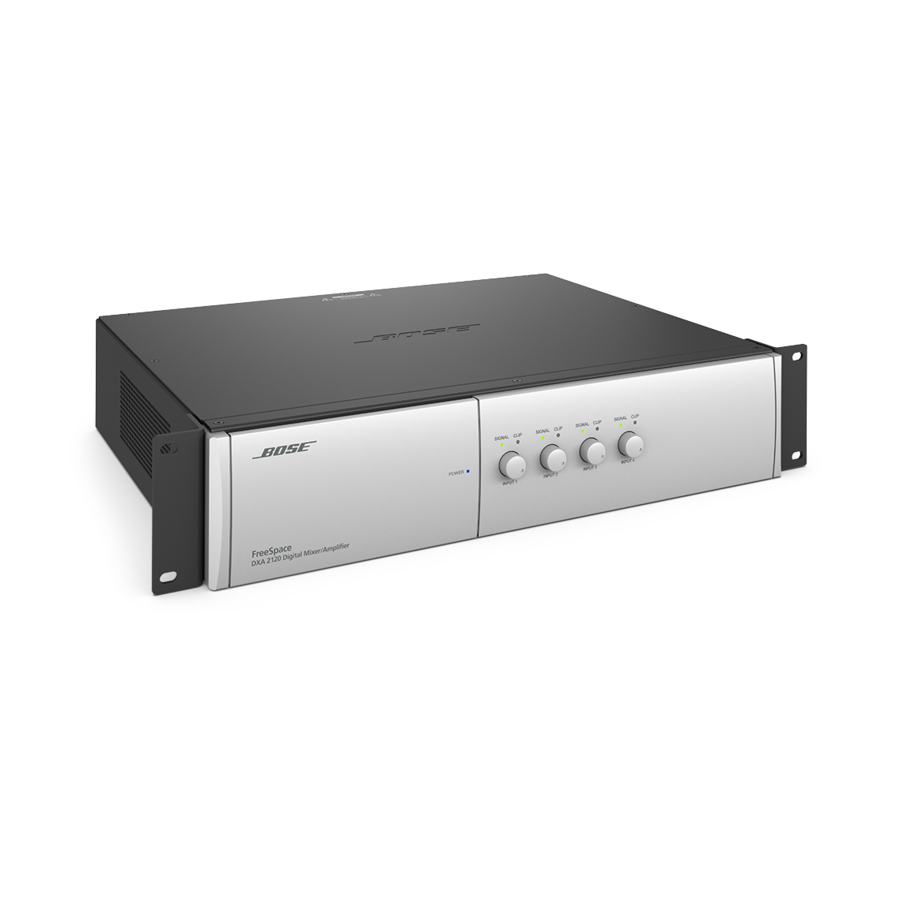
Product Overview The Bose® FreeSpace® DXA 2120 Digital Mixer/Amplifier integrates digital signal processing with two powered output channels. Designed as a mixer or router for business music applications, it features an LCD panel and controls behind the front cover for easy access. -
Page 17: Included Accessories
Rack ears with mounting hardware (2) connector (1) Additional Accessories The following application-specific Bose® accessories are not included with the FreeSpace® DXA 2120 Digital Mixer/Amplifier: Figure 3. Four volume controllers for use with the FreeSpace® DXA 2120 Digital Mixer/Amplifier Bose® Volume Control User Interface Bose®... -
Page 18: Front And Rear Panels
Front and Rear Panels pro.Bose.com FreeSpace® DXA 2120 Digital Mixer/Amplifier DXA 2120 Front Panel Figure 4. FreeSpace ® DXA 2120 amplifier front panel with closed compartment q DOOR - Provides access to system controls. w POWER STATUS WINDOW - Reveals power LED. -
Page 19: Rear Panel
Front and Rear Panels pro.Bose.com DXA 2120 Rear Panel Figure 6. FreeSpace® DXA 2120 amplifier rear panel q LINE INPUTS - Two unbalanced RCA audio jacks per input (summed to mono). w MIC/LINE Switch - Adjusts for the proper signal level being used with the four Euroblock input connectors. (Mic connections require using the Euroblock input jacks.) -
Page 20: Operation Mode Options
Installation pro.Bose.com Operation Mode Options Before making connections, decide how you want the sound sources distributed throughout the site. This depends on whether the area is specified for one or two zones, the kind of coverage needed, and the sources to be used. -
Page 21: Stereo Select Mode
Installation pro.Bose.com Stereo Select Mode Line-level sources can be connected using RCA jacks or Euroblock connectors. To connect a stereo source to RCA jacks, use either the left or right RCA jack of each INPUT. Figure 9. Stereo left and stereo right inputs Stereo Select Mode source routing is fixed, as shown below. -
Page 22: Dual Mono Select Mode
Installation pro.Bose.com Dual Mono Select Mode Line-level sources can be connected using RCA jacks or Euroblock connectors. The system sums the two RCA jacks for each input to mono. Dual Mono Select Mode source routing is fixed, as shown below. -
Page 23: Hardware Installation
Shelf Mounting the Chassis The Bose® FreeSpace® DXA 2120 Digital Mixer/Amplifier has rubber feet for use when positioning the chassis on a shelf or counter top. They help to protect the surface that supports the unit and to prevent chassis movement. Be sure to follow the “Placement Guidelines”... -
Page 24: User Interface Installation
Installation pro.Bose.com User Interface Installation The FreeSpace® DXA 2120 Digital Mixer/Amplifier is designed to be compatible with the following Bose® user interfaces (also described in the “Additional Accessories” section on page 17. • Bose® Volume Control User Interface (PC 041966) •... - Page 25 Installation pro.Bose.com Recommended cable lengths: For one user interface For two user interfaces 2000 ft (610 m) max. 2000 ft (610 m) max. Chassis Chassis 22-24 AWG or 0.34-0.25mm 22-24 AWG or 0.34-0.25mm gauge cable gauge cable Connect the user interface wires to the appropriate terminals on the 6-pin connector and insert it into the REMOTE jack.
-
Page 26: Controlcenter Zone Controllers
The amplifier is designed to work with the CC-1 ControlCenter Zone Controller for remote volume control, or the CC-2 ControlCenter Zone Controller for remote volume control and A/B source selection. See the appropriate Bose volume control user interface installation guide for more details. Connecting the CC-1... -
Page 27: Connecting The Cc-2
Installation pro.Bose.com Connecting the CC-2 FreeSpace Color DXA 2120 Brown White/Brown A/B_2 Green A/B_1 White/Blue Blue White/Green Orange VOL_2 White/Orange VOL_1 Connect one CC-2 zone controller to FreeSpace® DXA 2120. If one CC-2 is to be used in zone 2, then wire into VOL_2 and A/B_2. - Page 28 Installation pro.Bose.com Detailed schematics of user interfaces: Schematic for volume control user interface Schematic for volume control with A/B select user interface Mode user interface requirements • For Mixer Mode: Sources can be routed to either or both outputs. Use of one or two volume control user interfaces is optional. No user interfaces are required.
- Page 29 Installation pro.Bose.com Mixer Mode user interface application Figure 21. Mixer Mode with volume control user interfaces Adjusts the Adjusts the volume of the volume of the OUTPUT 1 OUTPUT 2 audio mix audio mix GAIN knobs disabled with user interface Note: Output 1 gain can be configured as the Master Volume, controlling Output 1 and Output 2 gains simultaneously using the MasterVol Linked menu option.
-
Page 30: System Wiring
Installation pro.Bose.com System Wiring Input and Output wiring information and illustrations are provided on the following pages. WARNING: Be sure the mixer/amplifier is disconnected from the AC (mains) power before making any connections. LINE 1-4 Source Inputs There are two sets of line input jacks for use with varied connector types. -
Page 31: Direct Source Input
Installation pro.Bose.com DIRECT Source Input A microphone or other audio source can connect to the DIRECT INPUT jack using one of the following cable types. The control input requires a normally open switch. Figure 26. Cable types for DIRECT INPUT... -
Page 32: Page Source Input
Installation pro.Bose.com PAGE Source Input A microphone or another paging source can be connected to the PAGE INPUT jack using one of the following cable types: Figure 27. Cable types for PAGE INPUT Source Connector PAGE IN Phone Plug (Balanced) - Page 33 Installation pro.Bose.com Follow the diagram below to insert the 5-terminal connector into the output jacks on the back of the mixer/amplifier. Notice the proper wiring for 4 ohm, 70 volt, or 100 volt uses. Both 70V and 100V wiring require the use of a jumper cable, as shown.
-
Page 34: Aux Output Connection
Installation pro.Bose.com AUX Output Connection The signal and any applied processing from any of the four inputs can be output using the line-level AUX OUTPUT jack. This output can feed into another amplifier or other equipment used in the installation. -
Page 35: System Setup
Installation pro.Bose.com System Setup This section provides instructions on adjusting system setting for preferred operation. To make these settings, the system must be connected to power and the POWER switch set to ON. Figure 31. Rear connection panel POWER switch AC power cord jack Figure 32. - Page 36 Installation pro.Bose.com Selecting an operation mode The setting menus available depend on the mode of operation you choose. Use the right arrow button to enter the mode menu. Then use the up or down arrows to select the mode you want.
-
Page 37: Mixer Mode Settings
Installation pro.Bose.com Mixer Mode Settings Here is an overview of common steps to follow in setting up the Mixer Mode: A. Choose this mode B. Set up inputs C. Set up outputs D. Choose EQ settings E. Set up Page Input, if applicable F. - Page 38 Installation pro.Bose.com Mixer Input Set-up Select each Input that has a source connected (1, 2, 3, & 4). • For Input Vol Lvl • For Input Bass Adj and Input Treb Adj Adjust the value +/- 6 dB increments of .5 dB •...
- Page 39 Installation pro.Bose.com Mixer EQ Set-up Select each Output to be used (1, 2, or Auxout). • For Spkr EQ Move up or down to choose the EQ setting needed An asterisk (*) marks the selection made • For Dynamic EQ Enable...
- Page 40 Installation pro.Bose.com Mixer Page In Set-up • For Page Vol Lvl • For Page Bass Adj and Page Treb Adj Adjust the value to +/- 6 dB in increments of .5 dB • For Page Enable Choose N (no) or Y (yes) •...
- Page 41 Installation pro.Bose.com Mixer Direct In Set-Up • For Vol Adj Adjust the value from -40 dB to +10 dB in increments of 1 dB • For Bass Adj and Treb Adj Adjust the value to +/- 6 dB in increments of .5 dB Mixer Master Vol Set-up •...
-
Page 42: Stereo Select Mode Settings
Installation pro.Bose.com Stereo Select Mode Settings Here is an overview of common steps to follow in setting up the Stereo Select Mode: A. Choose this mode B. Set up inputs C. Set up outputs D. Choose EQ settings E. Set up Page Input, if applicable F. - Page 43 Installation pro.Bose.com Stereo Select Input Set-up Select each Input that has a source connected. • For Input Vol Lvl • For Input Bass Adj and Input Treb Adj Adjust the value +/- 6 dB increments of .5 dB • For AGCEnable Choose N (no) or Y (yes) Note: AGC defaults to N.
- Page 44 Installation pro.Bose.com Stereo Select EQ Set-up • For Spkr EQ Move up or down to choose the EQ setting needed An asterisk (*) marks the selection made • For Dynamic EQ Enable Choose N (no) or Y (yes) Note: Dynamic EQ maintains tonal balance at all listening levels.
- Page 45 Installation pro.Bose.com Stereo Select Direct in Set-up • For Vol Adj Adjust the value from -40 dB to +10 dB in increments of 1 dB • For Bass Adj and Treb Adj Adjust the value to +/- 6 dB in increments of .5 dB...
-
Page 46: Dual Mono Select Mode Settings
Installation pro.Bose.com Dual Mono Select Mode Settings Here is an overview of common steps to follow in setting up the Dual Mono Select Mode: A. Choose this mode B. Set up inputs C. Set up outputs D. Choose EQ settings E. - Page 47 Installation pro.Bose.com Dual Mono Select Input Set-up Select each Input that has a source connected (1, 2, 3 & 4) . • For Input Vol Lvl • For Input Bass Adj and Input Treb Adj Adjust the value +/- 6 dB increments of .5 dB •...
- Page 48 Installation pro.Bose.com Dual Mono Select EQ Set-up • For Spkr EQ Move up or down to choose the EQ setting needed An asterisk (*) marks the selection made • For Dynamic EQ Enable Choose N (no) or Y (yes) Note: Dynamic EQ maintains tonal balance at all listening levels.
- Page 49 Installation pro.Bose.com Dual Mono Select Direct in Set-up • For Vol Adj Adjust the value from -40 dB to +10 dB in increments of 1 dB • For Bass Adj and Treb Adj Adjust the value to +/- 6 dB in increments of .5 dB...
-
Page 50: Overview Of Utility Mode Settings
Installation pro.Bose.com Overview of Utility Mode Settings In Utility Mode, there are two global system options: Lockout and Restore Factory Defaults. Also, current system firmware and EQ versions are viewable. The Lockout option allows the system settings to be locked to prevent unwanted changes. This Lockout function can be disengaged by pressing and holding the left and right arrows simultaneously for five seconds. -
Page 51: Technical Information
• Verify the user interfaces are of the right type for the operating mode selected. Additional Information Refer to the owner’s guide (online at pro.Bose.com) for more information about your product (including accessories and replacement parts). To request a printed copy, use the phone numbers provided. Limited Warranty Your product is covered by a limited warranty. -
Page 52: Factory Default Settings
Technical Information pro.Bose.com Factory Default Settings Channel Parameter Mixer Stereo Dual Mono Parameter Range Input 1 Bass 0 dB 0 dB 0 dB -6 dB ~ +6 dB Treble 0 dB 0 dB 0 dB -6 dB ~ +6 dB... -
Page 53: Contact Information
Bose Taiwan Branch, 9F-A1, No. 10, Section 3, Minsheng East Road, Taipei City 104, Taiwan Tel: 886 2 2514 7977 Mexico Bose de México, S. de R.L. de C.V., Paseo de las Palmas 405-204, Lomas de Chapultepec, 11000 México, D.F. Tel: 001 800 900 2673... - Page 56 ©2017 Bose Corporation, All rights reserved. Framingham, MA 01701-9168 USA www.pro.Bose.com All trademarks are the property of their respective owners AM298725 Rev. 03 June 2017...
Need help?
Do you have a question about the FreeSpace DXA 2120 and is the answer not in the manual?
Questions and answers