Bell'O ATC402 Assembly Instructions Manual
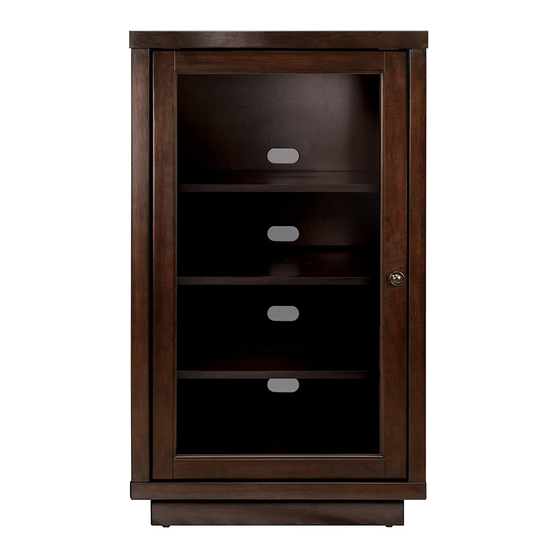
Audio/video component tower
Hide thumbs
Also See for ATC402:
- Assembly instructions manual (12 pages) ,
- Assembly instructions manual (18 pages)
Advertisement
Quick Links
Advertisement

Related Manuals for Bell'O ATC402


Summary of Contents for Bell'O ATC402
- Page 1 Atc402 Assembly InstructIons...
- Page 2 ! Do not PlAce Items on tHe sHelves wHIcH eXceeD tHe mAXImum weIGHt lImIts oF 75 lbs. For toP sHelF, AnD 50 lbs. For eAcH InterIor sHelF. AlwAys PlAce tHe HeAvIest comPonents on tHe bottom sHelF. Bell’O International Corp. will not be responsible for failure to assemble as directed or for the improper assembly, use or handling of this stand.
- Page 3 PArts lIst Quantity Quantity Part Part Acm7 Acm1 Acm8 Acm2 Acm9 Acm3 Acm10 Acm4 Acm11 Acm5 Acm12 Acm6 Acm13...
- Page 4 Assembly InstructIons note: Fig. 1 Fig. 1A Acm2 Acm3 PlAce Insert tAcH locK FlIPPInG Acm9 Acm5 Insert tAcH locK FlIPPInG Acm9...
- Page 5 Acm2 Fig. 2 Acm4 Acm11 Fig. 2A Acm3 Acm5 AttAcH tIGHten remove PullInG strAIGHt...
- Page 6 Fig. 3 Fig. 3A Acm1 Acm9 Acm9 Acm11 Acm3 Acm2 Fig. 3b Insert AttAcH locK FlIPPInG secure tIGHten remove PullInG strAIGHt...
- Page 7 Fig. 4 Acm4 Acm7 AttAcH Press...
- Page 8 Fig. 6 Acm10 Acm3 Acm2 Acm8 Insert...
- Page 9 Fig. 5 Acm2 Acm6 Acm12 Acm13 AttAcH PlAce AttAcH...
- Page 10 Atc402 Assembly InstructIons...
- Page 11 ! Do not PlAce Items on tHe sHelves wHIcH eXceeD tHe mAXImum weIGHt lImIts oF 75 lbs. For toP sHelF, AnD 50 lbs. For eAcH InterIor sHelF. AlwAys PlAce tHe HeAvIest comPonents on tHe bottom sHelF. Bell’O International Corp. will not be responsible for failure to assemble as directed or for the improper assembly, use or handling of this stand.
-
Page 12: Table Of Contents
PArts lIst Quantity Quantity Part Part Acm7 Acm1 Acm8 Acm2 Acm9 Acm3 Acm10 Acm4 Acm11 Acm5 Acm12 Acm6 Acm13... -
Page 13: Acm2
Assembly InstructIons note: Fig. 1 Fig. 1A Acm2 Acm3 PlAce Insert AttAcH locK FlIPPInG Acm9 Acm5 Insert AttAcH locK FlIPPInG Acm9... - Page 14 Acm2 Fig. 2 Acm4 Acm11 Acm3 Acm5 Fig. 2A AttAcH tIGHten...
- Page 15 Fig. 3 Fig. 3A Acm1 Acm9 Acm9 Acm11 Acm3 Acm11 Fig. 3b Acm2 Insert AttAcH locK FlIPPInG secure tIGHten...
-
Page 16: Acm7
Fig. 4 Acm4 Acm7 AttAcH Press... -
Page 17: Acm8
Fig. 5 Acm10 Acm3 Acm2 Acm8 Insert... -
Page 18: Acm12
Fig. 6 Acm2 Acm6 Acm12 Acm13 AttAcH PlAce AttAcH...
Need help?
Do you have a question about the ATC402 and is the answer not in the manual?
Questions and answers