Advertisement
Advertisement
Table of Contents

Subscribe to Our Youtube Channel
Related Manuals for Bell'O PVS4206HG


Summary of Contents for Bell'O PVS4206HG
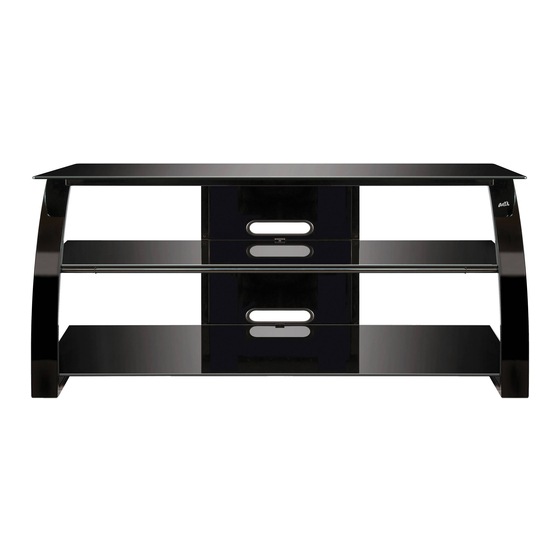
- Page 1 PVS4206HG AUDIO/VIDEO TELEVISION SYSTEM ASSEMBLY INSTRUCTIONS...
- Page 2 FOR YOUR SAFETY, PLEASE FOLLOW THESE PRECAUTIONS: ! DO NOT PLACE ITEMS ON THE SHELVES WHICH EXCEED THE MAXIMUM WEIGHT LIMITS OF 125 LBS. FOR TOP SHELF, 50 LBS. FOR THE MIDDLE SHELF, AND 75 LBS. FOR THE BOTTOM SHELF. ALWAYS PLACE THE HEAVIEST COMPONENTS ON THE BOTTOM SHELF.
-
Page 3: Parts List
Parts List Quantity Quantity Part Part 40 mm 25 mm 15 mm 35 mm... - Page 4 assEMBLY iNstrUCtiONs NOTE: 2 PEOPLE ARE RECOMMENDED TO ASSEMBLE THIS FURNITURE. TO AVOID DAMAGE DURING ASSEMBLY, IT SHOULD BE ASSEMBLED ON A SOFT SURFACE. FIG. 1 1. ATTACH the Top Shelf Support Frame (M3) to the Left Leg (M1) and to the Right Leg (M2) as shown using four 35 mm Bolts (M10).
- Page 5 FIG. 2 2. ATTACH the Rear Stabilizing Bar (M5) to the Left Leg (M1) and to the Right Leg (M2) using four 40 mm Bolts (M11) as shown. Tighten fully. 3. PLACE three Rubber Shelf Rings (M13), evenly spaced, on the Middle Shelf Support Bar (M4). 4.
- Page 6 FIG. 3 5. ATTACH the Rear CMS ® (Cable Management System) Post (M6) to the Rear Stabilizing Bar (M5) and to the Top Shelf Support Frame (M3) as shown using four 35 mm Bolts (M10). Tighten all fully. 6. Carefully MOVE the stand to the location it will occupy before attempting to add the Glass Shelves. NOTE: The stand MUST be on a flat surface and level before adding the Glass Shelves or any components.
- Page 7 FIG. 4 7. INSERT two Suction Pads (M16) into the holes at the base of the Left and Right Leg (M1 & M2). 8. Carefully PLACE the Bottom Glass Shelf (M9) down onto the lowest support lip on the Rear CMS ®...
- Page 8 FIG. 5 11. For each lower Glass Shelf, INSTALL the L-Brackets (M17) as shown above using the Small Screws (M18). Make sure the L-Brackets are above the Glass Shelves.
Need help?
Do you have a question about the PVS4206HG and is the answer not in the manual?
Questions and answers