
Related Manuals for Autotrol LOGIX 255-760 Meter


Summary of Contents for Autotrol LOGIX 255-760 Meter
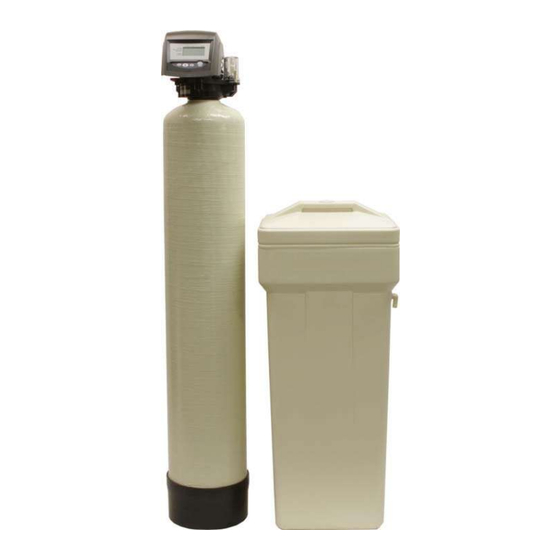
- Page 1 SOURCE: https://www.qualitywaterforless.com/ INSTALLATION & START-UP INSTRUCTIONS AUTOTROL LOGIX 255-760 METER WATER SOFTENER SYSTEMS - 1 - © 1999-2007 QualityWaterForLess.com info@qualitywaterforless.com...
- Page 2 Preface: Thank you for your purchase of a new Water Softener with Autotrol LOGIX 255-760 Meter from QualityWaterForLess.com! We have put together these instructions as reference, and to be used as general installation guidelines. It is always recommended that a licensed plumber perform all installation work according to all local codes. We at QualityWaterForLess.com cannot assume responsibility for improper installation,...
- Page 3 • If your tank is not pre-filled, please follow the additional instructions below. • First, place the riser tube into the tank as shown in Figure 2. NOTE: Please be sure that the riser tube seats into the bottom of the tank, and that the top of the riser tube is Approximately 1”...
- Page 4 Installing the Autotrol LOGIX 255-760 Meter Control Valve: • Using the included silicone lubricant packet, lubricate the inner and outer o- rings on the bottom of the Autotrol LOGIX 255-760 Meter Valve as shown in Figures 5 & 6 below.
-
Page 5: Locate The Two Plumbing Adaptors Supplied With Your System. Insert The Plumbing
FIGURE 8 FIGURE 9 FIGURE 10 FIGURE 11 • Locate the two plumbing adaptors supplied with your system. Insert the plumbing adapter through the universal nut as shown in figure 12 below. • Next push down the gasket over the adaptor flange as shown in figure 13 below. •... - Page 6 Plumbing your Fleck 7000SE Meter: • Before beginning your installation, please first familiarize yourself with the “IN” and “OUT” on the Autotrol LOGIX 255-760 Meter Valve. In order to prevent damage to your home and to the softener system, install the softener according to the “IN”...
- Page 7 Making the Brine Tank Connection: • Locate the included sight glass air check and brine fitting for the Autotrol LOGIX 255-760 Valve. The sight glass air check will look like a clear plastic vial with two screws, a rubber ball, and an o-ring.
- Page 8 • Locate the included section of included Brine Tubing. Loosen the compression nut on the brine fitting, and assemble the brine tubing to the brine fitting as shown in figure 20. • Finger-tighten the nut and use a wrench to turn the fitting ½ turn more until snug as shown in figure 21 below.
- Page 9 FIGURE 24 FIGURE 25 • Take the other end of your brine line tube and insert the tube through the small hole drilled through the brine tank, and brine well. Loosely unscrew the hex nut on the 2310 brine float assembly. Insert the tubing end firmly into the hex nut on the 2310 brine float assembly.
- Page 10 FIGURE 28 Making the Drain Connection: • Locate the drain port on the bypass, and apply Teflon tape as shown in figure 29 below. • Locate the included drain barb elbow and assemble the fitting as shown in figure 30 below. FIGURE 29 FIGURE 30 •...
- Page 11 Programming the Autotrol LOGIX 255/760 Meter Valve: • Before start-up a few simple steps must be followed to program the Autotrol LOGIX 255/760 Meter Valve. It will be important to know what your water Hardness and Iron is before doing this programming procedure.
- Page 12 • FIGURE 33 FIGURE 34 FIGURE 35 FIGURE 36 • Now that the power cord has been connected to the timer, please plug the transformer into a wall socket to power-up the timer. • The timer will show “ - . - - “ as shown in figure 37 below. NOTE: If this does not show up initially, your system has been pre-set by us.
- Page 13 • You will next see the time of day on the screen as shown in figure 38 below. Press the “set” button to make the time of day begin to flash. Use the “up” or “down” buttons to make the appropriate changes to the time of day noting that there is a difference between “AM”...
- Page 14 regeneration after a set number of days if the meter usage alone does not automatically initiate it. (EX every 7 day no-matter what) The “0” means that the meter will solely regenerate the system and is typical. Press the “set” button to make the override number begin to flash.
- Page 15 Enjoy Your Softener! Congratulations, you have successfully installed your new water softener with Autotrol LOGIX 255-760 Meter Valve! Please maintain your system by keeping the softener plugged-in and always keep your brine tank filled with salt to at least above the water level.
Need help?
Do you have a question about the LOGIX 255-760 Meter and is the answer not in the manual?
Questions and answers