Mercusys MW300RE User Manual
300 mbps wi-fi range extender
Hide thumbs
Also See for MW300RE:
- User manual (24 pages) ,
- Quick installation manual (51 pages) ,
- Quick installation manual (47 pages)

Related Manuals for Mercusys MW300RE


Summary of Contents for Mercusys MW300RE
- Page 1 Easy Wi-Fi Extension Flexible Placement MW300RE 300 Mbps Wi-Fi Range Extender 1910080032 REV1.0.0 1910080032 REV 1.0.0...
- Page 2 COPYRIGHT & TRADEMARKS Specifications are subject to change without notice. is a registered trademark of MERCUSYS TECHNOLOGIES CO., LTD. Other brands and product names are trademarks or registered trademarks of their respective holders. No part of the specifications may be reproduced in any form or by any means or used to make any derivative such as translation, transformation, or adaptation without permission from MERCUSYS TECHNOLOGIES CO.,...
-
Page 3: Safety Information
CE Mark Warning Safety Information When product has power button, the power button is one of the way to ● shut off the product; when there is no power button, the only way to completely shut off power is to disconnect the product or the power This is a class B product. - Page 4 RECYCLING This product bears the selective sorting symbol for Waste electrical and electronic equipment (WEEE). This means that this product must be handled pursuant to European directive 2012/19/EU in order to be recycled or dismantled to minimize its impact on the environment. User has the choice to give his product to a competent recycling organization or to the retailer when he buys a new electrical or electronic equipment.
- Page 5 MERCUSYS TECHNOLOGIES CO., LTD. The product carries the CE Mark: DECLARATION OF CONFORMITY For the following equipment: Product Description: 300Mbps Wi-Fi Range Extender Person responsible for marking this declaration: Model No.: MW300RE Trademark: MERCUSYS We declare under our own responsibility that the above products satisfy all...
-
Page 6: Table Of Contents
To connect to a host network ........... 11 Introduction ................1 To manage an existing profile .......... 11 Appearance ................1 Change the Extender’s IP Address ........12 LED Explanation..............1 DHCP Server............... 12 Button Explanation ............. 2 DHCP Settings ..............12 Position the Extender ............. -
Page 7: Introduction
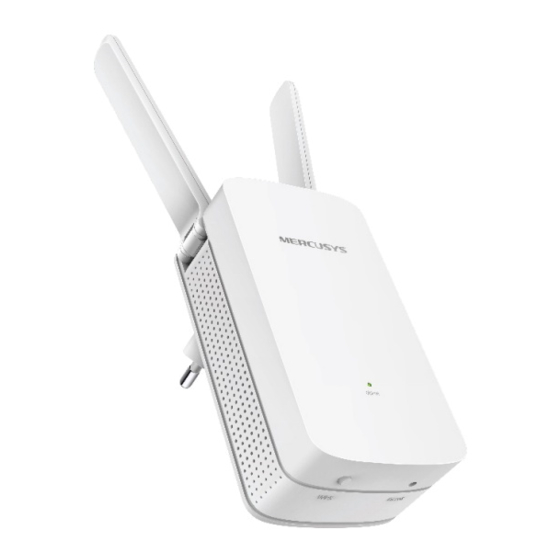
Appearance Introduction This chapter covers the following topics: Appearance Position the Extender LED Explanation Name Status Indication Blinking red The extender is connecting to the router. Solid red The extender is not connected to the router. Signal Solid green The extender is connected to the router, and is in a good location. -
Page 8: Button Explanation
Button Explanation Position the Extender The buttons are located on the bottom panel. For safety and best performance, we suggest that you position the extender WPS Button: If your wireless router supports WPS or QSS function, you can vertically as shown below. ... -
Page 9: Connect The Extender To The Internet
Before You Begin Please read this guide carefully before installing and using the range extender. The operating range of your wireless network may vary significantly depending Connect the Extender on the physical position of the wireless devices. Obstructions, such as metal appliances and walls, may weaken signals by getting in the way of your to the Internet network’s radio waves. -
Page 10: Basic Requirements
Basic Requirements Place your extender in a well-ventilated place far from direct sunlight, any heater or heating vent. Leave at least 2 inches (5cm) space around the device for heat dissipation. Turn off your extender and unplug the power adapter in a lighting storm ... - Page 11 When your extender is connected to your router successfully, you will see the management page and the Signal LED on your extender turns solid green or orange. Relocate Plug the extender into a power outlet about halfway between your router (Host Network) and the Wi-Fi “dead”...
-
Page 12: Using Your Web Browser (Pc Ui)
Using Your Web Browser (PC UI) Launch a web browser and type http://mwlogin.net in the address bar. Create a login password, then click Log in. Power On Plug the extender into a power outlet near your router, and the Signal LED turns solid red. - Page 13 Relocate Click Scan and select your host network (the router’s network), and enter the password when prompted. Then click Next. Plug the extender into a power outlet about halfway between your router (Host Network) and the Wi-Fi dead zone. The location you choose must be within the range of your existing host network.
-
Page 14: Using Wps (Wi-Fi Protected Setup)
If the Signal LED does not change from flashing to solid, Using WPS (Wi-Fi Protected Setup) please refer to Using Your Web Browser (Mobile UI) Using Your Web Browser (PC UI). Your router should support WPS. Otherwise, please refer to Using Some ISP gateways disable the WPS function by default. -
Page 15: Manage The Extended Network And Security Settings
Wireless MAC Filtering Manage the Extended Wireless MAC Filtering allows you to control the wireless devices accessing the Network and Security network based on the devices' MAC addresses. Settings Launch a web browser and type in http://mwlogin.net, then go to Wireless >... -
Page 16: Wireless Advanced
Click Add and configure a MAC filtering entry as shown in the figure Configure the settings according to your needs, then click Save. below, then click Save. MAC Address: Enter an MAC address in the format of XX-XX-XX- XX- XX-XX (X is any hexadecimal digit). -
Page 17: Profile
higher transfer rate. It is recommended to enable Short GI. AP Isolation - AP Isolation feature that allows you to confine and restrict all wireless devices on your network from interacting with each other, but still able to access the Internet. AP isolation is disabled by default. -
Page 18: Change The Extender's Ip Address
Change the Extender’s IP Subnet Mask: Select a subnet mask that determines the size of the network (255.255.255.0 by default). Address DHCP Server By default, the extender is set to obtain an IP address automatically from the front router. If you want to use a specific IP address appropriate to your network demand, please refer to the steps below. -
Page 19: Dhcp Client List
DHCP Client List The DHCP Client List displays the Client Name, MAC Address, Assigned IP and Lease Time for each DHCP Client attached to the device. Launch a web browser and type in http://mwlogin.net, then log in to DHCP Server > DHCP Client List webpage. You can view the information of the DHCP clients connected to the extender in the list. -
Page 20: Manage The Extender
You can view the current firmware version and the hardware version. Find the latest firmware of your extender from the product’s Support page at www.mercusys.com. Then download the latest firmware upgrade file to your computer. Click Browse… to locate and select the downloaded file. -
Page 21: Factory Defaults
Factory Defaults Launch a web browser and type in http://mwlogin.net, then go to System Tools > Factory Defaults webpage. Click Restore to reset your extender to its factory default settings. All current settings that you have configured for the extender will be lost once the extender is restored to its factory default settings. -
Page 22: Reboot
Reboot Launch a web browser and type in http://mwlogin.net, then go to System Tools> Reboot webpage. Click Reboot to reboot the extender. Old Password: Enter your current password. New Password: Enter your new password. Confirm Password: Re-enter your new password. Please DO NOT power off the extender during the reboot ... - Page 23 Click Mail Settings to set the parameters for Auto Mail Feature. Refresh - Click to update the system log. Save All - Click to save the system log as a .txt file on your computer. Mail Log - Click to send an email of current logs manually according ...
- Page 24 required by most mailboxes that need User Name and Password to log in. When selected, enter the mail account name and password. Enable Auto Mail Feature - Select to mail logs automatically. You could mail the current logs either at a specified time every day or by intervals, but only one could be the current effective rule.
-
Page 25: Appendix
Factory Defaults Name Status Appendix Common Default Settings IP Address 192.168.1.253 Subnet Mask 255.255.255.0 Domain http://mwlogin.net This chapter covers the following topics: Wireless Factory Defaults FAQ (Frequently Asked Questions) SSID MERCUSYS_RE_XXXX Wireless Security Disabled Appendix... -
Page 26: Faq (Frequently Asked Questions)
Settings to retrieve or reset your wireless password. FAQ (Frequently Asked Questions) Q1. How do I restore my extender’s configuration to its factory default settings? Q4. What can I do if I cannot access the web management page? There are three ways to reset the extender: Make sure your wireless device has connected to the extended network.
Need help?
Do you have a question about the MW300RE and is the answer not in the manual?
Questions and answers