Table of Contents
Advertisement
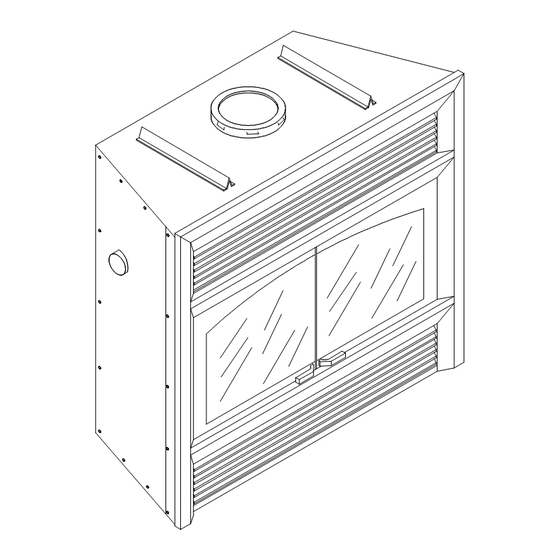
HE43-1
• Hot! Do not touch! The glass
and surfaces of this appliance
will be hot during operation
and will retain heat for a while
after shutting off the appliance.
Severe burn may result.
• Carefully supervise children in
the same room as appliance.
• If small children are present in the home, it
is recommended that this appliance be used
with a fire screen kit.
Printed in Canada
Operating Instructions
This installation manual will help you obtain
a safe, efficient, dependable installation for
your fireplace and chimney system. Please
read
instructions
installation.
CAUTION: Do not attempt to modify or
alter the construction of the fireplace or its
components. Any modification or alteration
of construction may void the warranty,
listings and approvals of this system. In that
case,
responsible for damages.
WARNING: This fireplace is designed for
use as a supplemental heater. It is not
intended for continuous use as a primary heat
source.
SAVE THESE INSTRUCTIONS FOR
2125 Monterey St., Laval, Qc, Canada, H7L 3T6
Rev. 11
November 2008
Installation and
for Security Fireplace
Model SECURE HE43-1
and
understand
these installation
before
beginning
Security
Fireplace
FUTURE REFERENCE
Listed to standards:
ULC-S610, UL-127
Report # 192-5237
your
will
not
be
PIHE43-1
Advertisement
Table of Contents

Related Manuals for Security Chimneys International SECURE HE43-1


Summary of Contents for Security Chimneys International SECURE HE43-1
-
Page 1: Operating Instructions
HE43-1 Installation and Operating Instructions for Security Fireplace Model SECURE HE43-1 This installation manual will help you obtain a safe, efficient, dependable installation for your fireplace and chimney system. Please read understand these installation instructions before beginning your installation. CAUTION: Do not attempt to modify or alter the construction of the fireplace or its components. - Page 2 CERTIFICATION LABEL...
-
Page 3: Table Of Contents
TABLE OF CONTENTS Page Safety rules ............................4 Fireplace maintenance Creosote ............................. 5 Chimney maintenance ........................ 5 Chimney fires ..........................5 Glass cleaning ..........................6 Doors adjustment ........................6 Glass replacement ........................6 Removal of ashes ........................7 Fireplace operation Fuel ............................. -
Page 4: Safety Rules
• Use only Security Fireplace glass doors, specifically designed for the model SECURE HE43-1 fireplace. (See Appendix for part number). -
Page 5: Fireplace Maintenance Creosote
FIREPLACE MAINTENANCE REOSOTE When wood is burned slowly, it produces tar and other organic vapors which combine with expelled moisture to form a black deposit called creosote. The creosote vapors condense in the relatively cool chimney flue of a slow burning fire. As a result, creosote residue accumulates on the flue lining. When ignited, this creosote makes an extremely hot fire. -
Page 6: Glass Cleaning
Figure 1 LASS REPLACEMENT The glass used for the SECURE HE43-1 doors is a high temperature ceramic glass. If the glass breaks, it must be replaced with a ceramic glass such as Neoceram. Tempered or ordinary glass will not withstand the high temperatures of the SECURE HE43-1. -
Page 7: Removal Of Ashes
OPERATING THE SECURE HE43-1 The Secure HE43-1 is designed to work best when fueled with seasoned cordwood. Hardwoods are preferred to softwoods since the energy content of wood is relative to its density. Hardwoods will result in a longer burning fire and less frequent refueling. -
Page 8: How To Use The Retractable Doors And Firescreens
OW TO USE THE RETRACTABLE DOORS AND FIRESCREENS The Security Fireplace Model HE43-1 features retractable doors and firescreens in order to allow a wider view of the fire and save space when the doors are opened. To retract the doors, simply open them at 90° and push them into the opening on the side of the firebox. -
Page 9: Fireplace Installation
Z21.60-M96/CGA 2.26-M96, Standard for Decorative Gas Appliances for Installation in Solid-Fuel Burning Fireplaces (reference Clause 4.1.3 T). 9. The fireplace model SECURE HE43-1 is sold with glass doors. The outside combustion air kit is mandatory and is included with the fireplace. The blowers and the decorative brass trims and panels are optional. -
Page 10: Tools And Building Supplies
Tools and building supplies normally required Tools: Building supplies: Phillips screwdriver If gas pipe is used: Slot style screwdriver 2" x 3" or heavier lumber Pipe wrench Hammer Drywall panel or equivalent Pipe cutter Saw and/or Sabersaw Silicone caulking (non- Pipe threader Level combustible) -
Page 11: Installation Procedure
PRECAUTIONS The most important areas of concern dealing with the fireplace installation are clearances to combustible materials, secure assembly of components parts, the height of the chimney system, the proper use of accessory equipment and the techniques used in using finishing materials applied to fireplace surrounds, hearth extensions and wall coverings. - Page 12 Insulate joists Same as ceiling Insulate joists Same as ceiling Firestop Rain cap Note : Non- combustible chase flashing must be used to cover chase opening Optional insulation Figure 5 HASE NCLOSURE A chase is a vertical box-like structure constructed to Solid continuous surround the fireplace and chimney.
-
Page 13: Hearth Extension
ANTEL A wood mantel, if installed, must be at least 48"(1.2 m) above the base of the fireplace (see Figure 7). There is no restriction regarding the length or the width of the mantel. EARTH EXTENSION REQUIREMENTS A non-combustible hearth extension must be built in front of the fireplace and extend out on both sides. Hearth extensions must be constructed according to the following guidelines: 1. -
Page 14: Outside Air Installation
UTSIDE AIR ASSEMBLY FIREPLACE AND CHIMNEY The outside air assemblies are mandatory for the fireplace and the AC chimney. During operation, the fireplace requires air for combustion and draws air out of the house. It may starve other fuel burning appliances such as gas or oil furnaces. As well, exhaust fans and fan driven appliances may compete for air, causing a negative pressure in the home, resulting in smoke entering the home from the fireplace. -
Page 15: Uzy5 Fan Kit Installation
UZY5 NSTALLATION OF THE FAN KIT MODEL Note: This fan kit can easily be installed when the fireplace has a pre-installed junction box. You just have to plug them in.. Rating: 120 Volts, 60Hz, .63A. The fans have magnetic blower mounts. The junction box (factory installed on approved fireplaces for the use of this fan kit) must be connected to 110 VAC service before permanently enclosing the fireplace. -
Page 16: Fireplace Dimensions
Notes Corner installation Due to CSIL ongoing commitment to quality, all specifications, ratings and dimensions are subject to change without notice. All framing dimensions calculated for ½’’dry wall at the fireplace face. If sheathing the chase or finishing with other thickness materials, calculations will need to be made. -
Page 17: Central Forced Air Kit
CENTRAL FORCED AIR KIT The knock-outs provided on the sides of the HE43-1 allow the connection of insulated flexible pipe which enables you to heat adjacent rooms up to 50 feet from the fireplace. The ducting system must be installed as described below : 1. -
Page 18: Chimney Installation General Notes
CHIMNEY INSTALLATION GENERAL NOTES 1. The Security Fireplace Model SECURE HE43-1 is listed only with Security Chimneys International Ltd. chimney systems. Do not connect the fireplace to a masonry chimney, chimney liner, or other brand of factory-built chimney. 2. The Oliver Macleod chimney models HT6103+ and HT6000+ are respectively equivalent to Security Chimneys International Ltd. -
Page 19: Straight Installation
CHIMNEY INSTALLATION INSTRUCTIONS STRAIGHT INSTALLATION Cut and frame the holes in the ceiling, floor and roof where the chimney will pass (see Figure 13). Use a plumb bob to line up the center of the holes. The hole sizes are indicated in Table 2 for the floor and ceiling holes and Table 3 (page 20) for the roof holes. - Page 20 Figure 14a Figure 14b NOTE THE OUTSIDE AIR KITS ARE MANDATORY FOR BOTH FIREPLACE AND CHIMNEY Figure 15...
- Page 21 AC CHIMNEY Figure 16b Figure 16a ROOF DOWN SLOPE HOLE SIZE SLOPE ASHT+/HT6103+ S-2100+/HT6000+ 8" 8" 8" 14 3/8" (365 mm) 16" (406 mm) 15" (380 mm) 2/12 14 5/8" (371 mm) 16 1/4" (413 mm) 15 3/8" (390 mm) 4/12 15 1/4"...
-
Page 22: Offset Installation
OFFSET CHIMNEY INSTALLATION The minimum chimney height (including the fireplace) when using elbows is: Fireplace Model SECURE HE43-1 Chimney Model 8" ASHT+ / HT6103+ / S-2100+ / HT6000+ / AC Vertical Installation 15 ft (4.57 m) Two (2) Elbows 18 ft. (5.49 m) Four (4) Elbows 20 ft. - Page 23 TOTAL HEIGHT DEVIATION ONE LENGTH BETWEEN ELBOWS TWO LENGTHS BETWEEN ELBOWS CHIMNEY DEVIATION ELBOW 8” & HEIGHT 8” 12” 18” 24” 36” 48” 8” & 48” 12” & 48” 18” & 48” 24” & 48” 36” & 48” 48” & 48” 4 5/16"...
- Page 24 Figure 17 Figure 18...
-
Page 25: Angled Firestop Installation
ANGLED WALL RADIATION SHIELD (RSM+, RSMI30, RSMI45) When traversing a combustible wall with the chimney at a 30º ou 45º angle, an angled firestop and/or wall radiation shield must be installed. Only one is required. Note: 45° angle for Canada only. In cold climate locations, we recommend that you use the insulated wall radiation shield since it will maintain the home’s thermal barrier. -
Page 26: Roof Support Installation
UNIVERSAL ROOF SUPPORT INSTALLATION This support has three possible uses: 1. For ASHT+/HT6103+ and S2100+/HT6000+ chimneys, it must be used on a roof to support the chimney. 2. It may be used on a floor, ceiling or roof above an offset to support the chimney above the offset. 3. -
Page 27: Chimney Chase And Multiple Terminations
CHIMNEY CHASE AND MULTIPLE TERMINATIONS For the purpose of this manual, a chimney chase is considered a part of the chimney system rather than part of a building. The termination must be placed a minimum of 18" (460 mm) above the chase. For installation where more than one chimney is located in the same chase or within the same general area, we suggest that their terminations be separated by at least 16"... -
Page 28: Parts And Components (Chimney)
PARTS AND COMPONENTS LIST Part AC Chimney ASHT+ Chimney Lengths 8" diameter 8" diameter 8" length 12" length AC8L12 8L12 18" length AC8L18 8L18 24" length 8L24 36" length AC8L36 8L36 48" length AC8L48 15º elbow AC8E15 8E15 30º elbow AC8E30 8E30 45º... - Page 29 CLEARANCE TO COMBUSTIBLES The following clearances meet the minimum requirements for a safe installation : Side wall: 18". (457 mm) Ceiling: 7 ft. (2135 mm) measured from the base of the fireplace Fireplace enclosure Bottom: 0" Side: 0" to spacers Back: 0"...
-
Page 30: Optional Parts
OPTIONAL PARTS Central forced air kit BISFWK-1 Flex adaptor and 2 clamps BISAF Flexible pipe 5" D.I. x 30 ft. long 5FLEX25 Blower for central forced air kit BISZY Fireplace blower (include 2 fans and thermostatic control) UZY5 Blower variable speed control with decorative wall plate VRUW Thermo-disk, on/off blower control Back draft damper...
Need help?
Do you have a question about the SECURE HE43-1 and is the answer not in the manual?
Questions and answers