Avanti DG2450SS Instruction Manual
Avanti products range
Hide thumbs
Also See for DG2450SS:
- Instruction manual (51 pages) ,
- Installation instructions manual (17 pages) ,
- Instruction manual (51 pages)
Table of Contents
Advertisement
Available languages
Available languages
Model Numbers / Nos. de Modelos:
GAS RANGE
COCINA DE GAS
BEFORE USE, PLEASE READ AND FOLLOW ALL SAFETY RULES AND OPERATING
INSTRUCTIONS. AND SAVE FOR LOCAL GAS AND ELECTRICAL INSPECTOR'S USE.
La sección en español empieza en la página 27
Avanti Products has a policy of continuous improvement on its products and reserves the right to change materials and
specifications without notice.
INSTRUCTION MANUAL
MANUAL DE INSTRUCCIONES
DG2450SS
Stainless Steel
Avanti Products, A Division of The Mackle Co., Inc.
P.O. Box 520604 - Miami, Florida 33152
www.avantiproducts.com
DG2451W
White
Advertisement
Table of Contents

Related Manuals for Avanti DG2450SS


Summary of Contents for Avanti DG2450SS
- Page 1 INSTRUCTIONS. AND SAVE FOR LOCAL GAS AND ELECTRICAL INSPECTOR’S USE. La sección en español empieza en la página 27 Avanti Products has a policy of continuous improvement on its products and reserves the right to change materials and specifications without notice.
-
Page 2: Table Of Contents
How to use the top burners How to use the Gas oven Oven light Care and Maintenance Troubleshooting Guide Service for Your Appliance Your Avanti Products Warranty Instrucciones en Español Registration Information and Registration Card 7 - 8 9 - 10 11 - 13... -
Page 3: Range Safety
A flexible gas connector, when used, must not exceed 3 feet in length. BEFORE YOU BEGIN! Installation of this range must conform with all local codes, or in the absence of local codes, with the National Fuel Gas Code, ANSI Z223.1 / NFPA.54, latest edition. -
Page 4: Important Safeguides
When installing or removing the range for service, a rolling life jack should be used. Do not push against any of the edges of the range in an attempt to slide it into or out of the installation. Pushing or pulling a range (rather than using a lift jack) also increases the possibility of bending the leg spindles or the internal coupling connectors. -
Page 5: The Anti-Tip Bracket
THE ANTI-TIP BRACKET The range will not tip during normal use. However, the range can tip if you apply too much force or weight to the open door without the anti-tip bracket fastened down properly. To reduce the risk of tipping the appliance, the appliance must be secured by properly installed anti-tip devices packed with the appliance. -
Page 6: Help Us Help You
Keep it handy to answer your questions. If you don't understand something or you need more assistance, please call: Avanti Customer Service 800-220-5570 Keep proof of original purchase date (such as your sales slip) with this guide to establish the warranty period. -
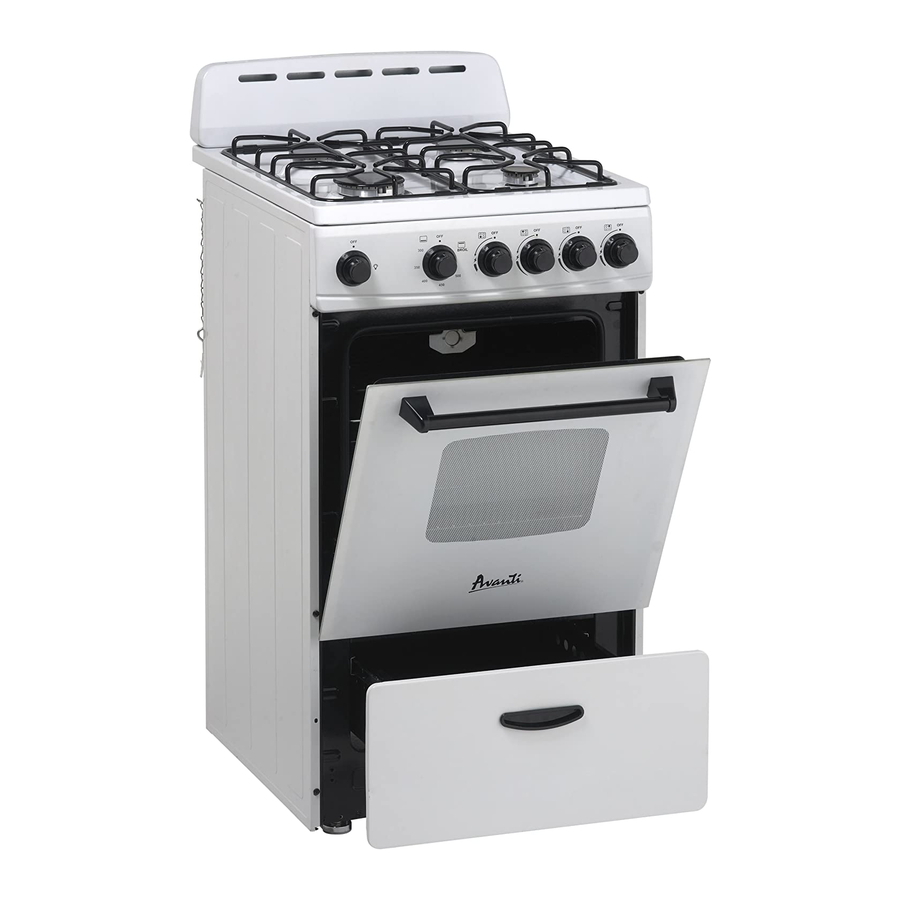
Page 7: Parts And Features
Backsplash Oven Vent Sealed Burners (Total 4) Control Panel Oven Door Handle Oven Door Drawer Handle Drawer Leveling Legs (Total 4) Anti-tip Bracket Cooktop Back of the Range Inlet Pipe Regulator(not pre-installed) Anti-tip bracket Power Cord Access Panel Back Panel... -
Page 8: Control Panel
COOKTOP 1. Auxiliary burner (AUX) - 3200 BTU/hr 2. Right semi-rapid burner (SR) - 4800 BTU/hr 3. Left semi-rapid burner (SR) - 4800 BTU/hr 4. Rapid burner (R) – 10000 BTU/hr Note: -The electric gas-lighting device is incorporated into the knobs. CAUTION: If the burner is accidentally extinguished, turn the gas off at the control knob and wait... -
Page 9: Before Using Your Gas Range
Regulator Clean the interior surface with lukewarm water using a soft cloth Have the installer show you the location of the range’s gas shut-off valve and how to shut it off if necessary. Have your range installed and properly grounded by a qualified installer in accordance with the installation instructions. - Page 10 Important: This appliance is designed and manufactured solely for the cooking of domestic (household) food and is not suitable for any non domestic application and therefore CANNOT be used in a commercial environment. The appliance guarantee will be void if the appliance is used within a non domestic environment i.e. a semi commercial, commercial or communal environment.
-
Page 11: Precautions & Recommendations
Do not allow children or other unqualified people to use the appliance without your supervision. During and after use of the range, certain parts will become very hot. Do not touch hot parts. Keep children away from the range when it is in use ... -
Page 12: General Information
8. When installing or removing the range for service, a rolling lift jack should be used. Do not push against any of the edges of the range in an attempt to slide it into or out of the installation. Pushing or pulling a range (rather than using a lift jack) also increases the... -
Page 13: Carbon Monoxide Warning
The gas range must be installed with all electrical connections in accordance with state and local codes. A standard electrical supply (115 V AC only, 60 Hz), properly grounded in accordance with the National Electrical Code and local codes and ordinances is required. -
Page 14: How To Use The Top Burners
Other intermediate operating adjustments can be achieved by positioning the indicator between the maximum and minimum positions, and never between the maximum and When the range is not being used, set the gas knobs to their shut-off valve placed on the main gas supply line. -
Page 15: General Features
High – Altitude effects on burners: The surface burners used on this unit range from 3,200 BTU to 10,000 BTU on natural gas installation under 2,000 feet above sea level. Burner strength is de- rated by 4% per 1000 feet. -
Page 16: Oven Thermostat
The position BROIL serves only to turn on the broil burner. NOTE: When the range will not be used for long periods of time, set the gas knobs to their positions and also close the gas shut-off valve placed on the main gas supply line. - Page 17 1 minute prior to repeating the ignition. 4) When using the range for the first time or after long period of non-usage, keep pressing the knob inward for approximately 10 – 15 seconds after the burner has lit to ensure the gas valve has been accurately primed.
-
Page 18: Oven Cooking
1 minute prior to repeating the ignition. 4) When using the range for the first time or after long period of non-usage, keep pressing the knob inward for approximately 10 – 15 seconds after the burner has lit to ensure the gas valve has been accurately primed. -
Page 19: Oven Light
Do always broil with oven door closed. Attention: the oven door becomes very hot during operation. Keep children away. OVEN LIGHT The range is equipped with a light that illuminates the oven to enable visually controlling the food that is cooking. This light is controlled by a push button on the control panel. -
Page 20: Care And Maintenance
CARE & MAINTENANCE GENERAL RECOMMENDATION Important: Before any operation of cleaning and maintenance disconnect the appliance from the electrical supply. It is advisable to clean when the appliance is cold and especially for cleaning the enameled parts.、 Avoid leaving alkaline or acidic substances (lemon juice, vinegar, etc.) on the surfaces. Avoid using cleaning products with a chlorine or acidic base. - Page 21 BURNERS AND GRIDS These parts can be removed and cleaned with appropriate products. After cleaning, the burners and their flame distributors must be well dried and correctly replaced. It is very important to check that the burner flame distributor and the cap has been correctly positioned - failure to do so can cause serious problems.
-
Page 22: Removable Storage Drawer
REMOVABLE STORAGE DRAWER The drawer comes out like a normal drawer. To remove the drawer pull it outward and lift upwards. Do not store flammable material in the oven or in the bottom drawer. REMOVING THE OVEN DOOR To facilitate oven cleaning, it is possible to remove the door. Please follow the instructions carefully: REMOVING THE OVEN DOOR –... -
Page 23: Replacing The Oven Light
Use a level on surface units to check the leveling of the range. -
Page 24: Troubleshooting Guide
Verify that the burners are positioned properly on the orifice hoods and the properly. burners are sitting flat on the burner support with tabs engaged in slots. See range conversion section of installation gas input. manual. Light pilots manually. power failure. -
Page 25: Service For Your Appliance
We are proud of our customer service organization and the network of professional service technicians that provide service on your Avanti appliances. With the purchase of your Avanti appliance, you can have the confidence that if you ever need additional information or assistance, the Avanti Products Customer Service team will be here for you. -
Page 26: Your Avanti Products Warranty
Alaska. C. Pick up and delivery. Your range is designed to be repaired in the home. D. Damage to your range caused by accident, misuse, fire, flood, acts of God, or use of products not mentioned in this manual. -
Page 27: Instrucciones En Español
INSTRUCCIONES EN ESPAÑOL SEGURIDAD DE LA COCINA Su seguridad y la seguridad de otros son muy importantes. Hemos incluido muchos mensajes de seguridad en este manual y también en su artefacto. Siempre lea y siga todos los mensajes de seguridad. Este es el símbolo de Alerta de Seguridad. -
Page 28: Medidas De Seguridad Importantes
MEDIDAS DE SEGURIDAD IMPORTANTES Antes de usar su electrodoméstico, debe posicionarlo e instalarlo tal como describimos en este manual, por lo tanto lea el manual cuidadosamente. Para reducir el riesgo de fuego, choque eléctrico o daño cuando use el electrodoméstico, siga estas precauciones básicas, incluyendo las siguientes: ... - Page 29 Piezas de repuesto – Solo debe utilizar piezas de reemplazo autorizadas por Avanti para darle mantenimiento a la cocina. Piezas de repuesto están disponibles en los Distribuidores de Fabrica autorizados. Contáctese con el Centro de Servicio de Avanti más cercano a ud.
-
Page 30: Piezas Y Caracteristicas
PIEZAS Y CARACTERISTICAS Caracteristicas Panel Anti-salpicaduras Ventilación del horno Hornillas Panel de controles Manija de la puerta del horno Puerta del horno Manija de la gaveta de almacenamiento Gaveta de almacenamiento Patas niveladoras Elemento Anti-volteo Superficie Trasero de la unidad Linea de gas Regulador de presíon de Elemento anti-volteo... -
Page 31: Panel De Controles
COCINA 1. Hornilla auxiliar (AUX) 2. Hornilla derecha semi-rápida (SR) – 3. Hornilla izquierda semi-rápida (SR) 4. Hornilla Rápida (R) Nota: -El elemento para encender el gas está incorporado a las perillas. PRECAUCION: Si la hornilla se apaga por accidente, gire la perilla apagando el gas. - Page 32 ANTES DE USAR SU COCINA A GAS ADVERTENCIA!! ASEGURESE QUE ESTA COCINA SEA INSTALADA POR UN TECNICO CALIFICADO. Instalación, ajustes, alteraciones, servicio o mantenimiento inapropiados pueden causar daños personales o a la propiedad. Consulte con un instalador calificado, agencia de servicios o proveedor de gas. Antes de usar su Cocina a gas ...
- Page 33 Limpie el interior del horno con un trapito limpio, humedecido con agua y detergente neutral, luego seque cuidadosamente. Coloque las rejillas y bandeja del horno en su lugar. Encienda el horno a la temperatura máxima para eliminar cualquier resto de grasa del CALENTADOR del horno.
- Page 34 PRECAUCIONES & RECOMENDACIONES PRECAUCIONES Y RECOMENDACIONES IMPORTANTES Después de desempacar su electrodoméstico, verifique que no esté dañado y que la puerta del horno cierra correctamente. En caso de duda, no use la cocina hasta que consulte con su proveedor o técnico calificado profesional.
- Page 35 operación. Asegúrese que los niños no estén al alcance y adviértales al respecto. Para evitar quemaduras utilice pañitos de cocina o guantes cuando deba manipular partes o utensilios calientes. Aléjese de la cocina cuando abra la puerta del horno. El aire caliente o vapor que escapa puede causar quemaduras en las manos, cara u ojos.
-
Page 36: Informacion General
INFORMACION GENERAL ADVERTENCIA!! 1. Este electrodoméstico no se debe usar para calentar la habitación. Esta información está basada en consideración a la seguridad. 2. La pared detrás de este electrodoméstico y el piso bajo este electrodoméstico deben estar sellados y no tener aperturas. 3. -
Page 37: Piezas De Reemplazo
PIEZAS DE REEMPLAZO Solo debe utilizar piezas de reemplazo autorizadas por Avanti para darle mantenimiento a la cocina. Piezas de repuesto están disponibles en los Distribuidores de Fabrica autorizados. Contáctese con el Centro de Servicio de Avanti más cercano a ud. -
Page 38: Hornillas A Gas
COMO USAR LAS HORNILLAS HORNILLAS A GAS El flujo de gas a las hornillas se ajusta al girar las perillas que controlan las válvulas. Girando la perilla para que la línea indicadora apunte a los símbolos marcados en el panel logra las siguientes funciones: La posición de rotación máxima permite que los líquidos hiervan rápido, mientras que la posición mínima permite cocer a fuego lento. -
Page 39: Caracteristicas Generales
Los símbolos marcados en el panel arriba de las presillas indica la correspondencia entre la perilla y la hornilla La hornilla más apropiada se debe elegir de acuerdo al diámetro y capacidad volumétrica del recipiente que se va a usar. Es muy importante que el diámetro de las ollas o sartenes coincida con el de la hornilla para asegurar el funcionamiento eficiente sin tener que desperdiciar gas. - Page 40 CALENTADOR DEL HORNO Permite cocción normal del horno. El flujo de gas al CALENTADOR se regula con un termostato que permite que la temperatura del horno se mantenga constante. El control de la temperatura se asegura con un termostato localizado en el interior del horno. El termostato se debe mantener dentro de su cubierta y limpio ya que, estando en la posición incorrecta o acumulando suciedad, podrían alterar el control de temperatura.
- Page 41 ENCENDIDO DEL CALENTADOR DEL HORNO El termostato permite el control automático de la temperatura. El suministro de gas al calentador del horno se controla con una llave termostática de dos lados (calentador del horno y de la parrilla) con un elemento de llama-falla. Para encender el calentador del horno siga estos pasos: 1) Abra la puerta del horno completamente.
-
Page 42: Luz Del Horno
COCINANDO EN EL HORNO Antes de introducir los alimentos, precaliente el horno a la temperatura deseada. Para una operación de precalentamiento, se recomienda retirar la bandeja del horno e introducirla al mismo tiempo con los alimentos cuando el horno haya llegado a la temperatura deseada. Verifique el tiempo de cocción y apague el horno 5 minutos antes que se termine el tiempo de cocción para recuperar el calor generado. - Page 43 La cocina está equipada con una luz que ilumina el horno la cual permite control visual para los alimentos que está cocinando. Esta luz se controla con un botón de presión en el panel de control. USANDO LA PARRILLA (BROILING) Muy importante: el calentador de la parrilla se debe usar siempre con la puerta del horno cerrada.
- Page 44 ADVERTENCIA!! ADVERTENCIA-NOTA MUY IMPORTANTE Nunca obstruya las aperturas de ventilación del panel anti-salpicaduras. No use la parrilla sin la bandeja de cocción. Importante: Siempre use guantes protectores apropiados cuando inserte o remueva la bandeja de parrilla, rejillas, ollas, cacerolas u otros utensilios de cocina en el horno.
-
Page 45: Cuidado Y Mantenimiento
CUIDADO Y MANTENIMIENTO RECOMENDACIONES GENERALES Receptáculo polarizado de 3 puntas conectado a tierra. ADVERTENCIA: Riesgo de choque eléctrico Enchufe a un receptáculo de 3 puntas conectado a tierra. No remueva la tercera punta del enchufe. No use un adaptador. Fuego, choque eléctrico o muerte pueden resultar de no seguir estas instrucciones. - Page 46 DENTRO DEL HORNO Esto se debe limpiar regularmente, Con el horno tibio, limpie las paredes internas con un trapito mojado en agua jabonosa muy caliente u otro producto similar. VALVULAS DE GAS En el caso que haya fallas en las válvulas de gas, llame al Departamento de Servicio. NOTA: El bombillo del horno no está...
- Page 47 En electrodomésticos con encendido eléctrico, verifique que el electrodo “S” esté siempre limpio para asegurar producción de chispas sin problemas. El enchufe de encendido debe ser limpiado cuidadosamente. INSTALACION Y RETIRO DE LA REJILLA DEL HORNO Las rejillas del horno vienen con un bloqueo de seguridad para evitar que se saquen del horno por accidente.
- Page 48 SACANDO LA PUERTA DEL HORNO – Para facilitar la limpieza del horno se puede remover la puerta. Por favor siga estas instrucciones cuidadosamente: – La puerta del horno se puede sacar muy fácilmente siguiendo estas instrucciones: – Abra la puerta completamente. (Figura 1) –...
- Page 49 INSTALACION DEL ELEMENTO ANTI-VOLTEO Para reducir el riesgo que la cocina se voltee debido a uso indebido de esta o de la puerta del horno, la cocina debe ser asegurada a su sitio instalando correctamente el elemento anti-volteo empacado con el electrodoméstico.
-
Page 51: Registration Information And Registration Card
REGISTRATION INFORMATION Thank you for purchasing this fine Avanti products. Please fill out this form and return it within 100 days of purchase and receive these important benefits to the following address: Avanti Products, A Division of The Mackle Co., Inc. - Page 52 PRINTED IN CHINA Ver: 001-12/21/2010...
Need help?
Do you have a question about the DG2450SS and is the answer not in the manual?
Questions and answers