Table of Contents
Advertisement
Quick Links
External-Antenna Nortel Networks WLAN - Access Point
This Guide contains several sections allowing you to install an AS-1200-BG-EXT or AS-1200-ABG-EXT
Nortel Networks WLAN - Access Point or an AS-1200-ABG-EXT-RE Nortel Networks WLAN - Remote
Edge Access Point (Remote Edge Access Point). These models contain internal 802.11a and 802.11b/g
antennas and connectors for optional external 802.11a and 802.11b/g antennas.
If you are installing an AS-1200-BG-INT or AS-1200-ABG-INT Nortel Networks WLAN - Access Point
with internal 802.11a and 802.11b/g antennas and no connectors for optional external antennas,
please refer to the Internal-Antenna Airespace Access Point Quick Installation Guide.
•
Overview
•
Step 1: Collecting Required Tools and Supplies
•
Step 2: Configuring the Nortel Networks WLAN - Access Point or Remote Edge Access Point
Before Installation
•
Step 3: Preparing Mounting Locations
•
Step 4: Mounting the Nortel Networks WLAN - Access Points
•
Step 5: Returning MAC Information
•
Planning Notes
•
FCC Statements for Nortel Networks WLAN - Access Points
ATTENTION!
Special Considerations
While Nortel Networks WLAN - Access Points have been engineered for easy installation, there are some
guidelines that are very important to the end users:
•
PLACE Nortel Networks WLAN - Access Points NO MORE THAN 140 FEET APART FROM EACH
OTHER. Placing Nortel Networks WLAN - Access Points further apart almost always results in
poor coverage.
•
DO NOT MOUNT Nortel Networks WLAN - Access Points OUTSIDE BUILDINGS.
•
DO NOT MOUNT Nortel Networks WLAN - Access Points ON BUILDING PERIMETER WALLS
UNLESS THE OPERATOR WANTS TO PROVIDE COVERAGE OUTSIDE THE BUILDING.
•
MAKE SURE that plenum-mounted Nortel Networks WLAN - Access Points and Remote Edge
Access Points are powered using Power Over Ethernet (POE) to comply with safety regulations.
March 16, 2004
Quick Installation Guide
External-Antenna Nortel Networks WLAN - Access Point Quick Installation Guide
System Release 2.0
Advertisement
Table of Contents

Subscribe to Our Youtube Channel
Related Manuals for Nortel AS-1200-BG-EXT


Summary of Contents for Nortel AS-1200-BG-EXT
-
Page 1: Quick Installation Guide
FCC Statements for Nortel Networks WLAN - Access Points ATTENTION! Special Considerations While Nortel Networks WLAN - Access Points have been engineered for easy installation, there are some guidelines that are very important to the end users: • PLACE Nortel Networks WLAN - Access Points NO MORE THAN 140 FEET APART FROM EACH OTHER. - Page 2 • MAKE SURE THAT THE Nortel Networks WLAN - Access Points ARE INSTALLED VERTICALLY. Nortel Networks WLAN - Access Points ARE DESIGNED TO BE INSTALLED VERTICALLY, either standing up in a plenum or hanging from a ceiling, to create the largest coverage area per Nortel Networks WLAN - Access Point.
- Page 3 WLAN - Access Point Deployment Guide section in the Nortel Networks Product Documentation, that Nortel Networks WLAN - Access Point and Remote Edge Access Point locations and mounting options have been selected, and that you have one Nortel Networks WLAN - Access Point or Remote Edge Access Point per indicated location.
-
Page 4: Step 1: Collecting Required Tools And Supplies
An assortment of sheet metal and drywall screws and toggle bolts. • CAT-5 (or higher) cables to connect the Nortel Networks WLAN - Access Point and Remote Edge Access Point locations and the (UNUSED PRODUCT) or other network device. •... -
Page 5: Preparing A Version 1.2 Nortel Networks Wlan - Access Point
Preparing a Version 1.2 Nortel Networks WLAN - Access Point If your Nortel Networks WLAN - Access Point has Operating System 1.2 or an earlier version loaded on it, or if you do not know what version the AP has loaded on it, use this procedure. If your AP is a Remote Edge Access Point or has Operating System 2.0 or later loaded on it, use the... - Page 6 Layer 2 and Layer 3 operation. If you do not have a mobility group of Nortel Networks WLAN - Wireless Security Switches that can be reconfigured back and forth between Layer 2 and Layer 3 operation, refer to RMA Procedures later in this document to RMA your version 1.2 Nortel...
-
Page 7: Preparing A Version 2.0 Nortel Networks Wlan - Access Point Or Remote Edge Access Point
AP and the Nortel Networks WLAN - Wireless Security Switch are either on the same subnet or that the AP has a route back to its Primary Nortel Networks WLAN - Wireless Security Switch. If the Nortel Networks WLAN - Access Point or Remote Edge Access Point is not... -
Page 8: Configuration Setup
Note: When you are installing a Remote Edge Access Point or a Nortel Networks WLAN - Access Point, a DHCP server must be accessible by the Remote Edge Access Point or a Nortel Networks WLAN - Access Point. Make sure AP ports are available (either Direct-Connect Mode through the Switch physical ports, or in Appliance Mode through the Nortel Networks WLAN - Wireless Security Switch Management/AP-Manager Interface). - Page 9 Switch, MAKE SURE that a DHCP server is available on the subnet where you will be installing the AP or Remote Edge Access Point, and that the subnet has a route back to the Nortel Networks WLAN - Wireless Security Switch. Also make sure that the route back to the Nortel Networks WLAN - Wireless Security Switch has destination UDP ports 12222 and 12223 open for LWAPP communications.
-
Page 10: Alternate Preparing A Version 2.0 Nortel Networks Wlan - Access Point Or Remote Edge Access Point
Also, if the Nortel Networks WLAN - Access Point or Remote Edge Access Point is not on the same subnet as the Nortel Networks WLAN - Wireless Security Switch, make sure there is a DHCP server on the same subnet as the Nortel Networks WLAN - Access Point or Remote Edge Access Point. - Page 11 <Switch IP Address> is the IP address of the Nortel Networks WLAN - Wireless Security Switch you are going to use to prepare the Nortel Networks WLAN - Access Point or Remote Edge Access Point, or which can be a comma-delimited string of Nortel Networks WLAN - Wireless Security Switch IP addresses.
- Page 12 If everything works (the GREEN LED is on and the RED LED is off), reboot the AP or Remote Edge Access Point and install it as described in this document. If your Nortel Networks WLAN - Access Point or Remote Edge Access Point fails this visual test, refer to RMA Procedures in the Nortel Networks Product Documentation to return your Nortel Networks WLAN - Access Points.
- Page 13 Remote Edge Access Points at each remote location must be on the same subnet to allow client roaming. Also, if the Nortel Networks WLAN - Access Point or Remote Edge Access Point is not on the same subnet as the Nortel Networks WLAN - Wireless Security Switch, make sure that a DHCP server is accessible on the same subnet as the Nortel Networks WLAN - Access Point or Remote Edge Access Point.
-
Page 14: Step 3: Preparing Mounting Locations
Step 3: Preparing Mounting Locations Step 3: Preparing Mounting Locations On your map, you should have the Nortel Networks WLAN - Access Point locations, mounting options, and power options. • Find the required mounting locations. • Use the ceiling-mount base to mark the wall or ceiling locations for sheet metal, drywall, or other screws. - Page 15 If necessary, drill holes for the various cables where they can be mostly hidden from casual view. When you are mounting the Nortel Networks WLAN - Access Point using an optional separately-orderable projection-mount L-bracket (the one with two long legs), the cables can be routed through the 5/8-inch (15.9 mm) holes in the bracket.
- Page 16 Nortel Networks WLAN - Access Point in its indicated location, oriented as shown on the map. Note that you can mount the Nortel Networks WLAN - Access Points in the ceiling plenum or below the ceiling, but the Nortel Networks WLAN - Access Points perform best when mounted below the ceiling.
-
Page 17: Ceiling Mount Base
Ceiling Mount Base Ceiling Mount Base When you are mounting the Nortel Networks WLAN - Access Point in the middle of a ceiling (flat sides toward the room or hallway), use the ceiling-mount base to mount the Nortel Networks WLAN - Access... -
Page 18: Ceiling-Mount Clips
Ceiling-Mount Clips Ceiling-Mount Clips When you are mounting the Nortel Networks WLAN - Access Point on the extruded aluminium rails of a hanging ceiling, use the ceiling-mount clips to mount the Nortel Networks WLAN - Access Point as shown in the following figure and as described below:... - Page 19 Yellow or Amber/802.11a LEDs lit), the Nortel Networks WLAN - Access Point is broadcasting its beacon signal(s). When this happens, complete the installation as quickly as possible to remove yourself from within 8 inches (20 cm) of the Nortel Networks WLAN - Access Point to comply with FCC RF radiation exposure guidelines.
-
Page 20: Projection Wall Mount
Projection Wall Mount Projection Wall Mount When you are mounting the Nortel Networks WLAN - Access Point out from a wall (flat sides along the wall or hallway), use an optional separately-orderable factory-orderable projection-mount L-bracket. • Before proceeding, gently screw the two factory-supplied screws and spring washers into the bottom of the Nortel Networks WLAN - Access Point. -
Page 21: Flush Wall Mount
Information. Flush Wall Mount Flush Wall Mount When you are mounting the Nortel Networks WLAN - Access Point against a wall (flat side toward the inside of the building), use an optional separately-orderable factory-orderable flush-mount bracket. • Before proceeding, gently screw the two factory-supplied screws and spring washers into the bottom of the Nortel Networks WLAN - Access Point. - Page 22 Slide the screws into the keyhole slots on the mounting bracket as shown in the following figure. Note: Make sure the side of the Nortel Networks WLAN - Access Point with the door is facing away from the wall. This ensures that the correct antenna is facing the building, and makes future upgrades easier.
- Page 23 Note: When the Nortel Networks WLAN - Access Point is powered up and is associated with an Nortel Networks WLAN - Wireless Security Switch (Green/Power and Yellow/802.11b/g and/or Yellow or Amber/802.11a LEDs lit), the Nortel Networks WLAN - Access Point begins broad- casting its beacon signal(s).
-
Page 24: Step 5: Returning Mac Information
Points, return the MAC addresses and their locations on the maps or floor plans to the network planner or manager. The Nortel Networks WLAN - Solution Management System Software (Solution Management System Software) operators will use the MAC address and location information to create maps for precise wireless Operating System management. -
Page 25: Planning Notes
About Cables • You will run one CAT-5 Ethernet cable from the Nortel Networks WLAN - Access Point to the (UNUSED PRODUCT), another network device, or a PoE injector/hub. When the Nortel Networks WLAN - Access Point will be mounted below the ceiling using the ceiling mount or wall mount brackets, you may have to drill a hole into the ceiling plenum to run the CAT-5 cable to the wiring closet. -
Page 26: About Mounting Options
Nortel Networks WLAN - Access Point. See the following figure for antenna port markings. Figure - Nortel Networks WLAN - Access Point External Antenna Port Markings About Mounting Options... -
Page 27: Fcc Statements For Nortel Networks Wlan - Access Points
FCC certification of this product is not allowed. Installers of the radio and end users of the Nortel Networks 2200 series must adhere to the installation instructions provided in this manual. -
Page 28: Safety Considerations
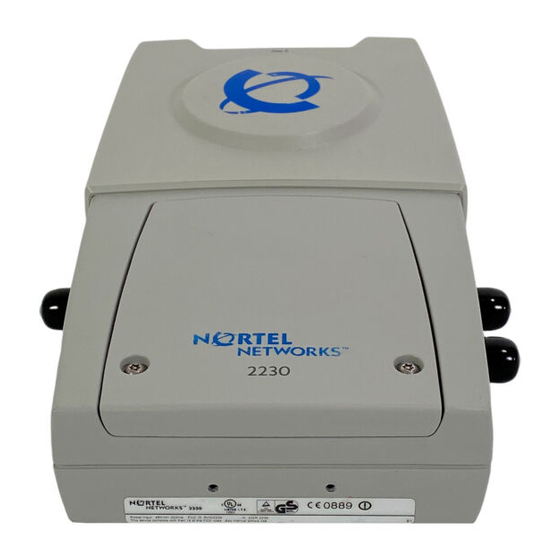
Safety Considerations • The 2230 Nortel Networks WLAN - Access Points with or without external antenna ports are only intended for installation in Environment A as defined in IEEE 802.3af. All interconnected equipment must be contained within the same building including the interconnected equipment's associated LAN connections.
Need help?
Do you have a question about the AS-1200-BG-EXT and is the answer not in the manual?
Questions and answers