
Related Manuals for NEFF T29TA79N0A


Summary of Contents for NEFF T29TA79N0A
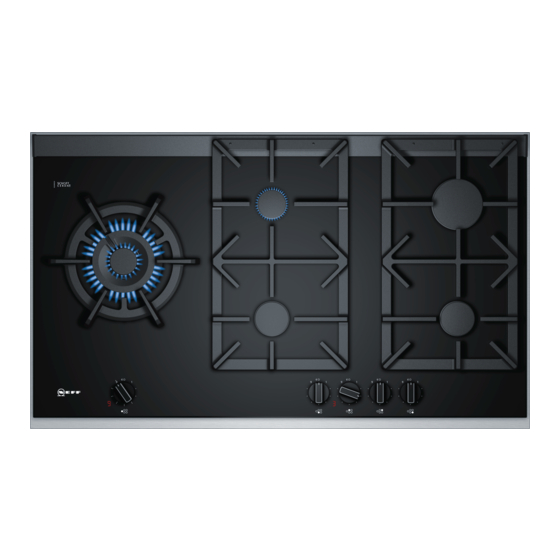
- Page 1 T29TA79N0A Gas hob USER INSTRUCTIONS INSTALLATION INSTRUCTIONS MAINTENANCE INSTRUCTIONS This cooktop is approved for use with Natural Gas and Propane. Leave these instructions with the owner.
-
Page 2: Table Of Contents
Additional information on products, accessories, Do not use lids or protective barriers for replacement parts and services can be found at www.neff-international.com and in the online shop children which are not recommended by the www.neff-eshop.com hob manufacturer. They may cause accidents such as those due to the overheating, ignition or detachment of fragments of materials. -
Page 3: Important Safety Information
Important safety information lack of experience and knowledge, unless (Important safety they have been given supervision or information instruction concerning use of the appliance by a person responsible for their safety. Children should be supervised to ensure that they do DO NOT MODIFY THIS APPLIANCE. -
Page 4: What To Do If You Smell Gas
Important safety information Do not store or use corrosive chemicals, What to do if you smell gas Risk of fire! ■ products which produce fumes, Do not try to light the appliance. inflammable materials or non-food products ■ Do not touch any electrical switch; do not below or near this domestic appliance. -
Page 5: Installation And Connection
Installation and connection 5Installation and connection Statutory requirements c o n n e c t i o n I n s t a l l a t i o n a n d This installation must conform with the following: Manufacturer’s Installation instructions ■... -
Page 6: Installation Of Cooktop Into The Kitchen Bench
Installation and connection A minimum depth of 50 mm from the top of the worktop Turn the brackets and tightly screw them in. The surface must be provided for the appliance. screws for the brackets must be vertical to the base of the housing. -
Page 7: Gas Connection
Installation and connection Position of the inlet connection: Wiring diagram Use pipe compound or thread sealant, properly threaded pipes and careful assembly procedure so that there is no cross threading, etc., which might cause damage or leakage. Make sure that all connections performed are free of leakage. -
Page 8: Converting The Cooktop From Nat. Gas To Propane
Installation and connection Converting the cooktop from Nat. Gas to Replacing the nozzles on dual-flame burners Propane Before you can replace the nozzles, you will need to remove the glass plate with the cut-out profiles for the All work involved in installation, setting and adaptation appliance. - Page 9 Installation and connection Carefully lift the glass plate with the cut-out profiles to release the rear clip fastener. Replacing the outer flame nozzle (fig. 9a): Undo the fastening screw L1 and pull the sleeve L2 back to provide easy access to the main nozzle (fig.
-
Page 10: Getting To Know Your Appliance
Getting to know your appliance Adjusting the bypass *Getting to know your If necessary, use a Torx screwdriver to adjust the bypass screws (M): appliance A: For Propane the bypass screws must be tightened properly. Burner locations B: For Natural Gas the bypass screws must finish flush y o u r a p p l i a n c e G e t t i n g t o k n o w with the fitting. -
Page 11: Residual Heat Indicator
Getting to know your appliance For dual double-flame burners, the inner and outer Residual heat indicator flames can be controlled separately. The available Every hotplate on the hob has a residual heat indicator power levels are as follows: that indicates whether it is hot or warm. Inner and outer flame on appears in the display the hob is still hot. -
Page 12: Gas Burners
Gas burners An orange-coloured flame is normal. This is caused by ÄGas burners the presence of dust in the atmosphere, spilt liquids, etc. If the burner flames are accidentally blown out, switch Switching on manually off the burner operating control knob and do not try to G a s b u r n e r s relight it for at least 1 minute. -
Page 13: Table Of Cooking Times
Settings table and tips Pans should be placed on burner that was mentioned. The model overview the hob carefully. describes all of the burners on the hob. Do not strike the hob and Example: do not place excessive weight on it. Meal Total Step 1... -
Page 14: Wok Burner 10-15
Settings table and tips Meal Total Step 1 Step 2 Meal Total Step 1 Step 2 time in time in Burner Burner ˜ § v ˜ § v ˜ § v ˜ § v min. min. Standard-output 20-24 10-12 10-12 Standard-output 25-30 25-30... -
Page 15: Step 2
Settings table and tips Meal Total Step 1 Step 2 Meal Total Step 1 Step 2 time in time in Burner Burner ˜ § v ˜ § v ˜ § v ˜ § v min. min. Standard-output 8-13 8-13 Small sausages (12 pcs) š... -
Page 16: Cleaning And Maintenance
Cleaning and maintenance 2Cleaning and maintenance Meal Total Step 1 Step 2 time in Burner ˜ § v ˜ § v min. Cleaning Standard-output 27-32 10-12 17-20 £ ¦ t e n a n c e C l e a n i n g a n d m a i n burner Once the appliance is cool, use a sponge to clean it with soap and water. -
Page 17: Trouble Shooting
Trouble shooting 3Trouble shooting DO NOT MODIFY THIS APPLIANCE. T r o u b l e s h o o t i n g Only authorized personnel from the Service Centre are qualified to work on the appliance. Sometimes certain faults detected can be easily resolved. -
Page 18: Customer Service
Customer service 4Customer service When contacting our Technical Assistance Service, C u s t o m e r s e r v i c e please provide the product number (E-Nr.) and production number (FD) of the appliance. This information is given on the specifications plate located on the lower section of the hob and on the label in the user manual. - Page 20 *9001250221* 9001250221 970320(A)
Need help?
Do you have a question about the T29TA79N0A and is the answer not in the manual?
Questions and answers