
Related Manuals for NEFF T29DA79N0A


Summary of Contents for NEFF T29DA79N0A
- Page 1 GAS HOB THIS COOKTOP IS APPROVED FOR USE WITH NATURAL GAS AND UNIVERSAL LPG. LEAVE THESE INSTRUCTIONS WITH THE OWNER. INSTALLATION INSTRUCTIONS MAINTENANCE INSTRUCTIONS T29DA79N0A...
-
Page 2: Table Of Contents
Warranty conditions ......18 Produktinfo Additional information on products, accessories, replacement parts and services can be found at www.neff-international.com and in the online shop www.neff-eshop.com... -
Page 3: Intended Use
Intended use This appliance is not intended for use by 8Intended use persons (including children) with reduced physical, sensory or mental capabilities, or R ead these instructions carefully. You will only lack of experience and knowledge, unless I n t e n d e d u s e be able to use your appliance safely and they have been given supervision or effectively when you have read them. -
Page 4: Important Safety Information
Important safety information The burners get very hot. Do not rest Risk of fire! (Important safety ■ inflammable objects on the hob. Do not information store objects on the hob. Do not store or use corrosive chemicals, Risk of fire! ■... -
Page 5: Installation And Connection
Installation and connection Preparing to install 5Installation and connection Refer to AS/NZS 5601.1 for piping size details. These built-in cooktops are intended to be inserted in a S tatutory requirements benchtop cutout. I n s t a l l a t i o n a n d c o n n e c t i o n This installation must conform with the following: Do not stick the cooktop onto the worktop with silicone. -
Page 6: Clearances
Installation and connection Clearances Installation of cooktop into the kitchen bench A range hood fitted above the top must be installed according to the installation instructions for the range Side clearances: If the distance measured from the hood. A minimum distance of 650 mm is required for a periphery of the nearest burner to any vertical surface is range hood and 750 mm for an exhaust fan. -
Page 7: Gas Connection
Installation and connection This appliance must be earthed. When connecting Fit regulator (N.G.) or a test point (Universal LPG) ■ the cooktop ensure that the earth wire is connected directly to the R 1/2’’ connection. first and that all wires are connected to the correct terminals. -
Page 8: Converting The Cooktop From Nat. Gas To
Installation and connection Ignite all burners both individually and concurrently to Fasten the distributors and burner caps to the ensure correct operation of gas valves, burners and corresponding burners. In addition to this, put the ignition. Turn gas taps to low flame position and pan supports in place on the corresponding burners. -
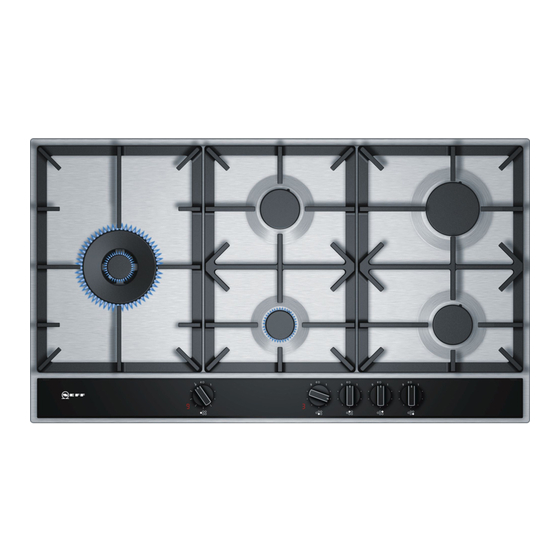
Page 9: Getting To Know Your Appliance
Getting to know your appliance Adjusting the bypass *Getting to know your If necessary, use a Torx screwdriver to adjust the bypass screws (M): appliance A: For ULPG the bypass screws must be tightened properly. B urner locations B: For Natural Gas the bypass screws must finish flush G e t t i n g t o k n o w y o u r a p p l i a n c e with the fitting. -
Page 10: Residual Heat Indicator
Getting to know your appliance For dual-wok burners, the inner and outer flames can Residual heat indicator be controlled separately. The available power levels are Every burner on the hob has a residual heat indicator as follows: that indicates whether it is hot or warm. Inner and outer flame on appears in the display the burner is still hot. -
Page 11: Gas Burners
Gas burners An orange-coloured flame is normal. This is caused by ÄGas burners the presence of dust in the atmosphere, spilt liquids, etc. In the event of the burner flames being accidentally S witching on manually extinguished, turn off the burner control and do not G a s b u r n e r s attempt to re-ignite the burner for at least one minute. -
Page 12: Table Of Cooking Times
Settings table and tips Place the pans on the pan Information on how to cook food on the different supports, never directly on burners is displayed. We recommend using the first the burner. burner that was mentioned. The model overview Make sure that the pan describes all of the burners on the hob. - Page 13 Settings table and tips Food Total Step 1 Step 2 Food Total Step 1 Step 2 time in time in Burner Burner ˜ § v ˜ § v ˜ § v ˜ § v min. min. Sautéed fresh vegetables** Pasta and rice Dual wok š...
- Page 14 Settings table and tips Food Total Step 1 Step 2 Food Total Step 1 Step 2 time in time in Burner Burner ˜ § v ˜ § v ˜ § v ˜ § v min. min. High-output 13-18 12-15 Dual wok 7-12 š...
- Page 15 Settings table and tips Cooking tips Food Total Step 1 Step 2 Use a pressure cooker to cook creamy soups and time in ■ Burner ˜ § v ˜ § v pulses. This significantly reduces the cooking time. If min. you are using a pressure cooker, follow the High-output 16-20...
-
Page 16: Cleaning And Maintenance
Cleaning and maintenance 2Cleaning and maintenance C leaning C l e a n i n g a n d m a i n t e n a n c e Once the appliance is cool, use a sponge to clean it with soap and water. -
Page 17: Trouble Shooting
Trouble shooting 3Trouble shooting D O NOT MODIFY THIS APPLIANCE. T r o u b l e s h o o t i n g Only authorized personnel from the Service Centre are qualified to work on the appliance. Sometimes certain faults detected can be easily resolved. -
Page 18: Customer Service
Customer service 4Customer service W hen contacting our customer service, please provide C u s t o m e r s e r v i c e the product number (E-Nr.) and production number (FD) of the appliance. This information is given on the specifications plate located on the lower section of the hob and on the label in the user manual. - Page 20 *9001124368* 9001124368 001214(C)
Need help?
Do you have a question about the T29DA79N0A and is the answer not in the manual?
Questions and answers