Table of Contents
Advertisement
ALL phases of this installation must comply with NATIONAL, STATE AND LOCAL CODES
IMPORTANT — This Document is customer property and is to remain with this unit. Please return to service information
pack upon completion of work.
These instructions do not cover all variations in
systems nor provide for every possible contingency to
be met in connection with installation. All phases of
this installation must comply with NATIONAL, STATE
AND LOCAL CODES. Should further information be
desired or should particular problems arise which are not
covered sufficiently for the purchaser's purposes, the matter
should be referred to your installing dealer or local distributor.
A. GENERAL
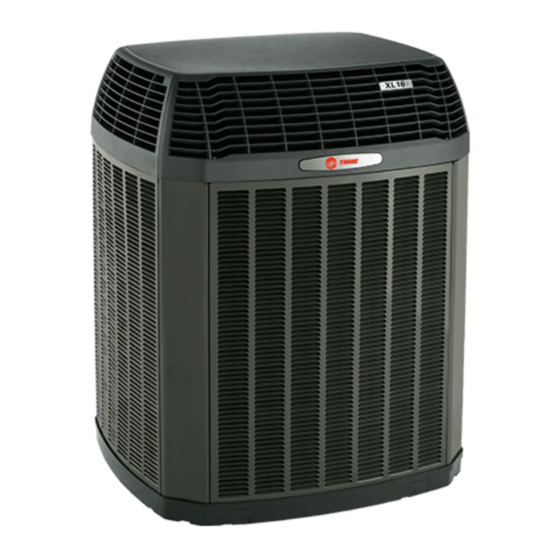
The following instructions cover 4TTX6 Condensing Units.
See special wiring and sequence of operation on page 5.
NOTICE:
These outdoor units may be used with indoor units
equipped with Thermostatic Expansion Valve only.
WARNING
!
These units use R-410A refrigerant which operates at 50%
to 70% higher pressures than R-22. Use only R-410A
approved service equipment. Refrigerant cylinders are
painted a "Rose" color to indicate the type of refrigerant
and may contain a "dip" tube to allow for charging of liquid
refrigerant into the system. All R-410A systems use a POE
oil that readily absorbs moisture from the atmosphere. To
limit this "hygroscopic" action, the system should remain
sealed whenever possible. Never break a vacuum with air
and always change the driers when opening the system for
component replacement.
Check for transportation damage after unit is uncrated.
Report promptly, to the carrier, any damage found to the unit.
To determine the electrical power requirements of the unit,
refer to the nameplate of the unit. The electrical power
available must agree with that listed on the nameplate.
B. LOCATION & PREPARATION OF THE UNIT
1. When removing unit from the pallet, notice the tabs on
the basepan. Remove tabs by cutting with a sharp tool as
shown in Figure 2 (see page 2).
2. The unit should be set on a level support pad at least as
large as the unit base pan, such as a concrete slab. If this
is not the application used please refer to application
bulletin "XL16i-APG**-EN" (* latest revision number).
3. The support pad must NOT be in direct contact with any
structure. Unit must be positioned a minimum of 12"
Installer's Guide
Condensing Units
4TTX6
UNIT CONTAINS R-410A REFRIGERANT!
R-410A OPERATING PRESSURE EXCEEDS THE
LIMIT OF R-22. PROPER SERVICE EQUIPMENT IS
REQUIRED. FAILURE TO USE PROPER SERVICE
TOOLS MAY RESULT IN EQUIPMENT DAMAGE OR
PERSONAL INJURY.
1
from any wall or surrounding shrubbery to insure
adequate airflow. Clearance must be provided in front of
control box (access panels) & any other side requiring
service access to meet National Electrical Code. Also,
the unit location must be far enough away from any
CAUTION
!
SERVICE
USE ONLY R-410A REFRIGERANT AND
APPROVED POE COMPRESSOR OIL.
5 FT. ABOVE UNIT-UNRESTRICTED
18-AC55D1-4
Advertisement
Table of Contents

Summary of Contents for Trane 4TTX6
- Page 1 TOOLS MAY RESULT IN EQUIPMENT DAMAGE OR PERSONAL INJURY. A. GENERAL The following instructions cover 4TTX6 Condensing Units. SERVICE See special wiring and sequence of operation on page 5. USE ONLY R-410A REFRIGERANT AND NOTICE: APPROVED POE COMPRESSOR OIL.
- Page 2 6. Precautions should be taken to avoid heat damage to the pressure tap valve core during brazing. It is Final refrigerant charge adjustment is necessary. Use the Charging Charts in the outdoor unit Service Facts. © 2009 Trane 18-AC55D1-4...
- Page 3 Installer’s Guide 5. Close off valve to vacuum pump and observe the micron LIQUID LINE SERVICE VALVE gauge. If gauge pressure rises above 500 microns in one (1) minute, then evacuation is incomplete or system has a leak. 6. If vacuum gauge does not rise above 500 microns in one (1) minute, the evacuation should be complete.
- Page 4 Installer’s Guide adjust system refrigerant charge upon completion of F. COMPRESSOR START UP installation. See unit Service Facts. After all electrical wiring is complete, SET THE THERMO- STAT SYSTEM SWITCH IN THE OFF POSITION SO E. ELECTRICAL CONNECTIONS COMPRESSOR WILL NOT RUN, and apply power by closing the system main disconnect switch.
- Page 5 REQUIRED WIRING Refer to Field Hook-up Diagrams above. BLK/TWIN 4TTX6 units require 80% airflow with “Y1” (first stage), 100% airflow with “Y2” (second stage). Note A – The installer must jumper at the LVTB “R” to “O”. Note B – Cut /remove the factory installed “BK” jumper (See Figures 1 & 2) Connect “Y1”...
- Page 6 Installer’s Guide 4TTX6 OUTLINE DRAWING NOTE: ALL DIMENSIONS ARE IN MM (INCHES). MODELS BASE 4TTX6024B 1118 (44) 829 (32-5/8) 756 (29-3/4) 5/8 5/16 143 (5-5/8) 92 (3-5/8) 210 (8-1/4) 79 (3-1/8) 692 (27-1/4) 4TTX6036B 1064 (41-7/8) 946 (37-1/4) 870 (34-1/4) 3/4 3/8...
- Page 7 Installer’s Guide MOUNTING HOLE LOCATION NOTE: ALL DIMENSIONS ARE IN MM (INCHES). NOTE: For model base size, see table on page 6. From Dwg. D152637 Rev. 1 18-AC55D1-4...
- Page 8 2 Check only necessary if heating unit is used for indoor section and wiring has been disturbed during installation of cooling equipment. 3 When applicable. 02/09 Trane www.trane.com Trane has a policy of continuous product and product data improvement and it reserves the right to change design and specifications without notice.


Need help?
Do you have a question about the 4TTX6 and is the answer not in the manual?
Questions and answers