Table of Contents
Advertisement
Advertisement
Table of Contents

Related Manuals for Integra DTM-6


Summary of Contents for Integra DTM-6
- Page 1 Instruction Manual DTM-6 Network Stereo Receiver...
-
Page 2: Table Of Contents
> Before Start > Part Names > Install > Initial Setup > Playback Supplementary information | Advanced Setup | Others Table of Contents Before Start Before Start What's in the box ............. 3 Part Names Part Names ............. 4 Install Step1: Connect the Speakers ......... -
Page 3: What's In The Box
> Before Start > Part Names > Install > Initial Setup > Playback Supplementary information | Advanced Setup | Others What's in the box 1. Main unit (1) 2. Remote controller (RC-906S) (1), batteries (AAA/R03) 3. (North American Models) power cord (1) (European Models) power cord (2) 4. -
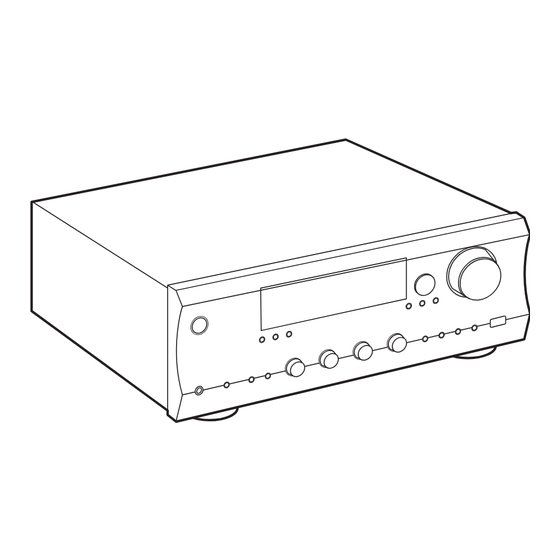
Page 4: Part Names
> Before Start > Part Names > Install > Initial Setup > Playback Supplementary information | Advanced Setup | Others Part Names Par t Names ... -
Page 5: Install
> Before Start > Part Names > Install > Initial Setup > Playback Supplementary information | Advanced Setup | Others 15.Input dial: Switches the input to be played. Turn the control to switch the source in the following order; BD/DVD#CBL/SAT#PC#GAME#TV/TAPE# CD#PHONO#AM#FM#NET#BLUETOOTH. - Page 6 > Before Start > Part Names > Install > Initial Setup > Playback Supplementary information | Advanced Setup | Others 90° 180° ...
-
Page 7: Install
> Before Start > Part Names > Install > Initial Setup > Playback Supplementary information | Advanced Setup | Others 16.ZONE 2 PRE OUT L/R/SUBWOOFER jacks: Audio output jack connected to a pre-main amplifier, a power amplifier or a subwoofer with built-in amplifier for multi-zone playback in a separate room. -
Page 8: Install
> Before Start > Part Names > Install > Initial Setup > Playback Supplementary information | Advanced Setup | Others Remote Controller 1. Í On/Standby button 2. Input Selector buttons: Switches the input to be played. 3. Play buttons: Used to control play of a Music Server or device connected via USB, or of RI connected devices. -
Page 9: Step1: Connect The Speakers
> Before Start > Part Names > Install > Initial Setup > Playback Supplementary information | Advanced Setup | Others Step1: Connect the Speakers Install You can connect two systems, Speaker A and Speaker B, as the Speaker System. When connecting only one set, connect to the SPEAKERS A terminals. -
Page 10: Step2: Connect An External Device
> Before Start > Part Names > Install > Initial Setup > Playback Supplementary information | Advanced Setup | Others Step2: Connect an external device 1. DIGITAL IN connection Connect an external device with a digital optical cable or digital coaxial cable. Note that this unit is equipped with an "Opt1Wkup feature"... - Page 11 > Before Start > Part Names > Install > Initial Setup > Playback Supplementary information | Advanced Setup | Others 2. LINE IN connection Connect an external device with an analog audio cable. You can connect a turntable that has an MM-type cartridge to the PHONO jack.
-
Page 12: Step3: Multi-Zone Connection
> Before Start > Part Names > Install > Initial Setup > Playback Supplementary information | Advanced Setup | Others Step3: Multi-zone Connection You can enjoy audio in the separate room by, for example, playing a Blu-ray Disc player in the main room (where this unit is located) and listening to internet radio in the separate room (ZONE 2). -
Page 13: Step4: Connect Other Cables
> Before Start > Part Names > Install > Initial Setup > Playback Supplementary information | Advanced Setup | Others Step4: Connect Other Cables 1. Network Hookup Connect this unit to the network using wired LAN or Wi-Fi (wireless LAN). You can enjoy Network Functions such as internet radio by connecting to the network. -
Page 14: Initial Setup With Auto Start-Up Wizard
> Before Start > Part Names > Install > Initial Setup > Playback Supplementary information | Advanced Setup | Others Initial Setup with Auto Start-up Wizard Initial Setup Starting up: When you press Í, "Now Initializing..." is displayed on the display. After this, when "Now Initializing..."... - Page 15 0 If "Retry" appears on the display, press Enter to retry select "Next". the settings. 0 This unit is displayed as "Integra DTM-6 XXXXXX". Use iOS Device 3. After "Now Connecting" is displayed on this unit, when When the access point is not displayed the Wi-Fi settings are complete, the display changes.
-
Page 16: Entering Text
> Before Start > Part Names > Install > Initial Setup > Playback Supplementary information | Advanced Setup | Others Entering text Text entry, for passwords, etc., uses the 1. Select the characters or symbols with cursor. following procedure. Up/Down/Left/Right (a). BS (backspace): Removes a character on the left of the cursor. -
Page 17: Playback
If a password is requested, BLUETOOTH wireless technology, the enter "0000". sound produced on this unit may slightly 0 This unit is displayed as "Integra be behind the sound played on the DTM-6 XXXXXX". BLUETOOTH wireless technology 0 To connect another BLUETOOTH enabled device. -
Page 18: Internet Radio
> Before Start > Part Names > Install > Initial Setup > Playback Supplementary information | Advanced Setup | Others Internet Radio Internet Radio Service Menus You can register certain stations as your favorites or delete stations you have registered from your favorites. The menu displayed depends on the service currently selected. -
Page 19: Spotify
> Initial Setup > Playback Supplementary information | Advanced Setup | Others Spotify Wi-Fi Integra DTM-6 XXX Device Devices Available Spotify Connect play is possible by "Off" in the Setup menu, manually turn connecting this unit to the same network as the unit on and then press NET on the a smart phone or tablet. -
Page 20: Airplay
Supplementary information | Advanced Setup | Others ® AirPlay Wi-Fi iPhone Integra DTM-6 XXX e.g., iOS 10 Basic Operations comes on and input switches to "NET". To reduce the amount of power You can wirelessly enjoy the music files on consumed in standby mode, press the ®... -
Page 21: Usb Storage Device
> Before Start > Part Names > Install > Initial Setup > Playback Supplementary information | Advanced Setup | Others USB Storage Device Basic Operations Supported Audio Formats remote controller to select the folder and music file, and then press Enter (b) to You can play music files stored on a USB This unit supports the following music file start playback. - Page 22 > Before Start > Part Names > Install > Initial Setup > Playback Supplementary information | Advanced Setup | Others digital audio. supported. However, playback times 0 We accept no responsibility whatsoever 0 Supported sampling rates: 44.1 kHz, 48 may not be displayed correctly. for the loss or damage to data stored on kHz, 88.2 kHz, 96 kHz, 176.4 kHz, 192 0 This unit supports the gapless playback...
-
Page 23: Listening To The Am/Fm Radio
> Before Start > Part Names > Install > Initial Setup > Playback Supplementary information | Advanced Setup | Others Listening to the AM/FM Radio You can receive AM/FM radio stations on "FM ST" indicator lights. 3. While pressing the cursor Up/Down this unit with the built-in tuner. - Page 24 > Before Start > Part Names > Install > Initial Setup > Playback Supplementary information | Advanced Setup | Others Tuning into Stations by Frequency Displaying Text Information (Radio sometimes not match the content being broadcast by the station. Text) It allows you to directly enter the frequency 3.
-
Page 25: Registering A Station
> Before Start > Part Names > Install > Initial Setup > Playback Supplementary information | Advanced Setup | Others Registering a station You can register up to 40 of your favorite radio stations. radio stations. Selecting a Preset Radio Station Registering 1. -
Page 26: Music Server
> Before Start > Part Names > Install > Initial Setup > Playback Supplementary information | Advanced Setup | Others Music Server 0 If media streaming is already turned on, 0 If "No Item." is displayed, check whether select "More streaming options..." in the the network is properly connected. - Page 27 > Before Start > Part Names > Install > Initial Setup > Playback Supplementary information | Advanced Setup | Others ∫ Controlling Remote Playback using a network service or playing music kHz, 88.2 kHz, 96 kHz, 176.4 kHz, 192 files on a USB storage device. from a PC ®...
-
Page 28: Multi-Zone
> Before Start > Part Names > Install > Initial Setup > Playback Supplementary information | Advanced Setup | Others Multi-zone Basic operations A power amplifier in another room: Zone2, within 8 seconds turn the Input Settings are required in the Setup menu to dial to select the input to be played in You can enjoy audio in the separate room adjust the volume and sound quality on a... - Page 29 > Before Start > Part Names > Install > Initial Setup > Playback Supplementary information | Advanced Setup | Others To turn off the function: Press the Í button while the remote controller is in the mode for controlling ZONE 2.
-
Page 30: Audio Menu
> Before Start > Part Names > Install > Initial Setup > Playback Supplementary information | Advanced Setup | Others AUDIO Menu By pressing Audio on the remote controller 1. Press Audio (c) on the remote controller. during play, you can adjust frequently used 2. -
Page 31: Supplementary Information For Player Functions
> Before Start > Part Names > Install > Initial Setup > Playback Supplementary information | Advanced Setup | Others Supplementary Information for Player Functions Supplementary information Due to firmware (the software for the system) updates after you make your purchase or firmware changes during production of the product, there may be additions or changes to the features available compared to what is in the instruction manual. -
Page 32: Setup Menu
> Before Start > Part Names > Install > Initial Setup > Playback Supplementary information | Advanced Setup | Others Setup Menu Advanced Setup The unit allows you to configure advanced settings to provide you with an even better experience. 1. - Page 33 > Before Start > Part Names > Install > Initial Setup > Playback Supplementary information | Advanced Setup | Others 3. Hardware COAX2 "BD/DVD", "CBL/SAT", "GAME", "PC", "CD", "TV/TAPE", "PHONO": Allocate an input selector to the DIGITAL IN COAXIAL 2 jack. (Default Value is "CBL/SAT") SpImpedance Set the impedance (≠) of the connected speakers.
- Page 34 > Before Start > Part Names > Install > Initial Setup > Playback Supplementary information | Advanced Setup | Others 4. Source BT Wakeup This function wakes up the unit on standby by connecting a BLUETOOTH wireless technology enabled device. "On": When this function is to be used Intelli Adjust the volume level difference between the devices...
- Page 35 0 This may not work with some BLUETOOTH wireless This is set to Integra DTM-6 ****** at the time of technology enabled devices. purchase. (* stand for alphanumeric characters identifying each unit) For details on how to enter text, refer to "Entering text"...
- Page 36 > Before Start > Part Names > Install > Initial Setup > Playback Supplementary information | Advanced Setup | Others 0 Wait for a while if "Firmware Update" cannot be selected. It will appear when the network Pairing Info You can initialize the pairing information saved on this unit. feature is started.
- Page 37 > Before Start > Part Names > Install > Initial Setup > Playback Supplementary information | Advanced Setup | Others GAME Set the 12V trigger output setting to each input. TUNER Set the 12V trigger output setting to each input. "Off": No output "Off": No output "Main (default value)": Output when "GAME"...
- Page 38 > Before Start > Part Names > Install > Initial Setup > Playback Supplementary information | Advanced Setup | Others BD/DVD Set the 12V trigger output setting to each input. TV/TAPE Set the 12V trigger output setting to each input. "Off": No output "Off": No output "Main": Output when "BD/DVD"...
- Page 39 > Before Start > Part Names > Install > Initial Setup > Playback Supplementary information | Advanced Setup | Others 12. 12V TRG C Set the 12V trigger output setting to each input. "Off": No output Set when outputting the control signal (maximum 12 V/25 mA) through the 12V TRIGGER "Main": Output when "CD"...
-
Page 40: Web Setup
> Before Start > Part Names > Install > Initial Setup > Playback Supplementary information | Advanced Setup | Others Web Setup You can make the settings for network Network Setting features for this unit in an internet browser Stat: You can see information for the on a PC, smartphone, etc. -
Page 41: Firmware Update
> Before Start > Part Names > Install > Initial Setup > Playback Supplementary information | Advanced Setup | Others Firmware Update The updating function on this unit How to update Updating the Firmware via Network This unit has functionality to update the firmware (the There are two methods for updating the firmware: via 0 Check that the unit is turned on, and the connection to system software) over a network or by the USB port. - Page 42 > Before Start > Part Names > Install > Initial Setup > Playback Supplementary information | Advanced Setup | Others are still unable to connect to the Internet, the DNS server 4. Connect the USB storage device to the USB port on the 0 Others: Disconnect then reconnect the power cord, then or proxy server may be temporarily down.
-
Page 43: Others
> Before Start > Part Names > Install > Initial Setup > Playback Supplementary information | Advanced Setup | Others Troubleshooting Others Before starting the procedure ∫ Power unit to the status at the time of shipment may solve the problem. - Page 44 > Before Start > Part Names > Install > Initial Setup > Playback Supplementary information | Advanced Setup | Others sound is output from the speakers. 0 Listen to the station in mono. Sound is interrupted 0 When listening to an AM station, operating the remote 0 There may be a problem with the BLUETOOTH wireless No sound from a connected external device controller may cause noise.
-
Page 45: Remote Controller
> Before Start > Part Names > Install > Initial Setup > Playback Supplementary information | Advanced Setup | Others this unit. connection may not be possible as the metal can effect ∫ Wireless LAN Network 0 Depending on ISP, setting the proxy server is necessary. on the radio wave. - Page 46 > Before Start > Part Names > Install > Initial Setup > Playback Supplementary information | Advanced Setup | Others ∫ Others Strange noises can be heard from the unit 0 If you have connected another unit to the same wall outlet as this unit, this noise may be an effect from the other unit.
-
Page 47: General Specifications
> Before Start > Part Names > Install > Initial Setup > Playback Supplementary information | Advanced Setup | Others General Specifications Amplifier (Audio) section Headphone Rated Output (*)The actual range will vary depending on factors such as obstacles between devices, magnetic fields around a 200 mW (32 ≠, 1 kHz, 10% THD) Rated Output Power (FTC) (North American) microwave oven, static electricity, cordless phone,... - Page 48 > Before Start > Part Names > Install > Initial Setup > Playback Supplementary information | Advanced Setup | Others Speaker Outputs SPEAKERS A: FRONT L/R SPEAKERS B: FRONT L/R (North American models are banana plug ready) Phones PHONES (Front, Ø1/4z/6.3 mm) Others USB: 2 (Front: Ver.2.0, 5 V/0.5 A, Rear: Ver.2.0, 5 V/1 A) Ethernet: 1...
- Page 49 This product is protected by certain intellectual property rights of Microsoft. Use or distribution of such technology outside of this product is prohibited without a license from Microsoft. Windows 7, Windows Media, and the Windows logo are trademarks or ® The Wi-Fi CERTIFIED Logo is a certification mark of Wi-Fi Alliance.
- Page 52 18 Park Way, Upper Saddle River, N.J. 07458, U.S.A. Tel: 800-225-1946, 201-818-9200 Fax: 201-785-2650 http://www.integrahometheater.com <Germany> Gutenbergstrasse 3, 82178 Puchheim, Germany Tel: +49-8142-4401-0 Fax: +49-8142-4208-213 http://www.integra.eu <PRC> 302, Building 1, 20 North Chaling Rd., Xuhui District, Shanghai, China 200032, Tel: +86-21-52131366 Fax: +86-21-52130396 http://www.integra.com.cn F1707-0 (C) Copyright 2017 Onkyo &...
Need help?
Do you have a question about the DTM-6 and is the answer not in the manual?
Questions and answers