Advertisement
Installation in:
Wooden Doors
Plastic Doors
Plasterboard Walls
DIY installation may involve the use of power tools or cut glass. Safety equipment (gloves, eye
protection, etc.) should be used and if in doubt consult a professional to carry out the installation.
Suitable Door Types
Instructions are provided for installation in all door types, including wooden, plastic, glass and metal. Before
installing in a door with unknown construction, please check for a metal plate in case a larger hole is required,
as described in the metal door installation section.
If you can only be sure of the construction of the door by drilling a hole in it, make a trial hole anywhere
covered by the proposed hole for the SureFlap Microchip Pet Door.
Note: a simple test for the presence of a steel plate in the door is with a magnet. If the magnet is attracted
to the door then there is a steel plate within, and you must follow the instructions for mounting in a metal
door. However, even if a magnet is not attracted to the door, still check for the presence of other metals,
such as aluminium, which require the same mounting conditions.
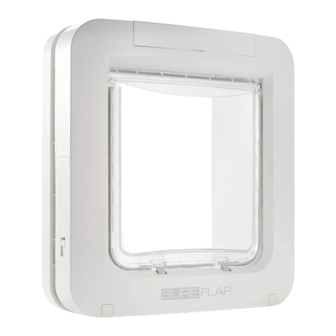
Pet Door Positioning
The ideal height of the SureFlap Microchip Pet Door is such that the base of the tunnel is the same height
above the ground as your pet's stomach. In practice however, mounting is normally dictated by features
in the door into which the unit will be installed. In these circumstances, it is usual to mount the pet door
as low as possible.
X
www.sureflap.com
Tools you will need:
Blu Tack
Crosshead Screwdriver
Drill
Jigsaw
Measure the height of your pet's stomach from the floor when your
1
pet is standing. This height is the level at which the bottom of the
hole should be cut through the door. Make a mark on the door at this
height. Note: If there is a large drop on the outside of the house you
will need to place a step outside for your pet to access the tunnel.
support@sureflap.com
Sharpened Pencil
Spirit Level
Ruler
1-855-461-4740
Advertisement
Table of Contents

Related Manuals for SureFlap Microchip Pet Door


Summary of Contents for SureFlap Microchip Pet Door
- Page 1 Pet Door Positioning The ideal height of the SureFlap Microchip Pet Door is such that the base of the tunnel is the same height above the ground as your pet’s stomach. In practice however, mounting is normally dictated by features in the door into which the unit will be installed.
- Page 2 Ensure you cut 2mm (0.078”) outside the line you have marked for the hole to allow enough clearance for the tunnel. Make sure that your jigsaw is sitting flat on the door at all times while cutting. www.sureflap.com support@sureflap.com 1-855-461-4740...
- Page 3 Clean off any loose debris, dust and dirt from the door before you install the SureFlap Microchip Pet Door. Mount the pet door in the hole with the main assembly (battery covers and LCD screen) inside the house. Mount the external frame on the outside of the house. Depending on the thickness of the door, the tunnel will protrude through the frame by differing amounts.
- Page 4 Installation in Metal Doors The presence of a metal plate in a door can influence the performance of the SureFlap Microchip Pet Door, reducing the range of the microchip reader. This includes the following: • Metal skin doors • Security doors •...
Need help?
Do you have a question about the Microchip Pet Door and is the answer not in the manual?
Questions and answers
I would like to know the thickness of the unit, particularly the side of the door that is the thinnest. I have installed a narrow acrylic panel over the flyscreen for a manual flap, but I now need to buy a flap that is sensor controlled. The flyscreen passes over the glass door, and I need to know that it will be able to do that.