Table of Contents
Advertisement
INSTALLATION INSTRUCTIONS
Multi Zone Inverter System
FEATURING R-410A
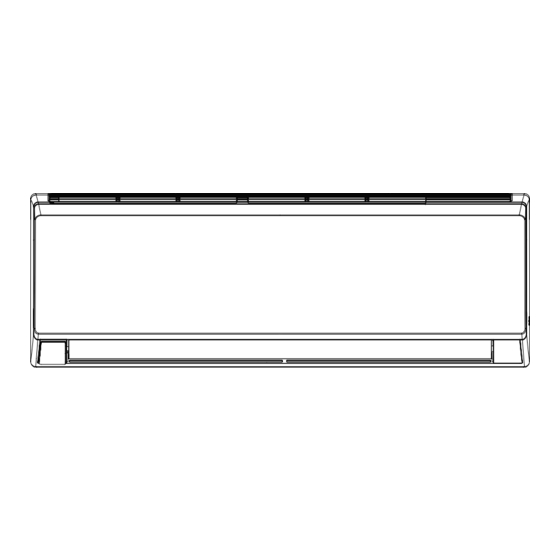
15 SERIES Indoor High Wall for Use with Multi-Split Applications
This Installation Guide is for use only when applying the M4HW15 indoor unit with
a M4THM model multi-split outdoor unit. If installing with a single zone mini split
outdoor unit, consult the installation manual shipped with the outdoor unit
88-M4MHW15M-1A-EN
Multi Split
Indoor Unit
Heat Pump
M4MHW15-A
Advertisement
Table of Contents

Related Manuals for Ameristar M4MHW15-A


Summary of Contents for Ameristar M4MHW15-A
-
Page 1: Installation Instructions
Multi Split Indoor Unit Heat Pump M4MHW15-A This Installation Guide is for use only when applying the M4HW15 indoor unit with a M4THM model multi-split outdoor unit. If installing with a single zone mini split outdoor unit, consult the installation manual shipped with the outdoor unit... -
Page 2: Warnings And Cautions
Warnings and Cautions Warnings are provided to alert others of the potential hazards that could result in severe personal injury or death, while cautions are designed to alert others of the conditions that could result in minor or moderate injury. Your personal safety and the proper operation of this machine depend upon the strict observance of these precautions. - Page 3 Warnings and Cautions WARNING R410-A Refrigerant under Higher Pressure than R-22! The units described in this manual use R410-A refrigerant which operates at 50 to 70% higher pressures than R-22. Use only R-410A approved service equipment. Refrigerant cylinders are painted with "pink" color to indicate the type of refrigerant and may contain a "dip"...
-
Page 4: Table Of Contents
Contents Safety Precautions ........................5 Pre-Installation Checklist ......................6 Items Shiped with the Unit ......................7 Necessary Tools ........................7 Clearance Requirements ......................8 Installation Location ........................9 Installing the Indoor Unit ......................10 Mounting Location ........................10 Drilling the Piping Hole ......................11 Refrigerant Piping at the Indoor Unit .................. -
Page 5: Safety Precautions
Ameristar 15 Series Multi-Split High Wall Indoor Unit Safety Precautions Your personal safety and the proper operation of this equipment depend upon the strict observance of these precautions. This mark indicates a potentially hazardous situation which, if not avoided, WARNING could result in death or serious injury. -
Page 6: Pre-Installation Checklist
Ameristar 15 Series Multi-Split High Wall Indoor Unit 12. If a system pump-down is performed, turn off the associated equipment and close service valves prior to removing the refrigerant piping. Failure to do so will introduce non-condensables in the system, causing abnormal pressure in the refrigeration cycle which could lead to injury and damage. -
Page 7: Items Shiped With The Unit
Ameristar 15 Series Multi-Split High Wall Indoor Unit Items Shipped with the Ameristar 15 Series Multi-Split High Wall Indoor Unit After unpacking the unit(s), please refrain from disposing of the packaging materials until items listed below are located. If any of these are missing, please contact the point of sale to obtain these items. -
Page 8: Clearance Requirements
Ameristar 15 Series Multi-Split High Wall Indoor Unit Clearance Requirements Space to the ceiling 6 in. or more Space to the wall 6 in. or more 6 in. or more Space to the wall 118 in. or more or more... -
Page 9: Installation Location
Ameristar 15 Series Multi-Split High Wall Indoor Unit Installation Location Indoor Unit WARNING Adequate Support Required! The wall structure must be adequate to support the weight of the unit. Failure to ensure adequate structural support could result in death, serious injury, and equipment or property damage. -
Page 10: Installing The Indoor Unit
Ameristar 15 Series Multi-Split High Wall Indoor Unit Installing the Indoor Unit WARNING Hazardous Service Procedures! The maintenance and troubleshooting procedures recommended in this section of the manual could result in exposure to electrical, mechanical or other potential safety hazards. Always refer to the safety warnings provided throughout this manual concerning these procedures. -
Page 11: Drilling The Piping Hole
Ameristar 15 Series Multi-Split High Wall Indoor Unit 09K: 12K: Wall Wall Wall Wall Mark in the middle of it Level Level Mark in the middle of it Space Space Space Space to the to the to the to the... -
Page 12: Refrigerant Piping At The Indoor Unit
Ameristar 15 Series Multi-Split High Wall Indoor Unit NOTICE If a wall sleeve is not used, unnecessary damage to the piping and wiring could occur. This typically results in current loss, improper grounding, and pipe leaks, Ensure no undue forces are on the piping and wiring through wall(s) and adequate draining still occurs. - Page 13 Ameristar 15 Series Multi-Split High Wall Indoor Unit 6. After evacuation is complete, additional charge can be added. a) If no additional charge is required, break the vacuum with refrigerant, then remove the gauge connectors. b) slightly open the liquid valve at the outdoor unit, allow system to equalize, then fully open the liquid valve and then open the vapor service valve.
-
Page 14: Installing The Condensate Pipe
Ameristar 15 Series Multi-Split High Wall Indoor Unit Installing the Condensate Pipe NOTICE Do not sharply twist or curve the condensate drain pipe. Ensure pipe ends are not submerged in water. Drain pipe must provide adequate flow and slope downward to the outlet. Failure to do so may result in leakage and overflow of the drain pan. - Page 15 Ameristar 15 Series Multi-Split High Wall Indoor Unit 3. Remove the wire clip and connect the power connection wire to the wiring terminal according to the correct color coding. It is recommended to use 4 wire colors (for example: Black, Blue, Red, Green) Connect Black to 1, Blue to 2, Red to 3 and Green to Ground.
-
Page 16: Binding The Pipes And Cables
Ameristar 15 Series Multi-Split High Wall Indoor Unit Binding the Pipes and Cables Note: The refrigeration pipes shall be insulated separately to prevent heat transfer between the two pipes. 1. At the beginning of the indoor connections, bind the insulated refrigerant pipes, power cable, and drain hose by evenly wrapping them with an appropriate pipe tape. -
Page 17: Refrigerant Piping Tips
Ameristar 15 Series Multi-Split High Wall Indoor Unit Refrigerant Piping Tips Flaring Process 1. Hold the pipe downward to prevent cuttings from entering the pipe. 2. Using an appropriate tube cutter and deburring tool, cut and deburr the refrigerant pipe. -
Page 18: Wiring Diagrams
Ameristar 15 Series Multi-Split High Wall Indoor Unit Wiring Diagrams Color Key Symbol Symbol Color Symbol Symbol Color Symbol Name White Green Jumper cap Yellow Brown COMP Compressor Blue Grounding wire YE/GN Yellow/Green Black Violet Orange Note: A "Jumper Cap" may be used to determine fan speed and the swing angle of horizontal louver for this model. -
Page 19: Unit Dimensions
Ameristar 15 Series Multi-Split High Wall Indoor Unit Indoor Unit Dimensions 9K-12K Indoor Units 6 5/8 18 3/16 6 5/16 Φ2 3/16 Φ2 3/16 2 1/8 2 1/8 3 1/2 4 11/16 21 5/16 7 1/4 Φ2 3/16 Φ2 3/16... - Page 20 Ameristar 15 Series Multi-Split High Wall Indoor Unit Indoor Unit Dimensions, continued 18K-24K Indoor Units 3/16 Φ2 3/16 Φ2 3/16 1 1/2 7 1/2 5 1/2 8 1/8 7 5/16 The dimensions in these drawings Φ2 3/4 Φ2 3/4 are rounded according to standard measurement.
-
Page 21: Auxillary Operation
Ameristar 15 Series Multi-Split High Wall Indoor Unit Auxiliary Operation If the remote controller is lost or damaged, please use the auxiliary button to turn on or turn off the air conditioner. Open the front panel of the unit and press the aux. button to turn on or turn off the unit. - Page 22 CONFORMSTO ULSTD.1995 CERTIFIEDTO CSASTD.C22.2 Literature Order Number 88-M4MHW15M-1A-EN Intertek N0.236 Date August 2017 3097844 Supersedes The manufacturer has a policy of continuous product and product data improvement and reserves the right to change design and specifications without notice. Only qualified technicians should perform the installation and ©...
Need help?
Do you have a question about the M4MHW15-A and is the answer not in the manual?
Questions and answers