Table of Contents
Advertisement
Quick Links
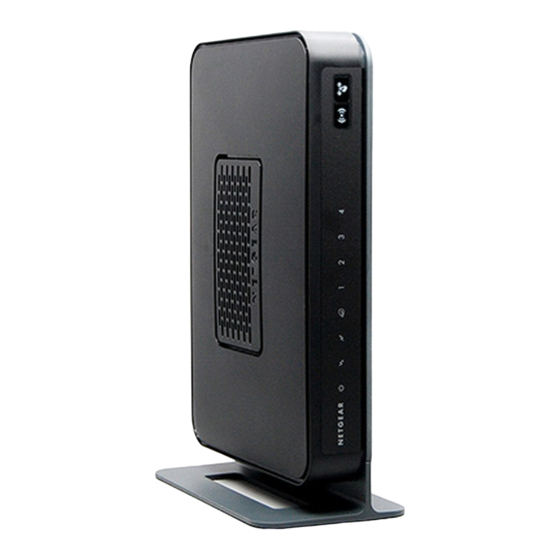
Home Wi-Fi Gateway Instructions
1. Connect the gateway. Use the coaxial cable provided by BendBroadband to connect the cable port
(A) to your cable outlet.
2. Connect your computer to the cable modem gateway with an Ethernet cable (B), or via a wireless
device using the default settings located on the back of your wireless gateway.
3. Attach the power adapter cable to the
gateway and plug it into an electrical
outlet. Make sure that the Power button on
the rear panel is in the ON position.
After the gateway and power is connected,
the gateway will automatically attempt to
do the following:
1
Advertisement
Table of Contents

Subscribe to Our Youtube Channel
Related Manuals for NETGEAR CG3000D


Summary of Contents for NETGEAR CG3000D
- Page 1 Home Wi-Fi Gateway Instructions 1. Connect the gateway. Use the coaxial cable provided by BendBroadband to connect the cable port (A) to your cable outlet. 2. Connect your computer to the cable modem gateway with an Ethernet cable (B), or via a wireless device using the default settings located on the back of your wireless gateway.
- Page 2 Connect to the BendBroadband cable network and download the latest configuration files. This can take up to 15 minutes to complete. Obtain an IP address for the gateway. Then the gateway assigns an IP address for the connected PC. ...
- Page 3 HOME Wi-Fi USER GUIDE Positioning Your Unit The operating distance or range of your wireless connection can vary significantly depending on the physical placement of your unit. For example, the thickness and number of walls the wireless signal must pass through might limit the range. For best results, place your Gateway: ...
- Page 4 By default, your SSID (name of your wireless connection) is encrypted specifically for your Gateway for added security. The SSID name should always begin with ‘CG3000D’. To change your SSID, click on Wireless Settings under Setup. Type the new name of your network in...
-
Page 5: Changing The Password
Changing the password Default Username: admin Default Password: password To change the router password: 1. In the main menu, under Maintenance, select Set Password. 2. To change the password, enter the new password twice. 3. Click Apply to save your changes. Note: You can also restore factory default settings by selecting “Yes”... - Page 6 Using Push ‘N’ Connect (WPS) Wireless Setup Push 'N' Connect (WPS) can be a quick way to automatically set up your gateway’s wireless network and set up your wireless computer to connect to it at the same time. WPS, also called Wi-Fi Protected Setup, is a relatively new technology, so before you decide to use it, check to make sure your wireless computers and devices support WPS.
-
Page 7: Troubleshooting Quick Tips
Method 2: Push Button This method is used when your wireless device has the ability to connect using WPS with a button. 1. First, make sure you know how WPS works on your computer or wireless device. If it works with WPS, there will be a WPS utility feature and it might have a WPS button. -
Page 8: Make Sure The Network Settings Of The Computer Are Correct
Make sure that the power cord is properly connected and that the power adapter is properly connected to a functioning power outlet. Check that you are using the power adapter that NETGEAR supplied for this product. Ensure that the power switch located on the back of your Gateway is in the ON position.
Need help?
Do you have a question about the CG3000D and is the answer not in the manual?
Questions and answers