Table of Contents
Advertisement
Available languages
Available languages
Advertisement
Chapters
Table of Contents

Related Manuals for Medion MD 90223


Summary of Contents for Medion MD 90223
- Page 1 Network hard drive/NAS with two integrated hard drives 2 x 3 TB (2 x 3000 GB)/ Netværksharddisk/NAS med to in- tegrerede harddiske 2 x 3 TB (2 x 3000 GB) ® ® MEDION LIFE P89653 (MD 90223) Instruction Manual Betjeningsvejledning...
-
Page 2: Table Of Contents
Contents Notes on how to use these instructions ...........3 1.1. Warning symbols and key words used in these instructions ..3 Proper use ..................4 Safety instructions ................5 3.1. Keep electrical equipment out of reach of children ....5 3.2. General points .................... 5 3.3. - Page 3 The web interface ................26 14.1. Opening the web interface ..............26 14.2. Features and settings of the web interface ........26 Media library ................... 27 15.1. My Library/Family Library ..............27 15.2. New folder/delete folder ..............28 15.3. Context menu for opening folders and files .........28 15.4.
-
Page 4: Notes On How To Use These Instructions
Notes on how to use these instructions 1. Notes on how to use these instructions Before using the product for the first time, you should read these operating instructions thoroughly and fol- low the safety advice! This product should only be used as directed and specified in these instructions. -
Page 5: Proper Use
Proper use WARNING! Warning of risk of electric shock! • Bullet point / information on operating steps and results Instructions to be carried out 2. Proper use This product is designed for the provision of data to a network and for the management of audio, video and image files stored on data media which are connected to the product directly or via a network. -
Page 6: Safety Instructions
Safety instructions 3. Safety instructions 3.1. Keep electrical equipment out of reach of children • This product may be used by children aged 8 and above and by people with reduced physical, sensory or mental abilities or who lack the experience and/or knowledge to use it if they are supervised or have been instructed in the safe use of the product and have understood the dangers that result from it. -
Page 7: Set-Up Location
Safety instructions • If the product has been moved from a cold room to a warm room, wait before connecting it to the power supply. The re- sulting condensation may damage the product. The product can be plugged in and operated safely as soon as it reaches room temperature. -
Page 8: Cleaning And Care
Never try to open and/or repair the product yourself. There is a risk of electric shock! If there is a fault, contact the MEDION Service Centre or another specialist repair shop in the interests of safety. 3.5. Cleaning and care •... -
Page 9: Information On Electrostatic Charge
Safety instructions • To interrupt the power supply, pull the plug out of the mains socket. • The mains adapter must remain easily accessible after con- nection so that it can be unplugged quickly in an emergency. • To avoid overheating, do not cover the mains adapter. •... -
Page 10: Notes On Conformity
3.9. Notes on conformity The product fulfils the requirements for electromagnetic com- patibility and electrical safety. MEDION AG hereby declares that these products comply with the fundamental requirements and the other relevant regula- tions set out in Directives 2006/95/EC and 2011/65/EU. -
Page 11: Capabilities Of The Lifecloud System
General information 4.2. Capabilities of the LifeCloud system The LifeCloud system can be used for the following network tasks: • As a central storage location for files that you want to make available to other users via the local network or the internet. •... -
Page 12: Features Of The Lifecloud System
Package contents 4.4. Features of the LifeCloud system The features of the LifeCloud system are as follows: • Two SATA hard drives (Serial ATA) • An Ethernet or LAN connection which allows access to the server via the local network or the internet. •... -
Page 13: Overview Of The Product
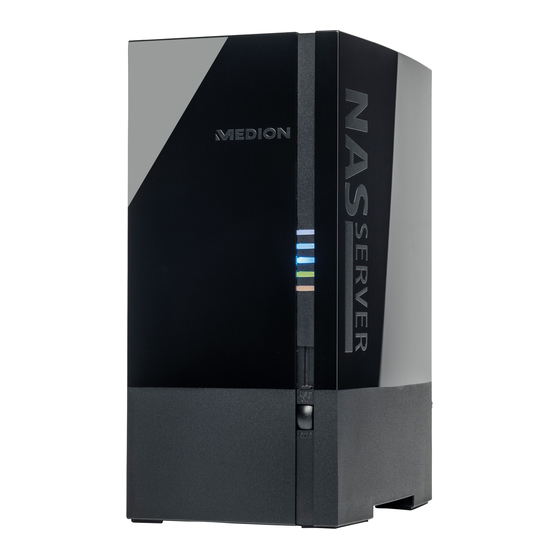
Overview of the product 6. Overview of the product 6.1. Hardware front and rear : Power indicator hard drive 1 (lights up blue when LED 1 (BLUE/RED) switched on, lights up red in the event of a hardware failure) : Power indicator hard drive 2 (lights up blue when LED 2 (BLUE/RED) switched on, lights up red in the event of a hardware failure) : Power indicator (lights up blue when switched on,... -
Page 14: About The Lifecloud
About the LifeCloud NOTE! LED 1 and LED 2 light up red before the hard disk con- figuration process has been carried out (see 10.2 on page 18). 7. About the LifeCloud In the basic version, you can create up to five user accounts on your Life- Cloud. -
Page 15: Switching The System On Or Off
Switching the system on or off system is in the same network. Ports for USB devices You can connect external USB drives to the USB ports or a USB printer which will be available to all the users in the local network. The USB port on the front of the server can also be used for the one- touch copy function. - Page 16 Initial operation Click on the entry Setup New Device In the next window, you will be prompted to press the front button OTC BUTTON ) on the LifeCloud system for 5 seconds until you hear a beep. The blue bar must be displayed. The LifeCloud server will now register your LifeCloud system.
- Page 17 Initial operation Tap the arrow pointing right. NOTE! After registration, you can create up to 5 user accounts on the LifeCloud system. If you have a premium ac- count on www.lifecloudmedion.com, you can open an unlimited number of user accounts on the LifeCloud system.
- Page 18 Initial operation Open the QR code link to install the app on your tablet PC/smartphone (see “18. Using the LifeCloud app on smart devices” on page 38 on how to use the app). Click on the arrow pointing right. ...
-
Page 19: On Initial Start-Up: Hard Drive Configuration
Initial operation 10.2. On initial start-up: hard drive confi guration After the starting the LifeCloud system for the first time, a hard disk configu- ration wizard will appear when you first log in to the LifeCloud. RAID I (“Redundant Array of Independent Disks”) The two hard drives of the LifeCloud system (3 TB each) are used in conjunc- tion in the RAID 1 configuration. - Page 20 Initial operation ATTENTION! The hard disk configuration can only be set up dur- ing the initial start-up or later in the system menu. Any change to the disk configuration will lead to a total loss of all the data on both disks. Therefore back up your data on other media BEFORE making any changes to the configuration! ...
-
Page 21: Copying Files With The Otc Button
Copying fi les with the OTC button 11. Copying fi les with the OTC button Connect a USB data carrier, which you want to use to copy data between the LifeCloud system and the USB data carrier, to the USB port on the front side of the LifeCloud system. - Page 22 RESET button In the next window, you will be prompted to press the front button OTC BUTTON ) on the LifeCloud system for 5 seconds until you hear a beep. The LifeCloud web interface has now detected that the RESET button on the system has been pressed and the following dialogue box will appear.
- Page 23 RESET button Select the appropriate user account and assign a new password. Afterwards, click the right arrow to finish the reset process. 22 of 110...
-
Page 24: Resetting To The System To The Default Settings
Using the LifeCloud agent 12.2. Resetting to the system to the default settings It may be necessary to restore the default settings of the LifeCloud system if it fails to react correctly or if you no longer have access to the system. ... -
Page 25: Using The Lifecloud Desktop
Using the LifeCloud agent 13.2. Using the LifeCloud desktop • You can see the login status in the top entry in the menu. If the status is Not logged in “ ”, you will need to enter the name of your LifeCloud sys- tem and a user name and password in order to log on and access the Life- Cloud system on the local network. - Page 26 Using the LifeCloud agent Open Lifecloud application Use this entry to open the web interface in your computer’s default browser. Preferences Here you can search for available software updates for the LifeCloud agent and display the IP address of the LifeCloud system. Wake up using “Wake On LAN”...
-
Page 27: The Web Interface
Enter “ ” in the address bar of the web browser • Click with the right mouse button on the Medion LifeCloud agent icon Navigate to LifeCloud (www) and then select the entry 14.2. Features and settings of the web interface The standard web browser will open and the login page will appear. -
Page 28: Media Library
Media library 15. Media library You can manage the media files stored on the LifeCloud system in the media library. You can use the top menu bar to sort or customise the file view or search for files. Family Library My Library The pre-installed root directories cannot... -
Page 29: New Folder/Delete Folder
Media library 15.2. New folder/delete folder Select the folder/root directory in which you want to open a new folder. Click on the plus sign at the top of the folder view and then enter a name Create for the new subdirectory. Confirm your selection by pressing ... - Page 30 Media library Upload (only for folders) Upload Click on to open the window to upload files. Here you can upload Drag und Drop files into Upload current folder via the file path or via the function (see “15.5. Uploading files to the LifeCloud system” on page 31). Add to album Select an album here or create a new album to which you would like to add this folder (see also “16.
-
Page 31: Albums
Media library 15.4. Albums Here you can create new albums or delete albums and also view the contents of an album. Creating a new album Click on the Albums symbol next to the item Enter a name and description for the album. ... -
Page 32: Uploading Files To The Lifecloud System
Media library 15.5. Uploading fi les to the LifeCloud system Proceed as follows to upload files to the LifeCloud system: Click on a folder in the media library into which you want to upload the files. Select Upload in the context menu of the folder or click the arrow at the top of the folder view. -
Page 33: Albums
Albums 16. Albums Here you will see the albums you have created in the media library. The albums list contain links to files which you highlighted in the media li- brary and added to an album. • Albums can also be shared with users outside the LifeCloud by sending them a link to the album. -
Page 34: Settings
Settings 17. Settings You can enter all the settings for the LifeCloud system on this screen. If you are logged onto the LifeCloud system as an administrator, you can ac- cess all the system settings. As a normal user, you can only configure the user settings: 17.1. - Page 35 Settings Clear Home Backround Here you can delete the current wallpaper and reset it to the default wallpa- per. What to do when a file already exists Here you can set the desired response of the LifeCloud system on uploading files that already exist on the server.
-
Page 36: Server Preferences
Settings 17.2. Server Preferences Network Sharing Enter the name of your Windows homegroup here and set the function to to make your files and folders available to the homegroup Wake ON LAN Set this function to so that network devices can switch on (“wake”) the LifeCloud system when it is in sleep mode. -
Page 37: Administration
Here you can check if new updates are available via the internet. Medion LifeCloud Pro Here you can purchase a subscription to a Medion LifeCloud Pro account or view your status with reference to a Medion LifeCloud Pro account. 36 of 110... - Page 38 Settings Disk Management Here you can see the status of the disk configuration. To format both hard drives so that you can subsequently reinstall them, Format select the entry To start a reconfiguration process (RAID 1 or JBOD), select the entry Reconfigure External Storage Here you can see the status of any external storage medium that is connect-...
-
Page 39: Using The Lifecloud App On Smart Devices
Tap on an icon to call up the corresponding menu. 18.2. Media library view In the main menu, click on Medion Library to display the LifeCloud me- dia library. In the media library, the public and private folders will be displayed. -
Page 40: Album View
Using the LifeCloud app on smart devices Open one of the root directories FamilyLibrary MyLibrary You can customise the view of the folder contents via the menu icons at the bottom edge of the screen. Tap on the button at the bottom of the screen to display the menu bar. - Page 41 Using the LifeCloud app on smart devices You can customise the view of the folder contents via the menu icons at the bottom edge of the screen. Tap on the button at the bottom of the screen to display the menu bar.
-
Page 42: Using Memeo Backup
Using Memeo Backup 19. Using Memeo Backup You will find the backup software Memeo Instant Backup on the software CD supplied with the product. You can install this when installing the LifeCloud agent (“Using the LifeCloud agent” on page 23). How to set up the backup function with Memeo Instant Backup on your Life- Cloud system: Creating a network drive for data backup... -
Page 43: Run Lifeclouddetect
Run LifeCloudDetect Now all the files from the drive of your computer will be backed up on the LifeCloud system. The following folders on the drive will not be backed • The folder “Program Files” • Temporary files and log files as well as virtual disk files •... -
Page 44: Cleaning
Cleaning 20.1. Do you need more help? If the above suggestions did not solve a specific problem, please contact us. The following information would help us: • What external devices are connected? • What messages appear on the screen? • When operating the product, at which step did the problem occur? •... -
Page 45: Disposal
Disposal 22. Disposal Packaging The product is packaged to protect it from damage in transit. Packaging materials are raw materials and can therefore be re- used or recycled. Hardware Do not under any circumstances dispose of the product with the household rubbish at the end of its service life. -
Page 46: Technical Data
Technical data 23. Technical data Power supply mains adapter Ktec KSAP0361200300HE Input (primary): 100-240 V ~ 50/60 Hz, 0.8 A Output (secondary): 12 V 3 A Connections 3 USB ports (front/rear): 2x USB 3.0 (blue), 1x USB 2.0 (white) LAN port: RJ45 (Ethernet 10/100 MBit &... -
Page 47: Glossary
Glossary 24. Glossary BitTorrent See Torrent. CIFS – Common Internet File System The recommended data sharing protocol for the Windows platform in which users can access shares over the network. Mac OS X and newer versions also support the CIFS protocol. See also Protocol. DHCP –... - Page 48 Glossary computer and the hard drive. Host interface The point at which a host and a drive are connected to each other. Host transfer rate The speed at which a host computer can transfer data via an interface. HTTP – HyperText Transfer Protocol The protocol used by the World Wide Web to transfer information between servers and browsers.
- Page 49 Glossary Partition A logical area of a hard drive which the operating system treats as a separate hard drive. Each partition is assigned a unique drive letter. Partitions which are connected as fixed drives are also known as “volumes”. Peer See Torrent.
- Page 50 Glossary TCP/IP Transmission Control Protocol/Internet protocol – a series of protocols used for communication via connected networks. The standard for data transmis- sion via networks. See also Protocol. Torrent BitTorrent (bit: smallest data unit, torrent: fast-moving stream of water, from the Latin torrens) is a file-sharing protocol which is particularly suitable for rapid distribution of large amounts of data.
-
Page 51: Legal Information
Germany The operating manual can be reordered via the service hotline and is availab- le for download via the service portal at www.medion.com/gb/service/start/. You can also scan the QR code above and download the operating manual onto your mobile device via the service portal. - Page 52 Indholdsfortegnelse Om denne brugsanvisning ............. 53 1.1. Advarselssymboler og signalord, der anvendes i denne brugs- anvisning....................53 Korrekt anvendelse ................ 54 Sikkerhedsanvisninger ..............55 3.1. Elektriske apparater er ikke legetøj ..........55 3.2. Generelt ......................55 3.3. Placering ....................56 3.4. Foretag aldrig reparationer på egen hånd! ........56 3.5.
- Page 53 13.2. Anvendelse af LifeCloud Desktop .............73 Webbrugergrænsefladen ............... 75 14.1. Start af webbrugergrænsefladen ............75 14.2. Webbrugergrænsefladens funktioner og indstillinger .....76 Media Library .................. 76 15.1. My Library/FamilyLibrary ..............77 15.2. Oprettelse af en ny mappe/sletning af en mappe ......77 15.3. Åbning af genvejsmenuen for mapper og filer ......77 15.4.
-
Page 54: Om Denne Brugsanvisning
Om denne brugsanvisning 1. Om denne brugsanvisning Læs denne brugsanvisning grundigt før den første ibrugtagning, og følg frem for alt sikkerhedsanvisnin- gerne! Al anvendelse og betjening af denne enhed skal udfø- res som beskrevet i denne brugsanvisning. Opbevar derfor denne brugsanvisning, så har adgang til den senere. -
Page 55: Korrekt Anvendelse
Korrekt anvendelse • Punktliste/oplysninger om hændelser under betjeningen Handling, der skal udføres 2. Korrekt anvendelse Denne enhed er beregnet til at gøre data tilgængelige på et net- værk og til håndtering af lyd-, video- og billedfiler på datamedi- er, som er tilsluttet enheden direkte eller via et netværk. LifeCloud-systemet er en filserver. -
Page 56: Sikkerhedsanvisninger
Sikkerhedsanvisninger 3. Sikkerhedsanvisninger 3.1. Elektriske apparater er ikke legetøj • Denne enhed kan bruges af børn fra en alder på 8 år og af personer med begrænsede fysiske, sensoriske eller menta- le evner eller mangel på erfaring/viden, hvis de er under op- syn eller er blevet instrueret i sikker brug af enheden og har forstået de dermed forbundne farer. -
Page 57: Placering
Sikkerhedsanvisninger tes fra et koldt til et varmt rum. Det kondensvand, der opstår i denne forbindelse, kan under visse omstændigheder øde- lægge apparatet. Når enheden har nået stuetemperatur, kan den uden risiko tages i brug. 3.3. Placering • Placer og betjen alle komponenter på et stabilt, jævnt og vi- brationsfrit underlag for at undgå, at enheden falder ned. -
Page 58: Rengøring Og Vedligeholdelse
ADVARSEL! Forsøg aldrig selv at åbne og/eller reparere appara- tet. Der er fare for elektrisk stød! Ved forstyrrelser bør du henvende dig til Medion Service Center eller til et andet egnet fagværksted for at undgå farlige situatio- ner. 3.5. Rengøring og vedligeholdelse •... -
Page 59: Bemærkning Om Elektrostatisk Afladning
Sikkerhedsanvisninger beskadigelse som følge af spændingsspidser på lysnettet. • Hvis du vil afbryde strømforsyningen, skal du tage strømfor- syningsstikket ud af stikkontakten. • Strømforsyningen skal også være let tilgængelig efter tilslut- ningen, så den om nødvendigt hurtigt kan kobles fra lysnet- tet. -
Page 60: Meddelelse Om Overensstemmelse
3.9. Meddelelse om overensstemmelse Enheden opfylder kravene til elektromagnetisk kompatibilitet og elektrisk sikkerhed. MEDION AG erklærer hermed, at disse enheder er i overens- stemmelse med de grundlæggende krav og øvrige relevante bestemmelser i direktiv 2006/95/EF og 2011/65/EF. Denne enhed opfylder de grundlæggende krav og relevante be- stemmelser i EU-direktivet for miljøvenligt design 2009/125/EF... -
Page 61: Generelt
Generelt 4. Generelt 4.1. Understøttede systemer og formater Dit LifeCloud-system understøtter følgende filsystemer, protokoller og appli- kationer: • TCP/IP-netværksprotokol • UPNP, integreret DLNA-server • Samba-server • FTP-server • FAT32, NTFS, XFS • Time Machine til MAC • iTunes Server • Windows Backup •... -
Page 62: Sådan Fungerer Lifecloud-Systemet Og De Medfølgende Komponenter
Generelt 4.3. Sådan fungerer LifeCloud-systemet og de medfølgende komponenter • LifeCloud (enhed): Hardwaren med indbygget harddisk, hvor dine filer gemmes og sikkerhedskopieres. • LifeCloud Web Interface: En brugergrænseflade, der er integreret i ser- veren og giver dig mulighed for at konfigurere, ændre og overvåge Li- feCloud-systemet via en webbrowser på... -
Page 63: Pakkens Indhold
Pakkens indhold 5. Pakkens indhold Kontroller, at der ikke mangler noget i pakken, og giv os besked senest 14 dage efter købet, hvis der mangler noget. Med det produkt, som du har købt, skal du have modtaget følgende: • LifeCloud (enhed) •... -
Page 64: Oversigt Over Enheden
Oversigt over enheden 6. Oversigt over enheden 6.1. Enhedens forside og bagside LED 1 (BLÅ/RØD) : Driftsindikator for harddisk 1 (lyser blåt i tændt til- stand, lyser rødt ved hardwarefejl) LED 2 (BLÅ/RØD) : Driftsindikator for harddisk 2 (lyser blåt i tændt til- stand, lyser rødt ved hardwarefejl) LED 3 (BLÅ/RØD) : Driftsindikator (lyser blåt i tændt tilstand, blinker... -
Page 65: Om Lifecloud
Om LifeCloud 7. Om LifeCloud I basisversionen kan du oprette op til 5 brugerkonti på din LifeCloud. Hvis du har en Premium-konto på www.lifecloudmedion.com, kan du oprette et ubegrænset antal brugerkonti, og du kan også udvide LifeCloud med en Torrent-klient og en USB-backupløsning. 8. -
Page 66: Tænd Og Sluk Enheden
Tænd og sluk enheden BEMÆRK! Inden du bruger One-Touch-Copy-funktionen, bør du læse de relevante anvisninger under „11. Kopiering af data med OTC-knappen“ på side 70. 9. Tænd og sluk enheden Hvis du vil tænde LifeCloud-systemet, skal du trykke på tænd/sluk-knap- pen i ca. - Page 67 Første ibrugtagning I det næste vindue bliver du bedt om at holde knappen på forsiden af Li- feCloud-systemet ( -knappen) nede i 5 sekunder, indtil der høres en signaltone. De blå linjer skal blive vist. LifeCloud-serveren registrerer nu dit LifeCloud-system. Status for processen vises med en blå...
- Page 68 Første ibrugtagning BEMÆRK! Når du har logget på, kan du oprette op til 5 bru- gerkonti på LifeCloud-systemet. Hvis du har en Pre- mium-konto på www.lifecloudmedion.com, kan du oprette et ubegrænset antal brugerkonti på LifeC- loud-systemet. Via den QR-kode, som også vises i webbrowseren, kan du nu installere app'en til din mobile terminalenhed (tablet/smartphone).
-
Page 69: Første Gang Du Bruger Systemet: Valg Af Harddiskkonfiguration
Første ibrugtagning Afslut konfigurationen ved at klikke på den højre pil. Nu vises LifeCloud-systemets webbrugergrænseflade (du kan finde flere op- lysninger under „14. Webbrugergrænsefladen“ på side 75). 10.2. Første gang du bruger systemet: Valg af harddiskkonfi guration Når LifeCloud-systemet er taget i brug, vises de mulige harddiskkonfiguratio- ner for datalagringen, når du logger på... - Page 70 Første ibrugtagning RAID I (eng. „Redundant Array of Independent Disks“, = „Redundant gruppe af uafhæn- gige harddiske) Ved konfigurationen RAID 1 anvendes LifeCloud-systemets to harddiske (hver på 3 TB) forbundet. De samme data gemmes på begge harddiske (spej- ling), så dine data har fuld redundans. Kapaciteten for RAID 1 er dermed mak- simalt lige så...
-
Page 71: Kopiering Af Data Med Otc-Knappen
Kopiering af data med OTC-knappen 11. Kopiering af data med OTC-knappen Tilslut et USB-datamedie, som du vil bruge til at kopiere data mellem Life- Cloud-systemet og USB-datamediet, til USB-stikket på LifeCloud-systemets forside Vent, til OTC-indikatoren lyser orange, og LifeCloud-systemet har fundet USB-datamediet. - Page 72 RESET-knappen I det næste vindue bliver du bedt om at holde knappen på forsiden af Li- OTC-KNAPPEN feCloud-systemet ( ) nede i 5 sekunder. LifeCloud-webbrugergrænsefladen har nu registreret, at der er blevet trykket på RESET-knappen, og den følgende dialogboks vises. ...
-
Page 73: Nulstilling Af Systemet Til Standardindstillingerne
RESET-knappen Vælg den relevante brugerkonto, og indtast en ny adgangskode. Klik derefter på den højre pil for at færdiggøre nulstillingen: 12.2. Nulstilling af systemet til standardindstillingerne Hvis LifeCloud-systemet reagerer fejlagtigt, eller hvis der er foretaget indstil- linger, som medfører, at du ikke har adgang til systemet, kan det være nød- vendigt at nulstille systemet til standardindstillingerne. -
Page 74: Anvendelse Af Lifecloud Agent
Anvendelse af LifeCloud Agent 13. Anvendelse af LifeCloud Agent 13.1. Installation af LifeCloud Agent • Via LifeCloud Agent kan du logge på LifeCloud-systemet via din pc på lo- kalnetværket og på den måde få adgang til LifeCloud-systemets webbru- gergrænseflade og netværksmappe. Sådan installerer du LifeCloud Agent: •... -
Page 75: Switch User
Anvendelse af LifeCloud Agent Når du har logget på, kan du bruge følgende menufunktioner i LifeCloud Agent: Switch User Her kan du logge på LifeCloud-systemet med et andet brugernavn. Log out Her kan du logge LifeCloud Agent af LifeCloud-systemet, f.eks. for at kunne logge på... -
Page 76: Webbrugergrænsefladen
Webbrugergrænsefl aden Open Lifecloud application Via dette punkt kan du åbne webbrugergrænsefladen i din computers stan- dardbrowser. Preferences Her kan du søge efter tilgængelige softwareopdateringer til LifeCloud Agent og få vist LifeCloud-systemets IP-adresse. Wake up using “Wake On LAN” Her kan du aktivere og deaktivere LifeCloud-systemets Wake On LAN-funkti- on (WON) (se „Wake ON LAN“... -
Page 77: Webbrugergrænsefladens Funktioner Og Indstillinger
Media Library linje eller • klik med højre museknap på ikonet for Medion Life Cloud Agent, og klik Navigation zum LifeCloud (www). derefter på punktet 14.2. Webbrugergrænsefl adens funktioner og indstillinger Standardwebbrowseren åbnes, og logonsiden vises. For alle brugere (inklusive administratoren) vises først startsiden (Home), når der er logget på. -
Page 78: My Library/Familylibrary
Media Library FamilyLibrary MyLibrary De forudinstallerede rodmapper kan ikke slettes, men deres undermapper kan slettes. Hvis der er tilsluttet datamedier til de bagerste USB-stik, vises de også i bibli- oteket. 15.1. My Library/FamilyLibrary FamilyLibrary Unsere Ordner Mappen og dens indhold kan ses og håndteres af alle bru- gere, der er logget på... - Page 79 Media Library Klik på punktet Open for at åbne mappeindholdet i det højre vindue eller for at åbne en mediefil direkte. Automatisk afspilning af medieindhold (kun for mapper) Via punktet Slideshow kan du starte afspilningen af alle billeder i denne mappe som et diasshow.
-
Page 80: Albums
Media Library Hvis du vil fjerne mediedelingen for denne mappe igen, skal du klikke på Unshare with DMA punktet View Details Klik på dette punkt for at vise mappe-/filegenskaberne. • I mappe-/filegenskaberne kan du ændre filnavnet, filtags (lyd-/videofiler) direkte. -
Page 81: Overførsel Af Filer Til Lifecloud-Systemet
Media Library 15.5. Overførsel af fi ler til LifeCloud-systemet Hvis du vil overføre filer til LifeCloud-systemet, skal du bruge følgende frem- gangsmåde: Klik i mediebiblioteket på en mappe, som du vil overføre filerne til. Vælg i mappens genvejsmenu punktet Upload , eller klik på... -
Page 82: Albums
Albums 16. Albums Her vises de albummer, som du har oprettet i mediebiblioteket. Albummer indeholder genveje til filer, som du har markeret i mediebibliote- ket og tilføjet til et album. • Du kan også dele albummer med brugere uden for LifeCloud ved at dele et link til albummet med disse brugere. -
Page 83: Preferences
Preferences 17. Preferences På denne side kan du foretage samtlige indstillinger for LifeCloud-systemet. Hvis du er logget på LifeCloud-systemet som administrator, kan du får ad- gang til alle systemindstillinger som administrator. Som bruger kan du kun konfigurere brugerindstillingerne: 17.1. User Preferences User I brugermenuen kan du tilpasse visningsbilledet og konfigurationen for den bruger, der er logget på... - Page 84 Preferences Clear Home Backround Her kan du slette den startbaggrund, der anvendes i øjeblikket, og nulstille den til standardbaggrunden. What to do when a file already exists Her kan du angive, hvordan LifeCloud-systemet skal håndtere filer, der allere- de eksisterer, når der overføres filer. What to do when adding files to albums •...
-
Page 85: Server Preferences
Preferences 17.2. Server Preferences Network Sharing Angiv her navnet på din Windows-hjemmegruppe, og indstil funktionen til for at gøre dine filer og mapper i hjemmegruppen tilgængelige. Wake ON LAN Hvis du indstiller denne funktion til , kan netværksenheder tænde („væk- ke“) LifeCloud-systemet, når det er i standbytilstand. -
Page 86: Administration
Her kan du lukke eller genstarte LifeCloud-systemet med eller Restart Software Updates Her kan du kontrollere, om der findes nye opdateringer via internettet. Medion LifeCloud Premium Her kan du købe en Medion Life Cloud Premium-konto eller få vist din status 85 af 110... - Page 87 Preferences for en Medion Life Cloud Premium-konto. Disk Management Her kan du se status for harddiskkonfigurationen. Hvis du vil formatere de to harddiske, for derefter at omkonfigurere dem, Format skal du vælge punktet Hvis du vil ændre konfigurationen (RAID 1 eller JBOD), skal du vælge...
-
Page 88: Anvendelse Af Life Cloud App På Smart-Enheder
Anvendelse af Life Cloud App på Smart-enheder 18. Anvendelse af Life Cloud App på Smart-enheder Hent LifeCloud-app'en til Smart-enheder via det link, der er angivet på omslaget, og installer app'en. Når installationen er gennemført, skal du trykke på ikonet for LifeCloud-app'en på... -
Page 89: Visning Af Mediebiblioteket
Anvendelse af Life Cloud App på Smart-enheder 18.2. Visning af mediebiblioteket Klik i hovedmenuen på punktet Medion Library for at få vist LifeCloud-systemets mediebibliotek. I mediebiblioteket kan du se de offentlige og private mapper. Åbn en af rodmapperne... -
Page 90: Visning Af Albummer
Anvendelse af Life Cloud App på Smart-enheder 18.3. Visning af albummer Klik i hovedmenuen på punktet Albums for at få vist LifeCloud-systemets albummer. Via menuikonerne nederst på skærmen kan du tilpasse visningen af mappe- indholdet. Tryk på knappen nederst på... -
Page 91: Anvendelse Af Memeo Backup
Anvendelse af Memeo Backup 19. Anvendelse af Memeo Backup På den medfølgende software-cd finder du backup-softwaren Memeo-In- stant Backup, som du kan installere i forbindelse med installationen af LifeC- loud Agent („13. Anvendelse af LifeCloud Agent“ på side 73). Sådan konfigurerer du backup-funktionen med Memeo Instant-Backup på dit LifeCloud-system: Oprettelse af et netværksdrev til datalagringen ... -
Page 92: Har Du Brug For Yderligere Hjælp
Anvendelse af LifecloudDetect medionlifeclouddetect.exe, som findes på den medfølgende software-cd i mappen util. Når du har kørt filen, vises et vindue, hvor du bliver bedt om at trykke på knappen på enhedens forside, så LifeCloud-systemet kan findes på net- værket. -
Page 93: Rengøring
Rengøring 21. Rengøring Du kan forlænge enhedens levetid ved hjælp af følgende forholdsregler: • Fjern altid lysnetadapteren og alle forbindelseskabler før rengøring. • Brug ikke opløsningsmidler eller ætsende eller gasformige rengørings- midler. • Rengør enheden med en blød, fnugfri klud. Gem emballagen, og brug kun denne emballage ved transport af enheden. -
Page 94: Tekniske Data
Tekniske data 23. Tekniske data Strømforsyning, lysnetadapter Ktec KSAP0361200300HE Indgang (primær): 100-240 V ~ 50/60 Hz, 0,8 A Udgang (sekundær): 12 V Stik 3 USB-stik (foran/bagpå): 2x USB 3.0 (blå), 1x USB 2.0 (hvid) LAN-netværksstik: RJ-45 (Ethernet 10/100 MBit og Gigabit) Lysnetadapterstik: 12 V Harddiske... -
Page 95: Ordliste
Ordliste 24. Ordliste BitTorrent Se Torrent. CIFS – Common Internet File System Den anbefalede fildelingsprotokol for Windows-platformen, hvor bruger- ne kan få adgang til shares via netværksmiljøet. Mac OS X og nyere versioner understøtter også´CIFS-protokollen. Se også protokol. DHCP – Dynamic Host Configuration Protocol En protokol, der bruges til at tildele enheder på... - Page 96 Ordliste se til. Værtsadapter Et udvidelseskort, der fungerer som interface mellem computerens system- bus. Værtsinterface Det punkt, hvor en vært og et drev er forbundet med hinanden. Værtsoverførselshastighed Den hastighed, som en værtscomputer kan overføre data med via et interfa- HTTP –...
- Page 97 Ordliste puter, der fungerer som server for arbejdsstationsbrugere på netværket. Operativsystem Software, som gør brugeren og den software, der er installeret på systemet, i stand til at kommunikere med computerhardware som f.eks. en harddisk. Partition En logisk del af en harddisk, som behandler operativsystemet som en separat harddisk.
- Page 98 Ordliste TCP/IP Transmission Control Protocol/Internet Protocol (overførselsstyringsprotokol/ internetprotokol). En række protokoller til kommunikation via netværk, der er forbundet med hinanden. Standarden for dataoverførsel via netværk. Se også protokol. Torrent BitTorrent (bit: mindste dataenhed, torrent (engelsk): rivende strøm, af latin torrens) er en fildelingsprotokol, der egner sig særligt godt til hurtig forde- ling af store datamængder.
-
Page 99: Kolofon
Am Zehnthof 77 45307 Essen Tyskland Brugsanvisningen kan efterbestilles via vores service-hotline og er til rådig- hed til download via serviceportalen www.medion.com/dk/service/start/. Du kan også scanne den ovenstående QR-kode og indlæse brugsanvisnin- gen på din mobile enhed via serviceportalen. 98 af 110... - Page 100 Open Source software. Indien u interesse hebt in de originele tekst van de gebruikte GPL/LGPL, kunt u deze downloaden via de volgende link: http://www.medion.com. Voer in het Download Center het juiste MD-nummer of MSN-nummer in. Deze num- mers vindt u op het betreffende apparaat.
- Page 101 GNU General Public Licence II. GNU General Public Licence Version 2, June 1991 Copyright (C) 1989, 1991 Free Software Foundation, Inc. 51 Franklin Street, Fifth Floor, Boston, MA 02110-1301, USA Everyone is permitted to copy and distribute verbatim copies of this license document, but changing it is not allowed. Preamble The licenses for most software are designed to take away your freedom to share and change it.
- Page 102 GNU General Public Licence 1. You may copy and distribute verbatim copies of the Program‘s source code as you receive it, in any medium, provided that you conspicuously and appropriately publish on each copy an ap- propriate copyright notice and disclaimer of warranty; keep intact all the notices that refer to this License and to the absence of any warranty;...
- Page 103 GNU General Public Licence and installation of the executable. However, as a special exception, the source code distributed need not include anything that is normally distributed (in either source or binary form) with the major components (compiler, kernel, and so on) of the operating system on which the executab- le runs, unless that component itself accompanies the executable.
- Page 104 GNU General Public Licence may differ in detail to address new problems or concerns. Each version is given a distinguishing version number. If the Program specifies a version number of this License which applies to it and „any later version“, you have the option of following the terms and conditions either of that version or of any later version published by the Free Software Foundation.
- Page 105 GNU General Public Licence blic Licenses are designed to make sure that you have the freedom to distribute copies of free software (and charge for this service if you wish); that you receive source code or can get it if you want it;...
- Page 106 GNU General Public Licence TERMS AND CONDITIONS FOR COPYING, DISTRIBUTION AND MODIFICATION 0. This License Agreement applies to any software library or other program which contains a notice placed by the copyright holder or other authorized party saying it may be distributed un- der the terms of this Lesser General Public License (also called „this License“).
- Page 107 GNU General Public Licence every part regardless of who wrote it. Thus, it is not the intent of this section to claim rights or contest your rights to work written en- tirely by you; rather, the intent is to exercise the right to control the distribution of derivative or collective works based on the Library.
- Page 108 GNU General Public Licence work during execution displays copyright notices, you must include the copyright notice for the Library among them, as well as a reference directing the user to the copy of this License. Also, you must do one of these things: a) Accompany the work with the complete corresponding machine-readable source code for the Library including whatever changes were used in the work (which must be distributed under Sections 1 and 2 above);...
- Page 109 GNU General Public Licence 10. Each time you redistribute the Library (or any work based on the Library), the recipient auto- matically receives a license from the original licensor to copy, distribute, link with or modify the Library subject to these terms and conditions. You may not impose any further restrictions on the recipients‘...
- Page 110 GNU General Public Licence NO WARRANTY 15. BECAUSE THE LIBRARY IS LICENSED FREE OF CHARGE, THERE IS NO WARRANTY FOR THE LI- BRARY, TO THE EXTENT PERMITTED BY APPLICABLE LAW. EXCEPT WHEN OTHERWISE STATED IN WRITING THE COPYRIGHT HOLDERS AND/OR OTHER PARTIES PROVIDE THE LIBRARY „AS IS“ WI- THOUT WARRANTY OF ANY KIND, EITHER EXPRESSED OR IMPLIED, INCLUDING, BUT NOT LIMI- TED TO, THE IMPLIED WARRANTIES OF MERCHANTABILITY AND FITNESS FOR A PARTICULAR PUR- POSE.
- Page 111 GNU General Public Licence 110 / 110...
- Page 112 United Kingdom Hotline: 0333 32 12 106 (National rate) Fax: 01793 71 57 16 To contact us by email please visit the “Service and Support” section of our website at www.medion.co.uk. www.medion.co.uk Medion Service Nordic A/S Naverland 29A 2600 Glostrup...
Need help?
Do you have a question about the MD 90223 and is the answer not in the manual?
Questions and answers