
Related Manuals for Likewise 052-4316-2

Summary of Contents for Likewise 052-4316-2
- Page 1 42" Hugger Ceiling FAN OWNER’S MANUAL 052-4316-2 Caution! For your safety, please read and understand this manual before installing or operating this product. V3. 2016...
-
Page 2: Table Of Contents
Table of Contents Technical Data Important Safety Instructions Parts List Parts Locations Before Installation Installation 7-11 Operation 11-12 Care and Maintenance Troubleshooting Environmental Protection Warranty Operating voltage 120 V, 60 Hz Power consumption Fan only: 45 W (Maximum) Bulbs One E12 candelabra-base bulb (60 W maximum) When it comes to products for your home, it’s essential they stand up to the realities of everyday family life. -
Page 3: Important Safety Instructions
IMPORTANT SAFETY INSTRUCTIONS WARNING! To avoid possible electric shock, switch off the power supply at the main fuse or circuit breaker box before installing, servicing or cleaning. DO NOT use the ceiling fan if it shows any sign of damage or if it has been dropped. DO NOT expose the ceiling fan to rain or moisture. -
Page 4: Parts List
PARTS LIST Description Description Part Illustration Part Illustration ST4.8 x 38 Mounting 1,5, Wood screw bracket with flat washer 4,5,6, Fan motor 7,8,9, assembly 10,17, 18,19 “J” hook Motor Zip tie housing Sm4 X 25 Outlet box screw with lock washer Blade M5 X 12 blade screw... -
Page 5: Parts Locations
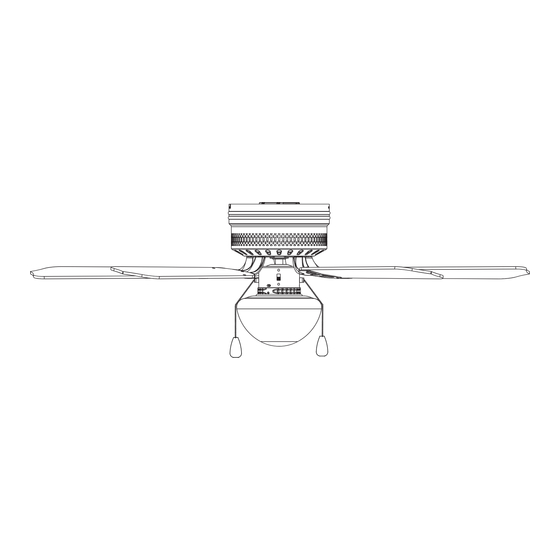
PARTS LOCATIONS Description Mounting Bracket Flat Washer/ Lock Washer Wood Screw/ Outlet Box Screw Motor Support Bar Mounting Screw Motor Switch Housing Reverse Switch Fan Pull Chain Light Pull Chain Motor Housing Motor Housing Screw Hexagon Nut Blade Screw Blade Blade Bracket Blade Bracket Screw Light Kit... - Page 6 WARNING! Read each step carefully before beginning any installation and make sure you understand each step. Keep children and pets away during installation. Keep fingers away from places where they can be pinched or injured. Tools Needed for Assembly (not supplied): 1 x star-head screwdriver 1 x stepladder 1 x flat screwdriver...
-
Page 7: Installation
Choosing a Location for the Ceiling Fan Choose a location where there is a high enough ceiling clearance, at least 6' 10"( 2.1 m) between the floor and the blades (fig. 3). For effective air circulation, fans should be located in the centre of the room, or a minimum of 32”... - Page 8 INSTALLATION Normal masonry ceiling Wooden ceiling Securely attach the mounting bracket (1) to an Drill two mounting holes in the ceiling joist. outlet box marked “Acceptable for Fan Securely attach the mounting bracket (1) to the Support,” using the supplied outlet box screws ceiling, using two sets of long wood screws (3) ith lock washers (2) (fig.
- Page 9 INSTALLATION Connect the motor wire (black) and light wire (blue) from the fan to the live wire from the outlet box. Connect the ground wire (green) from the fan to the ground wire from the outlet box. Connect the neutral wire (white) from the fan to the neutral wire from the outlet box. While connecting wires, make sure to: Match up the wires first.
- Page 10 INSTALLATION 4. Motor Housing Assembly Remove the motor housing screws (12) and washers from the mounting bracket (1). Slide the motor housing (11) over the motor assembly. Secure the sides of the mounting bracket (1) with the motor housing screws (12) (fig.
-
Page 11: Operation
INSTALLATION 7. Installing Bulb Install one 60 W (max.) candelabra bulb or equivalent CFL (not included) into the sockets on the light kit (18) (fig. 14). 8. Attaching Glass Shade Loosen the three light kit screws (19) on the light kit (18). -
Page 12: Care And Maintenance
OPERATION Forward and Reverse Function The reverse switch (8) is located on the surface of the switch housing (fig. 17). This switch controls directions: forward (switch up) or reverse (switch down). Note: Wait for the fan to stop before reversing the direction of the blade rotation. Downward air flow Up w ar d a i r f l o w Ceiling fans work best by blowing air downward... - Page 13 If the ceiling fan works abnormally, follow the instructions below or consult a qualified electrician. WARNING! To avoid possible electric shock, switch off the power supply at the main fuse or circuit breaker box before servicing. Problem Possible Reason Solution Blade screws are loose.
-
Page 14: Warranty
(if available). WARRANTY This Likewise product carries a one (1) year warranty against defects in workmanship and materials. Trileaf Distribution agrees to replace a defective product free of charge within the stated warranty period, when returned by the original purchaser with proof of purchase.
Need help?
Do you have a question about the 052-4316-2 and is the answer not in the manual?
Questions and answers