
Related Manuals for ROYLITE BSW350


Summary of Contents for ROYLITE BSW350
-
Page 1: User Manual
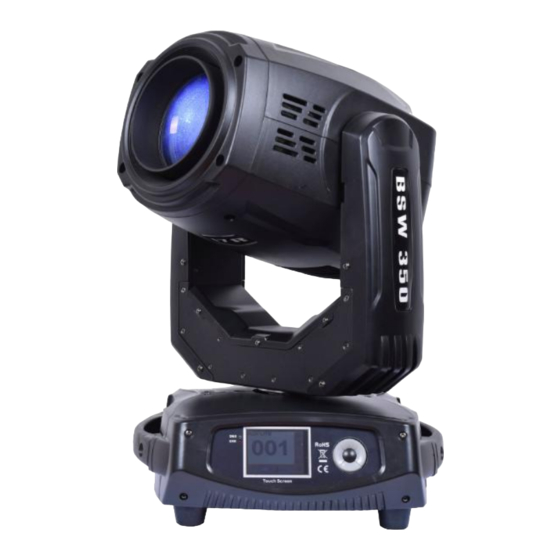
Beam Spot Wash 3 in 1 17R 350W Bulb User manual Thanks for choosing our goods please read this manual carefully before your operating... - Page 2 Introduction 350W Beam Spot Wash 3 in 1 Moving head light Model:BSW350 Voltage:AC100V-240V 50/60Hz Power Consumption:500W Light source:YODN R17 350W Color Temperature:8000K Beam Angle:1.5°- 35° linear fast zooming. Focus:High precision optical lens,electronic linear control Linear Dimmer:Mechanical dimmer 0-100% Color Wheel:14 fixed color+open,half-tone effect, linear color conversion, bi-directionally...
-
Page 3: Safety Information
Safety Information WARNING! Read the safety precautions in this section before ! installing, powering, operating or servicing this product. This product is for professional use only. It is not for household use. The following symbols are used to identify important safety information on the product and in this manual: WARNING! WARNING! DANGER! - Page 4 PROTECTION FROM ELECTRIC SHOCK • Disconnect the fixture from AC power before removing or installing any cover or part and when not in use. • Always ground (earth) the fixture electrically. • Use only a source of AC power that complies with local building and electrical codes and has both overload and ground-fault (earth-fault) protection.
-
Page 5: Using For The First Time
BSW350 fixtures accept AC mains power at 100-240 V nominal, 50/60 Hz. Do not apply AC mains power to the fixture at any other voltage than that specified on the fixture’s serial number label. -
Page 6: Connecting The Data Link
A DMX 512 data link is required in order to control a BSW350 via DMX. The BSW350 has 5-pin XLR connectors for DMX data input and output. The pin-out on all connectors is pin 1 = shield, pin 2 = cold (-), and pin 3 = hot (+). - Page 7 3 — click to set the language. 4 — click to turn on or off the lamp. 5 — click to set the channels mode, and the figures shows current channels number. 6 — click to reverse the display. 7 — Show the DMX signal state. Click to toggle Master/Slave mode, and the figure’s meaning is as follows: Green down arrow: The device is receiving DMX signal from console.
- Page 8 (color)/Music/Program Lamp Off/On(Curr-On/Off) Manual Control … Auto return 10 sec/20 sec/never Running Cnfg Tilt Cnfg Reverse Origin 0 - 255 0 - 255 Pan Cnfg Reverse Origin 0 - 255 0 - 255 M/S Mode Slave/Master Music Ctrl Cnfg Ctrl Mode Dim/Color/Gobo Other CHN DMX/Auto/Manual...
- Page 9 Mode Pan/Tilt Speed/Time Speed/Time Rot.Gobo Random Strobe Sync Display Config 30 sec/2 min/5 min/10 min/Keep on Sleep Brightness 1 - 10 Reverse Indicator Auto/KeepOn Advanced Fine Adj Factory Settings Middle/Keep/Test(Factory)/Test(Gob DMX Lost o)/Test(color)/Music/Program Quick Position Color Static Gobo ROT. Gobo Auto Gobos Auto/Max Fan Speed...
-
Page 10: Channel Mode
Battery (%) Lamp Servicetime ThisTime(m) Total(h) Err State EEPROM Well/Err Sensor Err Pan Raster Well/Err Tilt Raster Well/Err Pan Reset Well/Err Tilt Reset Well/Err Color wheel Well/Err Sta.gobo Well/Err RotGoboWheel Well/Err Rot.gobo Well/Err Focus Well/Err Zoom Well/Err Prism Well/Err LampComm Well/Err CPU2 Comm Well/Err... - Page 11 represents the number of control channels. Reset Operating: Reset Motors Reset All: Use the menu to reset all motors Pan/Tilt: Use the menu to reset Pan and Tilt Color: Use the menu to reset color Gobo: Use the menu to reset gobos Dim: Use the menu to reset dimmer Zoom/Prism etc.:...
- Page 12 Running Cnfg: configuration of Running. Tilt Cnfg: Reverse: The item allows to invert Tilt movement Origin: Set desired Origin value to change Tilt movement range (set the DMX value to 0 before changing this value, the tile motor will move when changing this value) End: Set desired final stop value to change Tilt movement range (set the DMX value to 255 before changing this value, the tile motor will move when changing this value)
- Page 13 Step Edit: Press into the edit interface. Time: Set desired duration for the selected step (Unit 0.1 seconds, e.g. the value of 123 is 12.3seconds) Chn: Use the menu to select desired channel Value: Set desired value of selected channel to meet selected step's needs. Copy: Use the menu to copy the selected step in the selected scene Paste:...
- Page 14 Following is the instructions of the menu options: Auto: Sleep When screen sleep. KeepOn: Lighting forever Advanced: Fine Adj: This is the factory adjustment function locked with password. Factory Settings: Used in factory only,it requires the password to enter.. DMX Lost: Use the menu to select run mode when external DMX cannot be connected.
- Page 15 or tilt motor will fails to work normally. If pan or tilt works abnormally, try stop this function temporarily. Pan and tilt will run normally without this function but, it will increase the amount of reset time, and cause more impacts between the limit structures, and the positional errors will not be corrected automatically when the step motors lose step.
- Page 16 EEPROM: This message will appear when EEPROM goes bad. Sensor Err: The states of all of the sensors Pan Raster: Is the position sensor (raster) error. Tilt Raster: Is the position sensor (raster) error. Pan Reset: Is the original position sensor error. Tilt Reset: Is the original position sensor error.
-
Page 17: Dmx Protocol
Time Left(h): This menu shows how much permitted time(hour)have left. click to input the serial number(SN) if needed. Input SN.: Input the serial number to get the license for usage. Shows the ID of the device. Product Code: This message informs you the product code of the firmware. It provide a reference in maintenance only and the user can ignore them usually. - Page 18 Mode/channel Type of Function value control 1-24 ECO mode(Lamp power 230W) step 25-29 Standard mode(Lamp power 280W) step 30-39 Rot. Gobo speed mode step 40-49 Rot. Gobo time mode step 50-59 Pan/Tilt speed mode step 60-69 Pan/Tilt time mode step 70-79 Blackout while pan/tilt moving step...
- Page 19 Mode/channel Type of Function value control 244-249 Random color selection sound step control. The is from Low to High sensitivity (set microphone sensitivity in menu : Run Settings) 250-255 Auto random color selection from fast to proportional slow Color wheel fine positioning 0-255 Fine positioning proportional...
- Page 20 Mode/channel Type of Function value control Static gobo wheel 0-54 Gobos with no shake step 55-199 Shaking gobos proportional 200-201 Open/Hole step 202-221 Forward gobo wheel rotation from fast to proportional slow 222-223 No rotation 224-243 backward gobo wheel rotation from slow proportional to fast 244-249 Random gobo selection by sound control.
- Page 21 Mode/channel Type of Function value control Gobo rotation – set position on channel 11/8/17 No rotation step 1-127 Forward gobo rotation from fast to slow proportional 128-129 No rotation step 130-255 Backward gobo rotation from slow to fast proportional Rot. gobo indexing and rotation - fine 0-255 Fine indexing(rotation) proportional...
- Page 22 Mode/channel Type of Function value control 0-255 Fine zooming proportional Focus 0-255 Continuous adjustment from far to near proportional Focus –fine 0-255 Fine focusing proportional Rot.Gobo speed/Time If in speed mode(set in menu) Max speed step 1-255 Speed from fast to slow proportional If in time mode(set in menu) Function is off...
-
Page 23: Gobo Replacement
Gobo replacement Identification of gobo wheel To replace a gobo: • Disconnect the fixture from power and allow to cool. • Position the head and apply the tilt lock. • Remove the rear head cover located on the same side as the pan lock See figure below. •... - Page 24 Cleaning Cleaning schedules for lighting fixtures vary greatly depending on the operating environment. Environmental factors that may result in a need for frequent cleaning include: • Use of smoke or fog machines. • High airflow rates (near air conditioning vents, for example). •...
Need help?
Do you have a question about the BSW350 and is the answer not in the manual?
Questions and answers