Table of Contents
Advertisement
Advertisement
Table of Contents

Related Manuals for Datawind SENIOR SIMPLE


Summary of Contents for Datawind SENIOR SIMPLE
- Page 1 SENIORSimple USER MANUAL...
-
Page 2: Table Of Contents
Table of Contents Getting ready to use the device ......... 4 What’s inside the box? ............4 Product Appearance ............6 Quick Start Guide ............... 7 Charging the Battery ............7 Power On and Power Save Mode ........8 Power off ................9 Introduction to Home screen and main menu .... - Page 3 Uninstalling APK Applications .......... 24 E-mail (Ubimail) ............... 25 Camera ................25 File Manager ..............27 Multimedia Players ............28 MUSIC ................29 Super-HD Player ............... 31 Set Date and Time ............32 About Tablet ..............33 Device ................34 Personal ................
-
Page 4: Getting Ready To Use The Device
Getting ready to use the device What’s inside the box? -
Page 6: Product Appearance
A: Mobile Internet Device B: AC Adaptor C: Easy Start Guide D: Warranty Card The use of non-approved hardware accessory items or unapproved software may cause damage to the product or malfunctions not covered by the manufacturer’s warranty Product Appearance... -
Page 7: Quick Start Guide
• Your device has a built-in battery. Before using the device for the first time, you must charge the battery for at least 6-8 hours. • Use only Datawind approved chargers. Unauthorized chargers may cause damage to your device and/or may lead to overcharging and/or explosion. -
Page 8: Power On And Power Save Mode
Computer USB port. • To charge your battery you first plug the mating end of the cable into the USB port of the tablet, then the other end of cable into the AC adapter. • Once cable is securely plugged into both tablet and AC Adapter, then only plug the AC adapter head into a standard AC outlet. -
Page 9: Power Off
Power off Press and hold “ ” button for 3 seconds. A menu will appear confirming that you would like to power off. Choose your desired option by tapping the corresponding item on the screen or Tap Cancel to exit to previous operation. -
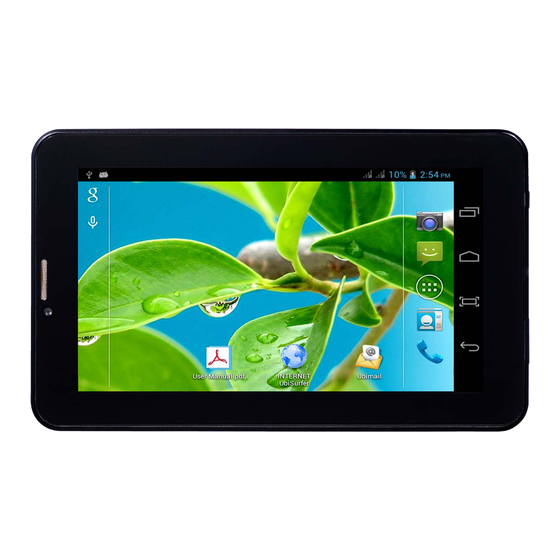
Page 10: Introduction To Home Screen And Main Menu
empty. Please recharge the battery for at least one minute before attempting to restart the device. Introduction to Home screen and main menu... -
Page 11: Using The Ubislate7Cz As A Phone
• Swipe left and right to see the entire apps on the main menu • Launch desire app by touching its icon • You can drag and drop your favorite apps on the home screen Using the UbiSlate7CZ as a phone •... - Page 12 • It comes with Bluetooth connectivity to pair with headsets and/or also will work through speakerphone or headset connections. • You must insert your valid GSM SIM card into the SIM card slot while the device is powered off in order for it to function correctly.
-
Page 13: Inserting A Sim Card
Inserting a SIM Card • SIM cards would be supplied by your local phone operator. • It is the use of these SIM cards that allows you access to the network for surfing the web and to use the UbiSlate7CZ as a Phone. •... -
Page 14: Bluetooth Pairing
Bluetooth Pairing Pairing your UbiSlate7CZ to your Bluetooth headset may differ for every headset; however the premise of searching for Bluetooth devices by the UbiSlate7CZ is fairly universal. A pairing system will then usually require passwords entered on both devices to finalize the pairing. Usually this pairing will only have to be performed once. -
Page 15: The Status Bar & Icons
The Status Bar & Icons The status bar is located on the bottom of the desktop. Home Page - Tap to return to the desktop Back - Tap to return to the last screen Recent Apps - Tap here for a list of recently opened applications Applications - Tap here to go to the application menu... - Page 16 MicroSD - This icon appears when a MicroSD card is inserted into the device - This icon appears when a USB device is connected to the device Android - This icon appears when the device is connected to a PC Wi-Fi - This icon appears when the device is connected to a Wi-Fi network...
-
Page 17: Shortcut Menu
Bluetooth - This Icon appears when Bluetooth is enabled Shortcut menu ● Tap “Wallpaper” to select new wallpaper for the home screen. ● Tap “Manage apps” to go the list of installed applications where you can modify, add or remove them ●... -
Page 18: Wifi Settings
WIFI Settings From the desktop, Tap the applications icon “ ” and tap on “Settings” followed by “Wireless & networks” to enter the wireless settings page. Setting>>wireless&networks>>Wi-Fi Tap or slide the box at end of the Wi-Fi bar to the right to turn on Wi-Fi and do the reverse to turn it off. -
Page 19: Using The Touch Screen
Using the Touch screen Your device comes with a responsive touch screen which works as follows: ● Tap: To activate an on-screen item (e.g., application icons, buttons, menu items, and the letter/symbols of the on-screen keyboard), simply tap them with your fingertip or compatible stylus. -
Page 20: Using Microsd Cards
contact or you may accidentally drag an item instead. ● Tap and hold: Some on-screen items have an alternate action if you touch and hold it (e.g., opening an alternate menu, or to activate the drag function). To touch and hold an item, touch the item and do not lift your fingertip/stylus until the action occurs. -
Page 21: The Ubisurfer Browser
towards the side with the touch screen). To remove the MicroSD card, you must first go into System Settings (by tapping “ ” shortcut, then tap “Storage” and scroll down on the right hand side until you see Unmount SD card. Accept the Unmount and then push down on the top of the MicroSD card and it will pop back up to be removed. -
Page 22: Ubisurfer Dual Browser Comparison Chart
UbiSurfer Dual Browser Comparison Chart Features UbiSurfer Browser Android Browser Email √ (Online) √ (Local) Web Surfing √ √ Web Acceleration √ Instant Messenger √ √ Social Networking √ √ Online Banking √ √ News/Weather/Sports √ √ Graphics √ √ Attachments √... - Page 23 and then click GO. On occasion, you may find multiple windows open. The number of open windows is written in a box at the top of the screen. If the number is greater than 1, you can close ALL extra windows by clicking Menu / Stop. To add the website which you are currently on to your bookmarks, click on the favorites button at the top right side of the screen next to the address bar.
-
Page 24: Apk Installation
● More: To toggle between windows, show browser history, and access system settings Note: If you are inactive for several minutes, the browser will give you a 60 second warning before disconnecting your session. Minimizing the application DOES NOT close it. -
Page 25: E-Mail (Ubimail)
E-mail (Ubimail) This device has an application called UbiMail which can be used to send and receive e-mails from almost any POP or IMAP e-mail address. Following the instructions when you open the application will allow you set up and use this program easily. - Page 26 In the application menu, tap the camera icon to enter the camera interface. Select either photo or video mode by tapping the preferred icon In photo mode, tap on to take a photo. In video mode, tap on to start a recording Tap on to stop recording.
-
Page 27: File Manager
File Manager From the application menu, tap “File Manager” to enter the list of files saved on the device including the file you just recorded and saved using Voice Recorder or pictures or videos from Camera. Note: You can also open, rename, move, install, delete and e-mail all files stored on the MicroSD card or USB device or by category in File Manager. -
Page 28: Multimedia Players
Multimedia Players There are some preinstalled multimedia applications on the device as follows:... -
Page 29: Music
MUSIC Go to application menu, tap on “MUSIC” to enter the music playback interface. Only music files that are stored inside the device will be shown in the file list. You can classify the music file list by: RECENT, ALBUMS, ARTISTS, SONGS, PLAYLISTS or GENRES by selecting the appropriate option. - Page 30 Tap the song for 1 second, the option menu will pop up. You can select Play, Add to playlist, Shop for Artist, Delete or Search .
-
Page 31: Super-Hd Player
Tap “Play” to enter the playback interface and start music playback or you may also tap the song name directly. On the playback interface, you can tap on the function bar to adjust the playback time, backward, forward, play, pause, shuffle, or repeat. -
Page 32: Set Date And Time
Tap on video, it will show the list of the video files in a small icon. Tap the file that you want to view to start playback. You can adjust the volume, play/pause, backward, forward, go back or go to submenu for more setting options by tapping the appropriate icon on the function bar. -
Page 33: About Tablet
time manually. You can also adjust the time zone, set it to 24-hour time format and/or adjust the date format by tapping the appropriate options provided. About Tablet From the application menu, tap on “Settings” and select “About Tablet” to check the device status such as the firmware version, battery consumption status, model no., and Android OS version. -
Page 34: Device
Device • Set Audio profile and Display setting as you like • Check storage, Battery status and Manage Apps Personal • Set your location as required • Set your security setting as you like • Set your preferable language and keyboard setting as you need •... -
Page 35: Connect To Pc
Connect to PC Use USB cable to connect your tablet with PC and select USB storage and select USB options you like... -
Page 36: Troubleshooting
Troubleshooting ● This Ubislate7CZ is a capacitive touch screen device. It requires a simple connection between your finger and the screen in order for the touch to be registered. At times instead of using your finger, a stylus made for capacitive touch screen devices may be used. -
Page 37: Important Safety Information
the Wi-Fi has stopped responding, you may need to power cycle the unit and keep it on the charger for an hour. ● If there is no sound coming from the speakers, check to see that the volume level is not set to 0, or check whether or not the audio file that you are listening to is not damaged by using it on another device or trying other files on this one. - Page 38 cell phones and two-way radios will apply to your use of the Ubislate7CZ. We advise you to follow these Laws and Regulations when using the device. ● If at all possible, use a wireless hands-free system (headphone, headset) with a low power Bluetooth emitter ●...
- Page 39 at high volume. Volume levels should be adjusted to an appropriate level to avoid permanent hearing damage. ● Do not cut off the power abruptly during software updates or during download or it may result in data loss and/or system errors. ●...
-
Page 40: Radio Frequency Information
handwritten record. ● When connecting with other devices, please read the user manual for detailed safety instructions, please do not connect it with any incompatible products. ● The Ubislate7CZ and its accessories may contain small parts. For safety purpose please keep them out of the reach of small children. - Page 41 FCC Warning This equipment has been tested and found to comply with the limits for a Class B digital device, pursuant to part 15 of the FCC Rules. These limits are designed to provide reasonable protection against harmful interference in a residential installation.
-
Page 42: Safely Disposing Of The Device
Safely disposing of the Device The Ubislate 7CZ should not be placed in household waste bins. Please check local regulations information disposal of electronic products in your area This appliance is labeled in accordance with e-waste rules as published by Central Government of India under the Environment Protect Act covering the Restriction in the Use of Hazardous Substances in the Manufacturing of Electrical and Electronic Equipment.
Need help?
Do you have a question about the SENIOR SIMPLE and is the answer not in the manual?
Questions and answers