Table of Contents
Advertisement
1746i-4_Manuals 6/5/17 1:37 PM Page 1
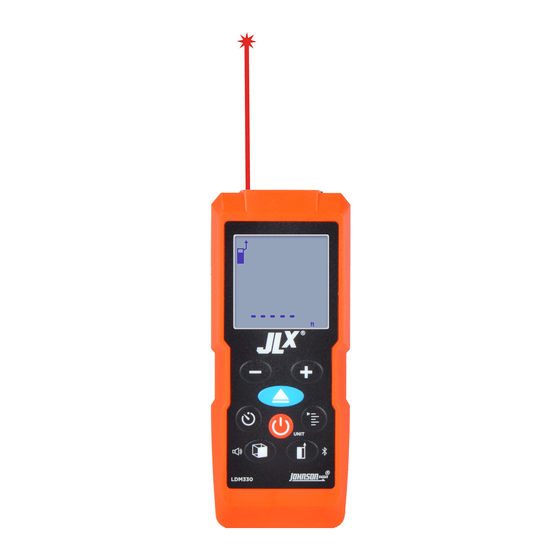
330' Laser Distance Meter w/Angle Sensor
and Bluetooth
®
Model No. LDM330
Instruction Manual
Congratulations on your choice of this JLX
®
branded Laser Distance Meter from Johnson. JLX
®
tools represent the highest quality tools Johnson has to offer, designed for professional users
looking to work smarter, faster and more efficiently. This Bluetooth
®
equipped LDM also
features an integrated angle sensor for simplifying complex measurements and functions as
a pocket-sized digital level. We suggest you read this instruction manual thoroughly before
using the instrument and save this instruction manual for future use.
This is a Class II laser tool and is manufactured to comply with CRF 21, parts 1040.10 and
1040.11 as well as international safety rule IEC 285. The laser also complies with EMC Test
according to EN61000-6-3; 2001+A11:2004, EN 6100-6-1:2011, EN 6100-4-2,
EN 61000-4-3, EN 60825, FCC Test according to PART 15.
©2017 Johnson Level & Tool
1
Advertisement
Table of Contents

Related Manuals for Johnson Level & Tool LDM330


Summary of Contents for Johnson Level & Tool LDM330
- Page 1 1746i-4_Manuals 6/5/17 1:37 PM Page 1 330′ Laser Distance Meter w/Angle Sensor and Bluetooth ® Model No. LDM330 Instruction Manual Congratulations on your choice of this JLX ® branded Laser Distance Meter from Johnson. JLX ® tools represent the highest quality tools Johnson has to offer, designed for professional users looking to work smarter, faster and more efficiently.
-
Page 2: Table Of Contents
1746i-4_Manuals 6/5/17 1:37 PM Page 2 Table of Contents 1. Kit Contents 8. Using the Bluetooth ® 2. Features and Functions 9. Tips from the Pros 3. Safety Instructions 10. Care and Handling 4. Location/Content 11. Troubleshooting Guide of Warning Labels 12. -
Page 3: Features And Functions
1746i-4_Manuals 6/5/17 1:37 PM Page 3 2. Features and Functions • Nine (9) measurement modes: Length (Single or Continuous), Area/Square, Volume/Cube, 1-Point Pythagoras, 2-Point Pythagoras, 3-Point Pythagoras, 3-Point Partial Pythagoras, Digital Level and Stake-out • Displays in English or metric units with decimals or fractions (English units only) •... -
Page 4: Safety Instructions
1746i-4_Manuals 6/5/17 1:37 PM Page 4 3. Safety Instructions Please read and understand all of the following instructions, prior to using this tool. Failure to do so, may void the warranty. DANGER! Class II Laser Product Max. Power Output: ≤ 1mW Wavelength: 650nm THIS TOOL EMITS LASER RADIATION. -
Page 5: Location/Content
1746i-4_Manuals 6/5/17 1:37 PM Page 5 4. Location/Content of Warning Labels Error Code Label The LDM may return an error code during use, as indicated by the display showing “ERR X,” where “X” represents a number from 1 to 6. The error codes are as follows: 1. -
Page 6: Location Of Parts/Components
1746i-4_Manuals 6/5/17 1:37 PM Page 6 5. Location of Parts/Components Addition Button LCD Screen Power Button Subtraction Button Press for: • Power on Measure Button • Set units of Press for: measurement • Power on Press and hold for: • Measure •... - Page 7 Notes: * Feature available in the LDM330 only. † Feature available in the LDM195 and LDM330 only. Feature found in the LDM130 and LDM330 only. ‡ Feature found in the LDM130, LDM195 and LDM330 only. ©2017 Johnson Level & Tool...
-
Page 8: Battery Installation
1746i-4_Manuals 6/5/17 1:37 PM Page 8 6. Battery Installation To install batteries in the Laser Distance Meter: 1. Unlock the battery cover located at the bottom of the back of the instrument by lifting the metal Unlocked Battery Cover bar up and over by 180°. 2. -
Page 9: Operating Instructions
1746i-4_Manuals 6/5/17 1:37 PM Page 9 Notes: • Use only alkaline batteries. • Remove the batteries when storing the instrument for an extended time (more than 3 months) to avoid damage to the tool should the batteries deteriorate. 7. Operating Instructions IMPORTANT: It is the responsibility of the user to ensure proper maintenance of the Laser Distance Meter. - Page 10 1746i-4_Manuals 6/5/17 1:37 PM Page 10 Volume Control The Laser Distance Meter has three volume settings: high, low and off. When the instrument is powered on, it will default to the most recently used volume setting. To change the volume setting, press and hold the button.
- Page 11 1746i-4_Manuals 6/5/17 1:38 PM Page 11 To select a mode, press the button. When there is no measuring mode icon shown near the top left of the LCD screen, the instrument is in the Length measuring mode. The selected measuring mode icon will display near the top left of the LCD screen for the Area, Volume, Pythagoras and Digital Level measuring modes.
- Page 12 1746i-4_Manuals 6/5/17 1:38 PM Page 12 Units of Measure The Laser Distance Meter has 7 units of measure. 1. Feet in decimal format (e.g., 6.637 ft) 2. Inches in decimal format (e.g., 79.646 in) 3. Feet and inches in 1/32″ (e.g., 6′7” 21/32) 4.
- Page 13 1746i-4_Manuals 6/5/17 1:38 PM Page 13 The Laser Distance Meter has two reference positions for measurement, which establish the place where a reading of zero (0) is located. When the instrument is first turned on, it will default to the most recently used position.
- Page 14 1746i-4_Manuals 6/5/17 1:38 PM Page 14 Using the Clipboard The clipboard feature can be used to store up to 20 measurements. To save a measurement to the clipboard: 1. After taking your measurement, press the button. 2. The clipboard icon ( ) will appear at the top center of the LCD screen.
- Page 15 1746i-4_Manuals 6/5/17 1:38 PM Page 15 Length Measurement Mode – Single 1. After turning on the instrument, it will default to the Length mode. If the mode has been changed and you wish to return to the Length mode, press the button until the measuring mode icon on the LCD screen disappears.
- Page 16 1746i-4_Manuals 6/5/17 1:38 PM Page 16 Area/Square Measurement Mode 1. Press the button once until the Area/Square mode icon ( displays near the top left of the LCD screen. 2. After selecting the desired unit of measure and reference position, aim the Laser Distance Meter so that the laser dot is on the selected target to measure the length.
- Page 17 1746i-4_Manuals 6/5/17 1:38 PM Page 17 Volume/Cube Measurement Mode 1. Press the button 2 times until the Volume/Cube mode icon ( displays near the top left of the LCD screen. 2. After selecting the desired unit of measure and reference position, aim the Laser Distance Meter so that the laser dot is on the selected target to measure the length.
- Page 18 1746i-4_Manuals 6/5/17 1:38 PM Page 18 2-Point Pythagoras Measurement Mode 2-Point Pythagoras measurement mode refers to a measurement mode based off the Pythagorean Theorem (A2 + B2 = C2). If you know 2 lengths (but not the third), this formula allows you to calculate a missing dimension of a triangle.
- Page 19 1746i-4_Manuals 6/5/17 1:38 PM Page 19 4. Aim the Laser Distance Meter so that the laser dot is on the selected target to measure the length of the base (represented by “A” in the figure above). 5. Keep your position stable and press the button again.
- Page 20 1746i-4_Manuals 6/5/17 1:38 PM Page 20 3. Keep your position stable and press the button. The “C” measurement will appear above the main display. 4. Aim the Laser Distance Meter so that the laser dot is on the selected target to measure the length “D” in the figure above. 5.
- Page 21 1746i-4_Manuals 6/5/17 1:38 PM Page 21 To use the 3-Point Partial Pythagoras measurement mode: 1. Press the button 5 times until the 3-Point Partial Pythagoras mode icon ( ) displays at the left of the LCD screen. 2. After selecting the desired unit of measure and reference position, aim the Laser Distance Meter so that the laser dot is on the selected target to measure the length “C”...
- Page 22 1746i-4_Manuals 6/5/17 1:38 PM Page 22 1-Point Pythagoras Measurement Mode This Laser Distance Meter is equipped with an angle sensor that can be used to both quickly check an angle (like a digital level) or to make more advanced 1-point Pythagoras calculations with only one measured length reference.
-
Page 23: Laser Distance Meter
1746i-4_Manuals 6/5/17 1:38 PM Page 23 Stake-out Measurement Mode The Stake-out mode is used when it is necessary to measure a repeating distance interval, such as when installing fence posting every 8 feet. It is important to have the volume enabled when using the stake-out mode, as the tool will beep to guide you to the correct distance. -
Page 24: Laser Distance Meter
1746i-4_Manuals 6/5/17 1:38 PM Page 24 7. The Laser Distance Meter will begin beeping steadily, and 3 numbers will appear on the LCD screen. • The top number indicates the set stake-out distance that you have set. • The middle number indicates the number of stake-out points between the unit and the selected target. -
Page 25: Laser Distance Meter
1746i-4_Manuals 6/5/17 1:38 PM Page 25 Digital Level Measurement Mode The Digital Level measurement mode provides an angle measurement. This laser distance meter can be used as a digital level to measure a vertical angle, shown above as “C.” There are many benefits to using this mode. - Page 26 1746i-4_Manuals 6/5/17 1:38 PM Page 26 Measurement Addition and Subtraction To add consecutive measurements, complete the following steps: 1. Complete your first measurement 2. Press the button. The first measurement will appear above the main display. 3. Complete your second measurement. The second measurement will appear above the main display, and the sum of the two measurements will appear in the main display.
-
Page 27: Laser Distance Meter
1746i-4_Manuals 6/5/17 1:38 PM Page 27 Calibrating the Angle Sensor This Laser Distance Meter is equipped with highly accurate digital angle sensors for using the 1-Point Pythagoras measurement mode. This sensor should be calibrated regularly for the most accurate results possible. To calibrate the angle sensor: 1. -
Page 28: Laser Distance Meter
1746i-4_Manuals 6/5/17 1:38 PM Page 28 10. Press the button. “CAL 3” will appear on the screen followed by “OK.” 11. Rotate the Laser Distance Meter 180 degrees so the laser beam is pointing towards you and the screen is facing the sky. 12. -
Page 29: Using The Bluetooth
1746i-4_Manuals 6/5/17 1:38 PM Page 29 8. Using the Bluetooth ® Measure-Up This LDM features Bluetooth ® for integration with your Android or iOS smartphone or tablet. The app allows you to photograph and dimension your jobsite. The dimensioned drawings can be saved or exported to email or other popular messaging apps. - Page 30 1746i-4_Manuals 6/5/17 1:38 PM Page 30 Convert Connect bluetooth Camera (for volumes). You can adjust the corners of the rectangles or cubes to adjust for any perspective distortion in your photo by dragging the Dimension Audio LDM Bluetooth/ Refresh ends of the line segments. Select the check mark icon to finish your Video Check mark...
-
Page 31: Tips From The Pros
1746i-4_Manuals 6/5/17 1:38 PM Page 31 9. Tips from the Pros • Take more than one measurement in situations where accuracy is critical. • Take 3-4 measurements from the same position to compare the consistency of each reading. • To accurately measure objects lacking an inside corner from the rear of the instrument, use a scrap piece of drywall or other flat material to extend... -
Page 32: Care And Handling
1746i-4_Manuals 6/5/17 1:38 PM Page 32 • Use 2-point or 3-point Pythagoras measurements when possible; they are generally more accurate than 1-point Pythagoras calculations. • Use the corner hook and corner extension to simplify measurements. • When working outside, a tripod will help stabilize the Laser Distance Meter for greater accuracy, particularly when longer measurements are needed. -
Page 33: Troubleshooting Guide
1746i-4_Manuals 6/5/17 1:38 PM Page 33 11. Troubleshooting Guide This section is designed to help you diagnose and troubleshoot common problems that prevent the Laser Distance Meter from working properly. If the Laser Distance Meter returns an ERR code (display shows ERR plus a number from 1 to 6), please refer to Section 4 of this manual for possible resolutions. -
Page 34: Technical Specifications
1746i-4_Manuals 6/5/17 1:38 PM Page 34 12. Technical Specifications Laser Wavelength 650 nm Laser Classification Maximum Power Output ≤1mW Typical Accuracy* ±1/16″ over the full working range Accuracy at Unfavorable Conditions** ±3/16″ over the full working range Angle Sensor Accuracy 0°, 90°... - Page 35 1746i-4_Manuals 6/5/17 1:38 PM Page 35 Operating Temperature Range 23°F - 104°F Storage Temperature Range -4°F - 160°F Dimensions 4.6″ x 1.9″ x 1.2″ Weight 4.38 oz. including batteries; 3.63 oz.excluding batteries IP Rating IP 54 *Tested per ISO 16331-1. **Per ISO16331-1, unfavorable conditions are designed to simulate bright sunlight and give an approximate indication of the working range of the tool outdoors on a bright, sunny day.
-
Page 36: Product Warranty
1746i-4_Manuals 6/5/17 1:38 PM Page 36 13. Product Warranty Johnson Level & Tool offers a two year limited warranty on each of its products. You can obtain a copy of the limited warranty for a Johnson Level & Tool product by contacting Johnson Level & Tool's Customer Service Department, as provided below, or by visiting our web site at www.johnsonlevel.com. -
Page 37: Warranty Registration
1746i-4_Manuals 6/5/17 1:38 PM Page 37 14. Warranty Registration Please register within 30 days of purchase. Registering ensures we have your information on file for warranty service even if you lose your receipt, and lets us contact you if there is ever a product recall. We will never sell your information and only send you marketing information if you opt-in. -
Page 38: Johnson Level & Tool
1746i-4_Manuals 6/5/17 1:38 PM Page 38 ©2017 Johnson Level & Tool...
Need help?
Do you have a question about the LDM330 and is the answer not in the manual?
Questions and answers