Makita JV103D Instruction Manual
Hide thumbs
Also See for JV103D:
- Instruction manual (93 pages) ,
- Instruction manual (85 pages) ,
- Instruction manual (85 pages)
Table of Contents
Advertisement
Quick Links
Advertisement
Table of Contents

Related Manuals for Makita JV103D


Summary of Contents for Makita JV103D
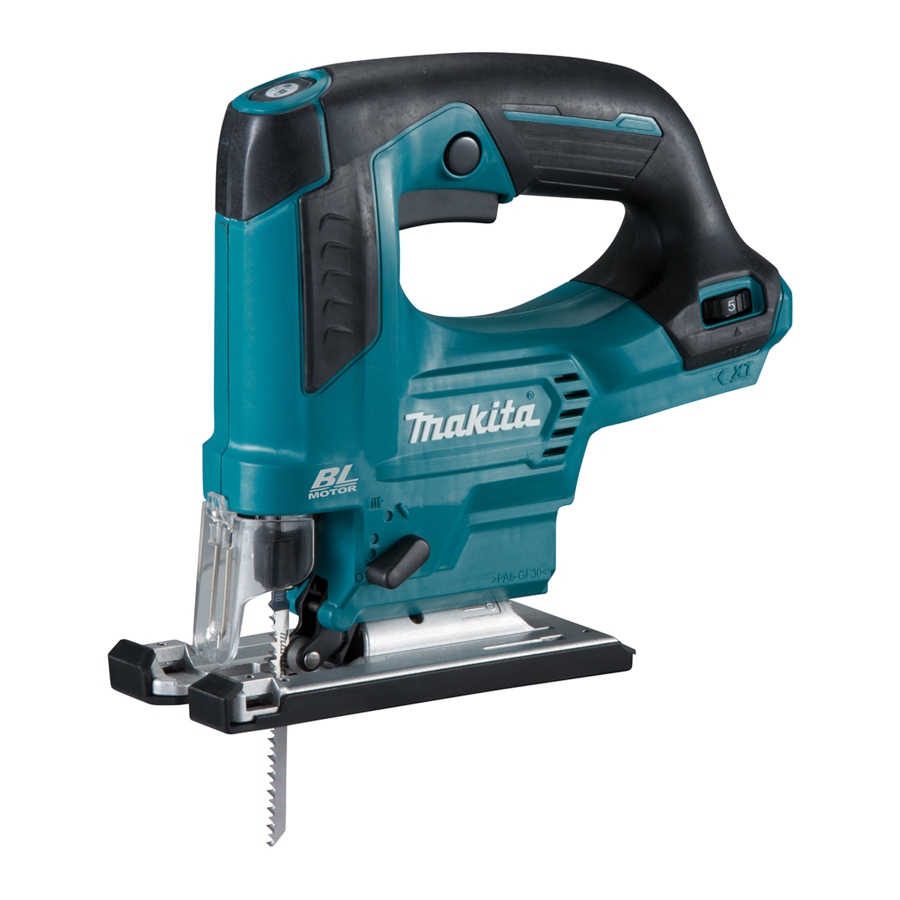
- Page 1 INSTRUCTION MANUAL Cordless Jig Saw JV103D Read before use.
-
Page 2: Specifications
SPECIFICATIONS Model: JV103D Length of stroke 23 mm Strokes per minute 800 - 3,000 min Blade type B type Max. cutting capacities Wood 90 mm Mild steel 10 mm Aluminum 20 mm Overall length 237 mm Rated voltage D.C. 10.8 V - 12 V max... - Page 3 Power tools can produce electromagnetic Maintain power tools and accessories. Check for fields (EMF) that are not harmful to the user. misalignment or binding of moving parts, break- However, users of pacemakers and other similar age of parts and any other condition that may medical devices should contact the maker of their affect the power tool’s operation.
- Page 4 15. Always use the correct dust mask/respirator have been altered, may result in the battery bursting causing fires, personal injury and damage. It will for the material and application you are work- ing with. also void the Makita warranty for the Makita tool and charger. SAVE THESE INSTRUCTIONS. Tips for maintaining maximum WARNING:...
-
Page 5: Functional Description
Overload protection FUNCTIONAL When the battery is operated in a manner that causes DESCRIPTION it to draw an abnormally high current, the tool automat- ically stops without any indication. In this situation, turn the tool off and stop the application that caused the tool CAUTION: Always be sure that the tool is to become overloaded. Then turn the tool on to restart. - Page 6 Selecting the cutting action ► 1 . Lock/unlock button 2. Lock on button 3. Switch trigger ► 1 . Cutting action changing lever NOTE: If the tool is left for 10 seconds without any operation in the standby mode, the tool automatically This tool can be operated with an orbital or a straight turns off and the lamp goes off.
-
Page 7: Electronic Function
Refer to the table to select the proper speed for the ASSEMBLY workpiece to be cut. However, the appropriate speed may differ with the type or thickness of the workpiece. In general, higher speeds will allow you to cut workpieces CAUTION: Always be sure that the tool is faster but the service life of the blade will be reduced. -
Page 8: Operation
OPERATION CAUTION: Always hold the base flush with the workpiece. Failure to do so may cause jig saw blade breakage, resulting in a serious injury. CAUTION: Advance the tool very slowly when cutting curves or scrolling. Forcing the tool may cause a slanted cutting surface and jig saw blade breakage. ► 1 . Jig saw blade holder 2. Jig saw blade CAUTION: If the lever does not move to the fixed position, the blade is not installed completely. -
Page 9: Plunge Cutting
Cutouts Cutouts can be made with either of two methods “Boring a starting hole” or “Plunge cutting”. Boring a starting hole ► 1 . Hex wrench 2. Bolt 3. Base Tilt the base until the desired bevel angle is obtained. The edge of the motor housing indicates the bevel angle by graduations. Then tighten the bolt to secure the base. For internal cutouts without a lead-in cut from an edge, pre-drill a starting hole 12 mm or more in diameter. -
Page 10: Metal Cutting
Dust extraction Clean cutting operations can be performed by connect- ing this tool to a Makita vacuum cleaner. ► 1 . Dust cover Installing or removing the dust cover Install the dust cover as shown in the figure. Installing or removing the dust nozzle Insert the dust nozzle all the way into the tool. -
Page 11: Rip Fence
To install, insert the rip fence into the rectangular hole on the side of the base with the fence guide facing down. Slide the rip fence to the desired cutting width position, then tighten the bolt to secure it. ► 1 . Button 2. Dust nozzle Connecting the tool to the vacuum cleaner ► 1 . -
Page 12: Cover Plate
Fit it on the back of the tool base. NOTICE: Never use gasoline, benzine, thinner, alcohol or the like. Discoloration, deformation or cracks may result. To maintain product SAFETY and RELIABILITY, repairs, any other maintenance or adjustment should be performed by Makita Authorized or Factory Service Centers, always using Makita replacement parts. 12 ENGLISH... -
Page 13: Optional Accessories
OPTIONAL ACCESSORIES CAUTION: These accessories or attachments are recommended for use with your Makita tool specified in this manual. The use of any other accessories or attachments might present a risk of injury to persons. Only use accessory or attachment for its stated purpose. If you need any assistance for more details regard- ing these accessories, ask your local Makita Service Center. - Page 16 Makita Corporation 885595-2 20170324 www.makita.com...
Need help?
Do you have a question about the JV103D and is the answer not in the manual?
Questions and answers