
Related Manuals for TP-Link Archer CR500


Summary of Contents for TP-Link Archer CR500
-
Page 1: User Guide
User Guide AC1200 Wireless Dual Band DOCSIS 3.0 Cable Modem Router Archer CR500 REV1.0.0 1910011916... -
Page 2: Table Of Contents
Contents About This Guide Chapter 1 Get to Know Your Modem Router 1. 1. Product Overview............3 1. - Page 3 6. 1. 2. Customize Your Settings..........30 6.
- Page 4 11. 3. Back up and Restore Configuration Settings ....... . 71 11.
-
Page 5: About This Guide
• The Quick Installation Guide (QIG) can be found where you find this guide or inside the package of the router. • Specifications can be found on the product page at http://www.tp-link.com. • A Technical Support Forum is provided for you to discuss our products at http://forum.tp-link.com. -
Page 6: Chapter 1 Get To Know Your Modem Router
Chapter Get to Know Your Modem Router This chapter introduces the modem router and shows its appearance. This chapter contains the following sections: • Product Overview • Product Appearance... -
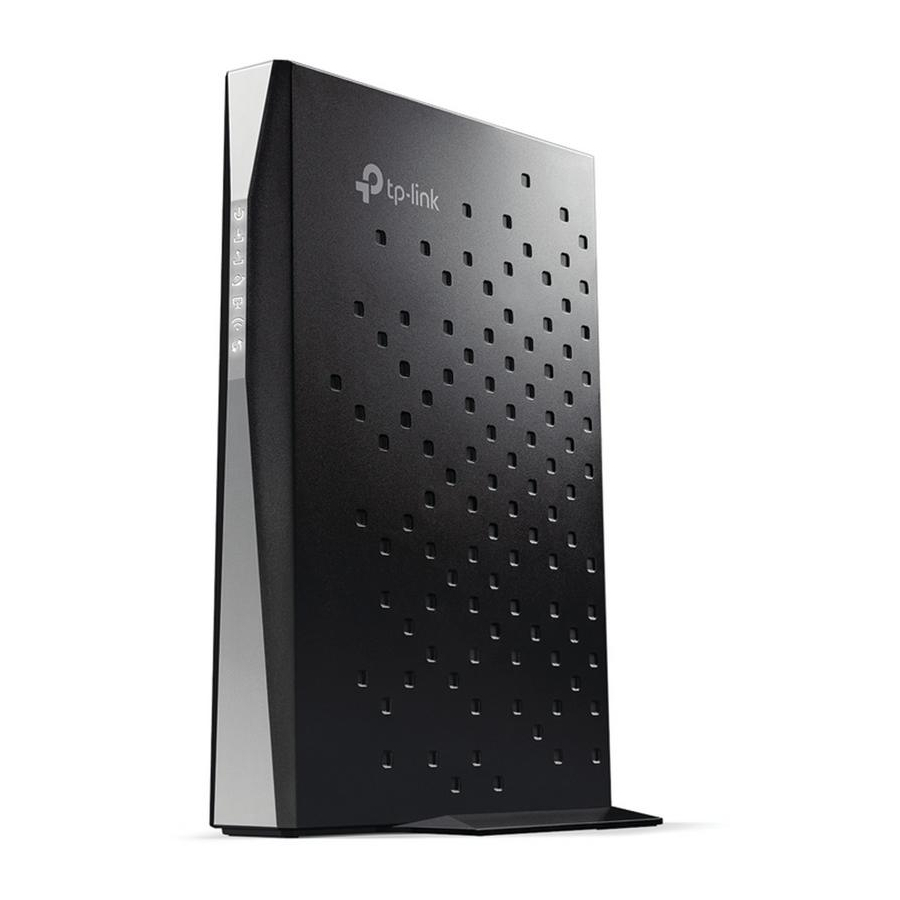
Page 7: Product Overview
Chapter 1 Get to Know Your Modem Router Product Overview TP-LINK’s Cable Modem Router is a combined wired/wireless network connection device with integrated wireless router and DOCSIS 3.0 modem, reducing hassle of configuration and saving space. With Ethernet ports and antennas, the modem router provides wired and wireless access for multiple computers and mobile devices. - Page 8 Chapter 1 Get to Know Your Modem Router Indication Status The modem router is synchronized with more than one Green channel. White The modem router is synchronized with one channel. Downstream Flashing The modem router is scanning for downstream channels. The initialization is not started, or has failed.
-
Page 9: Back Panel
Chapter 1 Get to Know Your Modem Router 1 2 2 Back Panel The back panel provides buttons and connection ports. Refer to the following for detailed instructions. Description Item With the modem router powered on, use a pin to press and hold the Reset Button Reset button for at least 8 seconds. -
Page 10: Chapter 2 Quick Start
Chapter Quick Start This chapter contains the following sections: • Position Your Modem Router • Connect Your Modem Router • Activate Your Modem Router... -
Page 11: Position Your Modem Router
Chapter 2 Quick Start Position Your Modem Router With the modem router, you can access your network from anywhere within the wireless network coverage. However, the wireless signal strength and coverage vary depending on the actual environment of your modem router. Many obstacles may limit the range of the wireless signal, for example, concrete structures or thick walls. - Page 12 Chapter 2 Quick Start Wait for about 1 minute until the following LEDs are solid on. Connect your computer to the modem router. Method 1: Wired Connect your computer’s Ethernet port to a LAN port on the modem router via an Ethernet cable.
-
Page 13: Activate Your Modem Router
Chapter 2 Quick Start Activate Your Modem Router Get your Internet service account information and the modem router’s Information Card ready. Information Card Serial Number MAC Address Wi-Fi Password/PIN SSID Make sure your computer is set to dynamically obtain an IP address. If not, refer to Appendix: Troubleshooting for instructions. -
Page 14: Log In To Your Modem Router
Chapter Log In to Your Modem Router... - Page 15 Chapter 3 Log In to Your Modem Router With a web management page, it is easy to configure and manage the modem router. The web management page can be used on any Windows, Macintosh or UNIX OS with a Web browser, such as Microsoft Internet Explorer, Mozilla Firefox or Apple Safari. Follow the steps below to log in to your modem router.
-
Page 16: Chapter 4 Configure Internet Connections
Chapter Configure Internet Connections This chapter introduces how to manually configure your Internet settings. Furthermore, you can also set up an IPv6 connection if your ISP provides IPv6 service. This chapter includes the following sections: • Set Up an IPv6 Connection •... -
Page 17: Set Up An Ipv6 Connection
Chapter 4 Configure Internet Connections Set Up an IPv6 Connection If your ISP has provided a line that supports IPv6 connection as well as some detailed IPv6 parameters, you can manually set up an IPv6 connection. Follow the steps below to set up an IPv6 connection: 1. -
Page 18: Test Internet Connectivity
Chapter 4 Configure Internet Connections • Number of addresses: Enter a value between 0-255 for DHCPv6 server preference. The default value is 255. • Valid Lifetime: The Valid Lifetime is the amount of time in which a network user will be allowed connection to the modem router with their current dynamic IP address. - Page 19 Chapter 4 Configure Internet Connections 3. Select Ping Traceroute as the Diagnostic tool and enter the parameters according to your needs. • Ping is used to test the connectivity between the router and the tested host, and measure the round-trip time. IP Address: Enter the IP address that you want to ping.
-
Page 20: Operation Modes
Chapter 4 Configure Internet Connections Operation Modes The modem router supports two operation modes: Router Mode and Bridge Mode. The modem router uses the Router Mode by default, and you can change the mode according to your needs. 4 3 1 Bridge Mode In this mode, the modem router can be configured to act as a bridging device between your LAN and your ISP. -
Page 21: Chapter 5 Network Security
Chapter Network Security This chapter guides you on how to protect your home network from unauthorized users by implementing the following network security functions. You can control certain client devices’ access to the Internet, block certain data from getting through your network, and get notified when a threat emerges or view log events. -
Page 22: Control Clients' Access
Chapter 5 Network Security Control Clients’ Access With the following functions,you can control wireless client devices’ access to the Internet by Wireless MAC Filtering; you can also deny clients’ access by using clients’ IP address, MAC address and port number; meanwhile, you can allow clients’ access by configuring Passthrough Options. -
Page 23: Deny Access By Ip Address
Chapter 5 Network Security 4. Select the filtering rule to either block (recommended) or allow the device(s) in the list. To block/allow specific device(s) 1 ) Select Block List (All devices in this list can not access this router.) Allow List (Only device in this list can access this router.) and click Save. -
Page 24: Deny Access By Mac Address
Chapter 5 Network Security 1. Visit http://tplinkmodem.net, and log in with the username (admin) and password (admin or the one customized by you). 2. Go to Advanced > NAT Forwarding > Filtering, click Add. 3. Enter the Start IP End IP of the clients that cannot access this router. -
Page 25: Deny Access By Port Number
Chapter 5 Network Security 3. Enter the MAC Address of the client that cannot access this router. For example, clients with the MAC address of 00:23:45:67:89:AB cannot access the router. 4. Click to save the settings. 5 1 4 Deny Access By Port Number If you want to deny access by using port numbers, follow the steps below to configure Port Filtering: 1. -
Page 26: Allow Access By Passthrough Options
Chapter 5 Network Security 4. Select the Protocol used for the specified ports, either TCP, UDP, or Both (all protocols supported by the modem router). 5. Select Enable this entry. 6. Click to save the settings. 5 1 5 Allow Access By Passthrough Options Passthrough Options allow specific services and clients to pass through the modem router. - Page 27 Chapter 5 Network Security • UPnP Enable: UPnP (Universal Plug and Play) protocol allows the applications or host devices in the both sides of NAT device can freely communicate with each other realizing the seamless connection of the network. You may need to enable the UPnP if you want to use applications for multiplayer gaming, peer-to-peer connections, real- time communication (such as VoIP or telephone conference) or remote assistance, etc.
-
Page 28: Use Firewall
Chapter 5 Network Security Use Firewall 1. Visit http://tplinkmodem.net, and log in with the username (admin) and password (admin or the one customized by you). 2. Go to Advanced > Firewall > Basic. 3. Configure the basic firewall settings according to the following explanations: •... -
Page 29: Record Log In A Remote Server
Chapter 5 Network Security 3. Enter your email address in the Contact Email Address field. 4. Enter the name of your SMTP sever in the SMTP Server Name field. 5. Enter the default admin/admin or specify new username and password in the SMTP User Name SMTP Password... - Page 30 Chapter 5 Network Security 3. Select the checkbox to record the corresponding events in the remote server. 4. Enter the specified IP address of the remote system log server in the Server Address field. 5. Click Save to make the settings effective.
-
Page 31: Chapter 6 Usb Settings
Chapter USB Settings This chapter describes how to share and access USB devices connected to the modem router among different clients. The modem router supports USB external flash drives, hard drives and USB printers. This chapter contains the following sections: •... -
Page 32: Local Storage Sharing
Chapter 6 USB Settings Local Storage Sharing Share your USB storage devices with different users on the network. 6 1 1 Access the USB Disk Connect Your USB Disk Insert your USB storage device into the modem router’s USB port directly or using a USB cable. - Page 33 Chapter 6 USB Settings ¾ Method 2: Open a web browser (or go to Computer) and type the server address \\TP-LINK ftp://TP-LINK in the address bar, then press Enter. Windows computer 1 ) Select > Connect to Server 2 ) Type the server address...
-
Page 34: Customize Your Settings
Chapter 6 USB Settings 6 1 2 Customize Your Settings ¾ To Only Share Specific Content By default, Share All is enabled so all content on the USB disk is shared. If you want to only share specific folders, follow the steps below: Visit http://tplinkmodem.net, then log in with the username (admin) and password (admin or the one customized by you). - Page 35 Chapter 6 USB Settings Tips: The modem router can share eight volumes at most. You can click on the page to detach the corresponding volume you do not need to share. ¾ To Set up Authentication for Data Security If you enable Authentication, network clients will be required to enter the username and password you set when accessing the USB disk.
- Page 36 Chapter 6 USB Settings • Sharing All is disabled, enable Authentication for specific folders. Note: Due to Windows credential mechanism, you might be unable to access the USB disk after changing Authentication settings. Please log out from the Windows and try to access again. Or you can change the address of the USB disk by referring to To Customize the Address of the USB Disk.
-
Page 37: Remote Access Via Ftp Server
Chapter 6 USB Settings Now you can access the USB disk by visiting \\Myshare (for Windows) or smb:// Myshare (for Mac). Remote Access via FTP Server You can access your USB disk outside the local area network. For example: • Share photos and other large files with your friends without logging in to (and paying for) a photo-sharing site or email system. - Page 38 Chapter 6 USB Settings Enable Authentication for Data Security It is strongly recommended that you set and apply a sharing account for data security. 1 ) Visit http://tplinkmodem.net, then log in with the username (admin) and password (admin or the one customized by you). 2 ) Select Advanced >...
- Page 39 Chapter 6 USB Settings Note: Due to Windows credential mechanism, you might be unable to access the USB disk after changing Authentication settings. Please log out from the Windows and try to access again. Enable the FTP (via Internet) Select the check box to enable FTP(via Internet), then click Save.
-
Page 40: Customize Your Settings
Chapter 6 USB Settings 1 ) Open a web browser (or go to Computer, only for Windows users). 2 ) Type the server address in the address bar: Type in ftp://<WAN IP address of the modem router>:<port number> (such as ftp://59.40.2.243:21). If you have specified the domain name of the modem router, you can also type ftp://<domain name>:<port number>... -
Page 41: Media Sharing
Chapter 6 USB Settings Select the Volume Folder Path, then specify the Share Name as you like. Tick Enable Authentication. If you allow network clients to modify this folder, tick Write Access. Click OK. Tips: The modem router can share eight volumes at most. You can click on the page to detach the corresponding volume you do not need to share. -
Page 42: Access The Usb Disk
Chapter 6 USB Settings 6 3 1 Access the USB Disk Connect Your USB Disk Insert your USB storage device into the modem router’s USB port directly or using a USB cable. Wait several seconds until the USB LED becomes solid on. Tips: •... -
Page 43: Customize Your Settings
Chapter 6 USB Settings 6 3 2 Customize Your Settings ¾ To Only Share Specific Content By default, Sharing All is enabled so all content on the USB disk is shared. If you want to only share specific folders, follow the steps below: Visit http://tplinkmodem.net, then log in with the username (admin) and password (admin or the one customized by you). -
Page 44: Printer Sharing
Note: Printers unlisted on this page may be incompatible with the modem router: http://www.tp-link.com/common/compatible/print-server/. Install the Driver of the Printer Make sure you have installed the driver of the printer on each computer that needs printer service. - Page 45 Cable a printer to the USB port with the USB cable. Wait several seconds until the USB LED becomes solid on. Install the TP-LINK USB Printer Controller Utility TP-LINK USB Printer Controller Utility helps you access the shared printer. Download and Install the utility on each computer that needs printer service. 1 ) Visit http://www.tp-link.com/app/usb/.
- Page 46 Chapter 6 USB Settings 3 ) Click the Auto-Connect for printing tab to pull down a list, then select Set Auto- Connect Printer. Windows 4 ) Select the printer you share, then click Apply.
- Page 47 Chapter 6 USB Settings Windows 5 ) You will see the printer marked as Auto-Connect Printer. Now you can print with this printer.
- Page 48 Windows Tips: The Print Server also allows different clients to share the scan feature of MFPs (Multi-Function Printers). To scan with TP-LINK USB Printer Controller, right-click the printer and select Network Scanner. Then, a scanning window will pop up. Finish the scanning process by following the on-screen instructions.
-
Page 49: Parental Control
Chapter Parental Control This function allows you to block inappropriate, explicit and malicious websites, and control access to specified websites at specified time. - Page 50 Internet. example, I want to allow my children’s devices (e.g. a computer or a tablet) to access only www.tp-link.com and wikipedia.org from 18:00 (6PM) to 22:00 (10PM) on weekdays and not other time.
- Page 51 Chapter 7 Parental Control 4. Click View Devices, and select the device to be controlled. Or, enter the Device Name MAC Address manually. 5. Click the icon to set the Effective Time. Select the appropriate cell(s) and click OK. 6. Enter a Description for the entry.
- Page 52 Black List and White List. Below are some sample entries to allow access. 1 ) Enter a web address (e.g. www.tp-link.com) or a web address keyword (e.g. wikipedia) to only allow or block access to the websites containing that keyword.
-
Page 53: Guest Network
Chapter Guest Network This function allows you to provide Wi-Fi access for guests without disclosing your main network. When you have guests in your house, apartment, or workplace, you can create a guest network for them. In addition, you can assign network authorities and bandwidth for guests to ensure network security, privacy, and fluency. -
Page 54: Create A Network For Guests
Chapter 8 Guest Network Create a Network for Guests Visit http://tplinkmodem.net, and log in with the username (admin) and password (admin or the one customized by you). Go to Advanced > Wireless 2.4G Wireless 5G > Guest Network. Locate the Wireless section. - Page 55 Chapter 8 Guest Network Assign network authorities according to your needs. • Allow guests to see each other Select this checkbox to allow the clients in your guest network to access each other. • Allow guests to access my local network Select this checkbox to allow the clients in your guest network to access your local network, not just Internet access.
-
Page 56: Chapter 9 Nat Forwarding
Internet to initiatively communicate with the devices in the local network, thus to realize some special functions. TP-LINK modem router includes three forwarding rules. If two or more rules are set, the priority of implementation from high to low is Port Forwarding, Port Triggers and DMZ. -
Page 57: Share Local Resources In The Internet By Port Forwarding
Chapter 9 NAT Forwarding Share Local Resources in the Internet by Port Forwarding When you build up a server in the local network and want to share it on the Internet, Port Forwarding can realize the service and provide it to the Internet users. At the same time Port Forwarding can keep the local network safe as other services are still invisible from the Internet. -
Page 58: Open Ports Dynamically By Port Triggers
Chapter 9 NAT Forwarding 4. Enter the service you want to use in Service Name field. Here we take HTTP as an example. 5. Enter the External Port, Internal Port and select the corresponding Protocol as shown in the above picture. 6. - Page 59 Chapter 9 NAT Forwarding modem router can forward them to the corresponding host. Port triggering is mainly applied to online games, VoIPs and video players. Common applications include MSN Gaming Zone, Dialpad and Quick Time 4 players, etc. Follow the steps below to configure the port trigger rules: 1.
-
Page 60: Free Applications From Port Restriction By Dmz
Chapter 9 NAT Forwarding 3. External Port ranges of different entries cannot overlap each other. Free Applications from Port Restriction by DMZ When a PC is set to be a DMZ (Demilitarized Zone) host in the local network, it is totally exposed to the Internet. -
Page 61: Chapter 10 Specify Your Network Settings
Chapter Specify Your Network Settings This chapter introduces how to change the default settings or adjust the basic configuration of the modem router using the web management page. This chapter contains the following sections: • Internet Settings • LAN Settings •... -
Page 62: Internet Settings
Chapter 10 Specify Your Network Settings 10 1 Internet Settings 1. Visit http://tplinkmodem.net, and log in with the username (admin) and password (admin or the one customized by you). 2. Go to Basic > Internet page. Select the Connection Type and enter the information provided by your ISP. -
Page 63: Use The Modem Router As A Dhcp Server
Chapter 10 Specify Your Network Settings 3. Type in a new IP Address appropriate to your needs. 4. Click Save in the DHCP Settings section to make the settings effective. 10 2 2 Use the Modem Router as a DHCP Server You can configure the modem router to act as a DHCP server to assign IP addresses to its clients. -
Page 64: Wireless Settings
Chapter 10 Specify Your Network Settings 3. Select Enable DHCP Server to enable the DHCP function. 4. Specify the Start IP Address End IP Address which must be on the same subnet with the LAN IP. The modem router will assign addresses within this specified range to its clients. - Page 65 Chapter 10 Specify Your Network Settings ¾ To enable or disable the wireless function: Enable the 2.4 GHz or 5GHz Wireless Network. If you don’t want to use the wireless function, just deselect the box. If you disable the wireless function, all the wireless settings won’t be effective.
-
Page 66: Use Wps For Wireless Connection
Chapter 10 Specify Your Network Settings • 802.11ac/n mixed (5GHz): Select if you are using both 802.11ac and 802.11n wireless clients. • 802.11a/n/ac mixed (5GHz): Select if you are using a mix of 802.11a, 802.11n and 802.11ac wireless clients. It is strongly recommended that you select 11a/n/ac mixed. Channel: Select the channel you want to use from the drop-down list. - Page 67 Chapter 10 Specify Your Network Settings 3. Keep the default WPS status as Enabled and select the PIN Number radio button. 4. Enter the client device’s PIN in the field on the above WPS screen. Then click the Connect button. Device has been added successfully will appear on the above screen, which means the client device has successfully connected to the modem router.
-
Page 68: View Wireless Information
Chapter 10 Specify Your Network Settings 10 3 3 View Wireless Information ¾ To view the detailed wireless network settings: 1. Visit http://tplinkmodem.net, and log in with the username (admin) and password (admin or the one customized by you). 2. Go to Advanced >... - Page 69 Chapter 10 Specify Your Network Settings • Beacon Interval: Enter a value between 25 and 1000 in milliseconds to determine the duration between which beacon packets are broadcasted by the router to synchronize the wireless network. The default is 100 milliseconds. •...
-
Page 70: Set Up A Dynamic Dns Service Account
Chapter 10 Specify Your Network Settings 10 4 Set Up a Dynamic DNS Service Account Most ISPs (Internet service providers) assign a dynamic IP address to the router and you can use this IP address to access your router remotely. However, the IP address can change any time and you don’t know when it changes. -
Page 71: Chapter 11 Administrate Your Network
Chapter Administrate Your Network This chapter introduces how to view basic information, change the system settings and administrate your modem router’s network. This chapter contains the following sections: • View Basic Information • Set System Time • Back up and Restore Configuration Settings •... -
Page 72: View Basic Information
Chapter 11 Administrate Your Network 11 1 View Basic Information 11 1 1 View System Information Visit http://tplinkmodem.net, and log in with the username (admin) and password (admin or the one customized by you). Go to Advanced > System Tools >... - Page 73 Chapter 11 Administrate Your Network Go to Advanced > System Tools > Connection Status page, then you can view the information of startup procedure, downstream bonded channels, upstream bonded channels, and time information.
-
Page 74: Set System Time
Chapter 11 Administrate Your Network 11 2 Set System Time System time is the time displayed while the modem router is running. The system time you configure here will be used for other time-based functions like Parental Control. You can manually set how to get the system time. Follow the steps below to set your system time. -
Page 75: Back Up And Restore Configuration Settings
Chapter 11 Administrate Your Network Select Enable SNTP. Enter the IP address or domain name of Time Server Time Server 2 Time Server 3, and the router will get the time from the NTP Server automatically. In addition, the router has some common built-in NTP Servers that will synchronize automatically once it connects to the Internet. -
Page 76: Change The Administrator Account
Chapter 11 Administrate Your Network Click Browse to locate the previous backup configuration file, and click Restore. Wait for the restoring and then the modem router will automatically reboot. To reset the modem router to factory default settings Visit http://tplinkmodem.net, and log in with the username (admin) and password (admin or the one customized by you). -
Page 77: Remote Management
Chapter 11 Administrate Your Network 11 5 Remote Management By default, the remote devices are not allowed to manage the modem router from the Internet. Follow the steps below to allow remote devices to manage the modem router. Visit http://tplinkmodem.net, and log in with the username (admin) and password (admin or the one customized by you). - Page 78 Chapter 11 Administrate Your Network Click Advanced > System Tools > Event Log page, then you can view the system logs. Click Refresh Log to refresh the log list. Click Clear Log to delete all the system logs.
-
Page 79: Appendix: Troubleshooting
Appendix: Troubleshooting T1 How do I restore my modem router’s configuration to its factory default settings? There are two ways to reset the modem router: • Method 1: Use the Reset button. For details, refer to the related button description. •... - Page 80 4 ) Click settings, deselect the following three options and click OK; 5 ) Go to Advanced > Restore advanced settings, click to save the settings.
- Page 81 • Change a web browser or computer and log in again. • Reset the modem router to factory default settings. Note: You’ll need to reconfigure the modem router to surf the Internet once the modem router is reset. Open a web browser and log in again. If login fails, please contact the technical support.
- Page 82 Please contact our Technical Support if the problem still exists. T5 How to configure MAC Clone? You can manually change the MAC address of the modem router. It is helpful when your Internet access account provided by your ISP is bound to one specific MAC address, in other words, your ISP just permits only one computer with the authenticated MAC address to access the Internet.
- Page 83 Check the Wi-Fi LED indicator on your wireless router/modem; Make sure your computer/device is still in the range of your router/modem, move closer if it is currently too far away; Go to Basic > Wireless page, and check the wireless settings, double check your Wireless Name and the SSID is not hidden.
- Page 84 Note: Wireless password/Network Security Key is case sensitive. 4 ) Connect to wireless network. Windows was unable to connect to XXXX /Cannot join this network/Taking longer than usual to connect to this network. 1 ) Check the wireless signal strength of your network, if it is weak (1~3 bars), please move the router closer and try again;...
- Page 85 4 ) Select both Obtain an IP address automatically Obtain DNS server address automatically, then click OK. 5 ) Click again to save your configuration. • For Windows XP: 1 ) Right-click the Network icon on the system tray and select Open Network Connections.
- Page 86 Specifications are subject to change without notice. is a registered trademark of TP-LINK TECHNOLOGIES CO., LTD. Other brands and product names are trademarks or registered trademarks of their respective holders. No part of the specifications may be reproduced in any form or by any means or used to make any derivative such as translation, transformation, or adaptation without permission from TP-LINK TECHNOLOGIES CO., LTD.
- Page 87 FCC STATEMENT This equipment has been tested and found to comply with the limits for a Class B digital device, pursuant to part 15 of the FCC Rules. These limits are designed to provide reasonable protection against harmful interference in a residential installation. This equipment generates, uses and can radiate radio frequency energy and, if not installed and used in accordance with the instructions, may cause harmful interference to radio communications.
-
Page 88: Safety Information
Safety Information • When product has power button, the power button is one of the way to shut off the product; when there is no power button, the only way to completely shut off power is to disconnect the product or the power adapter from the power source. •...
Need help?
Do you have a question about the Archer CR500 and is the answer not in the manual?
Questions and answers