
Related Manuals for IMC CANSAS


Summary of Contents for IMC CANSAS
- Page 1 CANSAS Users Manual Configuring Software Doc. Version 1.9 - 05.12.2014 © 2014 imc Meßsysteme GmbH imc Meßsysteme GmbH • Voltastraße 5 • 13355 Berlin • Germany...
-
Page 2: Table Of Contents
..........................37 2.6.3 CAN-Bus-wiring ..........................38 2.6.4 Connecting the terminators ..........................38 2.6.4.1 Termination in data logger ........................39 2.6.4.2 Termination with µ-CANSAS ........................39 © 2014 imc Meßsysteme GmbH imc CANSAS Users Manual - Doc. Version 1.9 - 05.12.2014... - Page 3 ........................85 3.4.2.4 Edit - Paste ........................86 3.4.2.5 Edit - New ........................86 3.4.2.6 Edit - Rename ........................86 3.4.2.7 Edit - Delete ........................87 © 2014 imc Meßsysteme GmbH imc CANSAS Users Manual - Doc. Version 1.9 - 05.12.2014...
- Page 4 4.7.1.4 UNI8 ........................138 4.7.1.5 DI16 ........................138 4.7.2 Output modules ..........................139 4.7.2.1 DAC8 ........................139 4.7.2.2 PWM8 ........................140 4.7.2.3 DO8R, DO16R ........................140 © 2014 imc Meßsysteme GmbH imc CANSAS Users Manual - Doc. Version 1.9 - 05.12.2014...
-
Page 5: Table Of Contents
..........................171 4.10.51 Rectangle (only for DAC8 modules) ..........................172 4.10.52 Resampling ..........................172 4.10.53 Root-mean-square ..........................173 4.10.54 SawTooth ..........................173 4.10.55 Schmitt-Trigger ..........................174 © 2014 imc Meßsysteme GmbH imc CANSAS Users Manual - Doc. Version 1.9 - 05.12.2014... - Page 6 5.7.1 Prompt for next calibration ..........................227 5.7.2 Recalibration overdue ..........................229 ............................. 232 5.8 TEDS 5.8.1 TEDS: Plug & Measure functionality for sensors ..........................232 © 2014 imc Meßsysteme GmbH imc CANSAS Users Manual - Doc. Version 1.9 - 05.12.2014...
- Page 7 ..........................282 6.5.6 Allow overmodulation beyond input range ..........................282 6.5.7 Filter ..........................283 6.5.8 Connector plugs CI8 ..........................284 6.5.8.1 SL Variety LEMO ........................284 © 2014 imc Meßsysteme GmbH imc CANSAS Users Manual - Doc. Version 1.9 - 05.12.2014...
- Page 8 6.11.3.2 Snapshot operation mode ........................317 6.11.4 Parameterization ..........................320 6.11.4.1 The channel's parameters ........................327 6.11.4.2 Offset adjustment ........................329 6.11.5 Tips ..........................330 © 2014 imc Meßsysteme GmbH imc CANSAS Users Manual - Doc. Version 1.9 - 05.12.2014...
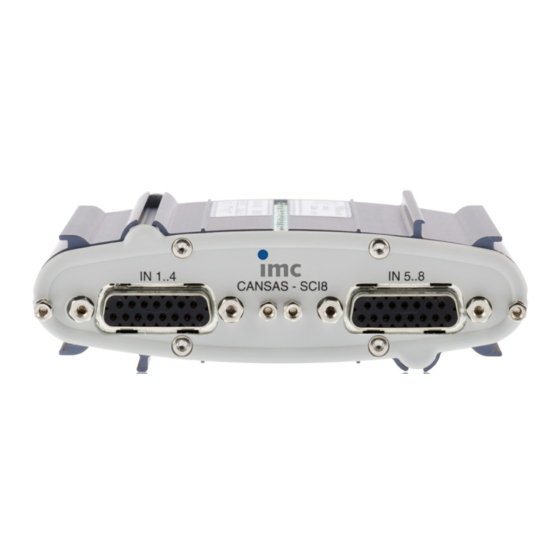
- Page 9 6.17.4 Connection PWM8 ..........................369 6.18 SC16, SCI8, SCI16 voltage, current and temp. modes ............................. 371 6.18.1 Voltage measurement ..........................373 6.18.2 Current measurement ..........................373 © 2014 imc Meßsysteme GmbH imc CANSAS Users Manual - Doc. Version 1.9 - 05.12.2014...
- Page 10 6.20.6 Sensors requiring adjustment of their supply ..........................423 6.20.7 Userdefined characteristic curves ..........................423 6.20.8 Sensor supply module ..........................423 6.20.9 Bandwidth ..........................424 © 2014 imc Meßsysteme GmbH imc CANSAS Users Manual - Doc. Version 1.9 - 05.12.2014...
- Page 11 ............................. 462 ............................. 463 7.3 C12 ............................. 465 7.4 C8 7.5 CI8 ............................. 468 ............................. 473 7.6 DAC8 ............................. 474 7.7 DCB8 7.8 DI16 ............................. 478 © 2014 imc Meßsysteme GmbH imc CANSAS Users Manual - Doc. Version 1.9 - 05.12.2014...
- Page 12 8.3.1.2 TEDS plugs ........................540 8.3.1.3 CAN/DSUB plugs ........................541 8.3.1.4 Connector plugs Cross-Reference ........................542 8.3.1.5 imc plugs ........................543 8.3.2 SENT ..........................548 © 2014 imc Meßsysteme GmbH imc CANSAS Users Manual - Doc. Version 1.9 - 05.12.2014...
- Page 13 8.3.7.7 CANSAS-HVCI8 ........................557 8.3.7.8 µ-CANSAS Phoenix strip terminal ........................558 8.3.8 Modules with Autosport (AS) terminals ..........................561 Last changes Index ..............................571 © 2014 imc Meßsysteme GmbH imc CANSAS Users Manual - Doc. Version 1.9 - 05.12.2014...
-
Page 15: About This Manual
In the first place, please accept our thanks for choosing our product! We wish you complete success in accomplishing your measurement goals using our imc CANSAS system. This manual presents you with detailed description of imc CANSAS' features. If you have any questions about our products which this manual does not answer, please contact our hotline 1.2 Guide to using the manual... -
Page 16: Notes / Quality Management / Customer Support
1.3 Notes / Quality Management / Customer Support 1.3.1 Quality Management imc Meßsysteme GmbH holds DIN-EN-ISO-9001 certification since May 1995. You can download the CE Certification, current certificates and information about the imc quality system on our Webpage: www.imc-berlin.com/about-imc/quality-assurance. For further information, please contact our Hotline 1.3.2 imc Guarantee... -
Page 17: Product Improvement / Change Requests
Products not satisfying these requirements may only be used with special approval of the regulating body in the country where operated. All signal lines connected to imc CANSAS must be shielded and the shielding must be grounded. Note The EMC tests were carried out using shielded and grounded input and output cables with the exception of the power cord. - Page 18 The FCC requires the user to be notified that any changes or modifications made to this device that are not expressly approved by imc may void the user's authority to operate this equipment. FCC - United States Federal Communications Commission...
-
Page 19: Important Information
The device has been carefully designed, assembled and routinely tested in accordance with the pertinent safety regulations and has left imc in perfect operating condition. To maintain this condition and to ensure continued danger-free operation, the user should pay particular attention to the remarks and warnings made in this chapter. -
Page 20: Transporting Imc Cansas
1.4.1.3 Transporting imc CANSAS When transporting the imc CANSAS module, always use the original packaging or an appropriate packaging which protects the device against knocks and jolts. Above all, never let the module fall. If transport damage occurs, please be sure to contact the imc customer service. -
Page 21: Guarantee
Important information 1.4.1.6 Guarantee Each device is subjected to a 24-hour "burn-in" before leaving imc. This procedure is capable of recognizing almost all cases of early failure. This does not, however, guarantee that a component will not fail after longer operation. Therefore, all imc devices are guaranteed to function properly for one year. -
Page 22: General Safety
CANSAS 1.4.1.8 General Safety Certain basic rules of safety are always to be followed, even with 'safe' devices such as imc CANSAS. Unintended and/ or inappropriate usage of the device can be dangerous for the operator and/or surrounding persons and, in the worst case, can damage the test object or imc CANSAS itself. We strongly discourage the user from making any modifications to the measurement system whatsoever. -
Page 23: Cleaning
(e.g. damage to housing, terminals, modules or power supply, or exposure to liquids or foreign substances), turn the device off immediately, unplug the power cord and inform imc's hotline © 2014 imc Meßsysteme GmbH imc CANSAS Users Manual - Doc. Version 1.9 - 05.12.2014... -
Page 24: Hardware Requirements
No guarantee is extended that this product will work under future versions of the operating system. Additional limitations imposed by the manufacturer of the CAN-Bus card used in your PC are possible. © 2014 imc Meßsysteme GmbH imc CANSAS Users Manual - Doc. Version 1.9 - 05.12.2014... -
Page 25: Startup
CD in the directory \Driver. It reflects the respective latest edition of the driver at the time of the imc CANSAS-CD's manufacture. As a rule, the current driver editions are provided by the manufacturer of the circuit boards as a CD or other hard copy, or are offered for download from the Internet. -
Page 26: Interface Cards
The functionality is provided by the manufacturer of the interface card or adapter. Please check the internet page of the manufacturer for driver updates also. At present for Windows 64 bit, interfaces for imc CANSAS are supported by imc and KVASER. © 2014 imc Meßsysteme GmbH... -
Page 27: Kvaser Interface Cards
Interface cards 2.2.1 KVASER interface cards imc CANSAS works with the KVASER -driver without problems for XP 32/64, Win7-32/64 and for Win 8/8.1. After the driver has been installed, the computer must be re-started. © 2014 imc Meßsysteme GmbH imc CANSAS Users Manual - Doc. Version 1.9 - 05.12.2014... -
Page 28: Imc Interface Adapter
Startup 2.2.2 imc interface adapter The imc CANSAS configuration software can use a USB adapter by imc for access to the CAN-Bus. Installation of the driver is accomplished by means of Window's Plug’n’Play functionality. The driver is located under \Driver\Imc on the CD. The interface can be used on all Windows operating systems which are USB-supported. -
Page 29: Firmware Of The Imc-Can/Usb Adapter
If problems arise despite proper installation of the USB-driver as described, you can get a readout of the version via Settings / Control panel /imc CAN/USB. This is useful, for instance, in order to inform our hotline of the problem. -
Page 30: Ixxat Interface Cards
"Wrapper-package" for the purpose of providing programs such as imc CANSAS with the benefit of the newest VCI 3 driver. This means that all IXXAT-interfaces can also be used for imc CANSAS under 64-bit Windows 7, if IXXAT makes the corresponding drivers available! IXXAT recommends the use of this new VCI-driver-combination for all Windows versions (as of Windows 2000). -
Page 31: Vector Interface Cards
Internet. The most current driver software can also be obtained there as a download. Some of the instructions and tips presented at that site are also on the imc CANSAS-CD as PDF-files in the folder \Driver\Vector. 2.2.6 IntrepidCS interface cards For Windows 7 64 Bit and 32 Bit imc CANSAS does support any interface cards from Vector. -
Page 32: Installation Of Imc Cansas Software
Startup 2.3 Installation of imc CANSAS software The software included for installing the imc CANSAS-module is on CD-ROM. The software is started by running the file "Setup.exe". The supported operating systems are listed here The installation process includes updating of the following drivers:... - Page 33 Installation of imc CANSAS software The next dialog is for selecting program components to install. The imc CANSAS Program files must be retained as active since they are essential for configuring imc CANSAS. The component Report Export formats only needs to be installed if a imc CANSAS report on module configurations is to be saved in an extraneous format, such as in the form of an Excel file.
- Page 34 The last dialog announces successful installation. If, however, the "Common Controls" are too old for the imc CANSAS software, the installation continues with the Microsoft installation of the common controls. This may make it necessary to reboot the computer.
-
Page 35: Connections
2.4.4 Checking connections A dialog called from the menu item in the imc CANSAS interface's ‘EXTRAS’ menu lets you make settings for the CAN-Bus access and for interface parameters. Details are available in Chapter "Operation" - Extras/ Interface and in the booklet or diskette about the interface-card. -
Page 36: Integrating The Imc Cansas Software With Imc Devices
2.5 Integrating the imc CANSAS software with imc DEVICES As of Version 1.4R5, the imc CANSAS software can operate not only as an independent program, but also integrated with the imc DEVICES software. This is supported by imc DEVICES as of Version 2.6. -
Page 37: Can-Bus Description
An identifier is a packet of data up to 8 Bytes in length. Each CAN-module is referred to as a node. A node can also be a sensor, control device, or a imc CANSAS- module's primary connection. -
Page 38: Can-Bus-Wiring
One 9-pin, male DSUB socket and one 9-pin, female DSUB socket or two 10-pin LEMO.1B.310 sockets at SL modules. This is the preferable alternative for connecting, and this is the only alternative imc CANSAS is designed for. In this case it doesn't matter whether other sensors are connected with the CAN-Bus with or without tee-junctions. -
Page 39: Termination In Data Logger
CAN-Bus description 2.6.4.1 Termination in data logger Current imc devices equipped with CAN-bus interface CAN2 can have a terminator resistor switched on internally via software. If the device is connected at one end of the CAN line, an external Y-cable with terminator is not needed. -
Page 40: Reset-Plug
Conversely, the net data rate depends on the package size and on whether the Standard Frame or the Extended Frame is used. For instance, if each imc CANSAS message has been optimally packed in 8byte chunks, the Standard Frame is used and there are no further subscribers connected to the node, the rate reaches 576,6 kBit/s, amounting to 36kSamples/s. -
Page 41: Number Of Can-Nodes
When using imc DEVICES or imc STUDIO: Use the CAN-1 synchronization . This is absolutely necessary if subsequent data processing is performed with in Online-FAMOS. © 2014 imc Meßsysteme GmbH imc CANSAS Users Manual - Doc. Version 1.9 - 05.12.2014... -
Page 42: Canopen
"Special functions" on the "CANopen" page. If it is set as a CANopen module, then the node-ID can be entered in this window. In this case, the imc CANSAS module’s entry in the tree diagram has only the two branches "Bus Interface" and "Special functions", along with their respective settings parameters. No other parameters can be set by means of imc CANSAS. -
Page 43: Troubleshooting Tips For Disturbances Of The Can-Bus
The two termination resistors are connected in parallel and together form an equivalent resistance of 60 Bus Reflections © 2014 imc Meßsysteme GmbH imc CANSAS Users Manual - Doc. Version 1.9 - 05.12.2014... - Page 44 For CAN-L recessive approx. 2,6 Volt DC-voltage measurement with low-speed CAN-Bus In contrast to high-speed bus coupling, the low speed bus coupling can also be run in single-wire mode. © 2014 imc Meßsysteme GmbH imc CANSAS Users Manual - Doc. Version 1.9 - 05.12.2014...
- Page 45 CAN_L - GND CAN_H - GND CAN_L - CAN_H Active at CAN_L at CAN_H 2,9 V 2,9 V Sleep-mode at CAN_L at CAN_H 2,5 V 2,5 V © 2014 imc Meßsysteme GmbH imc CANSAS Users Manual - Doc. Version 1.9 - 05.12.2014...
-
Page 46: Cabling Of Μ-Cansas
Startup 2.6.11 Cabling of µ-CANSAS In conjunction with a imc BUSDAQ unit able to supply the power for the connected imc µ-CANSAS units, a variety of system configurations are possible. When selecting a configuration, be sure to also select appropriate cable terminations. - Page 47 Configuration 2: two four-channel imc µ-CANSAS units connected to the imc BUSDAQ Termination provided by Termi-connectors, and internally at the imc BUSDAQ Termination at the last 4-channel µ-CANSAS unit. Power supply from the power supply unit © 2014 imc Meßsysteme GmbH...
- Page 48 Configuration 3: 4-channel imc µ-CANSAS unit via HUB Termination provided via Termi connector and internally at the imc BUSDAQ Termination at the last 4-channel µ-CANSAS unit. Power supplied from the power supply unit Configuration 4: Integrating a imc µ-CANSAS in a standard CAN-Bus system Termination with Y-cable and µ-CANSAS.
-
Page 49: Power Supply From Busdaq Unit
Configuration 6: imc µ-CANSAS via HUB. Termination inside of the cable µ-CANSAS are terminated internally. busDAQ supplies µ-CANSAS and CANSAS Configuration 7: imc µ-CANSAS and imc CANSAS. Termination inside of the imc BUSDAQ unit and at the imc CANSAS µ-CANSAS units are not termated. busDAQ supplies µ-CANSAS and CANSAS with power ©... -
Page 51: Operation
Calling imc CANSAS from imc DEVICES As of Version 1.4R5, the imc CANSAS software can operate not only as an independent program, but also some of its elements are integrated with the imc DEVICES software. This is supported by imc DEVICES as of Version 2.6. -
Page 52: The User Interface
The application window features the following elements: Menu bar [1] Toolbar [2] Module directory tree [3] Properties dialog [4] Status bar [5] © 2014 imc Meßsysteme GmbH imc CANSAS Users Manual - Doc. Version 1.9 - 05.12.2014... -
Page 53: File"- Menu
Deletes a module, a CAN-message or a virtual channel Start imc-sensors Starts imc - sensors database Paste sensor... Paste selected sensor from imc – sensor into selected channels, to set parameters. © 2014 imc Meßsysteme GmbH imc CANSAS Users Manual - Doc. Version 1.9 - 05.12.2014... -
Page 54: View"- Menu
Check configuration… Verifies the configuration Configure… Configures imc CANSAS modules Configure + Shift Configures imc CANSAS modules even if configuration has not been changed. Measure Conducts a measurement using the imc CANSAS modules Sensors: Prepare plug-in Set the module to default values. Afterwards sensors can be connected. -
Page 55: Extra"- Menu
Note: the command is not available if the window is already in Maximize-mode. Minimize Reduces the active window to an icon. Maximize Makes the active window fill the screen. Close Closes the window. © 2014 imc Meßsysteme GmbH imc CANSAS Users Manual - Doc. Version 1.9 - 05.12.2014... -
Page 56: Toolbar
The toolbar extends horizontally near the top of the window, below the title bar. It offers quick access to many imc CANSAS tools via a mouse-click. If the mouse cursor is held for a short while over a screen button, a brief help text will appear as a 'tool tip'. -
Page 57: The Module Tree
Up until the second hierarchy level, the appearance of the two different tree structures is the same. Once the imc CANSAS module's icon is opened, the entry for the input/output type and the CAN-Bus-Interface branch appear. The message definitions can be seen under the CAN-Bus-Interface branch. -
Page 58: Properties Display
There is a header at the top of the Properties display in which the entry type and the names of the entries are stated. © 2014 imc Meßsysteme GmbH imc CANSAS Users Manual - Doc. Version 1.9 - 05.12.2014... -
Page 59: Module Database
The Properties display has various dialog boxes and combo boxes as well as text boxes. The properties of the imc CANSAS modules or input channels can be altered by making selections or entries. The alterations are applied as soon as the card is turned on or the current selection in the tree is changed, or prior to the execution of a menu command. -
Page 60: Cansas Module
3.2.4.2.1 General CANSAS Module Properties dialog, Page 1 In addition to the imc CANSAS module type, the number of input channels is indicated. In the case of a imc CANSAS-INC4 module, there are 4 input channels. The serial number is assigned when the imc CANSAS module is manufactured, and it is unique. It is the main criterion for ordering the modules in the module database. - Page 61 The second index card contains information about the firmware and hardware versions. The module firmware version is the version currently being implemented by the imc CANSAS module. It can only be indicated once a connection to the module has been established.
- Page 62 Display of slot identification. For further information see Racks slot identification Slot information 3.2.4.2.4 Sensors Exchanging sensor information between the sensor-Eprom and sensor database. Further information see here © 2014 imc Meßsysteme GmbH imc CANSAS Users Manual - Doc. Version 1.9 - 05.12.2014...
-
Page 63: Can-Bus Interface
General bus connection settings are made in the dialog on this virtual index card. Once switched on, a imc CANSAS-module sends messages according to its configuration and to the Baud rate set for it. It also receives messages having the correct identifier for configuration messages (Master- ID). - Page 64 Synchronization jump width: 0-3 = 1-4 time quanta 0 ”SAMple point setting” 0: one sampling value; 1: three sampling values TSEG1 14 ”Time segment 1” TSEG2 3 ”Time segment 2” © 2014 imc Meßsysteme GmbH imc CANSAS Users Manual - Doc. Version 1.9 - 05.12.2014...
-
Page 65: Can-Bus Message
Two messages from different imc CANSAS-modules may take the same identifier as long as the modules are not connected to the same CAN-Bus. Values which an identifier may take are: 0.. 2047 (Standard-format), 0.. 536870912 (Extended-format). -
Page 66: Input/Output Stage
In the case of a imc CANSAS C12 module, the presence of 12 input channels is indicated. These are organized into two groups of 6, and the six-packs are configured en bloc. All the inputs are DCcoupled, non-isolated differential channels. -
Page 67: Input Channel
This dialog serves to indicate and to alter the properties of an input channel. The dialog's structure is determined by the type of imc CANSAS module involved. The following is the dialog for a imc CANSAS C12 module input channel, for illustration purposes: The property controls are arranged on three index cards. - Page 68 1 and the offset is 0. On the third index card, information about the placing of the channel data within the CAN-message is displayed. © 2014 imc Meßsysteme GmbH imc CANSAS Users Manual - Doc. Version 1.9 - 05.12.2014...
- Page 69 Motorola-Format: The byte containing themsB comes first. Bit 7 Bit 6 Bit 5 Bit 4 Bit 3 Bit 2 Bit 1 Bit 0 Byte 5 Byte 6 Byte 7 © 2014 imc Meßsysteme GmbH imc CANSAS Users Manual - Doc. Version 1.9 - 05.12.2014...
- Page 70 The message receiver must factor this value into the channel's signal values in order to obtain the input range set. ScaledValue = UnscaledValue * Factor + Offset © 2014 imc Meßsysteme GmbH imc CANSAS Users Manual - Doc. Version 1.9 - 05.12.2014...
- Page 71 The user interface 3.2.4.6.1 Third output module dialog The structure of the third card is different for data-outputting imc CANSAS modules such as DAC8 or RDO8R, and depends on whether or not the channel is assigned to a message. If the channel isn't assigned to any message, the card is empty except for a notice.
-
Page 72: Virtual Channels
Name: A name unique within the imc CANSAS-module, so that the channels can be distinguished from each other. Permitted characters include letters, numbers, "_" and "~", where the name's 1st character may not be a number. - Page 73 The page Message mapping contains information on the data type, the position in the message and the channel's scaling. © 2014 imc Meßsysteme GmbH imc CANSAS Users Manual - Doc. Version 1.9 - 05.12.2014...
-
Page 74: Special Functions
CANopen 3.2.5 Status bar The Status bar is located at the imc CANSAS window's bottom edge. The menu item 'View/ Status bar' lets you toggle the Status bar on and off. When you move through the menu using the arrow buttons, the left side of the status bar contains a description of the respective menu item's function. -
Page 75: Working With The Module Tree
Clicking over an entry while holding <Ctrl> adds it to the group of selected entries, regardless of its location in the tree; or if it is already selected, removes it from the group. © 2014 imc Meßsysteme GmbH imc CANSAS Users Manual - Doc. Version 1.9 - 05.12.2014... - Page 76 In other words, the names can be edited with the help of the Clipboard. Deleting entries The following entry types can be deleted from the Module Tree: © 2014 imc Meßsysteme GmbH imc CANSAS Users Manual - Doc. Version 1.9 - 05.12.2014...
- Page 77 Working with the Module Tree imc CANSAS module When a imc CANSAS module is deleted, all subordinate entries are also deleted. In order to be deleted an entry must be selected. Multiple CAN message entries can also be selected. When the <Del> key is pressed or the menu virtual channel item 'Edit/Delete' is selected, a prompt for confirmation is posted.
- Page 78 Right-clicking in the Module Tree opens a context menu which offers the most commonly used functions. By right-clicking on the Tree's title bar, a context menu appears for toggling between Grouped by channels and Grouped by messages. © 2014 imc Meßsysteme GmbH imc CANSAS Users Manual - Doc. Version 1.9 - 05.12.2014...
-
Page 79: Menu Functions
Open Database lets you select an already existing database. Module databases always take the extension .mdb. Once a database is opened, the previously open database is closed. The database's contents are read in and displayed. © 2014 imc Meßsysteme GmbH imc CANSAS Users Manual - Doc. Version 1.9 - 05.12.2014... -
Page 80: File - Save
Remarks: A special dialog entitled "Save as" appears, which allows the user to enter a name for the database. 3.4.1.5 File - Import Purpose: For importing the configurations of imc CANSAS modules which are stored in files in XML- format. 3.4.1.6 File - Export... -
Page 81: File - Print
The process of printing begins immediately, but can be aborted via the progress report dialog which then appears. Prerequisite: Only a single imc CANSAS module or the entire module database may be selected (selecting all of the modules one-by-one also works). If only one among multiple modules is selected, an error message will result. - Page 82 Format: This combo box lists all formats in which the report can be exported. Target: This combo box lists all targets available to the report. © 2014 imc Meßsysteme GmbH imc CANSAS Users Manual - Doc. Version 1.9 - 05.12.2014...
- Page 83 Filename. To finish, click on Save and the program will export the report to a file in the format specified. © 2014 imc Meßsysteme GmbH imc CANSAS Users Manual - Doc. Version 1.9 - 05.12.2014...
-
Page 84: File - Print Setup
Remarks: Alternatively, you can close the program from the Close-command in the Control menu, or by simply double-clicking on the Control menu box. The program will automatically save the latest settings changes to the database without prompting for confirmation. © 2014 imc Meßsysteme GmbH imc CANSAS Users Manual - Doc. Version 1.9 - 05.12.2014... -
Page 85: Edit
Data copied to the Clipboard by this command replace any data which previously were held in the Clipboard. There is another possibility if the entry for a imc CANSAS module is selected in the Module Tree. In this case, all the settings for the entire module are copied to the Clipboard. Using the command Edit-Paste, the settings can then be transferred to another module of the same type ©... -
Page 86: Edit - Paste
The changed name is applied once the <Return> key is pressed. Other properties of the new virtual channel can be set in its Properties dialog. 3.4.2.6 Edit - Rename Purpose: The name of a imc CANSAS module, a CAN-message of a channel in the Module Tree can be edited. Shortcuts Keyboard: The last entry selected can be edited. -
Page 87: Edit - Delete
Prerequisite: Virtual channels, CAN-messages and imc CANSAS modules can be deleted when they are selected. This function cannot be applied to other entry types. If the imc CANSAS module entry is selected (either alone or together with other entries), the module is deleted along with all its subordinate entries. -
Page 88: View - Adjust
In this mode, channels can be assigned to and deleted from messages by means of Drag & Drop operations. By channels: This is a command which restructures the Module Tree. The entries of a imc CANSAS module are sorted into the groups... -
Page 89: Module
Single integration: Integrates a new module on-line. Choose this option to use this program to make the settings for a newly purchased imc CANSAS-module. This is the preferable way to proceed as long as you have an actual module to integrate; the entry of the module's parameters will be handled automatically and the database settings will be compatible with the module. - Page 90 If you wish to use this option to make all settings for a genuine imc CANSAS-module manually, rather than automatically as above using Yes, then it is crucial that the module's serial number and type are entered exactly, AND that the module's Baud rate be the same as the default Baud rate.
- Page 91 PC's CAN-interface. The process can take some time. This is especially true if the PC- interface had not yet been used by the imc CANSAS program in the course of the session, since the interface initialization process still must take place beforehand.
- Page 92 If a imc CANSAS-module of the same type and serial number is already registered in the database, the system asks whether the Baud rate, Master/Slave-ID and module ID numbers are to be updated, in other words, to be overwritten: ©...
- Page 93 Menu functions If a imc CANSAS-module of the same serial number but a different type is already registered in the database, the system asks whether the module is to be (completely) overwritten, including the channel and message settings. When using the on-line option for integrating a module, this can never occur, since the serial number is unique and the serial number and module type are entered automatically.
-
Page 94: Module - Find Selections
Remarks: The search is accomplished using the dialog Find Modules. The search starts immediately. The first stage comprises a check of whether the corresponding imc CANSAS module is connected to the CAN-Bus. -
Page 95: Module - Check Configuration
Shortcuts Toolbar: Prerequisite: One or more imc CANSAS modules must be selected; all modules selected are checked. The module itself or any subordinate entry can be selected; the function is applied to the module affected. If the Database entry is selected, all the modules will be checked. -
Page 96: Module - Configure
If an error is detected in any module, configuration is canceled. The next step consists of checking whether the imc CANSAS module is connected to the CAN-Bus. Once a functioning connection has been established, the module's firmware version is compared with the firmware file. -
Page 97: Module - Measure
Purpose: Measurement data are read from the module. Shortcuts Toolbar: Prerequisite: The imc CANSAS modules from which measurement data are to be read must be selected in the Module Tree. Remarks: Calling this command causes the Measure dialog, as shown below, to appear:... -
Page 98: Module - Two-Point-Scaling
Measured Point 1! and Measured 2!. In the Assistant mode Offset, only the scaling offset is recomputed while the scaling factor remains unchanged. © 2014 imc Meßsysteme GmbH imc CANSAS Users Manual - Doc. Version 1.9 - 05.12.2014... - Page 99 This function is not available for: o Strain-gauge measurement o Temperature measurement The scaling distance between X1 and X2 must be at least 1/200 of the input range end value © 2014 imc Meßsysteme GmbH imc CANSAS Users Manual - Doc. Version 1.9 - 05.12.2014...
-
Page 100: Module - Sensors
(for module types supporting TEDS) Shortcut: Toolbar: Comparing characteristic values (from sensor-Eprom)... Purpose: This indicates whether the sensors connected match those belonging to the module’s current configuration. © 2014 imc Meßsysteme GmbH imc CANSAS Users Manual - Doc. Version 1.9 - 05.12.2014... -
Page 101: Module - Calculate Bus Load
Since there are two messages -> 258 bits With a data rate of 1 kHz, this means: 258 bits *1000/s = 258000 bits/s In reference to the node’s Baud rate: 258KBit/1000kBit= 25.8% © 2014 imc Meßsysteme GmbH imc CANSAS Users Manual - Doc. Version 1.9 - 05.12.2014... -
Page 102: Extra
3.4.5 Extra 3.4.5.1 Extras - Interface Purpose: Sets up an interface for communication via CAN-Bus between the PC and imc CANSAS modules. Prerequisites: An interface supported by this program must previously have been correctly installed as hardware using the corresponding board drivers. For this purpose, follow the instructions which come with the board. - Page 103 CANSAS module first becomes necessary. The initialization process can last a few seconds and is only performed once within a imc CANSAS session. By calling the Interface dialog after the interface has begun to be used and then closing it by pressing the OK softkey without having changed the settings, it is possible to reinitialize the interface if this option is set to Yes.
-
Page 104: Extras - Options
Firmware-Update: Enforce firmware in case of incompatibility between PC software and firmware of the module. Since imc CANSAS version 1.6 the handling of the firmware has been changed. This could cause incompatibilties with older versions. © 2014 imc Meßsysteme GmbH... - Page 105 Sensor: Reading/writing of Sensor-Eproms: unless this box is checkmarked, the Sensors page is disabled. Transfer of sensor information from Eproms to XML-files or into imc-Sensors, or importing of XML-file content to Eproms is not possible then. Normal export of sensor information from Eproms is not affected.
- Page 106 3.4.5.2.4 Display Display: CAN-Bus-Interface: this option box determines whether the message identifiers in all input boxes are to be expressed in hexadecimal format. © 2014 imc Meßsysteme GmbH imc CANSAS Users Manual - Doc. Version 1.9 - 05.12.2014...
-
Page 107: Help - Info About Cansas
Purpose: This command causes the copyright information and the product version number to be displayed. Shortcuts Toolbar: Remarks: The appearing dialog also indicates the amount of free hard drive memory and free RAM. © 2014 imc Meßsysteme GmbH imc CANSAS Users Manual - Doc. Version 1.9 - 05.12.2014... -
Page 108: General Notes On Working With Imc Cansas Modules
If there is at least imc CANSAS software where such a model is used, the setting can be read back in order to see how the module is really configured. -
Page 109: Operation
2. Activate the option Enable read-in from module and confirm with OK. 3. Next, the imc CANSAS-module is configured. 4. If the imc CANSAS module's configuration hasn't changed and for this reason the screen shown above is displayed, select the menu item Module / Configure…again, while holding down the SHIFT-key. This forces configuration to be carried out: ©... - Page 110 That is the typical situation: the database is empty, you have some imc CANSAS-modules already configured and want to know their configuration. 9. Now add the new modules using the Integration Assistant.
-
Page 111: Mdb Database
4. Now connect the power supply to the imc CANSAS-module. 5. The imc CANSAS-module boots up. You see the LED light up briefly. Then the LED goes off. The module has been reset. 6. The module can now be located as having the Baud rate 125kbit/s, the Master-ID = 2032 , Slave-ID = 2033 and standard identifiers. - Page 112 General. Then make the following settings, in this example, for rack operation: 11.Next, the module must be configured. So select it from the menu Modules /Configure… © 2014 imc Meßsysteme GmbH imc CANSAS Users Manual - Doc. Version 1.9 - 05.12.2014...
- Page 113 Master-ID, Slave-ID). Then you can combine any modules to CAN-Busses without their interfering with each other. If you use multiple imc CANSAS-modules in conjunction, give regard also to the notes on rack operation. There you can find hints especially on the topic of running multiple modules.
-
Page 114: Important Notes
Then you can resume work with the module as accustomed. If mysterious bus errors repeatedly occur when working with multiple imc CANSAS-modules (e.g. modules can't be found, configuration takes too long and doesn't always work), this may be caused by one of the following: o The CAN-Bus wiring is faulty (e.g. -
Page 115: Bus-Off Error - Change Baudrate
Use as the Master ID= 2 and the Slave ID= 3 (as with Standard Racks) Note imc CANSAS is using the slave ID plus seven following IDs. If ID = 2 and Slave ID = 3, then the IDs 4..10 will also be reserved and can’t be used for other purposes. -
Page 116: Using Cansas In A Rack
But these plugs are not both equipped as per CiAâ. In particular, the CAN-Bus is connected to only one of the two plugs. Only imc CANSAS modules should be connected at this plug. It is important not to use these plugs to, for instance, attach a Reset-plug or a CAN-Bus cable as a stub line. -
Page 117: Rack Maintenance
General notes on working with imc CANSAS modules 117 Baud rate: All imc CANSAS-modules in a rack must have the same Baud rate. If even only one of the modules or the PC is set to a different Baud rate, the CAN-Bus will not work. The CAN-controller components detect a bus-error and deactivate themselves. -
Page 118: Operating Software, Modification Of The Baud Rate
If only a single module is connected to your CAN-Bus (in other words, only the two CAN-nodes PC and 1 imc CANSAS-module), then you can change the Baud rate and other settings as you wish and then configure the module. Once the module has been configured successfully, the imc CANSAS- module reboots and starts up with the new Baud rate. - Page 119 If it ever does occur that modules with different Baud rates are joined in a common CAN-Bus, there will constantly be bus errors. imc CANSAS-modules will either not always show up during searches or not at all, or configuration fails etc. The symptoms are the same as for a physically defective bus, e.g., due to a line which is too long, or if there is too much interference or incorrect termination...
-
Page 120: Connecting To Imc Sensors
3.5.6 Connecting to imc SENSORS The sensor database imc SENSORS is a separate product and not an element of the imc CANSAS software. But the two programs work seamlessly in concert. Please refer also to the user's manual for the imc SENSORS software. -
Page 121: Sensor Recognition
There is an alternative to the Drag & Drop procedure, in which you also first select the sensor in imc SENSORS. Next, select one or more channels in the tree diagram on the left side of the imc CANSAS user interface and the menu item Edit / Add sensor.. -
Page 122: Guarding
CAN-Bus. The imc CANSAS module monitors this signal. If the message fails, the imc CANSAS unit goes into a defined rest state, e.g. zero Volts at the output. This functionality is useful for securing operation of an installation where disturbance of the CAN-transmission or outage of the guidance system must be expected. - Page 123 CAN-Bus in general. You can also specify the maximum interval which may elapse until the next time the imc CANSAS module receives this message. If this interval elapses and the message doesn't arrive, all of the imc CANSAS outputs go into their rest state.
-
Page 124: Heartbeats
Is the module configured as it is supposed to be? Naturally, the data-recording measurement system must be able to rely on the imc CANSAS module being configured as it should be. Otherwise, acquired data may be interpreted incorrectly. If the imc CANSAS-module was reconfigured, it's at least possible to detect. -
Page 125: Synchronization
TTL square 1s: A line is laid between the imc CANSAS-modules on which communication by TTL- level takes place. One of the imc CANSAS-modules is declared the Master and generates a 1 Hz square-wave signal. Other imc CANSAS-modules are declared slaves. They respond to the signal by getting into synchronization. - Page 126 CANSAS as Slave: After booting, a slave waits for a signal from the master. If there is no master to send a synchronization signal, the slave doesn't start. Once the master does become active, the slave starts at the same time.
- Page 127 Note that the identifiers which may be used for recognizing the imc CANSAS-modules (e.g. 2, 3 and 8 etc.) may not be the same as the identifier for synchronization.
- Page 128 In general, it's necessary for the data acquisition system and the master (timer) of all the imc CANSAS-units to be one and the same device. For an ideal match, use such devices as imc BUSDAQ and imc CRONOS-PL. One such unit can then serve as the master, configured as per the CAN-1 protocol, and the imc CANSAS-modules act as the slaves.
-
Page 129: Virtual Channels
CANSAS at a high sampling rate straight into the CANbus would severely strain its capacities. The data can be pre-processed while still in the imc CANSAS system (e.g. in the form of averaging, filtering and subsequent data compression). Consequently, the data load transferred to the CAN-bus can be reduced;... - Page 130 130 Virtual Channels Name: A designation unique within the imc CANSAS-module system, used to differentiate among the channels. Characters permitted in the name include the alphabet, numerals, "_" and "~", though the first character may not be a numeral. The name may take a maximum of 255 characters. The default name of a new virtual channels is "VirtualChannel_i", _i being the number of already present virtual channels + 1.
- Page 131 (factor and offset) of the numerical value's parameter channel into account. Message Mapping: See the information on input channel Properties dialogs in Chapter Operation © 2014 imc Meßsysteme GmbH imc CANSAS Users Manual - Doc. Version 1.9 - 05.12.2014...
-
Page 132: Data Formats
CAN-bus. However, channels in Real data format cannot be subjected to calculational operations. Channels in Digital or Integer format can be subjected to appropriate calculational operations. © 2014 imc Meßsysteme GmbH imc CANSAS Users Manual - Doc. Version 1.9 - 05.12.2014... -
Page 133: Integer-Arithmetic
The computational functions' algorithms therefore are always compromises of processor time and precision. The imc CANSAS-module mainly works with integers. The numerical range extends from -32767 to +32767 in whole numbers. Though scaling factor and offset can produce large real numbers, internally this small value range is all that is available for computations. -
Page 134: Constraints
There are limits on the processing power. In particular, imc CANSAS modules supporting high sampling rates (e.g. 10 kHz sampling rate for the digital data acquisition module DI16) will tend to exhaust the available processing resources when performing complex data processing at the highest possible sampling rate. -
Page 135: Leds
LEDs 135 4.6 LEDs The imc CANSAS-module is equipped with one or more LED depending on the module. It is located to the right above the external power supply jack. It can shine red or green, or their combination yellow. -
Page 136: Special Module-Specific Characteristics
DI16 takes digital data. The imc CANSAS module then sends the incoming data to the CAN-bus, either directly or after prior processing. Such prior processing is accomplished with the help of virtual channels;... -
Page 137: Bridge2
4.7.1.2 BRIDGE2 Bridge amplifier module BRIDGE2 2 physical inputs are available. Like all imc CANSAS modules, this module has a programmable red/green LED. Unlike the other modules, it additionally has two more yellow LEDs which can be used, by means of a special function, to indicate status information. -
Page 138: Uni8
To do this, a virtual channel must be created and positioned in a CAN-message (using Drag & Drop). In the settings dialog for this virtual channel, the function "Logical NOT" can be selected and its parameters set. © 2014 imc Meßsysteme GmbH imc CANSAS Users Manual - Doc. Version 1.9 - 05.12.2014... -
Page 139: Output Modules
-10 V...+10 V. All positive voltages from 0 V to +10 V are mapped to 0 mA..20 mA. No negative voltages can be mapped, since the current supply can only provide current in one direction. © 2014 imc Meßsysteme GmbH imc CANSAS Users Manual - Doc. Version 1.9 - 05.12.2014... -
Page 140: Pwm8
You can find further information about the modules, not concerning the Virtual Channels, in the chapter Properties of the Modules © 2014 imc Meßsysteme GmbH imc CANSAS Users Manual - Doc. Version 1.9 - 05.12.2014... -
Page 141: Sampling Rates
The problem usually arises whenever very many channels or low Baud rates are set. One possible remedy might be a higher Baud rate. © 2014 imc Meßsysteme GmbH imc CANSAS Users Manual - Doc. Version 1.9 - 05.12.2014... -
Page 142: Processing Functions Sorted By Group
Logical exclusive OR Output status word Logical NOT Isolated ampifier (only at CI8 module) Logical OR Logical AND Channal-status word Monoflop Module-status word Output status on LED © 2014 imc Meßsysteme GmbH imc CANSAS Users Manual - Doc. Version 1.9 - 05.12.2014... -
Page 143: Function Reference
Notes: If two channels are added, they must share the same sampling rate. If the 2nd parameteris a numerical value, it must have the same physical unit as the 1st parameter. © 2014 imc Meßsysteme GmbH imc CANSAS Users Manual - Doc. Version 1.9 - 05.12.2014... -
Page 144: (Negative Sign)
2nd parameter Result channel Integer or Digital Integer or Digital (2nd parameteris an input channel) Integer Integer or Digital 2nd parameteris a numerical value Integer © 2014 imc Meßsysteme GmbH imc CANSAS Users Manual - Doc. Version 1.9 - 05.12.2014... -
Page 145: (Division)
Description: The absolute value of the input channel's sample values is determined. Positive values remain unaffected, negative values' signs are inverted. This function simulates an ideal rectifier. © 2014 imc Meßsysteme GmbH imc CANSAS Users Manual - Doc. Version 1.9 - 05.12.2014... -
Page 146: Assignment
The cut-off frequency's input range depends on the input channel's sampling rate, the filter's order and on the filter characteristic. © 2014 imc Meßsysteme GmbH imc CANSAS Users Manual - Doc. Version 1.9 - 05.12.2014... -
Page 147: Barometer (Only For P8 Modules)
0x0007 must be specified as the 2nd parameter. If the operation should be performed only on the lowest bit (LSB), the number 0x0001 should be specified as the 2nd parameter. © 2014 imc Meßsysteme GmbH imc CANSAS Users Manual - Doc. Version 1.9 - 05.12.2014... -
Page 148: Bitwise Not
16-bit numbers. If a bit is set in either of the parameters' sample values, the corresponding bit of the result channel is set (=1), otherwise it is not. © 2014 imc Meßsysteme GmbH imc CANSAS Users Manual - Doc. Version 1.9 - 05.12.2014... -
Page 149: Bitwise Exclusive Or
0x0007 must be specified as the 2nd parameter. If the operation should be performed only on the lowest bit (LSB), the number 0x0001 should be specified as the 2nd parameter. © 2014 imc Meßsysteme GmbH imc CANSAS Users Manual - Doc. Version 1.9 - 05.12.2014... -
Page 150: Button Status (Only For Brigde2 And Uni8 Modules)
In the basic state the status word's value is 0. Therefore channels 1 ... 8 are not balanced. Depending on the status, the following values are added: © 2014 imc Meßsysteme GmbH imc CANSAS Users Manual - Doc. Version 1.9 - 05.12.2014... -
Page 151: Characteristic Curve
Remark: The X-values are expressed in the physical units of the input channel. The scaling of the result is automatically determined from the result values. © 2014 imc Meßsysteme GmbH imc CANSAS Users Manual - Doc. Version 1.9 - 05.12.2014... -
Page 152: Comparison Function
Notes: The constant value is specified in the physical units of the input channel. The input channel's scaling remains intact. Data types: Input channel Result channel Integer or Digital Integer © 2014 imc Meßsysteme GmbH imc CANSAS Users Manual - Doc. Version 1.9 - 05.12.2014... -
Page 153: Constant Digital Channel
An event is a transition from 0 to 1 (or nonzero), i.e., a positive edge. Notes: Only digital input channels are allowed. The input channel's sampling rate may only be 0.1 ms, 0.2 ms, 0.5 ms or 1 ms. © 2014 imc Meßsysteme GmbH imc CANSAS Users Manual - Doc. Version 1.9 - 05.12.2014... -
Page 154: Exp. Root Mean Square (Rms)
Description: The specified bit is extracted from a number. The result is a bit, i.e. either 0 (FALSE) or 1 (TRUE). The 2nd parameter states the bit which is to be extracted: Bit 1 (LSB) ..Bit 16 (MSB). © 2014 imc Meßsysteme GmbH imc CANSAS Users Manual - Doc. Version 1.9 - 05.12.2014... -
Page 155: Fixed Analog Value (Only For Dac8 And Pwm8 Modules)
(minimum) and a new upper range limit (maximum). All the input channel's sample values are linearly transformed to the result channel's new value range. © 2014 imc Meßsysteme GmbH imc CANSAS Users Manual - Doc. Version 1.9 - 05.12.2014... -
Page 156: Fixed Scaling
Notes: The function can only be carried out if the degree of stretching or contraction of the value range derived from the specified scaling factor and offset is not too large. Data types: Input channel Result channel Integer or Digital Integer © 2014 imc Meßsysteme GmbH imc CANSAS Users Manual - Doc. Version 1.9 - 05.12.2014... -
Page 157: Frequency Determination (Only For Di16 Modules)
For the most precise frequency measurements, use the incremental encoder module INC4. Data types: Input channel Result channel Digital Integer © 2014 imc Meßsysteme GmbH imc CANSAS Users Manual - Doc. Version 1.9 - 05.12.2014... -
Page 158: Greater
Notes: If 2 channels are to be compared with each other, they must share the same sampling rate. If the 2nd parameter is a number, it must be specified in the same physical units as the 1st parameter. © 2014 imc Meßsysteme GmbH imc CANSAS Users Manual - Doc. Version 1.9 - 05.12.2014... -
Page 159: High-Pass Filter
The cut-off frequency's input range depends on the input channel's sampling rate, the filter's order and on the filter characteristic. Data types: Input channel Result channel Integer or Digital Integer © 2014 imc Meßsysteme GmbH imc CANSAS Users Manual - Doc. Version 1.9 - 05.12.2014... -
Page 160: Hysteresis Filter
Notes: The hysteresis width is specified in the physical units of the input channel and must be 0. A hysteresis width of 0 returns the input channel as the result. Data types: Input channel Result channel Integer Integer Digital Digital © 2014 imc Meßsysteme GmbH imc CANSAS Users Manual - Doc. Version 1.9 - 05.12.2014... -
Page 161: Led-Flash
If the condition 'Flash for Overflow' is set, Parameters 2 and 3 are evaluated in the manner described only if the CANSAS module FIFO's overflow (and thus the module is overloaded); in such a case, some data will not be processed or transferred via the CAN-bus. Otherwise, the function's return value is 0 (FALSE). -
Page 162: Less Value
Digital Integer 2nd parameter is input channel) Integer Digital Digital (2nd parameter is input channel) Digital Integer or Digital 2nd parameter is a number Integer © 2014 imc Meßsysteme GmbH imc CANSAS Users Manual - Doc. Version 1.9 - 05.12.2014... -
Page 163: Logical And
2nd input channel Channel whose sample values are disjunctioned with the respective value from the 1st parameter Result channel Digital channel with the disjunction results. © 2014 imc Meßsysteme GmbH imc CANSAS Users Manual - Doc. Version 1.9 - 05.12.2014... -
Page 164: Logical Exclusive Or
Notes: Both channels must share the same sampling rate. Data types: 1st Input channel 2nd Input channel Result channel Integer or Digital Integer or Digital Digital © 2014 imc Meßsysteme GmbH imc CANSAS Users Manual - Doc. Version 1.9 - 05.12.2014... -
Page 165: Low-Pass Filter
Description: The maximum values within each reduction interval in the channel are determined. The reduction interval is the clock pulse of the result channel. The values returned are a sequence of the maxima found. © 2014 imc Meßsysteme GmbH imc CANSAS Users Manual - Doc. Version 1.9 - 05.12.2014... -
Page 166: Mean Value
The return value is the middle value in the ordered set. The result channel's first two values are the same as those of the input channel. Data types: Input channel Result channel Integer or Digital Integer © 2014 imc Meßsysteme GmbH imc CANSAS Users Manual - Doc. Version 1.9 - 05.12.2014... -
Page 167: Minimum
During balancing or shunt calibration, the button status is not regarded. It is possible to run multiple CANSAS-modules in synchronicity to each other, to the DCF-signal or to MUSYCS. For synchronized operation, the corresponding status value is added. -
Page 168: Monoflop
Data types: Input channel Result channel Integer or Digital Digital © 2014 imc Meßsysteme GmbH imc CANSAS Users Manual - Doc. Version 1.9 - 05.12.2014... -
Page 169: Output Status On Led (Only For Bridge2, Uni8 And Ci8 Modules)
And if the channels have different status in terms of "balanced" or "Not balanced", then "Not balanced" takes precedence. Universal amplifier module: © 2014 imc Meßsysteme GmbH imc CANSAS Users Manual - Doc. Version 1.9 - 05.12.2014... -
Page 170: Output Status Word (Only For Bridge2, C8, P8, Inc4 And Sc Modules)
In the basic state (status word = 0), the bridge amplifier channels 1 and 2 are not balanced. Depending on the status, the following values are added: © 2014 imc Meßsysteme GmbH imc CANSAS Users Manual - Doc. Version 1.9 - 05.12.2014... -
Page 171: Pulsesequenceencoder (Only For Output Modules)
Depending on the status, the following values are added: +1, if the module is running in synchronized mode Remark: It is possible to run multiple CANSAS-modules in synchronicity to each other, to the DCF-signal or to MUSYCS. For synchronized operation, the corresponding status value is added. In synchronized operation, 1 is added to the status value. -
Page 172: Rectangle (Only For Dac8 Modules)
The values returned are a sequence of the respective last values within the reduction interval. Notes: The result clock pulse may not exceed the input channel's sampling rate. © 2014 imc Meßsysteme GmbH imc CANSAS Users Manual - Doc. Version 1.9 - 05.12.2014... -
Page 173: Root-Mean-Square
'Increment'-value specified. Notes: Start-value and Increment must be specified in terms of the input channel's physical units. © 2014 imc Meßsysteme GmbH imc CANSAS Users Manual - Doc. Version 1.9 - 05.12.2014... -
Page 174: Schmitt-Trigger
Result channel Channel containing short-circuit status Description: Outputs short-circuit status of module at specified sampling rate. Result is 1 in case of short circuit, else 0. © 2014 imc Meßsysteme GmbH imc CANSAS Users Manual - Doc. Version 1.9 - 05.12.2014... -
Page 175: Sine (Only For Dac8 Modules)
Input channel Result channel Integer Integer 4.10.59 Smoothing based on 2 values Parameter Definition Input channel Channel to be smoothed Result channel Smoothed input channel © 2014 imc Meßsysteme GmbH imc CANSAS Users Manual - Doc. Version 1.9 - 05.12.2014... -
Page 176: Smoothing Based On 3 Values
Description: The square roots of the input channel's sample values are computed. When input channel sample values are negative, the return value is 0. Data types: Input channel Result channel Integer or Digital Integer © 2014 imc Meßsysteme GmbH imc CANSAS Users Manual - Doc. Version 1.9 - 05.12.2014... -
Page 177: Standard Deviation
1, and the square root of the result of this is taken. Notes: The result clock pulse may not exceed the input channel's sampling rate. Data types: Input channel Result channel Integer or Digital Integer © 2014 imc Meßsysteme GmbH imc CANSAS Users Manual - Doc. Version 1.9 - 05.12.2014... -
Page 178: Time Determination (Only For Di16 Modules)
The input channel's sampling rate may only be 0.1 ms, 0.2 ms, 0.5 ms or 1 ms. The higher the sampling rate is, the more exactly the time can be determined. For the most precise frequency measurements, use the incremental encoder module INC4. © 2014 imc Meßsysteme GmbH imc CANSAS Users Manual - Doc. Version 1.9 - 05.12.2014... -
Page 179: Triangle (Only For Dac8 Modules)
If the signal is analog output, the staircase-shaped signal generated by the DA-converter is slightly filtered (at 5kHz). The resulting curve shape resembles a triangle at high frequencies and a long signal period. Data types: Result channel Integer © 2014 imc Meßsysteme GmbH imc CANSAS Users Manual - Doc. Version 1.9 - 05.12.2014... -
Page 181: Measurement Technique
The following discussion, whenever it is in reference to terminal connections, circuitry etc., pertains only to the imc CANSAS-BRIDGE2 module, and only the most general remarks on bridge measurement are applicable for bridge measurement systems besides UNI8 and DCB8. Such generalized topics include instrument sensitivity and strain gauge properties. -
Page 182: Bridge Measurements With Wire Strain Gauges (Wsgs)
When connecting, observe the notes contained in the sections headed by "Block diagram" and "DC- Bridge measurement (measurement target: Sensor)". In the context of bridge amplifiers, strain analysis plays a major role. The configuration of a imc CANSAS BRIDGE2 bridge module takes full account of this fact. -
Page 183: Selectable Geometric Arrangements For Wire Strain Gauges And The Bridge Circuits Applied
This strain gauge arrangement uses an active WSG which is positioned on the test object in a uniaxial stress field. This WSG is joined by 3 passive resistors within the imc CANSAS module to form a full bridge. The strain gauge can have a resistance value of 120 . - Page 184 On the other hand, longitudinal force, torque and temperature are all compensated for. The strain is computed as: © 2014 imc Meßsysteme GmbH imc CANSAS Users Manual - Doc. Version 1.9 - 05.12.2014...
- Page 185 The strain is computed as: 5.1.2.1.6 General Full bridge General full bridge. N has to be set from a list. © 2014 imc Meßsysteme GmbH imc CANSAS Users Manual - Doc. Version 1.9 - 05.12.2014...
- Page 186 WSGs. In the bridge, the two longitudinal strain gauges are in adjacent bridge arms. This circuit offers improved sensitivity to the moment of bending and simultaneously compensates longitudinal force, torque and temperature. © 2014 imc Meßsysteme GmbH imc CANSAS Users Manual - Doc. Version 1.9 - 05.12.2014...
- Page 187 Two active strain gauges are placed under stress in equal magnitude. For measurement of tension and compression (non-linear) to eliminate bending. Temperature gradient should be small. The strain is computed as: © 2014 imc Meßsysteme GmbH imc CANSAS Users Manual - Doc. Version 1.9 - 05.12.2014...
- Page 188 (change in resistance). The typical range is between 1,9 and 4,7. The exact value can be found in the spec sheet for the WSG used. If the value entered for this parameter is outside of this range, a warning message will appear but the imc CANSAS module can still be configured. Poisson's ratio If a body suffers compression or tension and is able to be freely deformed, then not only its length but also its thickness changes.
-
Page 189: Bridge Balancing
“online”, before starting the measurement. The precondition for this is that the sensor used must be set up in the system the same way for the balancing as for the measurement and may not be stimulated dynamically. © 2014 imc Meßsysteme GmbH imc CANSAS Users Manual - Doc. Version 1.9 - 05.12.2014... -
Page 190: Incremental Encoders
190 Measurement Technique 5.1.3 Incremental Encoders The four incremental encoder channels of CANSAS-INC4are for measuring time or frequency-based signals. In contrast to the analog channels as well as to the digital inputs, the channels are not sampled at a selected, fixed rate, but instead time intervals between slopes (transitions) or number of pulses of the digital signal are measured. - Page 191 The frequency is determined as the number of events counted divided by the time between the first and the last "complete" event in the interval. An event is complete when a positive edge is succeeded by a subsequent positive edge. © 2014 imc Meßsysteme GmbH imc CANSAS Users Manual - Doc. Version 1.9 - 05.12.2014...
- Page 192 Input range = ([Frequency input range in Hz] / [Encoder pulses per m]) in m/s Resolution = ([Frequency resolution in Hz] / [Encoder pulses per m]) in m/s © 2014 imc Meßsysteme GmbH imc CANSAS Users Manual - Doc. Version 1.9 - 05.12.2014...
- Page 193 (sum) are "cumulative" measurements. In cumulative measurement, the return value is the sum of all displacement or angle changes, or of all event which occurred. © 2014 imc Meßsysteme GmbH imc CANSAS Users Manual - Doc. Version 1.9 - 05.12.2014...
- Page 194 Resetting the summation by means of a CAN-bus message INC Special functions: Resetting of summation This dialog enables resetting of the summations of individual incremental counter channels. © 2014 imc Meßsysteme GmbH imc CANSAS Users Manual - Doc. Version 1.9 - 05.12.2014...
- Page 195 Resetting of summation in the CAN-Assistant 2. imc Online FAMOS (imc DEVICES / imc STUDIO) sends a message if the virtual bit Bit01 is set. In this message, the value 0x04H is set to INC4 and resets the value of the incremental counter channel 02.
- Page 196 Aside from that, problems can occur even with conditioned encoder signals (e.g. TTL-levels) due to long cables, bad reference voltages, ground loops or interference. imc incremental encoder channels are able to counteract these problems thanks to a special 3-stage conditioning unit.
- Page 197 VREF (Threshold) = -10 V .. +10V VHYST (Hysteresis) = +100 mV...+4V Low pass filter: None, 20 kHz, 2 kHz, 200 Hz 5.1.3.1.5 Block diagram © 2014 imc Meßsysteme GmbH imc CANSAS Users Manual - Doc. Version 1.9 - 05.12.2014...
- Page 198 In some arrangements, grounding the sensor is preferred, in others grounding the measurement system (imc CANSAS chassis). Either way, ground loops must be avoided. Grounding is also recommended as a way of avoiding the buildup of high or dangerous potential differences between exposed conducting parts (such as the chassis) and ground.
- Page 199 Measurement modes 199 5.1.3.1.8 Missing tooth As of imc CANSAS Version 1.6R6, a new measurement mode, Missing tooth, is available for INC4 modules (as of motherboard 2). This mode is suited to incremental counters which have one or two missing teeth per revolution for the purpose of angle recognition.
-
Page 200: Mode (Events-Counting)
Chassis, Ground). There is a ground terminal provided in the connection plug (in addition to the ground for the built-in sensor supply voltage). A reference ground between the encoders and the imc CANSAS module may have to be established, as well, even for differential measurements. -
Page 201: Mode (Time Measurement)
5.1.3.2.3 Angle Angle (differential) Angle traveled within one sampling interval. For this purpose, the number of pulses per revolution must be entered. The absolute angle can be calculated in imc Online FAMOS or determined by the mode Angle(abs). Angle (absolute) Absolute angle. - Page 202 The point in time at which the edge is located within the sampling interval is determined. This information is needed by some functions in imc Online FAMOS, e.g. for determining the course of the RPMs from a pulse signal: OtrEncoderPulsesToRpm.
- Page 203 This pulse duration is compared to the period duration, resulting in a value between 0 and 100%. On the Scaling page, you set how the percent value is interpreted: PWM: Scaling dialog © 2014 imc Meßsysteme GmbH imc CANSAS Users Manual - Doc. Version 1.9 - 05.12.2014...
-
Page 204: Mode (Combined Measurement)
There is exactly one pulse time measurement per sampling interval. Change of the pulse times within one sampling interval, called jitter, is not recognized. If you record the data with an imc device, you can smooth the signal, averaging out the jitter by selecting the imc CANSAS channel’s sampling rate to be as close as possible to the counter frequency. -
Page 205: Digital Outputs (Cansas-Do8R, -Do16, -Do16R)
DO16 (without "R") serves the same purpose with open collector outputs. The imc CANSAS-DO8R module has 8 relay switches. The output signals can be set by a CAN-message or by a calculation. The output's state upon module power-up is defined. -
Page 206: Calculated Output Signals
CAN-message, then the function "Fixed digital value" is assigned by default. A different function can be selected by the user. Dialog for setting the defining function of an output signal not assigned to a message © 2014 imc Meßsysteme GmbH imc CANSAS Users Manual - Doc. Version 1.9 - 05.12.2014... - Page 207 In this case, the function "Greater" is selected, and it evaluates the channel "IsGreater" as its input. © 2014 imc Meßsysteme GmbH imc CANSAS Users Manual - Doc. Version 1.9 - 05.12.2014...
-
Page 208: Notes On Do8R And Do16R
0 and 1. When the ENTER-key is then pressed, the value is checked, accepted and sent to the module. © 2014 imc Meßsysteme GmbH imc CANSAS Users Manual - Doc. Version 1.9 - 05.12.2014... - Page 209 This way, it is possible to set multiple bits and then transfer them as a unit by using the function Transfer all values. Transfer all values This function transfers the output values of all output modules shown in the window to the modules. © 2014 imc Meßsysteme GmbH imc CANSAS Users Manual - Doc. Version 1.9 - 05.12.2014...
-
Page 210: Temperature Measurement
IPTS-68. An exception are the modules -CANSAS-T1 and -CANSAS-T4, where voltage coming from the sensor is converted according to the IEC584-1 / ITS90 standard. The temperature ranges of these modules differ from the temperature ranges of normal CANSAS modules. -
Page 211: Pt100 (Rtd) - Measurement
If fewer than 4 Pt100 units are connected, the current-loop must be completed by a wire jumper from the "last" RTD to -I4. If you dispense with the "support terminals" (±I1 to ±I4) provided in the imc Thermo connector for 4-wire connection, a standard terminal connector or any DSUB-15 connector can be used. The "current loop"... - Page 212 +IN3 -IN2 -IN3 +IN3 -IN3 +IN4 +IN4 -IN4 -IN4 cable -IREF shield -IR EF 15, 16 C H AS C H AS GND, CHASSIS, PE © 2014 imc Meßsysteme GmbH imc CANSAS Users Manual - Doc. Version 1.9 - 05.12.2014...
-
Page 213: Sampling Rates: Scanner Concept
The procedure thus provides only advantages if all channels are set to one low-speed sampling rate which determines the noise suppression properties. © 2014 imc Meßsysteme GmbH imc CANSAS Users Manual - Doc. Version 1.9 - 05.12.2014... - Page 214 (fas t s can n in g ) (interpolation) (A DC ) effective user channel rate: 200 Hz -> serious aliasing between 100 Hz .. 8.6 kHz © 2014 imc Meßsysteme GmbH imc CANSAS Users Manual - Doc. Version 1.9 - 05.12.2014...
-
Page 215: Can-Bus: Delay Times
The delay time is stated for the module's default setting. This means for four adjacent channels in a CAN- message, starting with Channel 1. One flashing LED and no additional virtual channels. © 2014 imc Meßsysteme GmbH imc CANSAS Users Manual - Doc. Version 1.9 - 05.12.2014... - Page 216 © 2014 imc Meßsysteme GmbH imc CANSAS Users Manual - Doc. Version 1.9 - 05.12.2014...
-
Page 217: Isolation, Grounding And Shielding
With these module types, it is possible to use the cable shielding of the CAN terminals, or the Chassis contact taking the form of a fastening bolt (only with imc CANSAS-SL, imc µ-CANSAS-HUB4 and the 4- channel imc µ-CANSAS), to establish the housing voltage level. -
Page 218: Isolation Voltage
1) The shielding for the CAN-bus connection is grounded on one side. 2) The shielding may not be connected on both sides since ground loops could result otherwise. 3) In order to avoid common mode errors, the signal reference can be connected to imc CANSAS ground via a resistor. -
Page 219: Shielding
Double shielding: double shielded cable input-channels sensor CHASSIS isolation CHASSIS To avoid compensation currents, always connect the shielding to one side (potential) only. © 2014 imc Meßsysteme GmbH imc CANSAS Users Manual - Doc. Version 1.9 - 05.12.2014... -
Page 220: Cansas Blinking Codes
220 Measurement Technique 5.5 CANSAS blinking codes The imc CANSAS modules come with an LED which can shine in three colors. The available colors are the primary colors Red and Green plus their resulting composite color yellow. With few exceptions, the light-blinking codes apply for almost all the modules. The UNI8 module has two additional LEDs which can be freely configured and only shine yellow light. -
Page 221: Fault Condition In Device
A imc CANSAS device error’s blinking code consists of a sequence of 7 blinks in various colors which depend on the particular error which occurred. This blinking code is emitted for the whole time, as long as the device is on. -
Page 222: Uni8 - Teds
NO ONLINE YELLOW --- GREEN INITIALIZATION FPGA For the imc CANSAS modules UNI8 and Canser, there are additional blinking codes which, however, do not indicate device errors but rather a status or an external error. 5.5.1.5 UNI8 - TEDS With the UNI8 module, particular blinking codes for status indication are already set as default settings. -
Page 223: Canser Gps
5.5.1.7 µ-CANSAS and µ-CANSAS-HUB4 imc µ-CANSAS-HUB4: There are two status-LEDs for the imc µ-CANSAS-HUB4, a green one to the right of CAN OUT and a red one next to CAN IN. It is possible to set which of the two LEDs indicates normal operation, and by which flashing pattern. - Page 224 The red LED briefly shines after startup. Next, the LEDs light up according to the user’s configuration. Either green or red must be chosen for the configuration, not both together (as previously described in reference to the imc µ-CANSAS-HUB4). Also note the previous note pertaining to the 4-channel imc µ- CANSAS module.
-
Page 225: Features And Modules
CANSAS blinking codes 225 5.6 Features and modules Many features available with the imc CANSAS software version 1.4 are dependent on the hardware properties of particular imc CANSAS modules. This means a particular hardware version, i.e. a specific circuit board, is required in order to access the software features. The list below indicates which features are associated with which production dates. - Page 226 UNI8: Bridge measurement Only for UNI8: measurement bridges can be connected. imc-Sensors The module is connected with the sensor database imc-Sensors. The data it contains can be used to make settings for the channels. UNI8: sensor recognition by A shorting jumper inside the connector is used to detect a Type K thermocouple.
-
Page 227: Calibrating The Modules
When a new module is integrated into the system, the following message appears if the recommended calibration date is has been reached: Hint for comming calibration during module integration © 2014 imc Meßsysteme GmbH imc CANSAS Users Manual - Doc. Version 1.9 - 05.12.2014... - Page 228 On the module's General page, an indication of the date of last calibration appears along with an exclamation point symbol: Comming calibration at the module tab © 2014 imc Meßsysteme GmbH imc CANSAS Users Manual - Doc. Version 1.9 - 05.12.2014...
-
Page 229: Recalibration Overdue
5.7.2 Recalibration overdue When a new module is integrated into the system, the following message appears if the calibration validity has expired: Warning, that re-calibration is overdue © 2014 imc Meßsysteme GmbH imc CANSAS Users Manual - Doc. Version 1.9 - 05.12.2014... - Page 230 On the module's General page, an indication of the date of last calibration appears along with an exclamation point symbol: Re-calibration warning at the general module tab © 2014 imc Meßsysteme GmbH imc CANSAS Users Manual - Doc. Version 1.9 - 05.12.2014...
- Page 231 Calibrating the modules 231 Upon initiating configuration, there is also an entry in the Information window: Re-calibration warning during configuration © 2014 imc Meßsysteme GmbH imc CANSAS Users Manual - Doc. Version 1.9 - 05.12.2014...
-
Page 232: Teds
Getting sensors mixed up is, unfortunately, a familiar situation. For all these reasons, imc is now introducing an electronic data sheet which can be retrofitted to all commercially available sensors and which eliminates the problems spelled out above. - Page 233 The digital part of a TEDS interface is based on the 1-wire protocol of the company Maxim/Dallas, a simple serial Master-Slave protocol. The sensors could be for instance the EEPROMs – DS2430 (256 b) and DS2433 (4 Kb). © 2014 imc Meßsysteme GmbH imc CANSAS Users Manual - Doc. Version 1.9 - 05.12.2014...
- Page 234 The retrofitted TEDS can be connected either at the sensor (TEDS 2) or at the measurement system. the measurement channels are appropriate for practically any sensor, so that the sensors can be connected to any unoccupied input on the device. © 2014 imc Meßsysteme GmbH imc CANSAS Users Manual - Doc. Version 1.9 - 05.12.2014...
-
Page 235: Sensor Database
SENSORS is the ideal counterpart for Plug & Measure. How the database, TEDS and imc Devices work in concert is described in the manual imc Devices. For details on the sensor database, see the manual imc SENSORS. - Page 236 236 Measurement Technique Fig. 4: An excerpt of the sensor description for a measurement channel connected to the CANSAS UNI8 module. the data are saved as an XML-file in the TEDS and can be called at any time. Along with sensor-specific data, the necessary channel-specific data (e.g.
-
Page 237: Operation In Cansas Software
Thanks to the specifications by IEEE 1451, all information stored in these sensors can also be used by imc devices. Such settings parameters which don't appear in the TEDS, such as the sampling interval, can be set later using the imc devices' operating interface. -
Page 238: Sensor Information
Note In order to be able to edit the sensor spec-sheet data, the program imc SENSORS must be installed. The sensor database imc SENSORS administers such information for sensors. In this program, it's possible to set up, edit and administer entries for sensors; see Sensor-Database 5.8.2.3 Saving imported sensor information in CANSAS... - Page 239 Drag & Drop. Alternatively, the imc CANSAS menu item Edit Insert sensor... can be used. Therefore imc Sensor has to be started and a sensor is selected. © 2014 imc Meßsysteme GmbH imc CANSAS Users Manual - Doc. Version 1.9 - 05.12.2014...
- Page 240 60 measured points. If an attempt is made to import a characteristic curve with more than 60 measured points, a corresponding error message appears. As of imc CANSAS Version 1.6R6, characteristic curves are also accepted if the curve's X-values decrease strictly monotonically. Previously, only characteristic curves with strictly monotonically increasing X-values were permitted.
- Page 241 5.8.2.4.2 Exchanging sensor information between the sensor-Eprom and sensor database With a module selected in imc CANSAS, the Sensors page in its dialog appears as follows: The pop-down selection list determines which sensor information is imported or exported. 5.8.2.4.3 Read Sensor-Eprom to imc-Sensors: Exports sensor-Eprom contents to the database imc SENSORS.
-
Page 242: Plug & Measure - Assembly Of The Sensor Clip
5.8.3 Plug & Measure - Assembly of the sensor clip Thread all parts of the Plug & Measure sensor clip to the cable Insert the written label into the housing. Put on the cap. © 2014 imc Meßsysteme GmbH imc CANSAS Users Manual - Doc. Version 1.9 - 05.12.2014... - Page 243 TEDS 243 Put on the adaptation tube for the matching cable to the groove from the housing. © 2014 imc Meßsysteme GmbH imc CANSAS Users Manual - Doc. Version 1.9 - 05.12.2014...
- Page 244 244 Measurement Technique Cover the adaptation shell by the silicone tube over the base of the housing. Adjust the adaptation shell inside the silicone © 2014 imc Meßsysteme GmbH imc CANSAS Users Manual - Doc. Version 1.9 - 05.12.2014...
-
Page 245: Assembly Of The Itt-Veam Plug (Uni8)
5.8.3.1 Assembly of the ITT-VEAM plug (UNI8) Move the crimp gasket over the silicone tube. Screw together the connector and move them close to the crimp gasket. © 2014 imc Meßsysteme GmbH imc CANSAS Users Manual - Doc. Version 1.9 - 05.12.2014... - Page 246 246 Measurement Technique Solder the cable to the pins of the connector. Remove the connector and screw them to the plug. © 2014 imc Meßsysteme GmbH imc CANSAS Users Manual - Doc. Version 1.9 - 05.12.2014...
- Page 247 TEDS 247 Bring together all parts and fix them with the screw cap. © 2014 imc Meßsysteme GmbH imc CANSAS Users Manual - Doc. Version 1.9 - 05.12.2014...
-
Page 249: Properties Of The Modules
In especially harsh conditions, the setup will include the imc CANSAS-SL modules. These can operate in a broad range of ambient temperatures, can withstand strong shock (MIL STD810F) and feature a high protection rating water resistance (IP65). - Page 250 µ-CAN-HUB4 1.5 R8 1.5 R8 Note For CANopen and TEDS, CAN base board 2 is required. Please see also the notes at Feature and modules © 2014 imc Meßsysteme GmbH imc CANSAS Users Manual - Doc. Version 1.9 - 05.12.2014...
-
Page 251: Bridge2: Dc-Bridge Measurement
DC-bridge measurement Technical data BRIDGE2. imc CANSAS-BRIDGE2's two bridge channels have a DC bridge excitation voltage of 3,5 V. Any initial imbalance (offset) of the measurement bridge, which can be as large as multiples of the input range, can be balanced Setting the operating mode (for each bridge channel separately): Channel0x ->... - Page 252 (GND) isn't open, but rather connected. This is ensured when a bridge which imc CANSAS provides with bridge excitation is connected, since -VB is at GND. A reference ground must be established in the measurement chain. There are various techniques as well as considerations.
-
Page 253: Dc- Bridge Readings (Measurement Target: Sensor)
To obtain the best result with the least noise possible, the bridge and the imc CANSAS module should be held at a shared reference voltage (ground). The ground terminal in the connection plug is designated CHASSIS. -
Page 254: Full Bridge
6.1.2 Full bridge Bridge2: block diagram full bridge A full bridge connected to the imc CANSAS-BRIDGE2 bridge channels consists of 4 resistor arms (denoted by R in the block diagram). The full bridge is external, meaning that all 4 bridge resistors are outside bridge of the imc CANSAS module. -
Page 255: Half Bridge
The other half must then be completed with two equal resistors of constant impedance. For imc CANSAS-BRIDGE2 bridge channels, this half-bridge completion is internally pre-wired. It is accessible via the terminals of the DSUB-plug as “HB1” and “HB2” and need only be connected by a jumper to the corresponding input pin. -
Page 256: Quarter Bridge
Going without a separate line for "+SENSE" and direct jumpering of "+SENSE" and "+VB" at the connection terminal causes a gain error of Rk/Rb in all configurations. © 2014 imc Meßsysteme GmbH imc CANSAS Users Manual - Doc. Version 1.9 - 05.12.2014... -
Page 257: Balancing And Shunt Calibration
As a rule both bridge channels are balanced at once. If balancing isn't possible because the unbalance exceeds the balance range, this can be indicated by the LEDs on the imc CANSAS-BRIDGE2 module (see Chapter... -
Page 258: Performing Bridge Balance By Button
Setting balance to be activated upon activation of module: Bridge amplifier -> Index card “Balance” -> check box “Perform bridge balance upon power up” This mode is desirable if the system's setup (process and imc CANSAS module) is at rest upon switching 6.1.5.3 Activating bridge balance via CAN-Bus Bridge balancing can be performed in response to a CAN-bus message. -
Page 259: Shunt Calibration
BRIDGE2: DC-bridge measurement 259 6.1.5.5 Shunt calibration imc CANSAS-BRIDGE2 offers the ability to electronically shunt the measurement bridge with a shunt calibration resistor of approx. 100k . This artificial unbalance of the bridge can provide an indication of the measurement bridge's functioning. -
Page 260: Connector Plugs Bridge2
Note If you use an imc device to measure, see application notes in chapter Field Busses of the imc DEVICES manual. There are examples how to use imc Devices- and imc CANSAS-software step by step. -
Page 261: Sampling Interval Bridge2
Such minor components can be disregarded after having been dampened by 30dB. Note that the value 30dB applies to frequency components of around half the sampling rate. © 2014 imc Meßsysteme GmbH imc CANSAS Users Manual - Doc. Version 1.9 - 05.12.2014... -
Page 262: Canser-Gps
The following CAN-Bus parameter have been set: Bus speed: 500kBaud; Identifier: Standard; IDs: 2020- 2023 s Note Bus speed and identifier are factory-set and can not be changed by user. © 2014 imc Meßsysteme GmbH imc CANSAS Users Manual - Doc. Version 1.9 - 05.12.2014... - Page 263 5 Hz GPS-mouse’s data, although not with full 5 Hz resolution. Important Note If you use the GPS mouse with an imc CRONOS-PL/SL unit, observe the following: CRONOS-PL/SL communicates with the connected GPS receiver at a Baud rate of 19,200 Bit/s. When the GPS mouse is connected, CRONOS-PL queries the Baud rate and modifies it if necessary.
-
Page 264: C12 Voltage, Temperature, Current
6 channels without contacts for 4-wire connection. Technical data C12 The imc CANSAS C12 module has 12 input channels. Signals for voltage, current, any DINconforming thermocouples or PT 100 units can be connected. Different screw-terminal plugs are provided for the respective types of measurements;... - Page 265 2 ms. The values accruing 10 ms 200 ms 1 min during the sampling interval are subsequently 20 ms 500 ms 10 s averaged. 50 ms 20 s © 2014 imc Meßsysteme GmbH imc CANSAS Users Manual - Doc. Version 1.9 - 05.12.2014...
-
Page 266: Connector Plugs C12
266 Properties of the Modules With imc CANSAS-C12 (with or without divider plugs), the reference potential discrepancies (-IN) between different sensors can be no greater than ±40 V without causing damage. Up to a discrepancy of ±5 V, there is no loss of system precision (but typically not even up to ±40V). -
Page 267: C8 Voltage, Temperature, Current
A voltage divider is in effect in the voltage ranges 6 0 V to 2V; the resulting input impedance is 1 M - even when the device is deactivated. The input configuration is differential and DC-coupled. without divider: <2V with divider: >= 60V © 2014 imc Meßsysteme GmbH imc CANSAS Users Manual - Doc. Version 1.9 - 05.12.2014... -
Page 268: Current Measurement
If the voltage source has no ground reference: The voltage source's potential floats freely in relation to imc CANSAS ground. In such a case, a reference to ground must be set up. One way to do this is to ground the voltage source itself. It is also possible to connect the negative signal input to imc CANSAS' ground, in other words, connect "-in"... -
Page 269: Temperature Measurement
(uncontrolled) parasitic thermocouples. The imc system avoids this problem by means of individual compensation sensors directly inside the connector pod and thus provides a convenient, flexible and affordable interconnections solution. -
Page 270: Measurement With Pt100 (Rtd) (Type: Standard Dsub)
Besides thermocouples, it's also possible to connect Pt100 sensors directly in 4-wire-configuration. A (supplementary) reference current source feeds up to four sensors connected in series jointly. When the imc-Thermoplug is used, the connection terminals are already wired in such a way that this reference circuit is "automatically" closed. -
Page 271: Thermocouple Measurement (Type Ii: Round Plugs)
It is not a problem if the ground potential at the thermocouple differs from that of the imc CANSAS units by a few volts. However, the maximum allowed common mode voltage may not be exceeded. -
Page 272: Sampling Intervals, Filters And Anti-Aliasing
Critical damping, 4th order, cutoff frequency 0,1 Hz 2s ..60s Arithmet. mean over the duration of the sampling interval of values sampled at 100 Hz © 2014 imc Meßsysteme GmbH imc CANSAS Users Manual - Doc. Version 1.9 - 05.12.2014... -
Page 273: Connector Plugs C8
Pin configuration of round plug: Terminal Signal (pin number) measurement ground (GND) neg. measurement input (-IN) positive sensor supply (+Vs) negative sensor supply (-Vs) pos. measurement input (+IN) © 2014 imc Meßsysteme GmbH imc CANSAS Users Manual - Doc. Version 1.9 - 05.12.2014... -
Page 274: Sl Variety Lemo
(+IN and -IN) are located inside the shielding. the shielding must be connected to the terminal pod housing. 6.4.6.3 SL Variety LEMO pin configuration of LEMO terminals © 2014 imc Meßsysteme GmbH imc CANSAS Users Manual - Doc. Version 1.9 - 05.12.2014... -
Page 275: Ci8 Isolated Voltage Channels With Current And Temperature Mode
© 2014 imc Meßsysteme GmbH imc CANSAS Users Manual - Doc. Version 1.9 - 05.12.2014... -
Page 276: Voltage Measurement
Balance page accessed via the module node Isolated amplifier. Balancing using the Measure dialog Zero balancing in the Measure dialog © 2014 imc Meßsysteme GmbH imc CANSAS Users Manual - Doc. Version 1.9 - 05.12.2014... - Page 277 It is also possible to perform a balancing procedure at a specific point in time as desired. Balancing dialog for CI8 © 2014 imc Meßsysteme GmbH imc CANSAS Users Manual - Doc. Version 1.9 - 05.12.2014...
- Page 278 8 bits. All other settings do not play any role here. Balancing message in the CAN Assistent © 2014 imc Meßsysteme GmbH imc CANSAS Users Manual - Doc. Version 1.9 - 05.12.2014...
- Page 279 CI8 isolated voltage channels with current and temperature mode 279 2. imc Online FAMOS (imc DEVICES) sends a message if the virtual bit Bit02 is set. In the data byte, the value 28Hex is transmitted, which consists of the values for channel 3= 0x08H plus channel 5= 0x20H.
-
Page 280: Current Measurement
ACC/DSUB_I4 isolated voltage channel - 10 kHz At the imc CANSAS-SL-CI8-L(-SUPPLY) with LEMO connectors, current measurement is connected via an internal 50 shunt. Toward this end, the current signal is connected at the pins +I and -IN. © 2014 imc Meßsysteme GmbH... -
Page 281: Temperature Measurement
A (supplementary) reference current source feeds the sensor. How to connect a Pt100 sensor is shown below. Connection scheme of a PT100 sensor with LEMO terminals © 2014 imc Meßsysteme GmbH imc CANSAS Users Manual - Doc. Version 1.9 - 05.12.2014... -
Page 282: Resistance Measurement
The supply outputs are electronically protected internally against short circuiting to ground. The reference potential, in other words the sensor's supply ground contact, is the terminal GND. For the imc CANSAS-SL-CI8-L-SUPPLY there is only an unipolar voltage supply available. -
Page 283: Filter
This option has no effect on resistance measurement. 6.5.7 Filter With imc CANSAS-CI8, the filter settings can be made for each channel separately. Off: Last sampled value of a sample interval. Mean value: The output value is averaged by (Sampling interval[ms] / 1 ms) samples. For temperature measurement, only this function is available. -
Page 284: Connector Plugs Ci8
251 Hz 6.5.8 Connector plugs CI8 See here for the pin assignment of the DSUB-15 ITT-VEAM plugs. 6.5.8.1 SL Variety LEMO pin configuration of LEMO terminals © 2014 imc Meßsysteme GmbH imc CANSAS Users Manual - Doc. Version 1.9 - 05.12.2014... -
Page 285: Dac8 Analog Outputs
Technical data DAC8. 6.6.1 General notes DAC8 The imc CANSAS-DAC 8 module has 8 digital / analog converters (DAC, D/A converters). This type of module's outputs can be configured as either voltage or current sources individual for every channel. The voltage range is from -10 V to +10 V at a resolution of 16 bits. -
Page 286: Linking The Output Signal To A Can-Message
Read-in-CAN-channel is set permanently. Output signal DAC01 is positioned in message "Message01". The function set is always "Read-in CAN-channel" Message mapping for an analog output signal © 2014 imc Meßsysteme GmbH imc CANSAS Users Manual - Doc. Version 1.9 - 05.12.2014... -
Page 287: Message Mapping
-20 V to +20 V, but any specification over ±10 V will be limited to ±10 V. DAC output is driven perfectly © 2014 imc Meßsysteme GmbH imc CANSAS Users Manual - Doc. Version 1.9 - 05.12.2014... -
Page 288: Calculating The Output Signal
The example below demonstrates how an rpm-value in the range –6000RPM to +6000RPM is read into the CAN-bus and outputted at DAC05. The dialog shows the corresponding CAN-bus settings: © 2014 imc Meßsysteme GmbH imc CANSAS Users Manual - Doc. Version 1.9 - 05.12.2014... -
Page 289: Configuring The Outputs
6.6.6 Configuring the outputs The imc CANSAS-DAC8 module's outputs can be configured either as voltage or current sources. The corresponding settings are made in the dialog accessed via the Module Tree entry Analog outputs. The default is voltage output. -
Page 290: Taking Measurements With The Analog Output Modules
Transfer all values. Transfer all values: This function transfers the output values of all output modules shown in the window to the modules. © 2014 imc Meßsysteme GmbH imc CANSAS Users Manual - Doc. Version 1.9 - 05.12.2014... -
Page 291: Connector Plugs Dac8
DAC8 analog outputs 291 6.6.9 Connector plugs DAC8 See here for the pin assignment of the DSUB-15 ITT-VEAM plugs. The imc CANSAS-K-DAC8 module is connected via BNC terminals. © 2014 imc Meßsysteme GmbH imc CANSAS Users Manual - Doc. Version 1.9 - 05.12.2014... -
Page 292: Dcb8: Bridge, Strain Gauges
The DCB8 module is also available in the PROTECT model, having ESD and transients protection. See the description of the UNI8 for properties and information on its constraints. © 2014 imc Meßsysteme GmbH imc CANSAS Users Manual - Doc. Version 1.9 - 05.12.2014... -
Page 293: Bridge Measurement
We recommend to angle a maximum range on the not used voltage measurement. An open entry in half- or quarter bridge mode can annoy the neighbor channels if this is also in half- or quarter bridge mode. © 2014 imc Meßsysteme GmbH imc CANSAS Users Manual - Doc. Version 1.9 - 05.12.2014... -
Page 294: Full Bridge
It is important that the measurement signal of the half bridge is connected to +IN (A). The IN (B) access leads to implausible measured values and influences the neighbor channels. © 2014 imc Meßsysteme GmbH imc CANSAS Users Manual - Doc. Version 1.9 - 05.12.2014... -
Page 295: Quarter Bridge
No direct current measurement is possible with the included connector ACC/DSUB(M)-UNI2, but it is possible only with the special shunt connector with a 50 shunt resistor (differential measurement). © 2014 imc Meßsysteme GmbH imc CANSAS Users Manual - Doc. Version 1.9 - 05.12.2014... -
Page 296: Sense And Initial Unbalance
(VB = 2.5 V) [mV/V] (VB = 5 V) [mV/V] (VB = 10 V) [mV/V] ±1000 ±500 ±200 ±100 ±50 ±20 ±10 ±5 ±2 ±1 ±0.5 © 2014 imc Meßsysteme GmbH imc CANSAS Users Manual - Doc. Version 1.9 - 05.12.2014... -
Page 297: Balancing And Shunt Calibration
Note that importing a changed configuration to the module deletes any previously performed bridge balancing and resets it to zero. Therefore, always repeat bridge balancing after importing a configuration! © 2014 imc Meßsysteme GmbH imc CANSAS Users Manual - Doc. Version 1.9 - 05.12.2014... -
Page 298: Voltage Measurement
If -in(B) and D are connected, then in practice a single-ended measurement is performed. This is no problem if there was no ground reference beforehand. © 2014 imc Meßsysteme GmbH imc CANSAS Users Manual - Doc. Version 1.9 - 05.12.2014... -
Page 299: Voltage Source At A Different Fixed Potential
±2 ±0.05 0.06 ±1 ±0.02 0.008 ±0.5 0.08 ±0.01 0.018 ±0.005 0.023 For notes on triggering the adjustment, refer to the section on bridge measurement © 2014 imc Meßsysteme GmbH imc CANSAS Users Manual - Doc. Version 1.9 - 05.12.2014... -
Page 300: Sensor Supply
Therefore the voltage supply must be set and configured using the software. Then the sensor can be connected. Otherwise the sensor and the CANSAS-module could be damaged. There is a 5 V pin at the imc connector. That voltage is not available for the CANSAS-modules, only for CRONOS-PL! The technical data of the sensor supply is listed as part of the data sheet of CANSAS-DCB8. -
Page 301: Di16 Digital Inputs
6.8.1 Overview The imc CANSAS DI16 module has 16 digital inputs which can be sampled at up to 10 kHz. The inputs are arranged in pairs each having a common reference ground. The 2 inputs within a pair are not mutually isolated, but each pair is isolated from the other pairs, the chassis the power supply and the CAN-bus. -
Page 302: Block Diagram
6.8.3 Block diagram Note The imc CANSAS-DI16 module's inputs are organized in pairs which are isolated from other inputs. The pairs' own reference grounds are not connected to the DI16 module's internal ground or CHASSIS. Eight inputs are accessible per connection terminal. -
Page 303: Can-Bus Message Dialog
DI16 digital inputs 303 6.8.5 CAN-bus message dialog The CAN-bus messages from the imc CANSAS DI16 module come with an extra setting: Transmission type This determines when messages are transmitted. Periodic: At the rate set for the assigned channel. In case of data change: The message is sent only if at least one value of the assigned channel's signal has changed since the last transmission. -
Page 304: Do16 Digital Outputs
Technical data DO16. 6.9.1 Configuring the outputs The imc CANSAS-DO16 module's outputs can be configured as open-drain or as totem-pole output stages. This setting applies to whole channel groups, meaning that Signals 1 through 8 share their settings, as do Signals 9 through 16. This setting must be made in the dialog accessed via the Module Tree entry Digital outputs. -
Page 305: Totem-Pole Mode
HCOM the plug's supply. LCOM comes from "Low" and "common", whereas HCOM comes from "High" and "common". The terminal plug CON1 is access for Bits 1...8; CON2 for Bits 9...16. © 2014 imc Meßsysteme GmbH imc CANSAS Users Manual - Doc. Version 1.9 - 05.12.2014... -
Page 306: Invert Output
306 Properties of the Modules 6.9.4 Invert Output A setting in the imc CANSAS software enables inversion of the imc CANSAS DO16 logic. To do this, the following configuration steps are necessary (these instructions describe inversion of all 16 outputs): 1. -
Page 307: Connector Plugs Do16
DO16 digital outputs 307 6.9.5 Connector plugs DO16 For the pin assignment of the DSUB-15 plugs see here Pin configuration imc CANSAS-L-DO16-Ph with Phoenix terminal blocks. © 2014 imc Meßsysteme GmbH imc CANSAS Users Manual - Doc. Version 1.9 - 05.12.2014... -
Page 308: Do8R, -Do16R Relay Outputs
Target value Relay position 0 (low) IN and ON connected 1 (high) IN and ON not connected The relays are single pole double throw switches. © 2014 imc Meßsysteme GmbH imc CANSAS Users Manual - Doc. Version 1.9 - 05.12.2014... -
Page 309: Starting The Do8R, Do16R Module
ON and OFF. For the pin assignment of the DSUB-15 plugs see here Pin configuration of imc CANSAS-L-DO8R-Ph with Phoenix terminal blocks Pin configuration of imc CANSAS-L-DO8R-V with ITT-VEAM terminals. © 2014 imc Meßsysteme GmbH imc CANSAS Users Manual - Doc. Version 1.9 - 05.12.2014... -
Page 310: Ign Ignition Angle Measurement Module
6.11 IGN ignition angle measurement module IGN technical specs imc CANSAS-IGN is a module for determining the ignition angle of gasoline engines. The module has electrically insulated inputs for connecting the ignition signal, a crankshaft sensor and a reference signal, as well as any camshaft signal. - Page 311 Typically, one or two cogs will be missing to indicate the zero position. The signal's amplitude depends on the RPMs. Motor's nuilt-in inductive pickup (VRS) © 2014 imc Meßsysteme GmbH imc CANSAS Users Manual - Doc. Version 1.9 - 05.12.2014...
- Page 312 Signals with digital levels are also possible: Logic level signal It is also possible to use a sensor returning only one pulse per crankshaft revolution: 1 pulse per revolution © 2014 imc Meßsysteme GmbH imc CANSAS Users Manual - Doc. Version 1.9 - 05.12.2014...
- Page 313 Camshaft sensor Precision imc CANSAS-IGN captures when the signals cross defined thresholds, at a resolution of fractions of microseconds. From these data it is possible to calculate the ignition angle with precision of 0.1 crankshaft degree and better, even at high RPMs. Thus, if there even is any imprecision, then it is in determining the pulse times.
-
Page 314: Interference Suppression
314 Properties of the Modules Monitoring of selected cylinders imc CANSAS-IGN can monitor selected cylinders by means of the camshaft position. The camshaft signal is only relevant if this monitoring has been configured. The condition for the monitoring is tat the ignition signal includes all of the cylinders' ignition pulses. -
Page 315: Housing
The momentary ignition angle is an averaged value of ignition impulses. All the ignition impulses extracted from the signal over the configured averaging duration are averaged. © 2014 imc Meßsysteme GmbH imc CANSAS Users Manual - Doc. Version 1.9 - 05.12.2014... -
Page 316: Operation Modes
Using the menu item "File / Export..." , it is possible to generate a .dbc or .cba file containing the scaling information in the respective format. © 2014 imc Meßsysteme GmbH imc CANSAS Users Manual - Doc. Version 1.9 - 05.12.2014... -
Page 317: Snapshot Operation Mode
CAN-Bus at 1 kHz. In other words, a snapshot every 30 s. Snapshot on the CAN-Bus After correction of the time base, the result is: Snapshot rescaled © 2014 imc Meßsysteme GmbH imc CANSAS Users Manual - Doc. Version 1.9 - 05.12.2014... - Page 318 The discrepancy between the Minimum and Maximum is clearly seen. The true course of the signal is between the two envelope lines. Ignition signal with snapshot at 100 kHz © 2014 imc Meßsysteme GmbH imc CANSAS Users Manual - Doc. Version 1.9 - 05.12.2014...
- Page 319 By means of the menu item File / Export..., it is possible to generate a .dbc or .cba file containing the scaling information in the respective format. © 2014 imc Meßsysteme GmbH imc CANSAS Users Manual - Doc. Version 1.9 - 05.12.2014...
-
Page 320: Parameterization
If the node "Ignition angle module" is selected in a imc CANSAS-IGN module in the tree diagram on the left side of the imc CANSAS user interface, then on the right side, a table for setting the module's general parameters appears. - Page 321 If monitoring of selected cylinders is used, the CAN-messages assigned to the cylinders are outputted at the same clock rate. © 2014 imc Meßsysteme GmbH imc CANSAS Users Manual - Doc. Version 1.9 - 05.12.2014...
- Page 322 Only in exceptional cases where the module is used only for determining the RPMs and no ignition signal is connected, this parameter is set to “passive”. © 2014 imc Meßsysteme GmbH imc CANSAS Users Manual - Doc. Version 1.9 - 05.12.2014...
- Page 323 -10 degrees, and the next ignition at 170 degrees, then KW, then both had ignition at 10 degrees before TDC. imc CANSAS-IGN uses the specification (in this case 4/720 degrees) in order to convert the 170 degrees to -10 degrees, since it knows from this parameter that there is ignition every 180 degrees.
- Page 324 If Monitoring of selected cylinders is desired, then the amount of cylinders is entered in this box. One to four cylinders are possible. The camshaft signal must be connected to the imc CANSAS-IGN's CAM terminal. The signal returns one or more pulses per camshaft revolution. Based on the camshaft position, it is possible to assign each ignition impulse.
- Page 325 30 degrees before TDC. The crankshaft's zero-marker is at 40 degrees before TDC ("40" is entered for the parameter Zero-marker on crankshaft [degrees before TDC]). © 2014 imc Meßsysteme GmbH imc CANSAS Users Manual - Doc. Version 1.9 - 05.12.2014...
- Page 326 Note when stating the angle positions for the camshaft that the distances between individual signal edges, in particular, must be stated precisely. Thus, it is less important whether the sequence specified is 60, 140, 320 or 70, 150, 330. © 2014 imc Meßsysteme GmbH imc CANSAS Users Manual - Doc. Version 1.9 - 05.12.2014...
-
Page 327: The Channel's Parameters
6.11.4.1 The channel's parameters If on the left side of the imc CANSAS user interface's tree diagram, one of the input channels (ignition signal, crankshaft, reference) in a imc CANSAS-IGN module is selected, then on the right side a table for setting the input channel parameters appears. - Page 328 Thus, even with low pass filters (e.g. imc CANSAS-IGN's adjustable 1st order low-pass) it is not easy to determine the delay time according to the rule of thumb (0.16 / cutoff frequency). This rule of thumb is only valid with a suddenly jumping input signal, for instance, if the threshold value is about 63% of the peak height.
-
Page 329: Offset Adjustment
6.11.4.2 Offset adjustment The offset is adjusted at factory. It is recommended to have the offset rechecked and adjusted once per year. For this purpose, imc offers maintenance servicing. The user can also perform the offset adjustment. To do this, one short circuit connector must be connected to each input channel. -
Page 330: Tips
© 2014 imc Meßsysteme GmbH imc CANSAS Users Manual - Doc. Version 1.9 - 05.12.2014... - Page 331 2nd cylinder's ignition pulse is captured, then 240 degrees are subtracted from its angle. The interference pulses directly after the ignition pulse ("pulses after") are no problem either. The imc CANSAS-IGN hardware suppresses pulses which do not closely follow another one.
-
Page 332: Ign Terminal
This terminal provides the analog and digital outputs and auxiliary power supply. The outputs and power supply are not isolated against the module's power supply. CANSS-IGN: CAN-connector and analog/digital outputs © 2014 imc Meßsysteme GmbH imc CANSAS Users Manual - Doc. Version 1.9 - 05.12.2014... - Page 333 REF returns one impulse per revolution of the crankshaft. The impulse comes in response to the first tooth following the gap for counters with a gap missing. The outputs are not defined in Snapshot mode. © 2014 imc Meßsysteme GmbH imc CANSAS Users Manual - Doc. Version 1.9 - 05.12.2014...
-
Page 334: Inc4 Incremental Encoder Channels
A detailed description of incremental encoder data acquisition is found in Chapter "Measurement technique". Setting the operating mode: IncrementalEncoderOx -> Index card “Inputs” -> Combo box “Measurement mode” © 2014 imc Meßsysteme GmbH imc CANSAS Users Manual - Doc. Version 1.9 - 05.12.2014... -
Page 335: Comparator Configuration
Setting the switching threshold or hysteresis can be accomplished either using the sliding button or the input box to the right of the sliding button: © 2014 imc Meßsysteme GmbH imc CANSAS Users Manual - Doc. Version 1.9 - 05.12.2014... -
Page 336: Sensor Types, Synchronization
The pins for the zero impulse (index) is connected to CON1 only! The zero impulse is only considered after configuring or reboot of the imc CANSAS INC4. A restart of the measurement without restart of the imc CANSAS does not reset the index channel! Incremental encoder sensors often have an index track (index signal, zero marker pulse) which emits a synchronization-signal once per revolution. -
Page 337: Sensors With Current Signals
11µAss signals: Heidenhain ROD 456, current c: max. 85 mA per (2-signal) encoder -> insufficient module supply! Sensor must be supplied externally! © 2014 imc Meßsysteme GmbH imc CANSAS Users Manual - Doc. Version 1.9 - 05.12.2014... -
Page 338: Sensor Supply At Can/L-Inc4-Supply
For the DSUB-15 pin configuration - see here For the LEMO pin configuration (CAN/SL-INC4-L) - see here For the DSUB-9 pin configuration (CAN/K-INC4) - see here © 2014 imc Meßsysteme GmbH imc CANSAS Users Manual - Doc. Version 1.9 - 05.12.2014... -
Page 339: Iso8 Isolated Voltage Channels With Current And Temp. Modes
TK-connector 3 pol. IEC 584 (green) Technical data ISO8. The imc CANSAS ISO8 module comes with 8 isolated input channels, which can carry your choice of voltage, current, Pt100 or any DIN-conforming thermocouples' signals. However, it is only possible to measure with multiple thermocouples at the same time if they are all of the same type. -
Page 340: Connector Plugs Iso8
6.13.1 Connector plugs ISO8 For the pin assignment of the DSUB-15 plugs see here Connections to imc CANSAS-K-ISO8-BNC are made with BNC sockets. imc CANSAS-K-ISO8-T2 and imc CANSAS-K-ISO8-T3 come with two- or three-pin TK-sockets. © 2014 imc Meßsysteme GmbH imc CANSAS Users Manual - Doc. Version 1.9 - 05.12.2014... -
Page 341: Hci8 Isolated Voltage, Current, Resistor, Temperature
RTD (Pt100) CANSAS-HCI8, by means of its 8 isolated channels, enables the measurement of: voltage, current, resistance and temperature. Highligths: isolated measurement of low voltages, resistor, current and temperature (thermocouples and Pt100) on a high common mode level differential: max. -
Page 342: Current Measurement
Warning Do not damage the safety seal! Each high-voltage module of your CANSAS-HCI8 unit was inspected for compliance with the safety guidelines per DIN EN 61010-1 prior to delivery, and subjected to a high-voltage test. The module is sealed after having passed these final tests. -
Page 343: Thermocouple Measurement
6.14.3.2 Pt100 (RTD) - Measurement Measurement range: -200°C to +850°C -50°C to +150°C configuration for Pt100 (RTD) sensors © 2014 imc Meßsysteme GmbH imc CANSAS Users Manual - Doc. Version 1.9 - 05.12.2014... -
Page 344: Resistance Measurement
+IN is broken, the indicated value is the input range end value. 6.14.5 Bandwidth The channels' max. sampling rate is 1 kHz (1 ms). The analog bandwidth is 440 Hz (-3 dB). © 2014 imc Meßsysteme GmbH imc CANSAS Users Manual - Doc. Version 1.9 - 05.12.2014... -
Page 345: Connection
HCI8 isolated voltage, current, resistor, temperature 345 6.14.6 Connection The standard CANSAS-L-HCI8 Module ist equipped with 2x 6-pin Service connectors on the rear side. Those terminal connections are dedicated to imc personal for service issues (calibration and adjustment) contact + PT1... -
Page 346: Hvci8
Temperature measurements on high voltage battery or fuel cell terminals, e.g. Hybrid or Electric vehicles. Technical details: imc CANSAS-HVCI8 6.15.1 Voltage measurement Voltage ( Voltage up 50 mV to 60 V to 800 V © 2014 imc Meßsysteme GmbH imc CANSAS Users Manual - Doc. Version 1.9 - 05.12.2014... -
Page 347: Current Measurement Only Channels In1
Note that the physical location is important. The precision stated in the technical specs applies for installation location in a thermally stabilized environment. © 2014 imc Meßsysteme GmbH imc CANSAS Users Manual - Doc. Version 1.9 - 05.12.2014... -
Page 348: Pt100 Measurement Only Channels In1
Note There is a possibility for certain function configurations to cause an electrostatic discharge (ESD) directly at the connection terminals. This can lead to asynchronous operation (crash) of the CANSAS-L- HVCI8. This will not cause any damage. A brief interruption of the power supply causes the module to restart (correctly). - Page 349 The measurement signal is directly connected to the device via a safety banana jack. The imc CANSAS-HVCI8 module ist equipped with 2x 6-pin Service connectors on the rear side. Those terminal connections are dedicated to imc personal for service issues (calibration and adjustment)
-
Page 350: P8 Pressure
Measurement modes pressure, absolute pressure, relative The imc CANSAS pressure module is offered in two housing varieties, imc CANSAS–L–P8, imc CANSAS-K- P8 and imc CANSAS–IP65–P8, and can measure either absolute pressure or in relation to ambient pressure. Technical data P8. -
Page 351: General Remarks
The built-in barometer requires permanent contact to the surrounding air. For this purpose, all housing models come either with air-inlets or in the case of the IP65-housing, Goretex (R) membranes © 2014 imc Meßsysteme GmbH imc CANSAS Users Manual - Doc. Version 1.9 - 05.12.2014... -
Page 352: Sensors
(occasionally) be hotter than the sensor, but if the sensor gets too hot, its accuracy is diminished. In particular, the characteristic curve array for correction of the temperature-dependency is gauged for 85°C. © 2014 imc Meßsysteme GmbH imc CANSAS Users Manual - Doc. Version 1.9 - 05.12.2014... -
Page 353: Factors Affecting Pressure Measurement
You risk permanent damage by pulling the tube off self-closing nipples under high pressure. The pressure remains intact at the sensor. If the temperature rises subsequently, the sensor could be permanently damaged. Therefore, always ensure ventilation. © 2014 imc Meßsysteme GmbH imc CANSAS Users Manual - Doc. Version 1.9 - 05.12.2014... -
Page 354: Sampling Intervals, Filters And Anti-Aliasing
The frequency response only pertains to the device's electrical portion. The frequency response of the sensors themselves and of their leadwires is not accounted for. © 2014 imc Meßsysteme GmbH imc CANSAS Users Manual - Doc. Version 1.9 - 05.12.2014... -
Page 355: Operating Software
Info on the right. Progress indication dialog for read-in of sensor properties © 2014 imc Meßsysteme GmbH imc CANSAS Users Manual - Doc. Version 1.9 - 05.12.2014... - Page 356 In addition, the characteristic data of the built-in barometers are also read in. These can be viewed by selecting Pressure measurement in the tree diagram and the index card "Barometer-Info" on the right. © 2014 imc Meßsysteme GmbH imc CANSAS Users Manual - Doc. Version 1.9 - 05.12.2014...
-
Page 357: Measurement Mode
Note that absolute pressure sensors are also able to perform relative pressure measurements thanks to the built-in barometer. Relative pressure sensors, by contrast, can only measure relative pressure. Setting the measurement mode © 2014 imc Meßsysteme GmbH imc CANSAS Users Manual - Doc. Version 1.9 - 05.12.2014... -
Page 358: Balancing
0,0mbar, but may be off by a few bits. The value is only 0,0 for the purposes of the measurement channel's specified accuracy. © 2014 imc Meßsysteme GmbH imc CANSAS Users Manual - Doc. Version 1.9 - 05.12.2014... -
Page 359: Barometer
It should not be used to take the difference between an absolute pressure and a relative pressure reading. For such purposes, begin by setting relative pressure measurement as the channel's measurement mode. This will produce much better measurement results. © 2014 imc Meßsysteme GmbH imc CANSAS Users Manual - Doc. Version 1.9 - 05.12.2014... -
Page 360: Maintenance
Caution When hooking up a coupling, especially one under pressure, fluid can escape. Be sure to take precautions against any dangers this could entail. © 2014 imc Meßsysteme GmbH imc CANSAS Users Manual - Doc. Version 1.9 - 05.12.2014... -
Page 361: Pressure Terminals, Aggressive Media
Ammonium, liquid Amyl acetate Amyl alcohol Aniline Barium chloride Barium sulfide Benzene Blast furnace gas Borax Butane Butyl alcohol Calcium hydroxide Carbon dioxide, dry Carbon disulfide © 2014 imc Meßsysteme GmbH imc CANSAS Users Manual - Doc. Version 1.9 - 05.12.2014... - Page 362 Hydraulic fluid HSA-oil in water Hydraulic fluid HSB-water in oil Hydraulic fluid HSC-Glycol-water Hydraulic fluid HSD-water-free Hydraulic fluid -hydrocarbons Hydraulic oil, mineral-based Hydrogen cyanide Hydrogen peroxide 10% © 2014 imc Meßsysteme GmbH imc CANSAS Users Manual - Doc. Version 1.9 - 05.12.2014...
- Page 363 Pentachlorophenol Petrolaether Petrol Phenol solution Phosphoric acid, cold <45% Salt solution Potassium cyanide Potassium dichromate Potassium sulfate Propane gas Saline solutions Oxygen, fat free Seawater © 2014 imc Meßsysteme GmbH imc CANSAS Users Manual - Doc. Version 1.9 - 05.12.2014...
- Page 364 All specifications on the material are intended strictly for orientation purposes. Every application is subjected to unique environmental influences which must be taken into account when selecting materials. © 2014 imc Meßsysteme GmbH imc CANSAS Users Manual - Doc. Version 1.9 - 05.12.2014...
-
Page 365: Pin Configuration Of Cansas-P8-Ip65
4-pin Phoenix 3-pin Amphenol or Supply 3-pin Amphenol 3-pin Amphenol Terminations: external 4-pin Amphenol plug (120 between PIN1 and PIN2) Reset: as with all IP65 P8 © 2014 imc Meßsysteme GmbH imc CANSAS Users Manual - Doc. Version 1.9 - 05.12.2014... -
Page 366: Grounding
366 Properties of the Modules 6.16.13 Grounding imc CANSAS P8 should be grounded. Its housing is metal and conducting, which means that grounding is advisable for safety reasons. But grounding also makes sense for measurement-technical reasons, but isn't totally necessary when using plastic tubes. Lack of grounding can cause noisy measurement values, however. -
Page 367: Pwm8 Pulse Width Modulation Outputs
The frequency is fix and can be be set individually for each channel: Each 4-channel group in a connector is isolated from the other connector's channels and from the power supply and CAN-bus. © 2014 imc Meßsysteme GmbH imc CANSAS Users Manual - Doc. Version 1.9 - 05.12.2014... -
Page 368: Scaling
Alternative a factor of 1 causes a range of 0 to 65535 (V) : CAN message PWM output 65535 100 % 32767 50 % 6554 10 % © 2014 imc Meßsysteme GmbH imc CANSAS Users Manual - Doc. Version 1.9 - 05.12.2014... -
Page 369: Delay Time
Pin configuration of imc CANSAS-L-PWM8-V with ITT VEAM terminals . The imc CANSAS-K-PWM8-BNC is equipped with BNC connectors. Outputs configured as Open drain with external voltage supply © 2014 imc Meßsysteme GmbH imc CANSAS Users Manual - Doc. Version 1.9 - 05.12.2014... - Page 370 370 Properties of the Modules Outputs configured as Open drain with internal voltage supply Outputs configured as TTL © 2014 imc Meßsysteme GmbH imc CANSAS Users Manual - Doc. Version 1.9 - 05.12.2014...
-
Page 371: Sc16, Sci8, Sci16 Voltage, Current And Temp. Modes
SCI8 and SCI16 The imc CANSAS modules SCI8, SCI16 and SC16 have 8 or 16 input channels respectively. The modules belonging to the SCIxx group (SCI8, SCI16) have extended isolation properties, with channel-to-channel isolation and common mode voltage of up to 60 V (with a test voltage of 300 V). The SC16's isolation voltage values are limited to 40 V (Common mode voltage and max. - Page 372 To avoid crosstalk, which is typical for scanner systems, it is recommended to short circuit the inputs of the channel, which are not in use. © 2014 imc Meßsysteme GmbH imc CANSAS Users Manual - Doc. Version 1.9 - 05.12.2014...
-
Page 373: Voltage Measurement
For this reason imc offers a cable specially constructed with this connection exclusively for current measurement. © 2014 imc Meßsysteme GmbH imc CANSAS Users Manual - Doc. Version 1.9 - 05.12.2014... -
Page 374: Temperature Measurement
Pt100 sensors are fed from the module and have no set voltage reference in the sense of an external common mode voltage. It is also not permissible to set one up, for instance by grounding one of the four connection cables: © 2014 imc Meßsysteme GmbH imc CANSAS Users Manual - Doc. Version 1.9 - 05.12.2014... -
Page 375: Pt100 (Rtd) - Measurement (Type: Lemo)
For Pt100, note that in a 4-wire measurement a large variety of combinations of broken and shorted leads are possible. Many of these combinations, especially ones with a broken Sense lead, will not return the default value stated. © 2014 imc Meßsysteme GmbH imc CANSAS Users Manual - Doc. Version 1.9 - 05.12.2014... -
Page 376: Deactivate Probe-Breakage Recognition
Message 1 is sent first and then Message 2 (delay > 1 ms). The effect of that change takes up to several 100 ms. © 2014 imc Meßsysteme GmbH imc CANSAS Users Manual - Doc. Version 1.9 - 05.12.2014... -
Page 377: External Sensor Supply (Optional)
The supply voltage is set on a module-by-module basis and does not apply to all inputs. The settings are made via software interface. Make sure that the sensor supply is not set too high before connecting a sensor. Otherwise, both the sensor and the imc CANSAS module could suffer damage. -
Page 378: Sl Variety Lemo
Maximum sampling rate, recommended for temperature measurement (optimum 50 Hz noise suppression): SCI8: >= 500 ms (2 Hz) SC16, SCI16: >= 1s (1 Hz) © 2014 imc Meßsysteme GmbH imc CANSAS Users Manual - Doc. Version 1.9 - 05.12.2014... -
Page 379: Isolation - Concept
© 2014 imc Meßsysteme GmbH imc CANSAS Users Manual - Doc. Version 1.9 - 05.12.2014... -
Page 380: Isolation Of The Voltage Supply Module
220 V!) to be coupled in via the input circuitry. The HF-circuit is closed by the signal source, which is either directly galvanically grounded or coupled to ground via leakage capacitances. © 2014 imc Meßsysteme GmbH imc CANSAS Users Manual - Doc. Version 1.9 - 05.12.2014... -
Page 381: Filter
"No filter", this averaging replaces the current value from the previous filter stage. With very slow sampling rates, the value is also generated by taking averages. © 2014 imc Meßsysteme GmbH imc CANSAS Users Manual - Doc. Version 1.9 - 05.12.2014... - Page 382 Nevertheless, you obtain correct data at the desired rate over the CAN-Bus. © 2014 imc Meßsysteme GmbH imc CANSAS Users Manual - Doc. Version 1.9 - 05.12.2014...
-
Page 383: Sc16 Filter
500 ms 26 Hz 13 Hz 6 Hz 6 Hz 10 s 6 Hz 20 s 6 Hz 30 s 6 Hz 60 s 6 Hz © 2014 imc Meßsysteme GmbH imc CANSAS Users Manual - Doc. Version 1.9 - 05.12.2014... -
Page 384: Sci16 Filter
500 ms 28 Hz 14 Hz 7 Hz 7 Hz 10 s 7 Hz 20 s 7 Hz 30 s 7 Hz 60 s 7 Hz © 2014 imc Meßsysteme GmbH imc CANSAS Users Manual - Doc. Version 1.9 - 05.12.2014... -
Page 385: Sci8 Filter
500 ms 14 Hz 7 Hz 3 Hz 3 Hz 10 s 3 Hz 20 s 3 Hz 30 s 3 Hz 60 s 3 Hz © 2014 imc Meßsysteme GmbH imc CANSAS Users Manual - Doc. Version 1.9 - 05.12.2014... -
Page 386: Delay
Thus the most current (the newest) measured value in the message comes from Channel 4. Conversely, the measured value from Channel 1 is the most delayed one. © 2014 imc Meßsysteme GmbH imc CANSAS Users Manual - Doc. Version 1.9 - 05.12.2014... -
Page 387: Sent: Gateway From Sent To The Can-Bus
SENT stands for Single Edge Nibble Transmission for Automotive Applications. Highlights: The imc CANSAS-SENT module can be used with any sensor having a SENT output. Sensor having a SENT output are used in the automotive industry, e.g. as a Hall sensor, pressure sensor, steer angle sensor, throttle valve position sensor or air mass sensor. -
Page 388: Operating Modes, Isolation
The chassis itself is grounded. The Minus-pole of the module’s power supply is connected with the chassis. The imc CANSAS-SENT module has 8 inputs. One SENT-sensor can be connected at each input. Each individual input is equipped with its own circuit. All inputs are mutually isolated, and each has its own (and thus consequently isolated) power supply voltage. -
Page 389: Standard Operation
The SENT sensor is supplied with power by the CANSAS-SENT module. The CANSAS-SENT module contains the input circuit defined in the standard SAE J2716. The sensor is connected with the imc CANSAS module via three lines, GND (ground), SIG (sensor signal output) and V (supply voltage). -
Page 390: Interference-Free Signal Tapping
6.19.1.2 Interference-free signal tapping A SENT sensor to be used for measuring with imc CANSAS-SENT may already be installed and wired up. In that case, the SENT sensor is connected with another device which has the input circuitry conformant to SAE J2716 and which already supplies the SENT sensor. -
Page 391: Parameterizing The Sent Inputs
On: The Status channel is activated. A corresponding channel (which can not be parameterized) is created. The Status channel’s values are unsigned and are 9 bits wide. © 2014 imc Meßsysteme GmbH imc CANSAS Users Manual - Doc. Version 1.9 - 05.12.2014... - Page 392 If a CRC error occurs in the evaluation of the serial protocol transferred in the SENT messages, the serial protocol affected is rejected and not transmitted on the CAN-bus. © 2014 imc Meßsysteme GmbH imc CANSAS Users Manual - Doc. Version 1.9 - 05.12.2014...
- Page 393 Interference-free signal tapping Off, On: see the description of operating modes above Attention! Making the wrong selection can lead to damage to the connected devices! © 2014 imc Meßsysteme GmbH imc CANSAS Users Manual - Doc. Version 1.9 - 05.12.2014...
-
Page 394: Parameterizing The Fast-Channels
7. See the examples further below. Number of bits The number in the SENT-message is this many bits wide. With CANSAS, the amount can be between 1 and 16 (theoretically up to 24). See the examples further below. -
Page 395: Fast-Channel Examples: Nibble Order, Start Bit Position
Channel 2 Data [9] Channel 2 MSN [1] Channel 2 Data [8] Channel 2 MSN [0] The example above also applies for an alternative from A.5 Pressure. © 2014 imc Meßsysteme GmbH imc CANSAS Users Manual - Doc. Version 1.9 - 05.12.2014... - Page 396 Channel 2 Data [6] Channel 2 MSN [2] Channel 2 MSN Channel 2 Data [5] Channel 2 MSN [1] Channel 2 Data [4] Channel 2 MSN [0] © 2014 imc Meßsysteme GmbH imc CANSAS Users Manual - Doc. Version 1.9 - 05.12.2014...
- Page 397 Channel 2 Data [8] Channel 2 MSN [2] Channel 2 MSN Channel 2 Data [7] Channel 2 MSN [1] Channel 2 Data [6] Channel 2 MSN [0] © 2014 imc Meßsysteme GmbH imc CANSAS Users Manual - Doc. Version 1.9 - 05.12.2014...
- Page 398 Inverted Copy MSN [1] Inverted Copy Data [0] Inverted Copy MSN [0] The example above is also applicable for A.4 Single Sensors and an alternative from A.5 Pressure. © 2014 imc Meßsysteme GmbH imc CANSAS Users Manual - Doc. Version 1.9 - 05.12.2014...
- Page 399 Channel 2 MSN [2] Channel 2 MSN Channel 2 Data [5] Channel 2 MSN [1] Channel 2 Data [4] Channel 2 MSN [0] … … … … © 2014 imc Meßsysteme GmbH imc CANSAS Users Manual - Doc. Version 1.9 - 05.12.2014...
- Page 400 Channel 2 LSN, xxx [3] Data 4 Channel 2 LSN, xxx [2] Channel 2 LSN, Channel 2 LSN, xxx [1] Channel 2 LSN, xxx [0] … … … … © 2014 imc Meßsysteme GmbH imc CANSAS Users Manual - Doc. Version 1.9 - 05.12.2014...
- Page 401 Channel 2 Data [0] Channel 2 LSN, xxx [2] Channel 2 LSN, Channel 2 LSN, xxx [1] Channel 2 LSN, xxx [0] … … … … © 2014 imc Meßsysteme GmbH imc CANSAS Users Manual - Doc. Version 1.9 - 05.12.2014...
- Page 402 Channel 2 MSN, xxx [3] Data 4 Channel 2 MSN, xxx [2] Channel 2 MSN, Channel 2 MSN, xxx [1] Channel 2 MSN, xxx [0] … … … … © 2014 imc Meßsysteme GmbH imc CANSAS Users Manual - Doc. Version 1.9 - 05.12.2014...
-
Page 403: Scaling The Fast-Channels
In this way, the integer value from the SENT message is correctly interpreted as physical units. Note that on the Scaling page the designations X1, Y1, … are reversed from the order in the other imc CANSAS modules in conformity to the nomenclature in SAE J2716, according to which, X1 and X2 designate two physical values and Y1, Y2 represent the corresponding integer values from the SENT message. -
Page 404: Format The Can Messages
404 Properties of the Modules The following picture shows the scaling in the imc CANSAS GUI: 6.19.3 Format the CAN messages For each SENT input, there is a CAN message containing all FAST channels. 1..4 FAST-channels can be configured. The FAST channels are obtained from the SENT message’s 6 data nibbles. The CAN message is as large as all the extracted channels strung together. -
Page 405: Timing Of The Can Message
Example of demands on CAN capacities: 2 sensors are to be operated at a CANSAS-SENT module. Each delivers one SENT message every 3ms. Each sensor has a (14-bit) pressure channel and a (10-bit) temperature. Also, the Serial Protocol is to be evaluated. -
Page 406: Overloading The Can-Bus
CAN-IDs (and correspondingly lower priority) may not succeed in sending their messages. That also occurs in the PC which configures the CANSAS. For instance, if the Master and Slave IDs are set to 2032 and 2033, respectively, they have bottom priority. So the PC itself is no longer able to communicate with the module via the CAN-bus. -
Page 407: Pin Configuration
SIG Signal Input 7 GND Input 3 GND Input 7 V Supply (5 V) Input 4 V Supply (5 V) Input 8 Not used Not used © 2014 imc Meßsysteme GmbH imc CANSAS Users Manual - Doc. Version 1.9 - 05.12.2014... -
Page 408: Uni8: Universal
*the thermocouple has no low-impedance connection to the device ground. Technical data UNI8. CANSAS-L-UNI8 ITT-VEAM Signalseite CANSAS-L-UNI8 ITT-VEAM CAN-Anschluss © 2014 imc Meßsysteme GmbH imc CANSAS Users Manual - Doc. Version 1.9 - 05.12.2014... -
Page 409: Voltage Measurement
For instance, if the potential to ground is +10 V at +IN and +8 V at -IN, the common mode voltage is +9 V. © 2014 imc Meßsysteme GmbH imc CANSAS Users Manual - Doc. Version 1.9 - 05.12.2014... -
Page 410: Voltage Source With Ground Reference
If -in(B) and -VB(D) are connected, then in practice a single-end measurement is performed. This is no problem if there was no ground reference beforehand. © 2014 imc Meßsysteme GmbH imc CANSAS Users Manual - Doc. Version 1.9 - 05.12.2014... -
Page 411: Voltage Source At A Different Fixed Potential
8.4 V in the 50 V input range and 38.4 V in the 20 V input range. For notes on triggering the adjustment, refer to the section on bridge measurement © 2014 imc Meßsysteme GmbH imc CANSAS Users Manual - Doc. Version 1.9 - 05.12.2014... -
Page 412: Bridge Measurement
The Sense lead makes it possible to infer the measurement bridge's true supply voltage, in order to obtain a very exact measurement value in mV/V. © 2014 imc Meßsysteme GmbH imc CANSAS Users Manual - Doc. Version 1.9 - 05.12.2014... -
Page 413: Half Bridge
No direct current measurement with the standard included connector ACC/DSUB-UNI2 is possible, but only with the optional ACC/DSUB-I2 connector with a 50 shunt resistor (differential measurement). © 2014 imc Meßsysteme GmbH imc CANSAS Users Manual - Doc. Version 1.9 - 05.12.2014... -
Page 414: Sense And Initial Unbalance
(VB = 2.5 V) [mV/V] (VB = 5 V) [mV/V] (VB = 10 V) [mV/V] ±1000 ±500 ±200 ±100 ±50 ±20 ±10 ±5 ±2 ±1 ±0.5 © 2014 imc Meßsysteme GmbH imc CANSAS Users Manual - Doc. Version 1.9 - 05.12.2014... -
Page 415: Balancing And Shunt Calibration
Otherwise, if unconnected channels are in quarter- or half-bridge mode, interference may occur in a shunt calibration! If you use an imc measurement device to measure, see application notes in chapter Field Busses of the imc DEVICES manual. There are examples how to use imc DEVICES- and imc CANSAS-software step by step. -
Page 416: Current Measurement
In the settings interface, set the measurement mode to Current. Note that the jumper between +IN(A) and +I; ¼Bridge(G) should be connected right inside the connector. © 2014 imc Meßsysteme GmbH imc CANSAS Users Manual - Doc. Version 1.9 - 05.12.2014... -
Page 417: 2-Wire For Sensors With A Current Signal And Variable Supply
For the former UNI8: If the amplifier is equipped with a 350 quarter bridge completion, ground referenced current measurement is not possible! Thus this operation is not possible, too. © 2014 imc Meßsysteme GmbH imc CANSAS Users Manual - Doc. Version 1.9 - 05.12.2014... -
Page 418: Temperature Measurement
Pt100 inside of the connector. However, if the temperature processes in CANSAS' environment are not stable, a Pt100 in the connector is absolutely necessary. This is certainly the case if there is a draught, if the module is used on-board a vehicle, if cables with terminals of different temperature are connected, if the ambient temperature is fluctuating or, when in doubt, whenever reliable and precise measurement is required. - Page 419 This is ensured by attaching the thermocouple to a grounded metal body, for instance. The thermocouple is connected for differential measurement. Since the unit is grounded itself, the necessary ground reference exists. In the CANSAS operating software, select the measurement mode "Thermocouple (mounted with ground reference)". Thermocouple measurement with ground...
- Page 420 In this case, the amplifier must provide the necessary ground potential. Thermocouple measurement without ground reference In the CANSAS operating software, select the measurement mode "Thermocouple (mounted without ground reference)". In this measurement mode, the UNI8 unit itself provides the ground reference by having Terminals B and D connected internally.
-
Page 421: Pt100/ Rtd Measurement
The cable resistance that has to be compensated (simple line) is not supposed to be more than 7 (ca. 140 m cable length with 0.35 mm consider overview of cable resistance as function © 2014 imc Meßsysteme GmbH imc CANSAS Users Manual - Doc. Version 1.9 - 05.12.2014... -
Page 422: Probe-Breakage Recognition
By using the Sense-leads, the voltage at the resistor itself can be determined precisely. The voltage drop along the conducting cable thus does not cause any measurement error. © 2014 imc Meßsysteme GmbH imc CANSAS Users Manual - Doc. Version 1.9 - 05.12.2014... -
Page 423: Sensors Requiring Adjustment Of Their Supply
Therefore the voltage supply must be set and configured using the software. Then the sensor can be connected. Otherwise the sensor and the CANSAS-module could be damaged. There is a 5 V pin at the imc connector. That voltage is not available for the CANSAS-modules, only for the imc CRONOS-series! The technical data of the sensor supply is listed in the data sheet of the CANSAS-UNI8. -
Page 424: Bandwidth
The analog bandwidth (without digital low-pass filtering) is 200 Hz 6.20.10 Connection The analog channels are equipped with DSUB-15 plugs (CANSAS-x-UNI8-D), ITT-VEAM-plugs (CANSAS-x- UNI8) or LEMO-plugs (CANSAS-x-UNI8-L)ITT-VEAM-plugs (C1) or LEMO-plugs (C1-1-LEMOSA). In the connection diagrams, the numbering for LEMO and custom ITT VEAM connectors appear alongside... -
Page 425: Sampling Intervals, Filters And Anti-Aliasing
Critical damping, 4th order, cutoff frequency 0.1 Hz 2 s to 60 s Arithmet. mean over the duration of the sampling interval of values sampled at © 2014 imc Meßsysteme GmbH imc CANSAS Users Manual - Doc. Version 1.9 - 05.12.2014... - Page 426 If you use a sampling interval other than 1 ms and the default filter is not suited to your measurement requirements, simply select 1 ms as the sampling interval and then arrange the appropriate low-pass filtering or averaging by means of a virtual channel. © 2014 imc Meßsysteme GmbH imc CANSAS Users Manual - Doc. Version 1.9 - 05.12.2014...
-
Page 427: Recognition Of Sensor By Means Of Wire Jumpers
However, only a thermocouple of type K can be unambiguously recognized in this way. This option must be set globally in the CANSAS software. Go to the menu item Extras ->... -
Page 428: Connector Plugs
B (+IN and -IN) are enclosed in the shielding Caution The CANSAS-module must be grounded. Its frame is metal and conducting. The ground connection passes through a bolt on the back plane. Leaving aside safety considerations, grounding is usually necessary for measurement-technical reasons. -
Page 429: Pin Configuration Of Round Plugs Lemosa
RTD current source quarter bridge completion, Sense-lead for RTD 3-wire connector This pin configuration applies also to CANSAS-SL-UNI8-L, see modules with LEMO plugs 6.20.13.3 Pin configuration of round plugs ZF LEMO p o s. sen so r su p p ly sh ield to d i g i tal G N D n eg . -
Page 430: Assembly Instructions For Itt Veam With Pt100 Inside Of Connector
SensePT PT100 junction plate for ITT VEAM Warning Be certain that the Pt100's contacts aren't shorted. 100 must be measured between Pins G and D! © 2014 imc Meßsysteme GmbH imc CANSAS Users Manual - Doc. Version 1.9 - 05.12.2014... -
Page 431: Connection Using Crimps
Pins G and D! 6.20.14.3 Recommended tools VEAM contact inserter T98143 For crimping: Crimping pliers by DML M22520/1-01 Crimping adapter M22520/1-02 © 2014 imc Meßsysteme GmbH imc CANSAS Users Manual - Doc. Version 1.9 - 05.12.2014... -
Page 432: Uni8/Dcb8-Protect
The sensor supply is limited to a maximum of 15 V Shunt calibration of bridges is no longer accurate. Pt100 measurement in 3-wire mode is typically subject to an offset of 1.1 K © 2014 imc Meßsysteme GmbH imc CANSAS Users Manual - Doc. Version 1.9 - 05.12.2014... -
Page 433: Μ-Cansas-V1
+SU PPLY +SU PPLY +IN_60V +IN_60V +IN_1V +IN_1V -SUPP LY -SUPPLY Connection diagram for voltage up to ± 1V Connection diagram for voltage > ± 1V © 2014 imc Meßsysteme GmbH imc CANSAS Users Manual - Doc. Version 1.9 - 05.12.2014... -
Page 434: Voltage Measurement: With Zero-Adjusting
It is also possible to perform a balancing procedure at a specific point in time as desired. © 2014 imc Meßsysteme GmbH imc CANSAS Users Manual - Doc. Version 1.9 - 05.12.2014... -
Page 435: Balance Upon Power-Up
Next assign this message to a channel. Since only one data byte is available, the length of this channel can have a maximum of 8 bits. All other settings do not play any role here. © 2014 imc Meßsysteme GmbH imc CANSAS Users Manual - Doc. Version 1.9 - 05.12.2014... - Page 436 2. Online FAMOS sends a message if the virtual bit Bit03 is set. In the data byte, the value 01Hex is transmitted. Balancing message in Online FAMOS © 2014 imc Meßsysteme GmbH imc CANSAS Users Manual - Doc. Version 1.9 - 05.12.2014...
-
Page 437: Voltage Balancing Via Measurement Window
If four single-channel imc µ-CANSAS modules are connected via a imc µ-CANSAS-HUB4, note the following: if the values from four imc µ-CANSAS modules are to fit into one message, then a channel’s length is limited to 16 bits. Since a message can transport a maximum of 8 data bytes, this amounts to only 2 bytes per channel. -
Page 438: Sampling Interval, Filter
438 Properties of the Modules 6.21.5 Sampling interval, filter For imc µ-CANSAS-V1, sampling rates can be set in steps of 1, 2, and 5. The available sampling interval for the imc µ-CANSAS-V1 extends from 60s to 0,5 ms. µ-CANSAS-V1 Filter settings Off: Output of the last value sampled at the output clock rate set Mean value: The output value is the mean value over (output clock rate [ms] / 500µs) values. -
Page 439: Μ-Cansas-V1 Connector
1x 8-pin Phoenix 1x 6-pin Autosport µ-CAN-V1-L 1x 8-pin Phoenix 2x 5-pin LEMO 0B Sensor connector with Autosport AS plug see here . Cables see here © 2014 imc Meßsysteme GmbH imc CANSAS Users Manual - Doc. Version 1.9 - 05.12.2014... -
Page 440: Μ-Cansas-T1
, with their characteristic curves are supported. In contrast to the normal imc CANSAS modules the modules imc µ- CANSAS-T1 and imc µ-CANSAS-T4 are using the standard IEC584-1 / ITS90 to convert the voltage. -
Page 441: Message Mapping
6.22.3 Sampling interval, filter For imc µ-CANSAS-T1, sampling rates can be set in steps of 1, 2, and 5. The available sampling interval for the imc µ-CANSAS-B1 extends from 60s to 0,5 ms. With imc µ-CANSAS-T1, the following filter is set: Mean value: The output value is the mean value over (output clock rate [ms] / 500µs) values. -
Page 442: Μ-Cansas-B1
µ-CANSAS-B1 is particularly designed for use in extremely warm environments. µ-CANSAS-B1 The imc µ-CANSAS-B1’s bridge channel has a DC voltage source (5V) to supply of the measurement bridge. Note Synchronization is performed exclusively as Slave according to the CAN1-protocol and is provided under the node Special functions. - Page 443 µ-CANSAS-B1 443 µ-CANSAS-B1: Bridge circuit When using strain gauges, all common positioning arangements are available options for the module: µ-CANSAS-B1: Strain gauges © 2014 imc Meßsysteme GmbH imc CANSAS Users Manual - Doc. Version 1.9 - 05.12.2014...
-
Page 444: Full Bridge
444 Properties of the Modules 6.23.2 Full bridge µ-CANSAS-B1: Full bridge The full bridge consists of four resistor arms. All 4 of the bridge’s resistors are outside of the imc CANSAS- module. Input ranges: connected at +IN_1V and -IN Voltage: ±200 mV/V ... ±0,5 mV/V ©... -
Page 445: Half Bridge
The other half must be completed using a (highly constant) symmetric resistant conductors. With the imc µ-CANSAS bridge channel, this half-bridge completion is already available as a pre-configured internal circuit. It has an external contact “HB” at the terminal connector and only needs to be connected with the input pin -IN by means of a wire jumper. -
Page 446: Bridge Balancing
446 Properties of the Modules 6.23.4 Bridge balancing µ-CANSAS-B1: Balancing dialog With imc µ-CANSAS-B1, there are a variety of ways to perform balancing: Bridge balancing upon power-up automatically balances out the zero offset as soon as the module is activated. -
Page 447: Bridge Balancing Upon Power-Up
8 bits. All other settings do not play any role here. Balancing message in the CAN Assistenten © 2014 imc Meßsysteme GmbH imc CANSAS Users Manual - Doc. Version 1.9 - 05.12.2014... -
Page 448: Balancing In The Measurement Window
In the measurement window, the balancing is performed by selecting the channel and touching the Balance button. Alternatively, the Channel menu offers the command Perform balancing for selections. µ-CANSAS-B1: voltage balancing via measurement window © 2014 imc Meßsysteme GmbH imc CANSAS Users Manual - Doc. Version 1.9 - 05.12.2014... -
Page 449: Message Mapping
If four single-channel imc µ-CANSAS modules are connected via a imc µ-CANSAS-HUB4, note the following: if the values from four imc µ-CANSAS modules are to fit into one message, then a channel’s length is limited to 16 bits. Since a message can transport a maximum of 8 data bytes, this amounts to only 2 bytes per channel. -
Page 450: Sampling Interval, Filter
450 Properties of the Modules 6.23.6 Sampling interval, filter For imc µ-CANSAS-B1, sampling rates can be set in steps of 1, 2, and 5. The available sampling interval for the imc µ-CANSAS-B1 extends from 60s to 0,5 ms. µ-CANSAS-B1 Filter settings Off: Output of the last value sampled at the output clock rate set Mean value: The output value is the mean value over (output clock rate [ms] / 500µs) values. -
Page 451: Μ-Cansas-B1 Connector
1x 8-pin Phoenix 1x 6-pin Autosport µ-CAN-B1-L 1x 8-pin Phoenix 2x 5-pin LEMO 0B Sensor connector with Autosport AS plug see here . Cables see here © 2014 imc Meßsysteme GmbH imc CANSAS Users Manual - Doc. Version 1.9 - 05.12.2014... -
Page 452: Μ-Cansas-V4
Make note of the channels’ message mapping. The channels can be sent together in one message in the customary manner or divided among multiple messages as desired. With each imc µ-CANSAS channel having a message length of 16 bits, all 4 channels can be sent by the HUB in one message. If a message length higher than 16 Bit (24 or 32 Bit) is set, then the 4 channels need to be distributed over 2 messages. -
Page 453: Μ-Cansas-T4
Make note of the channels’ message mapping. The channels can be sent together in one message in the customary manner or divided among multiple messages as desired. With each imc µ-CANSAS channel having a message length of 16 bits, all 4 channels can be sent by the HUB in one message. If a message length higher than 16 Bit (24 or 32 Bit) is set, then the 4 channels need to be distributed over 2 messages. -
Page 454: Μ-Cansas-B4
Make note of the channels’ message mapping. The channels can be sent together in one message in the customary manner or divided among multiple messages as desired. With each imc µ-CANSAS channel having a message length of 16 bits, all 4 channels can be sent by the HUB in one message. If a message length higher than 16 Bit (24 or 32 Bit) is set, then the 4 channels need to be distributed over 2 messages. -
Page 455: Μ-Cansas-Hub4
The channels can be sent together in one message in the customary manner or divided among multiple messages as desired. With each imc µ-CANSAS channel having a message length of 16 bits, all 4 channels can be sent by the HUB in one message. If a message length higher than 16 Bit (24 or 32 Bit) is set, then the 4 channels need to be distributed over 2 messages. -
Page 456: Synchronization
Synchronization of the imc µ-CANSAS-HUB4 modules is performed exclusively as Slave according to the CAN1-protocol. Within the HUBs, the imc µ-CANSAS modules connected are synchronized. If the imc µ-CANSAS-HUB4 is synchronized to CAN1-Slave, then the connected imc µ-CANSAS modules are also synchronized to the other synchronized CAN-Bus participants. -
Page 457: General Technical Specs
4W (unless otherwise indicated) Unless otherwise indicated, the technical specs given are valid for the following ambient conditions: temperature 23°C air pressure 1013 mbar relative humidity 40% © 2014 imc Meßsysteme GmbH imc CANSAS Users Manual - Doc. Version 1.9 - 05.12.2014... -
Page 458: General Technical Specs
µ-CANSAS Unless otherwise indicated, the technical specs given are valid for the following ambient conditions: temperature 23°C air pressure 1013 mbar relative humidity 40% © 2014 imc Meßsysteme GmbH imc CANSAS Users Manual - Doc. Version 1.9 - 05.12.2014... - Page 459 Power consumption: < 1W (unless otherwise indicated) Unless otherwise indicated, the specifications apply under the following ambient conditions: temperature 23°C air pressure 1013 mbar relative humidity 40% © 2014 imc Meßsysteme GmbH imc CANSAS Users Manual - Doc. Version 1.9 - 05.12.2014...
-
Page 460: Bridge2
Cable length (max.) 28 m or max. 3% of for 120 bridge with Cu-cable bridge impedance 14 mm , 130 m . 3. /m: max © 2014 imc Meßsysteme GmbH imc CANSAS Users Manual - Doc. Version 1.9 - 05.12.2014... - Page 461 35 x 111 x 90 mm CANSAS-BRIDGE2 41 x 128 x 145 mm CANSAS-K-BRIDGE2 Weight 300 g / 900 g for the K variant Module description BRIDGE2 © 2014 imc Meßsysteme GmbH imc CANSAS Users Manual - Doc. Version 1.9 - 05.12.2014...
-
Page 462: Canser-Gps
Elevation (above sea level) 2023 Real; in m Satellite count 2023 Integer; number of satellites used Status 2023 1: valid; 0: maintenance Module description CANSER-GPS © 2014 imc Meßsysteme GmbH imc CANSAS Users Manual - Doc. Version 1.9 - 05.12.2014... -
Page 463: C12
Input current 4 nA (typ.) (max.) after transients static 40 nA average dynamic input current dynamic 100 nA Gain uncertainty: 23°C © 2014 imc Meßsysteme GmbH imc CANSAS Users Manual - Doc. Version 1.9 - 05.12.2014... - Page 464 35 x 111 x 90 mm CANSAS-C12 75 x 111 x 145 mm CANSAS-L-C12-T 40 x 128 x 145 mm CANSAS-K-C12 (8 TE Cassette) Weight 300 g Module description C12 © 2014 imc Meßsysteme GmbH imc CANSAS Users Manual - Doc. Version 1.9 - 05.12.2014...
- Page 465 60 V nominal; testing voltage:300 V(10 s) analog input no isolation analog reference ground:CHASSIS Overvoltage protection 80 V permanent channel to chassis 250 V <1 ms © 2014 imc Meßsysteme GmbH imc CANSAS Users Manual - Doc. Version 1.9 - 05.12.2014...
- Page 466 Noise 51 nV range ±5 mV sampling rate 100 Hz = 50 Ω 305 nV source pkpk Bandwidth 0 Hz to 20 Hz -3 dB © 2014 imc Meßsysteme GmbH imc CANSAS Users Manual - Doc. Version 1.9 - 05.12.2014...
- Page 467 CANSAS-SL-C8-L 38 x 112.5 x 152 mm CANSAS-SL-C8-D 78 x 112.5 x 152 mm CANSAS-SL-C8-L-SUPPLY 58 x 112.5 x 152 mm CANSAS-SL-C8-D-SUPPLY Module description C8 © 2014 imc Meßsysteme GmbH imc CANSAS Users Manual - Doc. Version 1.9 - 05.12.2014...
-
Page 468: Ci8
6 with max. –250 V automotive load dump =30 , t =300 µs, t <60 µs ISO 7637, Testimpuls 6 © 2014 imc Meßsysteme GmbH imc CANSAS Users Manual - Doc. Version 1.9 - 05.12.2014... - Page 469 Gain uncertainty <0.07% <0.15% with shunt-plug Offset uncertainty 15 µV range 100 mV 4LSB range >100 mV Offset drift 2.5 ppm/K over full temperature range © 2014 imc Meßsysteme GmbH imc CANSAS Users Manual - Doc. Version 1.9 - 05.12.2014...
- Page 470 -25°C|; ambient temp. T Sensor feed (PT100) 250 µA Resistance measurement Measurement range 0 Ω to 150 Ω, 250 Ω 0 Ω to 500 Ω, 1 kΩ © 2014 imc Meßsysteme GmbH imc CANSAS Users Manual - Doc. Version 1.9 - 05.12.2014...
- Page 471 <1% (max.) 15 V Max. capacitive load >4000 µF 2,5 V, 10 V, 15 V >1000 µF 12 V, 15 V >400 µF 24 V © 2014 imc Meßsysteme GmbH imc CANSAS Users Manual - Doc. Version 1.9 - 05.12.2014...
- Page 472 4 channels per plug 2x 10-pin LEMO (HGA.1B.310) CAN (in / out), power supply (alternatively) 1x 6-pin LEMO (HGA.1B.306) DC power supply Module description CI8 © 2014 imc Meßsysteme GmbH imc CANSAS Users Manual - Doc. Version 1.9 - 05.12.2014...
-
Page 473: Dac8
2x DSUB-15 / 4 channels CANSAS-SL-DAC8-D 2x DSUB-9 CAN (in/out), power supply (alternatively) 1x 6-pin LEMO (HGA.1B.306) DC supply for all SL models Module description DAC8 © 2014 imc Meßsysteme GmbH imc CANSAS Users Manual - Doc. Version 1.9 - 05.12.2014... -
Page 474: Dcb8
±10 V to ±50mV 92 dB >84 dB ±20 mV to ±5mV 120 dB >100 dB 0.4 µV bandwidth 0.1Hz to 190 Hz (RTI) Noise (RTI) 14 nV © 2014 imc Meßsysteme GmbH imc CANSAS Users Manual - Doc. Version 1.9 - 05.12.2014... - Page 475 350 completion Cable resistance for bridges <6 10 V excitation 120 (without return line) <12 5 V excitation 120 <24 2,5 V excitation 120 © 2014 imc Meßsysteme GmbH imc CANSAS Users Manual - Doc. Version 1.9 - 05.12.2014...
- Page 476 The precision of the bridge measurement is not affected by actual precision of the bridge supply. The current value of the bridge supply is continuously monitored and compensated. © 2014 imc Meßsysteme GmbH imc CANSAS Users Manual - Doc. Version 1.9 - 05.12.2014...
- Page 477 CAN (in / out), supply (alternatively) 2x 10-pin LEMO (HGA.1B.310) CAN (in / out), supply (alternatively) 1x 6-pin LEMO (HGA.1B.306) power supply Module description DCB8 © 2014 imc Meßsysteme GmbH imc CANSAS Users Manual - Doc. Version 1.9 - 05.12.2014...
-
Page 478: Di16
75 x 111 x 145 mm CANSAS-L-DI16-Ph 152 x 111 x 145 mm CANSAS-L-DI16-V 38 x 112.5 x 152 mm CANSAS-SL-DI16-D Weight 300 g Module description DI16 © 2014 imc Meßsysteme GmbH imc CANSAS Users Manual - Doc. Version 1.9 - 05.12.2014... -
Page 479: Do16
PHOENIX (MC 1,5/4STF-3,81) Supply Connection terminals at SL 2x DSUB-15 outputs 2x 10-pin LEMO (HGA.1B.310) CAN (in/out), supply (alternatively) 1x 6-pin LEMO (HGA.1B.306) Supply Module description DO16 © 2014 imc Meßsysteme GmbH imc CANSAS Users Manual - Doc. Version 1.9 - 05.12.2014... -
Page 480: Do8R, Do16R
: DO8R 4x DSUB-15 -L-DO16R 8x ITT VEAM -L-DO8R-V PHOENIX terminal block -L-DO8R-Ph, K-DO16R 2x DSUB-9 CAN (in/out) PHOENIX (MC 1,5/4STF-3,81) supply Module description DO8R, DO16R © 2014 imc Meßsysteme GmbH imc CANSAS Users Manual - Doc. Version 1.9 - 05.12.2014... -
Page 481: Ign
-10 V to +10V ignition signal -100° to +100° 0 V to 10 V RPM 0 to 10000 RPM Load current ±10 mA / channel (max.) © 2014 imc Meßsysteme GmbH imc CANSAS Users Manual - Doc. Version 1.9 - 05.12.2014... - Page 482 CANSAS-IGN Weight 800 g Connection terminals 4xBNC inputs 1x DSUB-15 outputs 2x DSUB-9 CAN (in / out) PHOENIX (MC 1,5/4STF-3,81) power supply Module description © 2014 imc Meßsysteme GmbH imc CANSAS Users Manual - Doc. Version 1.9 - 05.12.2014...
-
Page 483: Inc4
Overvoltage protection 60 V long-term Sensor supply Reference: GND +5 V 200 mA, 20 mA Supply voltages 10 V to 50 V DC © 2014 imc Meßsysteme GmbH imc CANSAS Users Manual - Doc. Version 1.9 - 05.12.2014... - Page 484 4x 7-pin LEMO (HGG.1B.307) only CANSAS-SL-INC4-L CAN (in/out) 2x 10-pin LEMO (HGA.1B.310) power supply (alternatively) power supply 1x 6-pin LEMO (HGA.1B.306) for all SL models Module description INC4 © 2014 imc Meßsysteme GmbH imc CANSAS Users Manual - Doc. Version 1.9 - 05.12.2014...
-
Page 485: Iso8
500 k voltage with divider current Input current static 4 nA (Type.) 40 nA (max.) in-swung scanning state dynamic 100 nA (max.) middle dynamic input current © 2014 imc Meßsysteme GmbH imc CANSAS Users Manual - Doc. Version 1.9 - 05.12.2014... - Page 486 CANSAS-ISO8 75 x 111 x 145 mm CANSAS-L-ISO8-BNC, -L-ISO8-T 40 x 128 x 145 mm CANSAS-K-ISO8, K-ISO8-BNC, K-ISO8-T2, -K-ISO8-T3 Weight 300 g Module description ISO8 © 2014 imc Meßsysteme GmbH imc CANSAS Users Manual - Doc. Version 1.9 - 05.12.2014...
-
Page 487: Hci8
>1 G , <40 pF chanel-to-channel >1 G , <10 pF Crosstalk >165 dB (50 Hz) ranges source >92 dB (50 Hz) ranges © 2014 imc Meßsysteme GmbH imc CANSAS Users Manual - Doc. Version 1.9 - 05.12.2014... - Page 488 Supply network Measurement category CAT II Assessment voltage 300 V Overvoltage protection diff. input voltage, 1 min. 600 V (differential) human body model ESD 2 kV © 2014 imc Meßsysteme GmbH imc CANSAS Users Manual - Doc. Version 1.9 - 05.12.2014...
- Page 489 Dimensions (W x H x D) tested in this mounting orientation 75 x 111 x 145 mm CANSAS-L-HCI8 Weight 790 g CANSAS-L-HCI8 Module description: HCI8 © 2014 imc Meßsysteme GmbH imc CANSAS Users Manual - Doc. Version 1.9 - 05.12.2014...
-
Page 490: Hvci8
/ case >1 G , <40 pF channel-to-channel >1 G , <10 pF Crosstalk >165 dB (50 Hz) ranges source >92 dB (50 Hz) ranges © 2014 imc Meßsysteme GmbH imc CANSAS Users Manual - Doc. Version 1.9 - 05.12.2014... - Page 491 ESD 2 kV Test impulse 6 Transient protection: Ri=30 , td=300 µs, tr<60 µs automotive load dump ISO 7637, test impulse 6 © 2014 imc Meßsysteme GmbH imc CANSAS Users Manual - Doc. Version 1.9 - 05.12.2014...
- Page 492 Operating temperature -30°C to 85°C Dimensions (W x H x D) 116 x 111 x 160 mm Weight 1.1 kg Module description: HVCI8 © 2014 imc Meßsysteme GmbH imc CANSAS Users Manual - Doc. Version 1.9 - 05.12.2014...
-
Page 493: P8 (Pressure)
-15°C to +100°C Fluorine rubber (FPM, FKM) Sealings not used in standard 0°C to +100°C butadiene acrylonitrile rubber (NBR) models 0°C to +100°C Ethylene Propylene © 2014 imc Meßsysteme GmbH imc CANSAS Users Manual - Doc. Version 1.9 - 05.12.2014... - Page 494 Module nipple Recommended coupling (optional) 0..10bar absolute NW5, brass, Perbunan CAN/21KFAD14MPX: NW5, brass, ® pressure sealing, free passage Perbunan -sealing, free passage ® sensor (A10) © 2014 imc Meßsysteme GmbH imc CANSAS Users Manual - Doc. Version 1.9 - 05.12.2014...
- Page 495 Accuracy ratings pertain to state after transients. If the module is subjected to accelerations, the inertia will cause measurement errors with the sensitive sensors. Module description P8 © 2014 imc Meßsysteme GmbH imc CANSAS Users Manual - Doc. Version 1.9 - 05.12.2014...
-
Page 496: Pwm8
Dimensions (W x H x D) 35 x 111 x 90 mm CANSAS-PWM8 81 x 128 x 145 mm CANSAS-K-PWM8 75 x 111 x 145 mm CANSAS-L-PWM8-V Module description PWM8 © 2014 imc Meßsysteme GmbH imc CANSAS Users Manual - Doc. Version 1.9 - 05.12.2014... -
Page 497: Sc16
28 Hz 500 Hz (2 ms), 200 Hz (5 ms) sampling rate / 7 100 Hz (10 ms) to 2 Hz (500 ms) Resolution 16 bit © 2014 imc Meßsysteme GmbH imc CANSAS Users Manual - Doc. Version 1.9 - 05.12.2014... - Page 498 Uncertainty -200°C to 850°C, four-wire connection < 0.2 K plus percentage of reading < 0.05 % Drift 25°C|; ambient temp: T 0.01 K/ © 2014 imc Meßsysteme GmbH imc CANSAS Users Manual - Doc. Version 1.9 - 05.12.2014...
- Page 499 55 x 111 x 145 mm; 850 g CANSAS-L-SC16, -L-SC16-2T 41 x 128 x 145 mm; 500 g CANSAS-K-SC16, -K(1)-SC16-2T 81 x 128 x 145 mm CANSAS-K1-SC16-3T © 2014 imc Meßsysteme GmbH imc CANSAS Users Manual - Doc. Version 1.9 - 05.12.2014...
- Page 500 (alternatively) 2x DSUB-9 CANSAS-SL-SC16-D(-SUPPLY) 2x 10-pin LEMO (HGA.1B.310 CANSAS-SL-SC16-L (-SUPPLY) 1x 6-pin LEMO (HGA.1B.306) power supply (for all SL models) Module description SC16 © 2014 imc Meßsysteme GmbH imc CANSAS Users Manual - Doc. Version 1.9 - 05.12.2014...
-
Page 501: Sci8, Sci16
SCI8: in CANopen mode: INT16, INT32, and FLOAT max. 200 Hz (5 ms) / channel TEDS - Transducer conform IEEE 1451.4 ACC/DSUB(M)-TEDS-xxx Electronic Data Sheets Class II MMI © 2014 imc Meßsysteme GmbH imc CANSAS Users Manual - Doc. Version 1.9 - 05.12.2014... - Page 502 Uncertainty <±0.2 K -200°C to 850°C, four-wire connection <±0.05% plus percentage of reading Drift ±0.01 K/K -25°C ambient temperature T = |T © 2014 imc Meßsysteme GmbH imc CANSAS Users Manual - Doc. Version 1.9 - 05.12.2014...
- Page 503 60 Hz, 100 Ω source impedance, SCI8, SCI16 <-105 dB range ±100 mV CMRR / IMR 100 dB (50 Hz) Common-Mode reference: frame (CHASSIS) all other channels: CHASSIS © 2014 imc Meßsysteme GmbH imc CANSAS Users Manual - Doc. Version 1.9 - 05.12.2014...
- Page 504 CAN (in / out) power supply (alternatively) 2x DSUB-9 CANSAS-SL-SCI8(16)-D(-SUPPLY) 2x 10-pin LEMO (HGA.1B.310) CANSAS-SL-SCI8(16)-L(-SUPPLY) 1x 6-pin LEMO (HGA.1B.306) DC power supply Module description SCI8, SCI16 © 2014 imc Meßsysteme GmbH imc CANSAS Users Manual - Doc. Version 1.9 - 05.12.2014...
-
Page 505: Sent
-40°C to 85°C condensation allowed Terminal connection PHOENIX (MC 1,5/4STF-3,81) power supply 2x DSUB-15 8 SENT inputs 2x DSUB-9 CAN (IN / OUT), power supply (alternatively) © 2014 imc Meßsysteme GmbH imc CANSAS Users Manual - Doc. Version 1.9 - 05.12.2014... - Page 506 The modules can be configured for CAN-network applications either -by order- at factory, or by the customer using appropriate configuration software. The necessary software as well as cables and additional accessories are presented in the documentation "Integrating CANSAS in CAN Networks". © 2014 imc Meßsysteme GmbH...
-
Page 507: Uni8
"CiA DS 404V1.2" supports 4 PDOs in INT16, INT32, and FLOAT TEDS - Transducer conform IEEE 1451.4 ACC/DSUB(M)-TEDS-xxx Electronic Data Sheets Class II MMI © 2014 imc Meßsysteme GmbH imc CANSAS Users Manual - Doc. Version 1.9 - 05.12.2014... - Page 508 Drift +20 ppm/K +95 ppm/K -25°C|; ambient temp. Offset uncertainty 0.02 % 0.05 % of range Drift 0.05 nA/K 0.5 nA/K -25°C|; ambient temp. © 2014 imc Meßsysteme GmbH imc CANSAS Users Manual - Doc. Version 1.9 - 05.12.2014...
- Page 509 0.016 K Uncertainty 4-wire measurement 0.2 K of reading +0.02% -25°C|; ambient temp: +0.01 K/K Sensor feed 1.23 mA Resistor measurement Input range to 800 © 2014 imc Meßsysteme GmbH imc CANSAS Users Manual - Doc. Version 1.9 - 05.12.2014...
- Page 510 CAN (in / out), supply (alternatively) 2x 10-pin LEMO (HGA.1B.310) CAN (in / out), supply (alternatively) 1x 6-pin LEMO (HGA.1B.306) power supply Module description UNI8 © 2014 imc Meßsysteme GmbH imc CANSAS Users Manual - Doc. Version 1.9 - 05.12.2014...
- Page 511 The precision of the bridge measurement is not affected by actual precision of the bridge supply. The current value of the bridge supply is continuously monitored and compensated. © 2014 imc Meßsysteme GmbH imc CANSAS Users Manual - Doc. Version 1.9 - 05.12.2014...
-
Page 512: Μ-Can - V1/V4
Supply voltage 9 V to 50 V DC Power consumption 1.5 W µ-CANSAS-V1 4.5 W µ-CANSAS-V4 Operating temperature -40°C to 120°C © 2014 imc Meßsysteme GmbH imc CANSAS Users Manual - Doc. Version 1.9 - 05.12.2014... - Page 513 "CiA DS 404V1.2" supports 1 PDO in INT16, INT32, and FLOAT TEDS - Transducer Electronic conforming to IEEE 1451.4 DataSheets Class II MMI Module description µ-CANSAS-V1 µ-CANSAS-V4 © 2014 imc Meßsysteme GmbH imc CANSAS Users Manual - Doc. Version 1.9 - 05.12.2014...
-
Page 514: Μ-Can - T1/T4
T Supply voltage 9 V to 50 V DC Power consumption 1.5 W µ-CANSAS-T1 4.5 W µ-CANSAS-T4 Temperature range -40°C to 120°C © 2014 imc Meßsysteme GmbH imc CANSAS Users Manual - Doc. Version 1.9 - 05.12.2014... - Page 515 " supports 1 PDO in INT16, INT32, and FLOAT TEDS - Transducer Electronic conforming to IEEE 1451.4 DataSheets Class II MMI Module description µ-CANSAS-T1 µ-CANSAS-T4 © 2014 imc Meßsysteme GmbH imc CANSAS Users Manual - Doc. Version 1.9 - 05.12.2014...
-
Page 516: Μ-Can - B1/B4
9 V to 50 V DC Power consumption typ. 1 W, max. 1.5 W µ-CANSAS-B1 typ. 4 W, max. 4.5 W µ-CANSAS-B4 Temperature range -40°C to 120°C operating temperature © 2014 imc Meßsysteme GmbH imc CANSAS Users Manual - Doc. Version 1.9 - 05.12.2014... -
Page 517: Μ-Can - Hub4
Operating temperature -40°C to 120°C Dimensions (B x H x T) 70 x 70 x 30 mm without interconnections Weight 200 g Module description µ-CANSAS-HUB4 © 2014 imc Meßsysteme GmbH imc CANSAS Users Manual - Doc. Version 1.9 - 05.12.2014... -
Page 518: Sensor Supply Module
40 % 2.5 V Capacitive load (max.) >4000 µF 2,5 V, 10 V, 15 V >1000 µF 12 V, 15 V >400 µF 24 V © 2014 imc Meßsysteme GmbH imc CANSAS Users Manual - Doc. Version 1.9 - 05.12.2014... -
Page 519: Synchronization Line
0.35 mm² 0.5 mm² 0.75 mm² 1 mm² Nomogram to determine cable resistance as f unction of one w ay distance and cross-section of copper cables © 2014 imc Meßsysteme GmbH imc CANSAS Users Manual - Doc. Version 1.9 - 05.12.2014... -
Page 520: Accessories
520 General Technical Specs 7.29 Accessories 7.29.1 DSUB-screw terminals for measurement inputs All plugs are 15-pin connection blocks made for direct connection to the imc CANSAS sockets CON1 and CON2. For attaching the lines, there are screw terminals inside the plug enclosure. Measurement... -
Page 521: Can-Bus Accessories
CANSAS CAN/ Power Supply Unit-230 Power connection cable CAN/AMPH-3-POWER Supply cable for pressure expansion 3-pin Amphenol to 3-pin Amphenol (female-female) © 2014 imc Meßsysteme GmbH imc CANSAS Users Manual - Doc. Version 1.9 - 05.12.2014... -
Page 522: Dsub Connector For Incremental Sensors With Current Signals
INC-4 module: auxiliary power 5 V, 5 mA, 25 mW DSUB-15(14) VCC connector plug DSUB-15 with screw clamp in the connector housing © 2014 imc Meßsysteme GmbH imc CANSAS Users Manual - Doc. Version 1.9 - 05.12.2014... -
Page 523: Pin Configuration And Power Supply
Hardware Version 2: Valid for all UNI8, P8, DO16R, C8 and all -L- modules. For all other modules, please check in the software under General/ Version/ Hardware whether this is the version. Generally it only is for modules shipped since late-2003. © 2014 imc Meßsysteme GmbH imc CANSAS Users Manual - Doc. Version 1.9 - 05.12.2014... - Page 524 CAN_H dominant high bus connected as per CiA line CAN_SYNC imc CANSAS-specific: Additional line for a sync signal (1 Hz). Generally 5 V to CAN Ground. 1Wire EEPROM imc CANSAS-specific: EEPROM information about mounting position (when used in a rack) Exists only at female CAN-OUT plug P212.
-
Page 525: Can-Bus Wiring
8.1.1.2 Notes for the use of CANcabs Problem: Pins 4 and 9 are used in imc CANSAS for Reset and OneWire EEPROM. When a CANcabs extra cable from any of the companies Vector, dSPACE or KVASER is used, it results in duplicate pin assignment, since these pins are also used in those cases. -
Page 526: Specification Of Components Used
Slope resistor: 8.1.2 SL modules CAN-Bus connectors Below is shown the pin configuration of the CAN-bus plug/socket set (CAN IN and CAN OUT) at the imc CANSAS modules with SL housing. Only differences to the standard imc CANSAS modules are described here. -
Page 527: Μ-Cansas Can-Bus Connections
Also give regard to the cables' cross-sections. 8.1.3 µ-CANSAS CAN-Bus connections Below is the pin configuration of the imc µ-CANSAS modules’ CAN-Bus connector. Connections of -AS modules are made via 6-pin Autosport terminals of the type AS208-35SA (CAN IN) and AS208-35PA (CAN OUT). -
Page 528: Can-Bus Pin Configuration And Contact Wiring
Signal Use in imc CANSAS +CAN_SUPPLY dominant high bus imc CANSAS-specific: line + imc CANSAS supply +9…+50 V. The module is supplied via the pins +CAN_SUPPLY and –SUPPLY. -SUPPLY imc CANSAS-specific: - imc CANSAS power supply (minus contact: 0V). CAN_LOW... - Page 529 Signal Use in imc CANSAS +CAN_SUPPLY dominant high bus imc CANSAS-specific: line + imc CANSAS supply +9…+50 V. The module is supplied via the pins +CAN_SUPPLY and –SUPPLY. -SUPPLY imc CANSAS-specific: - imc CANSAS power supply (minus contact: 0V). CAN_LOW...
-
Page 530: Cables For Μ-Cansas
8.1.3.2 Cables for µ-CANSAS For connecting your imc µ-CANSAS modules, pre-configured cables are available. The connection schematics below are to help you select the necessary components. Like the imc µ-CANSAS modules, the imc µ-CANSAS cables are designed for use in extreme temperature conditions. - Page 531 Type 2 CAN connection cable: From 6-pin female AS608-35SA on device side to 9-pin DSUB-socket and 4- pin Phoenix socket; shielded, 1,5 m. Temperature range: -15 °C … 60 °C. For direct connection of imc µ- CANSAS-xx-AS(T) and µ-HUB4-AS (µimc CANSAS connected via male CAN-connector, if connected at CAN IN socket [right side]) to the imc CAN-interface and an external power supply.
- Page 532 Type 1 CAN connection cable: From 6-pin female AS608-35SA on device side to 9-pin DSUB-socket; shielded, 1,5 m. Temperature range: -40 °C … 120 °C. For direct connection of imc µ-CANSAS-x1-AST, imc µ-CANSAS-x4-AS(T) and µ-HUB4-AS (imc µ-CANSAS connected via male CAN-terminal, if connected at CAN IN socket [right side]) to the imc CAN-interface, if the module is supplied via the CAN-Bus.
-
Page 533: Power Supply
The connectors at the Phoenix-terminal and those for the CAN-bus are not connected internally but are separated from each other by diodes. Therefore, make sure that the imc CANSAS module is supplied with power via only one of the two possible ways! Note when arranging the power supply that the starting current is greater than the long-term current. -
Page 534: Cansas Sl Power Supply
The connectors at the 6-pin LEMO socket and those for the CAN-bus are not connected internally but are separated from each other by diodes. Therefore, make sure that the imc CANSAS module is supplied with power via only one of the two possible ways! The DC-supply inputs on the device itself (LEMO-socket) are galvanically isolated, i.e. -
Page 535: Μ-Cansas Power Supply
Power Supply 535 8.2.3 µ-CANSAS power supply The imc µ-CANSAS modules are supplied via the CAN-Bus terminals +SUPPLY and –SUPPLY ( see image in previous section for pin configuration). The permitted supply voltage range for the imc µ-CANSAS modules is 9 V to 50 V DC. -
Page 536: Signal Connection
In such cases, the values of the technical specifications may not be reached. 8.3.1 Standard modules with DSUB-15 The illustration below shows the view of the imc CANSAS module from the inputs' side: Note Don't loosen screws crossed out in red! These secure the device housing. - Page 537 2. Audible click when the lid snaps in the front of the DSUB pod 3. Insert the bend protection 4. The pressure nut must be screwed back on 5. The lid screws can be tightened © 2014 imc Meßsysteme GmbH imc CANSAS Users Manual - Doc. Version 1.9 - 05.12.2014...
-
Page 538: Acc/Dsubxx Plugs
[]: if SEN SUPPLY with ±15V option, then this pin = -15V []:1/4 Bridge with UNI8, DCB8 * if SEN SUPPLY with ±15V option, then this pin 6 = reference ** not C8 © 2014 imc Meßsysteme GmbH imc CANSAS Users Manual - Doc. Version 1.9 - 05.12.2014... - Page 539 ** OPDRN is reserved and is not to be connected. ***ACC/DSUB-REL4 should only be used as replacement for CAN/DSUB-STD (RELAIS). Note that OFF and ON are swapped. © 2014 imc Meßsysteme GmbH imc CANSAS Users Manual - Doc. Version 1.9 - 05.12.2014...
-
Page 540: Teds Plugs
[]: if SEN SUPPLY with ±15V option, then this pin 6 = reference pin = -15V pin = -15V []:1/4 Bridge with UNI8, DCB8 ** not for imc CANSAS © 2014 imc Meßsysteme GmbH imc CANSAS Users Manual - Doc. Version 1.9 - 05.12.2014... -
Page 541: Can/Dsub Plugs
CHASSIS CHASSIS CHASSIS CHASSIS CHASSIS CHASSIS Index at CON1 only For CAN/DSUB-STD(RELAIS), ACC/DSUB-REL4 could be used as replacement. Note that OFF and ON are swapped. © 2014 imc Meßsysteme GmbH imc CANSAS Users Manual - Doc. Version 1.9 - 05.12.2014... -
Page 542: Connector Plugs Cross-Reference
542 Pin configuration and power supply 8.3.1.4 Connector plugs Cross-Reference * 2-bit block isolated low impedance ** ON and OFF swapped, CAN/DSUB-STD(RELAIS) is the recommended and delivered plug © 2014 imc Meßsysteme GmbH imc CANSAS Users Manual - Doc. Version 1.9 - 05.12.2014... -
Page 543: Imc Plugs
-in5 -in5 +in6 +in6 -in6 -in6 The plug CAN/DSUB-U6/U4 serves to connect six voltage signals to imc CANSAS-C12 and four voltage signals to imc CANSAS-ISO8. © 2014 imc Meßsysteme GmbH imc CANSAS Users Manual - Doc. Version 1.9 - 05.12.2014... - Page 544 The maximum signal voltage is 60 V! Note that the resistance dividers are not symmetrical! The divider plug CAN/DSUB-U6D serves to connect six voltage signals to imc CANSAS-C12. The accuracy ratings only apply to devices correctly configured and connected. Please make sure that no inputs used may be not connected, otherwise overshoot may occur at inputs, thus affecting other channels and resulting increased measurement error.
- Page 545 8.3.1.5.2 imc Thermo-plug ACC/DSUB-T4 The patented imc thermo-plug comes with a terminal strip and a built-in temperature sensor (Pt1000) which provides cold junction compensation inside of the DSUB-15 connector. By this means, any thermocouple types can be connected at the differential inputs (+IN and -IN): The temperature sensor measures the contact's own temperature and compensates its parasitic thermal voltage.
- Page 546 Note The thermoplug CAN/DSUB-T6 serves to connect six thermocouples to imc CANSAS-C12. When connecting the thermoplug to imc CANSAS, you must wait until the signal contact's (internal Pt100) low-pass-filtered temperature signal transient has subsided and the thermoplug's temperature has adjusted itself to that of the module. The time delay should be at least 5 seconds but may be greater if the temperature discrepancy is large (up to several minutes is possible).
- Page 547 Note Four Pt100-thermocouples can be connected to the CAN/DSUB-Pt100 screw terminals in four-wire configuration. The necessary feed-current is provided by the imc CANSAS module. To close the current loop, any non-connected Pt100 units must be replaced with wire bridges: No Pt100 at Terminals 1+2 -> bridge Terminals 9+10.
-
Page 548: Sent
SIG Signal Input 7 GND Input 3 GND Input 7 V Supply (5 V) Input 4 V Supply (5 V) Input 8 Not used Not used © 2014 imc Meßsysteme GmbH imc CANSAS Users Manual - Doc. Version 1.9 - 05.12.2014... -
Page 549: Ign Terminals (Bnc)
10 Digital Ground 0 V 11 Digital Ground 0 V 12 Digital Ground 0 V 13 Ground 0 V 14 not connected 15 Analog Ground 0 V © 2014 imc Meßsysteme GmbH imc CANSAS Users Manual - Doc. Version 1.9 - 05.12.2014... -
Page 550: Pin Configuration Dsub-9 Connectors
-INDEX -INDEX -INDEX -INDEX The incremental counter inputs have a common index track, which is connected in parallel to the other inputs in each DSUB. © 2014 imc Meßsysteme GmbH imc CANSAS Users Manual - Doc. Version 1.9 - 05.12.2014... -
Page 551: Modules With Itt Veam Terminals
* - Sensor supply voltages available with optional sensor supply module imc CANSAS -L-DO8R-V, -L-DI16-V, -L-DAC8-V, -L-PWM8-V ITT VEAM -L-DO8R-V -L-DI16-V -L-DAC8-V L-PWM8-V PWM Open Drain PWM TTL CHASSIS CHASSIS CHASSIS CHASSIS © 2014 imc Meßsysteme GmbH imc CANSAS Users Manual - Doc. Version 1.9 - 05.12.2014... -
Page 552: Can/Sl Modules With Lemo Terminals
552 Pin configuration and power supply 8.3.6 CAN/SL modules with LEMO terminals The imc CANSAS modules of the housing model SL which are equipped with LEMO connectors have certain limitations regarding measurement possibilities. The exact limitations are stated in the general... -
Page 553: C8, Ci8, Sci8, Sci16, Sc16 Lemo
-SUPPLY (GND) +INDEX +IN Y -IN Y - Bezug von +INDEX ist -SUPPLY (GND) - Sensorversorgungsspannung 5VDC/ 100mA (optional 300mA) - andere Sensorversorgungsspannungen durch optionales Sensorversorgungsmodul © 2014 imc Meßsysteme GmbH imc CANSAS Users Manual - Doc. Version 1.9 - 05.12.2014... -
Page 554: Modules With Phoenix Terminal Block
+IN 7 +IN 15 -IN 7 -IN 15 +IN 8 +IN 16 -IN 8 -IN 16 LEVEL 1 LEVEL 1 DGND DGND CHASSIS CHASSIS CHASSIS CHASSIS © 2014 imc Meßsysteme GmbH imc CANSAS Users Manual - Doc. Version 1.9 - 05.12.2014... -
Page 555: Cansas-L-Di16-Ph
Supply * Supply * 5 VDC 5 VDC Supply * Ground * Ground * CHASSIS CHASSIS CHASSIS CHASSIS * updated pin configuration, starting from July 2011 © 2014 imc Meßsysteme GmbH imc CANSAS Users Manual - Doc. Version 1.9 - 05.12.2014... -
Page 556: Cansas-L-Do16-Ph
5 V 2 GND 1 LCOM 1/CHASSIS LCOM 2/CHASSIS GND 2 8.3.7.5 CANSAS-L-DO8R-Ph connection socket OFF1 OFF2 OFF3 OFF4 OFF5 OFF6 OFF7 OFF8 CHASSIS CHASSIS CHASSIS © 2014 imc Meßsysteme GmbH imc CANSAS Users Manual - Doc. Version 1.9 - 05.12.2014... -
Page 557: Cansas-Hci8
Note There is a possibility for certain function configurations to cause an electrostatic discharge (ESD) directly at the connection terminals. This can lead to asynchronous operation (crash) of the imc CANSAS-L-HVCI8. This will not cause any damage. A brief interruption of the power supply causes the module to restart (correctly). -
Page 558: Μ-Cansas Phoenix Strip Terminal
558 Pin configuration and power supply 8.3.7.8 µ-CANSAS Phoenix strip terminal Pin configuration of the Phoenix strip terminal for imc µ-CANSAS-V1-AS Phoenix MPT0,5/8 Signal +IN with divider (MR 2..60V) +IN without divider (MR 0,1..1V) -IN_COM 8-pin Phoenix strip terminal reserved... - Page 559 Signal connection 559 8.3.7.8.1 Connection instructions Within a imc µ-CANSAS module there is a Phoenix strip terminal (model: MPT0.5/8) for connecting sig- nals. This strip terminal is located on a connector junction which can be detached from the front of the module.
- Page 560 Step 8: Once the housing face is placed flush on the housing, the module can be closed tight with the Torx screws. © 2014 imc Meßsysteme GmbH imc CANSAS Users Manual - Doc. Version 1.9 - 05.12.2014...
-
Page 561: Modules With Autosport (As) Terminals
Signal connection 561 8.3.8 Modules with Autosport (AS) terminals Pin configuration of the Autosport terminal type AS212-35SN for imc µ-CANSAS-V4-AS AS212-35SN Signal +IN_60V_CH1 (MB: 2..60V) +IN_1V_CH1 (MB: 0,1..1V) +SUPPLY_CH1 +SUPPLY_CH2 -SUPPLY_CH2 +SUPPLY_CH3 n.c. -SUPPLY_CH4 +IN_60V_CH4 (MB: 2 .. 60V) +IN_1V_CH4 (MB: 0,1 .. 1V) +IN_60V_CH3 (MB: 2 .. - Page 562 562 Pin configuration and power supply Pin configuration of the Autosport terminal type AS214-35SN for imc µ-CANSAS-B4-AS AS214-35SN Signal +Sense_CH4 +SUPPLY_CH4 HB_CH4 -IN_COM_CH4 HB_CH3 -IN_COM_CH3 n.c. n.c. HB_CH2 -IN_COM_CH2 -IN_COM_CH1 HB_CH1 +Sense_CH1 +SUPPLY_CH1 +Sense_CH2 +SUPPLY_CH2 +Sense_CH3 +SUPPLY_CH3 -SUPPLY_CH3 -SUPPLY_CH4 n.c.
-
Page 563: Last Changes
The syntax in the listed data sheets of the IEC (EN) norm has been improved. currently released in previous manual CANSAS module Version Date Version Date HCI8 2013-09-26 2013-06-26 HVCI8 2013-09-26 2012-08-10 Chapter Bug-fix © 2014 imc Meßsysteme GmbH imc CANSAS Users Manual - Doc. Version 1.9 - 05.12.2014... - Page 564 New description for incremental encoder modes. Chapter Bug-fix Amendments and bug-fix in version 1.8 rev 7 Chapter Amendments Minor layout improvements and new driver for Intrepid interfaces. Chapter Bug-fix © 2014 imc Meßsysteme GmbH imc CANSAS Users Manual - Doc. Version 1.9 - 05.12.2014...
- Page 565 V 1.3 01.11.2011 V 1.8 04.07.2012 V 1.7 10.08.2011 SCI8, SCI16 V 1.7 04.07.2012 V 1.5 19.04.2011 SC16 V 1.8 04.07.2012 V 1.7 04.10.2011 Chapter Bug-fix © 2014 imc Meßsysteme GmbH imc CANSAS Users Manual - Doc. Version 1.9 - 05.12.2014...
- Page 566 CANSAS-L-INC4-V- new pin configuration SUPPLY Typ 2 currently released in previous manual CANSAS module Version Date Version Date HCI8 2011-07-22 2011-03-24 Chapter Bug-fix © 2014 imc Meßsysteme GmbH imc CANSAS Users Manual - Doc. Version 1.9 - 05.12.2014...
- Page 567 SCI8 / SCI16 25.03.2011 16.07.2009 UNI8 24.03.2011 19.05.2010 Chapter Bug-fix Amendments and bug-fix in version 1.7 rev 1 Chapter Amendments CAN/L-CI8-V-SUPPLY pin configuration rectified Chapter Bug-fix © 2014 imc Meßsysteme GmbH imc CANSAS Users Manual - Doc. Version 1.9 - 05.12.2014...
- Page 568 19.05.2010 11.12.2009 UNI8 19.05.2010 11.12.2009 Chapter Bug-fix SUPPLY Sensor supply module: ±15 V changed from 5,7 W to 3 W (also for UNI8 and DCB8) © 2014 imc Meßsysteme GmbH imc CANSAS Users Manual - Doc. Version 1.9 - 05.12.2014...
- Page 569 Amendments and bug-fix in version 1.6 rev 8 Chapter Amendments currently released in previous manual Module CANSAS Version Date Version Date 30.3.2010 17.07.2009 Chapter Bug-fix © 2014 imc Meßsysteme GmbH imc CANSAS Users Manual - Doc. Version 1.9 - 05.12.2014...
- Page 570 Chapter Bug-fix PWM8 Pin 11 labeled with Vcc, previously 5V LEMO modules current supply: +SUPPLY and -SUPPLY swapped INC4 INDEX channel on CON1 only © 2014 imc Meßsysteme GmbH imc CANSAS Users Manual - Doc. Version 1.9 - 05.12.2014...
-
Page 571: Index
HCI8 µ-CANSAS-V1: 5V Supply voltage bandwidth: C8 µ-CANSAS-V1: balance bandwidth: P8 µ-CANSAS-V1: Connector Barometer 147, 351 µ-CANSAS-V1: Filter Before Starting µ-CANSAS-V1: Sampling interval Bittiming © 2014 imc Meßsysteme GmbH imc CANSAS Users Manual - Doc. Version 1.9 - 05.12.2014... - Page 572 CAN-Bus: Pin configuration at SL housings 267, 465, 538 CAN-Bus: Synchronization C8 LEMO CAN-Bus-wiring C8: anti-aliasing CANcabs C8: bandwidth CANcardX C8: current measurement CANcaseXL C8: DSUB15 CAN-Controller C8: filter CAN-message © 2014 imc Meßsysteme GmbH imc CANSAS Users Manual - Doc. Version 1.9 - 05.12.2014...
- Page 573 DCB8 474, 538 Combination mode Balancing comparator Bandwidth comparator conditioning Bridge measurement sense incremental encode Connection Comparison Description Connection Initial unbalance DCB8 Sensor supply © 2014 imc Meßsysteme GmbH imc CANSAS Users Manual - Doc. Version 1.9 - 05.12.2014...
- Page 574 DO8R: ITT VEAM terminal File - Close DO8R: Phoenix File - Export double samples File - Import Double shielding File - New Driver-software for the PC © 2014 imc Meßsysteme GmbH imc CANSAS Users Manual - Doc. Version 1.9 - 05.12.2014...
- Page 575 General terms and conditions IGN outputs (DSUB9) IGN parameterization GPS mouse (5Hz) IGN snapshot operation mode GPS mouse and CRONOS-PL/SL IGN: description Greater imc CANSAS-SENT module © 2014 imc Meßsysteme GmbH imc CANSAS Users Manual - Doc. Version 1.9 - 05.12.2014...
- Page 576 Input/Output stage LEDs inputs (BNC) IGN LEDs IGN Integer-arithmetic LEDs:CANOpen Integrating CANSAS software in imcDevices LEMO (SL): INC4 Integration of SENT sensors LEMO connector Intel-format © 2014 imc Meßsysteme GmbH imc CANSAS Users Manual - Doc. Version 1.9 - 05.12.2014...
- Page 577 - two-point-scaling Phase: synchronity Module database Phaseshift: CANSAS modules Module description PWM8 Phoenix - socket Module Tree: work with Phoenix (CANSAS-L-DO8R-Ph) Module-status word © 2014 imc Meßsysteme GmbH imc CANSAS Users Manual - Doc. Version 1.9 - 05.12.2014...
- Page 578 40, 111 Properties Display resistance HCI8 properties of modules Resistance measurement Properties of the modules UNI8 Pt100 211, 270, 281, 374 Resistance measurement: CI8 UNI8 © 2014 imc Meßsysteme GmbH imc CANSAS Users Manual - Doc. Version 1.9 - 05.12.2014...
- Page 579 SC16, SCI16, SCI8: specification single track encoder SC16, SCI16, SCI8: thermocouple measurement single-signal SC16, SCI16, SCI8: voltage measurement SL housing: CAN-Bus connectors scale input channel Slave: Synchronization © 2014 imc Meßsysteme GmbH imc CANSAS Users Manual - Doc. Version 1.9 - 05.12.2014...
- Page 580 HCI8 Synchronization 74, 125 terminal block HVCI8 Synchronization line Terminal IGN Synchronization: blinking codes terminator in µ-CANSAS synchronization: incremental encoder terminator in data logger © 2014 imc Meßsysteme GmbH imc CANSAS Users Manual - Doc. Version 1.9 - 05.12.2014...
- Page 581 View - Adjust Cable compensation View - Group by Connection View - Split Current meas. ground ref. View - Status bar Current meas. with var. supply © 2014 imc Meßsysteme GmbH imc CANSAS Users Manual - Doc. Version 1.9 - 05.12.2014...
- Page 582 Restriction of Hazardous Substances Windows wiring: CAN-Bus wiring: CAN-Bus at SL housings Write Sensor-Eprom WSGs XML Format zero adjusting: µ-CANSAS-V1 zero marker pulse zero pulse ZF LEMO UNI8 © 2014 imc Meßsysteme GmbH imc CANSAS Users Manual - Doc. Version 1.9 - 05.12.2014...
Need help?
Do you have a question about the CANSAS and is the answer not in the manual?
Questions and answers
How to reset
To reset IMC CANSAS, there are two main methods:
1. Manual Reset via Measure Dialog:
- Use the reset command from the channel menu in the Measure dialog to manually reset all selected incremental counter channels.
2. Reset via CAN-Bus Message:
- Enable resetting in the Special Functions node under the Resetting page.
- Use a CAN-Bus message with a specific identifier (e.g., 200).
- The respective channel to be reset is determined by the bit in the message’s data byte.
Additionally, a Reset-plug (DSUB-plug with Pins 3 and 4 jumpered) can be used to reset a module with unknown CAN-Bus settings to a defined baud rate for communication. This requires:
- Disconnecting the module's power.
- Inserting the Reset-plug into one CAN terminal.
- Connecting the other terminal to the PC’s CAN-adapter with a short cable.
- Ensuring no other CAN nodes are connected.
This answer is automatically generated