Table of Contents
Advertisement
Advertisement
Table of Contents

Related Manuals for FitLux 585


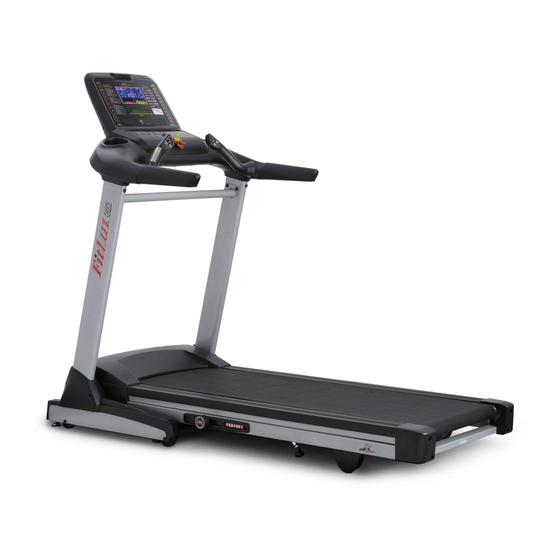
Summary of Contents for FitLux 585
- Page 1 MOTORIZED TREADMILL...
-
Page 3: Table Of Contents
TABLE OF CONTENTS IMPORTANT SAFETY INSTRUCTIONS ......P. 1 ELECTRICAL GROUNDING INSTRUCTIONS ..... . . P. -
Page 4: Important Safety Instructions
IMPORTANT SAFETY INSTRUCTIONS Please read the following basic precautions prior to use of the treadmill: * Never operate the treadmill with the air openings blocked. * Keep air openings free of lint, hair and the likes. WARNING * This treadmill requires a dedicated circuit as 110V/220V 15/10AMP separately that is not shared by any other electrical appliances. -
Page 5: Electrical Grounding Instructions
* Do not walk or jog barefoot or without shoes. * Do not plug into the same outlet with any * Do not walk or jog in loose shoes or slippers. other electrical appliance while using this Athletic shoes are always recommended treadmill. -
Page 6: Caution: Before And After Running On The Treadmill
CAUTION: BEFORE AND AFTER RUNNING ON THE TREADMILL Before Running: 1. Read the manual first for familiarization of the computer and other important features. 2. Before starting the treadmill, always stand on two side rails on both sides (not on the running belt) as shown on drawing. - Page 7 What to lubricate? Do not lubricate with other than our approved lubricant. Your treadmill comes with one 30ml tube of silicone. For further lubrication, you may order from distributor for our 200ml silicone: 200ml silicone in one bottle with 35cm applicator. 100% silicone, non-petroleum base, contains of no harmful solvents, non-toxic and nonflammable.
-
Page 8: Assembly Parts List
2 3 1 2 3 4 ASSEMBLY PARTS LIST MAIN FRAME ....... . COMPUTER FRAME . -
Page 9: Assembly Instructions
ASSEMBLY INSTRUCTIONS STEP 1: Fold up the Front Post. STEP 2: Fix by each 3 Bolts (A) on both sides. STEP 3: Fix Side Covers (3) at the Bottom of Front Post. Wedge the bottom rim of Side Covers (3) into the frame, then use Screw (B) to fix. - Page 10 STEP 4: Ask one person to hold the Computer Frame (2) at the top of two Front Posts. Well connect the cables (4-1). Then insert Computer Frame (2) into top of Front Posts and fix by (A) (4-2). SCREW While inserting Computer Frame into Front Post, please ensure not to cut, press, bend or deform the cables inside.
-
Page 11: Treadmill Operation
TREADMILL OPERATION CAUTION: Before beginning a workout session make sure the safety key is properly placed onto the computer console and the safety clip is securely attached to an article of your clothing. Always start the treadmill while standing on the side rails but not on the running belt. Allow the treadmill to reach a speed of at least 1.0 KPH before walking on the running belt. - Page 12 FOR USER PROGRAM (U1, U2, U3) Press EDIT USER button to choose U1, U2 or U3 for setting user’s desired profile. Press ENTER button, first range on both Incline and Speed Dot Matrix flashes, then press INCLINE up/down and SPEED fast/slow button to set desired incline and speed of first range. Press ENTER button, it jumps to 2nd range on both Dot Matrix, repeat above procedures to set desired incline and speed of 2nd range.
- Page 13 HRC 2 (INCLINE CONTROL) OPERATION: Operation is same as HRC 1 1. Actual heartbeat is lower than preset max heartbeat: Increase incline 1% per detection. 2. Actual heartbeat is higher than preset max. heartbeat: Decrease incline 1% per detection. HRC 3 (SPEED AND INCLINE CONTROL) OPERATION: Operation is same as HRC 2 1.
-
Page 14: Computer Instruction
COMPUTER INSTRUCTION: JOGGING WARM UP WALKING RUNNING SPRINTING INCLINE DOT MATRIX SPEED DOT MATRIX SPEED DISPLAY BAR: JOGGING RUNNING SPRINTING WARM UP WALKING Warm up: 0.8 ~ 2.0 kph Walking: 2.1 ~ 5.0 kph Jogging: 5.1 ~ 9.0 kph Running: 9.1 ~ 13.0 kph Springting: 13.1 ~ 20.0 kph DISTANCE: 0 ~ 99.9KM PROGRAM: 1 ~ 12... - Page 15 PULSE: 40 ~ 200 BPM LEVEL: 1 ~ 3 SPEED: 0.8 ~ 18KPH DOT MATRIX: 8 X 16 FOR BOTH SPEED AND INCLINE PROFILE INCLINE DOT MATRIX SPEED DOT MATRIX 1. In quick start and target modes, Incline Dot Matrix will show the accumulated laps, and Speed Dot Matrix will show the circle of lap.
- Page 16 PROFILES FOR PROGRAMS P 1 ~ P 4 PROGRAM SPEED & INCLINE SPEED SPEED INCLINE SPEED INCLINE SPEED INCLINE SPEED INCLINE LEVEL 1 2.0 KPH 2.0 KPH 3.0 KPH 3.0 KPH Interval 1 3.0 KPH 4.0 KPH 6.0 KPH 3.0 KPH Interval 2 Interval 3 4.0 KPH...
- Page 17 P 5 ~ P 8 PROGRAM SPEED & INCLINE INCLINE SPEED INCLINE SPEED INCLINE SPEED INCLINE SPEED INCLINE LEVEL 1 Interval 1 4.0 KPH 4.0 KPH 4.0 KPH 4.0 KPH Interval 2 4.0 KPH 4.0 KPH 4.0 KPH 4.0 KPH Interval 3 4.0 KPH 4.0 KPH...
- Page 18 P 9 ~ P 12 PROGRAM SPEED & INCLINE INCLINE SPEED INCLINE SPEED INCLINE SPEED INCLINE SPEED INCLINE LEVEL 1 Interval 1 2.0 KPH 2.0 KPH 3.0 KPH 3.0 KPH Interval 2 3.0 KPH 4.0 KPH 6.0 KPH 3.0 KPH Interval 3 4.0 KPH 6.0 KPH...
- Page 19 FUNCTION OF BUTTONS: Quick Incline buttons There are 12 incline buttons 1, 2, 3, 4, 5, 6, 7, 8, 9, 10, 11, 12(%). Quick Speed buttons There are 12 speed buttons 2, 3, 4, 5, 6, 7, 8, 10, 12, 14, 16, 18(KPH). Target TIME button It is to select target time for countdown exercise.
-
Page 20: How To Use Asa System
Handlebar buttons For convenient operation, there are incline up/down and stop button on left handlebar, and speed fast/slow, start buttons on the right handlebar. EMERGENCY KEY Insert on the computer for starting the machine. Remove for emergency stop for safety. When removing, machine stops, and incline does not descend to 0. -
Page 21: Master Power Switch Location
MASTER POWER SWITCH LOCATION To completely shut off power to the treadmill, turn off master power switch and unplug from outlet. ERROR MESSAGE & TROUBLE SHOOTING E1 (ERROR 1): When the machine starts but computer could not read the signal from sensor for 7 seconds, E1 will be shown on the computer. -
Page 22: How To Fold Up For Storage
HOW TO FOLD UP FOR STORAGE Please note there is a LEVER-ARM on the left side of the main frame. Photo 2 This LEVER-ARM is to control power folding. The procedures to fold the machine up automatically are as below: 1. -
Page 23: Aligning The Running Belt
ALIGNING THE RUNNING BELT Ensure the running belt is centered on your treadmill at all times FIGURE A Running style and Non-level surface are two instances which may cause the belt to drift off center. Minor adjustments to the two bolts at the rear of the treadmill are necessary when the belt has drifted off center (See Fig. -
Page 24: Cleaning And Inspecting The Running Belt
CLEANING AND INSPECTING THE RUNNING BELT Turn off power and unplug from electrical outlet. Carefully position the treadmill on its side. Use a damp cloth to wipe off the inside of the running belt. Carefully rotate the running belt by hand to clean the entire inside face. -
Page 25: How To Work Out Safely And Efficiently
HOW TO WORK OUT SAFELY AND EFFICIENTLY First of all, we strongly suggest you to check with your doctor before you start your walking program. Of course, if your have arthritis, anemia, low back pain, uncontrolled diabetes, or serious diseases of the lungs, kidneys, liver, or heart, you should see a doctor regularly anyway. -
Page 26: Exploded Drawing
Exploded Drawing... -
Page 27: Parts List
Parts No. Description Description Description MAIN FRAME NUT (M10) CABLE (12C x 1200mm) BOTTOM STAND SENSOR CABLE / BLUE (60mm) SIDE FRAME (L) SCREW ( 3 x 10L) CABLE / BROWN (60mm) SIDE FRAME (R) BOLT (M10 x 15L) CABLE / BROWN(170mm) FRONT FRAME WASHER (M8 x 16L) CABLE (3C x 1300mm) - Page 28 20160328...
Need help?
Do you have a question about the 585 and is the answer not in the manual?
Questions and answers