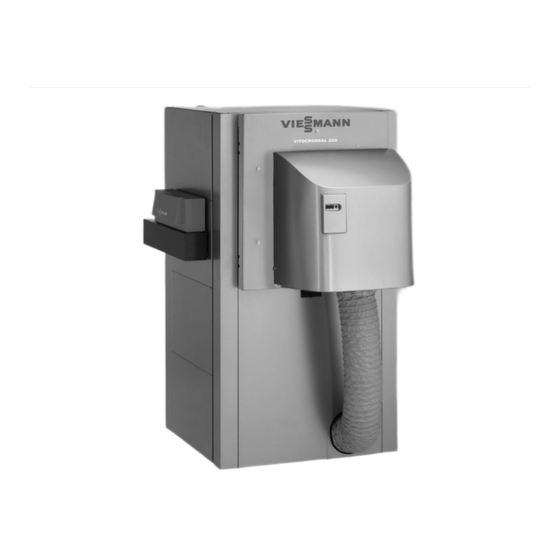
Viessmann VITOCROSSAL 200 Service Instructions Manual
Gas condensing boiler with matrix cylinder burner for natural gas e and ll type ct2
Hide thumbs
Also See for VITOCROSSAL 200:
- Service instructions manual (96 pages) ,
- Service instructions for contractors (88 pages) ,
- Instructions manual (72 pages)

Related Manuals for Viessmann VITOCROSSAL 200


Summary of Contents for Viessmann VITOCROSSAL 200
- Page 1 VIESMANN Service instructions for contractors Vitocrossal 200 Type CT2 Gas condensing boiler with MatriX cylinder burner for natural gas E and LL For applicability, see the last page VITOCROSSAL 200 Please keep safe. 5692 908 GB 3/2011...
-
Page 2: Safety Instructions
Safety instructions Safety instructions Please follow these safety instructions closely to prevent accidents and mate- rial losses. Safety instructions explained ■ The system must be commissioned by the system installer or a qualified per- Danger son authorised by the installer. This symbol warns against the ■... - Page 3 Replace faulty components only ■ Shut off the electricity supply to with original Viessmann spare the building from a safe place parts. (outside the building). If you smell flue gas Danger Flue gas can lead to life-threat- ening poisoning.
- Page 4 Installing non-author- ised components and making non-approved modifications or conversions can compromise safety and may invalidate our warranty. For replacements, use only orig- inal spare parts supplied or approved by Viessmann.
-
Page 5: Table Of Contents
Index Index Commissioning, inspection, maintenance Steps – commissioning, inspection and maintenance.......... Further details regarding the individual steps............Troubleshooting Diagnosis......................41 Burner control unit flow diagram..............51 Connection diagrams Burner control unit connection diagram..............53 Mains filter unit connection diagram..............54 Component overview.................. -
Page 6: Commissioning, Inspection, Maintenance
Commissioning, inspection, maintenance Steps – commissioning, inspection and maintenance For further information regarding the individual steps, see the page indicated Commissioning steps Inspection steps Maintenance steps Page • • 1. Information regarding maintenance work....• 2. Checking the high limit safety cut-out setting..... •... - Page 7 Commissioning, inspection, maintenance Steps – commissioning, inspection and… (cont.) Commissioning steps Inspection steps Maintenance steps Page • • 22. Checking the ignition and ionisation electrodes..24 • • 23. Closing the boiler door..........25 • • 24. Cleaning the burner............25 •...
-
Page 8: Further Details Regarding The Individual Steps
Commissioning, inspection, maintenance Further details regarding the individual steps Information regarding maintenance work Danger The product contains ceramic fibres. If handled incorrectly, fibre dust may be released. Observe the stipulations of the Technical Guideline for the Handling of Haz- ardous Materials (TRGS) 521. Checking the high limit safety cut-out setting Never set the high limit safety cut-out Control unit installation and serv-... -
Page 9: Filling Siphon With Water
Commissioning, inspection, maintenance Further details regarding the individual steps (cont.) Filling siphon with water 1. Release the siphon and fill with water (otherwise flue gas may escape). 2. Check that the condensate can drain freely. 3. Refit the siphon. Starting the heating system Control unit operating and serv- 4. - Page 10 Commissioning, inspection, maintenance Further details regarding the individual steps (cont.) 7. Match the coding at the boiler control unit according to the table on page 58. Control unit installation and service instructions 8. Check the function of the neutralising system, including the hydraulic seal in the siphon.
-
Page 11: Checking The Gas Type
Commissioning, inspection, maintenance Further details regarding the individual steps (cont.) Checking the gas type 1. Determine the gas type and Wobbe 2. In the delivered condition, the burner index (Wo) from your gas supply util- is set up for natural gas E. If required, ity. -
Page 12: Checking The Static And The Supply Pressure
Commissioning, inspection, maintenance Further details regarding the individual steps (cont.) 07. Release the gas train from flange 12. Affix supplied label "Set to ..." F over the existing label. 08. Remove restrictor C with rubber 13. Start the burner (see page 9). cork gasket D. - Page 13 Commissioning, inspection, maintenance Further details regarding the individual steps (cont.) Supply pressure 3. Record the actual value in the report (on page 65). 1. Start the burner. 4. Close the gas shut-off valve. Note For commissioning, see page 9. 5. Remove the pressure tester and close test nipple A.
-
Page 14: Checking The Co 2 Content
Commissioning, inspection, maintenance Further details regarding the individual steps (cont.) Checking the CO content Preparing the test 1. Open the gas shut-off valve. 2. Start the burner. 3. Press "S" E and "-" D simultane- ously. Display C will then show the follow- ing: ■... - Page 15 Commissioning, inspection, maintenance Further details regarding the individual steps (cont.) 3. If the CO content must be adjusted: ■ Remove cap B. ■ Turn adjusting screw A in small increments (3 mm Allen key) until the CO content reaches the speci- fied range: –...
- Page 16 Commissioning, inspection, maintenance Further details regarding the individual steps (cont.) 3. If the CO content must be adjusted: ■ Remove cover B. ■ Turn adjusting screw A in small increments (Torx 40) until the CO content reaches the specified range: –...
-
Page 17: Checking The Ionisation Current
Commissioning, inspection, maintenance Further details regarding the individual steps (cont.) Checking the ionisation current 01. Switch OFF the mains isolator. 07. Switch the mains isolator ON and press reset. 02. Pull ionisation current cable plug 08. Check the ionisation current. 03. -
Page 18: Shutting Down The System
Commissioning, inspection, maintenance Further details regarding the individual steps (cont.) Shutting down the system 1. Switch OFF the mains isolator or the 2. Pull connecting plugs fÖ, fA, lÖ and power supply and safeguard against fÖ/aBH from the burner. unauthorised reconnection. 3. - Page 19 Commissioning, inspection, maintenance Further details regarding the individual steps (cont.) 5. Undo six screws on boiler door E and open the door. Please note Scratches inside the combustion chamber can lead to corrosion. Never put tools or other objects into the combustion chamber.
-
Page 20: Separating The Neutralising System (If Installed) From The Boiler And Connecting The Drain Hose
Commissioning, inspection, maintenance Further details regarding the individual steps (cont.) Separating the neutralising system (if installed) from the boiler and connecting the drain hose 1. Separate hose A to the neutralising system from siphon B. 2. Connect drain or cleaning hose C to the siphon and run it to the drain Cleaning the combustion chamber and heating surfaces Thoroughly clean the combustion cham-... -
Page 21: Checking Gaskets And Thermal Insulation Parts
Commissioning, inspection, maintenance Further details regarding the individual steps (cont.) For normal cleaning, flush the heating Cleaning agent manufacturer's surfaces thoroughly with a water jet. You details may use cleaning agents if you notice stubborn residues, surface discoloura- Note tion or soot deposits. "Fauch 600"... -
Page 22: Checking All Connections On The Heating Water Side For Leaks
Commissioning, inspection, maintenance Further details regarding the individual steps (cont.) Checking all connections on the heating water side for leaks Danger Note There is a risk of injury when Also check the connections to control working on pressurised compo- equipment and to the minimum pressure nents. -
Page 23: Checking The Condensate Drain And The Neutralising System (If Installed)
Neutralising system operating instructions Note You can obtain neutralising agent from Viessmann quoting part no. 9521 702. 4. Release and flush lower part A of siphon B. 5. Fill lower part A of siphon B with water and reassemble. -
Page 24: Checking The Burner Gauze Assembly
Commissioning, inspection, maintenance Further details regarding the individual steps (cont.) Checking the burner gauze assembly Burner component installation instructions 1. Check the wire mesh and cover of burner gauze assembly A for dam- age. Slight wavy deformations of the burner gauze assembly A are OK. 2. -
Page 25: Closing The Boiler Door
Commissioning, inspection, maintenance Further details regarding the individual steps (cont.) Closing the boiler door Note Tighten the boiler door screws evenly across with a torque of at least 18 Nm. Cleaning the burner 4. Pull the connecting cables from fan E and remove fan. -
Page 26: Installing The Burner
Commissioning, inspection, maintenance Further details regarding the individual steps (cont.) Installing the burner 2. Plug the connecting cables into fan 3. Secure Venturi mixing pipe D with gas train A and gas supply pipe B on fan E, and plug in connecting cables. -
Page 27: Checking The Rotary Damper Setting
Commissioning, inspection, maintenance Further details regarding the individual steps (cont.) 3. Check the inlet seals of the gas train 4. Start the burner (see page 9). for tightness. 5. Check the outlet seals of the gas Please note train, the fittings between the fan and The use of leak detecting the burner flange, and between the spray can result in incorrect... -
Page 28: Implementing Final Tests
Commissioning, inspection, maintenance Further details regarding the individual steps (cont.) 1. Open the gas shut-off valve. 5. Check the position of the rotary damper during the start-up phase. 2. Check the position of the rotary Rotary damper windows B must be damper in burner idle mode. -
Page 29: Checking The Water Quality
Commissioning, inspection, maintenance Further details regarding the individual steps (cont.) Checking the water quality Enter the volume of top-up water, the water hardness and the pH value in the tables. For water quality requirements, see from page 67. Fill water Top-up water Meter reading Total water... -
Page 30: Expansion Vessel And System Pressure
Commissioning, inspection, maintenance Further details regarding the individual steps (cont.) Total hardness pH value Water treatment Date Feedwater Boiler water Boiler Medium Metering water volume The pH value should be between 8.2 and 9.5. Expansion vessel and system pressure Note 3. -
Page 31: Checking The Gaskets/Seals On The Flue Gas Side
Commissioning, inspection, maintenance Further details regarding the individual steps (cont.) Checking the gaskets/seals on the flue gas side 1. Check seal A between flue gas col- 2. Check lip seal B of the boiler flue lector D and boiler body E for tight- connection for tightness. -
Page 32: Checking The Mixer For Ease Of Operation And Leaks
Commissioning, inspection, maintenance Further details regarding the individual steps (cont.) 3. If required, retighten the flue gas col- lector seal A at clamping clips C. Replace lip seal B if it leaks. Checking the mixer for ease of operation and leaks 1. -
Page 33: Air Pressure Switch
Air pressure switch Function The air pressure switch A signal is assessed under the following operating conditions: ■ prior to the fan start (idle state check) ■ in the pre-purge phase ■ in control mode, subject to at least a starting output being produced. - Page 34 Burner control unit Display and programming unit Function A display and programming unit is integrated into the burner control unit. The display indicates the relevant operating conditions, the service and parameter conditions as well as all fault and error messages. The display comprises three elements of Status Service seven segments each.
- Page 35 Burner control unit (cont.) Idle state check Status Service Fan ramp-up Status Service Valve check Pre-purge Status Service Pre-ignition Status Service Safety time Status Service Flame established Status Service Flame stabilisation Operation with flame Status Service Post-purge Status Service...
- Page 36 Burner control unit (cont.) Standby Status Service Display Status Service (one digit) (two digits) Operating display in For current operating Display "FL" if a flame Page 35 standard mode condition/status, see signal is present pages 34 and 36 Operating display for For message code —...
- Page 37 Burner control unit (cont.) Quality of the ionisation current Status Service Note A value of > 50 for the quality of the ion- isation current is very good. If the value is lower, check the ionisation current, μ A. Otherwise which should then be >...
- Page 38 Burner control unit (cont.) Manual mode and service display To call up the service display and for manual mode, a heat demand must be issued by the control unit. The service display shows the current level of modulation in %. Display: "d 0"...
-
Page 39: Fault Memory
Burner control unit (cont.) 1. Press a. Status Service The operating phase under which the fault has occurred, is displayed under "Service" as long as this key is held down. (Phase from "01" to "36"; see flow diagram on page 51). 2. - Page 40 Burner control unit (cont.) Status Service 2. Press S to scan faults from the penultimate to the tenth from last. Display under Fault "Status" most recent fault tenth to last fault The relevant fault code is displayed under "Service". 3. Press S. Then the operating display will be shown again.
-
Page 41: Troubleshooting
Troubleshooting Diagnosis Faults with indication on the display and programming unit (fault codes) Message codes Message System characteris- Cause Measures code tics Burner does not start Gas supply pres- Check gas flow pressure; sure too low; gas check gas pressure lim- pressure limiter iter switches off... - Page 42 Troubleshooting Diagnosis (cont.) General process errors Fault Display System charac- Cause Measure teristics code F AA F AA Fan pressure is Wind influence on Check flue gas produced during draught (chimney) the air pressure switch idle state check F AA F AA Air pressure Air pressure...
- Page 43 Troubleshooting Diagnosis (cont.) Fault Display System charac- Cause Measure teristics code F A2 Burner control unit Interruption - Check safety chain in fault state safety chain has (strapping plug been opened (strapping plug F A3 No password Values in burner Enter password.
- Page 44 Troubleshooting Diagnosis (cont.) Fault Display System charac- Cause Measure teristics code F A7 F A7 No flame signal Incorrect gas type Adjust gas type during safety time; selected (see page 11) ionisation flame monitor reports no flame signal F A7 F A7 No flame signal Gas train does not...
- Page 45 Troubleshooting Diagnosis (cont.) Fault Display System charac- Cause Measure teristics code F A8 F A8 Flame extin- Incorrect parame- Replace and ena- guishes during ter memory stick ble parameter operation inserted memory stick F A8 F A8 Flame extin- Combustion char- Adjust burner (see guishes during acteristics not...
- Page 46 Troubleshooting Diagnosis (cont.) Fault Display System charac- Cause Measure teristics code F 16 None Burner control unit EMC fault Have your system in fault state tested for EMC interference F 4b F 4b Could not find Parameter set Plug stick into parameter mem- enabled, but burner control unit;...
- Page 47 Troubleshooting Diagnosis (cont.) Fault Display System charac- Cause Measure teristics code F 40 None Burner control unit Set default value Replace memory in fault state for fan in parame- stick I Danger ter set incorrect Plug-in termi- nals on the burner control unit 'live'.
- Page 48 Troubleshooting Diagnosis (cont.) Fault Display System charac- Cause Measure teristics code F 53 Shortage of gas to Gas valve does Replace gas train. gas pressure lim- not open; gas After replacing the iter; check valve valve leaking gas train extended tightness reset (see page 45)
- Page 49 Troubleshooting Diagnosis (cont.) Fault Display System charac- Cause Measure teristics code 01, 02, 05 01, 02, Fault in area of Internal system Replace burner to 0d, 0F, 05 to 0d, burner control unit fault and EMC control unit 14, 15, 17, 0F, 14, EMC measure: try 1A to 1c,...
- Page 50 Troubleshooting Diagnosis (cont.) Fault Cause Measure content too low Incorrect setting Check that burner has been adjusted for the correct gas type, and change gas restrictor if required (see from page 11). Adjust burner in accordance with the details on page 14 CO is formed or burner Too little or too much Adjust correctly.
-
Page 51: Burner Control Unit Flow Diagram
Burner control unit flow diagram Burner control unit flow diagram... - Page 52 Burner control unit flow diagram Burner control unit flow diagram (cont.) After the controller issues a heat demand, the following program sequence will be run: Phase Duration Fault 0 ... Waiting for heat demand 0 ... Fan idle state max. 2 min Air pressure switch idle state check max.
-
Page 53: Connection Diagrams
Connection diagrams Burner control unit connection diagram MatriX cylinder burner A Burner control unit MPA 5113 M Solenoid valve stage 2 (BV 2) B Vitotronic control unit N Solenoid valve stage 1 (BV 1) C Fan motor with PWM control and O Servomotor for rotary valve feedback B2 Safety chain jumper... -
Page 54: Mains Filter Unit Connection Diagram
Connection diagrams Mains filter unit connection diagram Mains filter To the burner control unit (plug a-Ö), only in conjunction with Contactor To the fan (plug a-Ö) flue gas damper. - Page 55 (230 V~/50 Hz) via a perma- contactor B (plug aBH) nent connection. Flue gas damper Note Make the power supply (230 V~/50 Hz) via a permanent connection. The faulty power cable should only be replaced with an original Viessmann power cable.
-
Page 56: Component Overview
Component overview Component overview MatriX cylinder burner A Burner frame E Gas train B Air pressure switch F Rotary damper with servomotor C Gas fan G Venturi mixing pipe D Display and programming unit H Mains filter unit with contactor... -
Page 57: Control Unit
Component overview Component overview (cont.) B Air pressure switch M Gas supply pipe D Display and programming unit N Burner control unit H Mains filter unit with contactor O Ignition unit K Ignition electrodes p Burner gauze assembly L Ionisation electrode... -
Page 58: Control Unit
Control unit Adjusting codes at the control unit Vitotronic service instructions In conjunction with the following control units: ■ Vitotronic 100, type GC1B ■ Vitotronic 200, type GW1B ■ Vitotronic 300, type GW2B Coding address Rated output of the MatriX cylinder burner in Coding card 1042... -
Page 59: Parts Lists
Parts lists Parts lists Spare parts information 027 Enriching nozzle Quote the part no. and serial no. (see 028 Parameter memory stick type plate) and the position number of 029 Compensation set the required part (as per this parts list). 030 VPS connecting cable for gas pres- Obtain standard parts from your local sure limiter... - Page 60 Parts lists Parts lists (cont.) 223 Bottom part, cable channel 300 Thermal insulation pack 224 Top part, cable channel 301 Decorative adhesive tape 225 Strain relief 302 Spray paint, Vitosilver 226 Edge protector 303 Touch-up paint stick, Vitosilver 227 Brace 304 Dirko-HT sealant 228 Mounting panel 305 Installation instructions...
- Page 61 Parts lists Parts lists (cont.) MatriX cylinder burner 2f 007...
- Page 62 Parts lists Parts lists (cont.) Vitocrossal 200, type CT2...
- Page 63 Parts lists Parts lists (cont.)
- Page 64 Parts lists Parts lists (cont.)
-
Page 65: Commissioning/Service Report
Commissioning/service report Commissioning/service report Setting and test values Commission- Maintenance/ service Static pressure mbar Supply pressure (flow pressure) = for natural gas E mbar = for natural gas LL mbar Tick gas type Carbon dioxide content CO ■ at the upper rated actual % by output... - Page 66 Commissioning/service report Commissioning/service report (cont.) Note The CO content for all natural gases must be between 7.5 and 10.5 %. The CO content must always be lower in partial load than it is in full load.
-
Page 67: Water Quality Requirements
Water quality requirements Water quality requirements Note The manufacturer's warranty excludes Maintaining the following requirements damage due to corrosion and scaling. is necessary to safeguard your warranty rights. Prevention of damage due to scaling Prevent excessive scale build-up (calcium carbonate) on the heating surfaces. For heating systems with operating temperatures up to 100 °C, VDI Directive 2035 Sheet 1 "Prevention of damage to hot water heating systems –... - Page 68 Water quality requirements Water quality requirements (cont.) ■ In systems > 50 kW, install a water ■ Commission the system step by step, meter to capture the volume of the fill starting with the lowest boiler output & top-up water. Enter the amount of fill and at a high heating water flow rate.
- Page 69 Water quality requirements Water quality requirements (cont.) Prevention of damage due to corrosion on the water side The corrosion resistance of ferrous Sealed unvented systems – e.g. sys- materials on the heating water side of tems with a diaphragm expansion vessel heating systems and boilers depends on –...
- Page 70 Water quality requirements Water quality requirements (cont.) Where chemicals are used as part of the corrosion protection, we recommend that the manufacturer of the chemicals issues a certificate of suitability of the additives with regard to the boiler mate- rials and the materials of the other heat- ing equipment components.
-
Page 71: Specification
Specification Specification Gas boiler, category I 2ELL Rated heating output = 50/30 °C 135-404 168-503 209-628 = 80/60 °C 123-370 153-460 192-575 Rated heat input 127-381 158-474 198-593 Product ID CE-0085 BS 0399 Connection values relative to the max. load with ■... - Page 72 Specification Specification (cont.) Gas restrictor dimensions (natural Rated heating output Dimension a gas E) 404 kW 17.8 503 kW 22.0 628 kW 24.0...
-
Page 73: Certificates
Certificates Declaration of conformity We, Viessmann Werke GmbH&Co KG, D-35107 Allendorf, declare as sole respon- sible body, that the product Vitocrossal 200, type CT2, output 404-628 kW with Vitotronic boiler control unit and MatriX cylinder burner conforms to the following standards:... -
Page 74: Manufacturer's Certificate According To The First Bimschv [Germany]
Manufacturer's certificate according to the first BImSchV [Germany] We, Viessmann Werke GmbH&Co KG, D-35107 Allendorf, confirm that the product Vitocrossal 200, type CT2, output 404 - 628 kW with MatriX cylinder burner complies with the following conditions stipulated by the first German Immissions Order (BImSchV): ■... -
Page 75: Keyword Index
Keyword index Keyword index Fault memory........39 Air pressure switch......33 Faults without fault display....49 Flow diagram........51 Flow pressure........13 Boiler water quality requirements..67 Burner control unit......34 Burner gauze assembly, checking..24 Gas connection tightness....26 Checking expansion vessel....30 Implementing final tests.....28 Checking the CO2 content....14 Information display......36 Checking the gaskets/seals on the flue Installing the burner......26... - Page 76 Applicability Serial No.: 7454039 7454040 7454041 7311947 7311948 7311949 Viessmann Werke GmbH&Co KG Viessmann Limited D-35107 Allendorf Hortonwood 30, Telford Telephone: +49 6452 70-0 Shropshire, TF1 7YP, GB Fax: +49 6452 70-2780 Telephone: +44 1952 675000 www.viessmann.com Fax: +44 1952 675040...
Need help?
Do you have a question about the VITOCROSSAL 200 and is the answer not in the manual?
Questions and answers