
Related Manuals for DSIC DS2 Series


Summary of Contents for DSIC DS2 Series
-
Page 1: User Manual
DS2 User Manual Ver.0 2016. 08. 18 DS2 Series User Manual Android 5.1.1 Aug. 18, 2016 ISO 9001 Certified Quality Management System... - Page 2 While reasonable efforts were made to ensure that the information in this document was complete and accurate at the time of printing, DSIC Co., Ltd. can assume to no liability for any errors. Changes and corrections to the information in this document might be incorporated in future release.
- Page 3 Contact DSIC Support DSIC Co., Ltd. provides a technical support customer service for you to report problems or to ask questions about the product. Please contact us through our email: support_pda@dsic.co.kr. For additional support, visit the DSIC Web site: http://www.mobilebase.co.kr...
-
Page 4: Table Of Contents
DS2 User Manual Ver.0 2016. 08. 18 Contents Revision History ................................... 6 Chapter 1: Introduction to the DS2 ..........................8 Specifications ....................................8 Overview of terminal features ............................9 Chapter 2: Getting Started ..............................11 SIM card installation ..............................12 Battery mounting and operation .......................... - Page 5 DS2 User Manual Ver.0 2016. 08. 18 Chapter 8: Application Guide ............................32 Barcode Tray ..................................32 File Manager ..................................35 Key Mapping ..................................35 OTA Update..................................39 Chapter 8: Developer’s Guide ............................40 USB Driver ..................................40 OS Update ..................................40 Emergency Update .................................
-
Page 6: Revision History
DS2 User Manual Ver.0 2016. 08. 18 Revision History Date Description Link Aug.12.2016 Released Manual Nov.28.2016 Barcode Tray Update... -
Page 7: Safety Information
DS2 User Manual Ver.0 2016. 08. 18 Safety Instruction Read this instruction carefully to keep yourself safe and to avoid the loss of property. Make sure that battery terminals (metal part) do not come into contact with any conductive materials like a necklace or coin. Also make sure that batteries do not get damaged by teeth or nails. -
Page 8: Chapter 1: Introduction To The Ds2
DS2 User Manual Ver.0 2016. 08. 18 When storing a battery for a long period of time, recharge it and keep it at a room temperature. Even a fully charged battery will suffer reduced lifespan due to the char acteristics of the battery. -
Page 9: Overview Of Terminal Features
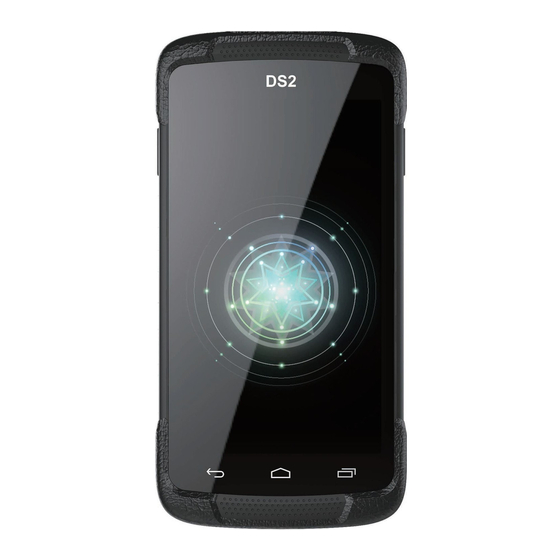
DS2 User Manual Ver.0 2016. 08. 18 Overview of terminal features Front view Micro USB port Scanner trigger (Programmable) Power Button Scanner trigger (Programmable) Reset 5inch WVGA touch screen... - Page 10 DS2 User Manual Ver.0 2016. 08. 18 Back view Barcode scanner Barcode scanner Micro USB port Speaker Hand belt hook Battery cover lock Scanner trigger Power button Battery cover Hand belt hook...
-
Page 11: Chapter 2: Getting Started
DS2 User Manual Ver.0 2016. 08. 18 Chapter 2: Getting Started This chapter will describe how to install and charge battery, mount micro SD card and start the terminal To start up the terminal, Install Micro SD card Mount battery ... -
Page 12: Sim Card Installation
DS2 User Manual Ver.0 2016. 08. 18 Micro SD card installation Important : Turn your device off before installing or removing a card. Be careful not to bend or scratch the card and avoid exposing it to static electricity, water, or dirt. Keep cards out of the reach of small children. Insert the card carefully as shown in the following picture. -
Page 13: Battery Mounting And Operation
DS2 User Manual Ver.0 2016. 08. 18 Battery mounting and operation Slide in a battery and press down to mount clear Then, install battery cover to the device and lock as process Slide in a battery and press down to mount Install battery cover to the device and lock as clear picture above... - Page 14 According to the European Guideline 2006/66/EC, defective or used battery packs/ batteries must be collected separately and disposed in an environmentally correct manner. Batteries that is no longer suitable for use can be directly returned at: DSIC Co., Ltd. Floor, Daeryung Technotown 3, 448 Gasan-Dong, Guemchun-Gu, Seoul, Korea Tel. Service: +82-2-2107-5152 Fax: +82-2-2107-5178 Email:dsic_pda@dsic.co.kr...
-
Page 15: Connecting Power Source
DS2 User Manual Ver.0 2016. 08. 18 Connecting power source Connect power using one of the method listed below. Caution Verify that the terminal battery is installed prior to the connection. If the battery is not properly installed and is connected to the wall charger, the terminal may power on and of continuously, preventing proper operation. Note Failure to unplug the wall charger before removing the battery may cause damage to the terminal ... -
Page 16: Operating Power Of The Terminal
DS2 User Manual Ver.0 2016. 08. 18 Operating power of the terminal Power on / off Make a long press Power button at the right side of the terminal to turn on. When you first turn on your device, you’ll see a Welcome screen. Choose the right language you want and touch Start or the Start icon. -
Page 17: Home Screen
DS2 User Manual Ver.0 2016. 08. 18 Home Screen Make yourself at home. After you finish setting up your device, the Home screen appears for the first time. To move between Home screens, swipe left or right. Get around At the bottom of every Home screen you’ll find the Favorites tray: another quick way to get to your apps. -
Page 18: Status Bar
DS2 User Manual Ver.0 2016. 08. 18 Back Opens the previous screen you were working in, even if it was in a different app. Once you back up to the Home screen, you can’t go back any further. Home Opens the central Home screen. Recent apps Press Home for few seconds to browse a list of thumbnail images of app you’ve worked with recently. -
Page 19: Organize Your Home Screens
DS2 User Manual Ver.0 2016. 08. 18 Organize your Home screens To change the wallpaper: 1. Touch & hold the background, then touch Wallpapers. 2. Swipe right to left to choose a wallpaper image. Or choose an image from your Photos, Downloads or Drive. -
Page 20: Android Version & Updates
DS2 User Manual Ver.0 2016. 08. 18 finger, move your finger on the screen until you reach the target position. For example, you can move apps around on the Home screen. Swipe or slide. Quickly move your finger across the surface of the screen, without pausing ... -
Page 21: Chapter 3: Essentials
DS2 User Manual Ver.0 2016. 08. 18 Chapter 3: Essentials Display Change the display settings on your device by following these steps: 1. Go to Settings > Device > Display 2. Choose from the following settings. Some of these settings may vary by your device and version of Android. - Page 22 DS2 User Manual Ver.0 2016. 08. 18 TIP: Wi-Fi and mobile signal strength are indicated at the top of the screen by white bars. To see whether the selected Wi-Fi network has a full internet connection, open Quick Settings: swipe down from the top right on tablets, or with two fingers on the phones.
-
Page 23: Security
DS2 User Manual Ver.0 2016. 08. 18 Security If a lock is set for your screen, the screen goes dark and locks when the display goes to sleep or if you press the Power button. You can set locks of different strengths using Screen lock settings: 1. -
Page 24: Screenshots
DS2 User Manual Ver.0 2016. 08. 18 Downloads includes most files (excluding Play content) you’ve downloaded from emails or the Web Gallery lets you browse all the images and videos that have been uploaded to your account. Use the Downloads app to view, reopen, or delete files you download from email or other sources (excluding videos, magazines and other media) In the Downloads app: Touch an item to open it. -
Page 25: Chapter 4: Use The Keyboard
DS2 User Manual Ver.0 2016. 08. 18 Chapter 4: Use the keyboard Enter & edit text Use the onscreen keyboard to enter text. Here’s what it looks like on a DS2 device: To make the keyboard go away, touch the Back button below it. Some apps open the keyboard automatically. -
Page 26: Emoji
DS2 User Manual Ver.0 2016. 08. 18 Cut, copy, paste. Select the text you want to cut or copy. Then touch the Cut or Copy icons. To paste, touch the space where you want to paste your text and then touch Paste. -
Page 27: Keyboard Dictionaries
DS2 User Manual Ver.0 2016. 08. 18 3. Continue to touch words unless the one you want doesn’t appear. If so, type it. Android continues to suggest words as you type. To change your keyboard and input methods, go to Settings > Personal > Language &... -
Page 28: Chapter 5: Try Some Apps
DS2 User Manual Ver.0 2016. 08. 18 Chapter 5: Try some apps All Apps To see all your apps, touch the All Apps icon in the Favorites tray on any Home screen. This is where you can see all your apps. You can move app icons to any of your Home screens. -
Page 29: Contacts
DS2 User Manual Ver.0 2016. 08. 18 Within each category you can browse groups of images, crop, edit, and tag them, create slideshows, make pictures or videos available offline, and share with friends. Contacts The Contacts app gives you quick access to everyone you want to reach. To open it, touch the Contacts icon on a Home or All Apps screen. -
Page 30: Chapter 6: Settings
DS2 User Manual Ver.0 2016. 08. 18 Chapter 6: Settings Most apps include their own settings, typically available from Menu > Settings on DS2 devices. The fastest way to adjust system settings that you access frequently, such as Wi-Fi or brightness, is through Quick Settings. -
Page 31: Chapter 7: Accessibility
DS2 User Manual Ver.0 2016. 08. 18 Chapter 7: Accessibility To use the accessibility options, open Settings > System > Accessibility. Accessibility settings let you modify your device’s display and sound options, such as increasing the text size, changing the speed at which text is spoken, and more. You can also try magnification gestures which allow you to zoom in and out, as well as temporarily magnify what’s under your finger. -
Page 32: Chapter 8: Application Guide
DS2 User Manual Ver.0 2016. 08. 18 Chapter 8: Application Guide Barcode Tray To activate Barcode Tray program, touch barcode tray icon at your screen. Scan Test Text view the scanned barcode Barcode Module Setting Setting to enable, or disable barcode types Scan Setting Setting scanning feature, such as time out, prefix and suffix, scanner key setting, notification options and etc. - Page 33 DS2 User Manual Ver.0 2016. 08. 18 Barcode Module Setting Setting to enable, or disable barcode types Scan Setting Setting scanning feature, such as time out, prefix and suffix, scanner key setting, notification options and etc.
- Page 34 DS2 User Manual Ver.0 2016. 08. 18 Setting Export / Import Set up barcode configuration by programming, or export the set up to file Information Demonstrate the installed barcode scanner to your device and application version information of your barcode scanner. Barcode tray program is able to be updated by OTA Update...
-
Page 35: File Manager
DS2 User Manual Ver.0 2016. 08. 18 File Manager It demonstrates capacity of internal memory and SD card memory. File search, move, delete, rename, share, and property is available. Key Mapping It is enabling you to create a shortcut for repeating a sequence of keys or commands. Go Settings >... - Page 36 DS2 User Manual Ver.0 2016. 08. 18 Select one of key in PROGRAMMABLE KEY You can select an application to short cut for execution...
- Page 37 DS2 User Manual Ver.0 2016. 08. 18 Or, swipe the screen to left to set sequence. When you select No use, then the key has no function To reset the function key, press the icon. Then you can reset the config.
- Page 38 DS2 User Manual Ver.0 2016. 08. 18 Press Menu icon to import, export, remove, or reset your key mapping configuration Key Position You can set your key mapping with graphic interface as below...
-
Page 39: Ota Update
DS2 User Manual Ver.0 2016. 08. 18 OTA Update Go to Settings > About tablet > OTA Update Start > OTA Start Check your available latest OS update at Select Version Then touch Start Update button if you have available OS update. -
Page 40: Chapter 8: Developer's Guide
Input micro SD card into your device WHILE pressing and holding Power + Left Scan Key on your device and, afterward to enter DSIC SD Download screen When OS image file has been copied and installed completely, Done will be displayed on your device screen. -
Page 41: Barcode Scanner Api
DS2 User Manual Ver.0 2016. 08. 18 Barcode scanner API Environments To develop barcode scanner feature on your application, please download 2 files from below link. Barcode Sample_dsic DS2_usb_driver https://www.dropbox.com/sh/vatneib1h0828um/AAA2VgQkmW84czxEErD3IFena?dl=0 SDK made by AIDL(Android Interface Definition Language) and Android SDK 19 version (Lollipop). AIDL service starts at Barcode Tray. To use SDK, Barcode Tray must be turned on. -
Page 42: Basic Implementation
- Example of global declaration of broadcast BroadcastReceiver mBarcodeReadBroadCast = new BroadcastReceiver() { @Override public void onReceive(Context context, Intent intent) { (intent.getAction().equals("app.dsic.barcodetray.BARCODE_BR_DECODING_DATA")) { BarcodeDeclaration.SYMBOLOGY_IDENT symbology_ident = BarcodeDeclaration.SYMBOLOGY_IDENT.fromInteger( intent.getIntExtra("EXTRA_BARCODE_DECODED_SYMBOLE", -1)); TextView editText = (TextView) findViewById(R.id.editText); (symbology_ident != BarcodeDeclaration.SYMBOLOGY_IDENT.NOT_READ) { String data = "["+symbology_ident.toString()+"]"+... - Page 43 DS2 User Manual Ver.0 2016. 08. 18 Modifiable Name of Decoding Broadcast ( app.dsic.barcodetray.BARCODE_BR_DECODING_DATA In case to modify the name of Decoding Broadcast, please use AIDL API. Symbology Identification Decoding data Decoding Broadcast contains below Contents Type Default Value...
- Page 44 2016. 08. 18 - Example of registry broadcast @Override protected void onResume() { super.onResume(); /*Set Broadcast receiver*/ registerReceiver(mBarcodeReadBroadCast, new IntentFilter("app.dsic.barcodetray.BARCODE_BR_DECODING_DATA")); @Override protected void onPause() { super.onPause(); /*AIDL Service disconnect*/ unregisterReceiver(mBarcodeReadBroadCast); Note: Above examples are an example. You can also add at Androidmanifest.xml.
-
Page 45: Controlling Scanning & Barcode Using Aidl
AIDL which is including many functions. Many of functions don’t need to intent service implement. Some are using only barcode tray. For details, please refer Common APIs. Step 1: Connect to AIDL import app.dsic.barcodetray.IBarcodeInterface; private IBarcodeInterface mBarcode;... - Page 46 DS2 User Manual Ver.0 2016. 08. 18 protected void onResume() { super.onResume(); /*AIDL Service connect*/ bindService(new Intent("app.dsic.barcodetray.IBarcodeInterface"), srvConn, BIND_AUTO_CREATE); @Override protected void onPause() { super.onPause(); /*AIDL Service disconnect*/ unbindService(srvConn); IBarcodeInterface.aidl serviceConnection Copy package in your source code. Then, make global value and set barcode.
- Page 47 DS2 User Manual Ver.0 2016. 08. 18 The API related files API has consisted as below; BarcodeDeclaration.java IBarcodeInterface.aidl BarcodeDeclaration.java This is declaration files related to return value and parameter. Below is meaning of each declaration in the file; BARCODE_RESULT: API return value ...
- Page 48 DS2 User Manual Ver.0 2016. 08. 18 RESULT_OPEN_FAIL Barcode scanner open fail 1.0.11 RESULT_NOT_ON_SCANNING Do not use anymore 1.0.11 RESULT_SCAN_DISABLE Scanning disable status 1.0.11 RESULT_DRIVER_ERROR Error in barcode driver layer 1.0.11 RECEIVE_TYPE Parameter ㆍvoid SetRecvType(int nRecvType) INTENT_EVENT It is receiving data with INTENT method. Regarding Action 1.0.11 Value ㆍint GetRecvType()
- Page 49 DS2 User Manual Ver.0 2016. 08. 18 IBarcodeInterface.aidl These files are to communicate with barcode service Name Description of function Parameter Return Value User Accessibility Version Open() It activates barcode scanner module None Int (BARCODE_RESULT) 1.0.11 Close() It deactivates barcode scanner module None Int (BARCODE_RESULT) 1.0.11...
- Page 50 It gets current Delay Time void 1.0.11 GetIntentName() It gets Action Name of broadcast when Intent Event void String √ 1.0.11 Default value: “app.dsic.barcodetray.BARCODE_BR_DECODING_DATA” SetIntentName(String It is to set Action Name of broadcast when Intent Event String IntentName void √ 1.0.11 IntentName)
- Page 51 DS2 User Manual Ver.0 2016. 08. 18 GetIntentBarcodeData() It gets Action Name of broadcast when Intent Event. Default value: Void String √ “EXTRA_BARCODE_DECODED_DATA” SetIntentBarcodeData(String It is to set Barcode Data Name when Intent Event String BarcodeData void √ BarcodeData) GetIntentSymData() It gets name of barcode symbology data of broadcast when Intent event Void String...
-
Page 52: Kiosk Mode
DS2 User Manual Ver.0 2016. 08. 18 KIOSK MODE Kiosk mode is enabling to lock down unwanted device misuse. It is to control which application and device features can be used by user such as blocking access to games, social media apps and etc. When you allow access to business application apps, KIOSK MODE will ensure that the user cannot access anything other than those allowed application. -
Page 53: Password Change
DS2 User Manual Ver.0 2016. 08. 18 Password change Input new password more than 4 characters Notification clear... -
Page 54: Setting Background
APP List, KIOSK On, KISOK Off and new password. If you want to assign special email account, then select Receive Email. To check the exported file, go File Manager > All Files > Internal > DSIC > kiosk... -
Page 55: Device Administration
DS2 User Manual Ver.0 2016. 08. 18 Device Administration Go Settings > Security > Device administrators > XXXXX (Your application) > Activate You use the Device Administration API to write device admin applications that users install on their devices. The device admin application enforces the desired policies. Here's how it works: A system administrator writes a device admin application that enforces remote/local device security policies. - Page 56 DS2 User Manual Ver.0 2016. 08. 18...
Need help?
Do you have a question about the DS2 Series and is the answer not in the manual?
Questions and answers