Table of Contents
Advertisement
Model: 801400, 801401, 801555, 801556,
Model: 801505, 801506, 801507, 801515,
STALGAST Radom sp. z o.o. ul. Staniewicka 5 03-310 Warsaw
telephone: 22 517 15 75 fax.: 22 517 15 77 www.stalgast.com email: stalgast@stalgast.com
INSTRUCTION MANUAL
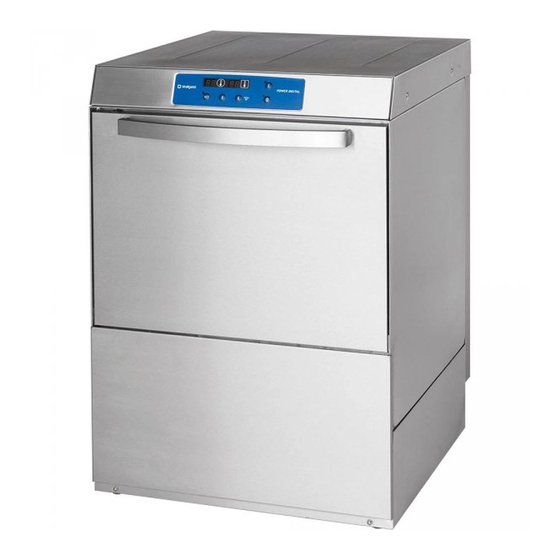
DISHWASHER
supply voltage
801565, 801566
supply voltage
801516, 801517
230 v
230/400 v
v1.0 - 07.2016
Advertisement
Table of Contents

Related Manuals for Stalgast 801400


Summary of Contents for Stalgast 801400
- Page 1 Model: 801400, 801401, 801555, 801556, 801565, 801566 230/400 v supply voltage Model: 801505, 801506, 801507, 801515, 801516, 801517 STALGAST Radom sp. z o.o. ul. Staniewicka 5 03-310 Warsaw telephone: 22 517 15 75 fax.: 22 517 15 77 www.stalgast.com email: stalgast@stalgast.com...
-
Page 2: Table Of Contents
10. LIST OF SPARE PARTS ......................16 11. ELECTRICAL WIRING DIAGRAM ...................18 11.1. Electrical wiring diagram for dishwasher 801400, 801401 ................18 11.2. Electrical wiring diagram for dishwasher GE313, GE323, GE333, GE343, GE353, GE363 ......19 11.3. Electrical wiring diagram for dishwasher GE413, GE423, GE433, GE443 ............20 12. -
Page 3: Safety Instructions
Thank you for purchasing our product. Please carefully read this instruction manual before first use. Reproduction of this manual without the consent of the manufacturer is prohibited. The photos and drawings are illustrative and may differ from the purchased device. CAUTION: The manual should be kept in a safe place, available to the staff. -
Page 4: Technical Data
3. TECHNICAL DATA Model 801400, 801505, 801506, 801555, 801556, 801565, 801566 801401 801507, 801515, 801516, 801517 Dimensions (LxWxH) 465x565x700 565x665x835 Power Supply 230 V/l 230V/l 400V/3+N+PE 400V/3+N+PE Frequency 50 Hz Maximum Energy Consumption 2730 W 3400 W 4900 W 6650 W... -
Page 5: Installation
4. INSTALLATION 4.1. Positioning of the device The device should be moved to the place of installation, unpacked and the package contents should be checked. In the even any damage to the device or any of its elements is detected, this must be immediately notified to the transport company. The packaging material must be kept away from children and pets, as they may cause an accident. -
Page 6: Connection Of The Device To The Water And Sewerage System
PE - yellow-green N - blue L1, L2, L3 - remaining colors Fig. 2 - Etikette mit dem Schaltplan Fig. 3 - The power cord Fig. 4 – 1. Connection diagram panel; 2. Terminal box; 3. Nameplate The power cord should be a flexible, oil resistant cable with a protective conductor, with a polychloroprene sheath –... -
Page 7: The First Start-Up
4.5. The first start-up Before starting the machine, check the correct operation of the electrical protection system. The above steps and the first start-up of the device may only be performed by the employees of the technical service, who will also conduct a brief training concerning the functioning of the device. -
Page 8: Device Operation
6. DEVICE OPERATION 6.1. Activities carried out before the start of washing Only use detergents and rinse aids intended exclusively for industrial dishwashers. It is prohibited to use detergents intended for manual dish washing. We recommend using detergents produced specifically for this dishwasher. When filling the detergent containers, be careful not to accidentally activate the device, as this may cause damage or failure of the device. - Page 9 2. Button functions On/Off Program selection Wash cycle Lamp indicating chamber heating element operation Lamp indicating boiler heating element operation 3. Start-up of the device Turn on the switch located on the wall, open the dishwasher door, place the overflow plug in the appropriate place (fig. 9) and close the door of the device.
-
Page 10: Electronic Elements
Do not turn the device off when the water is still in the tank. Before turning the device off, always empty the tank of water. In the event the device will no longer be used, after the completion of the above and the possible initiation of a regeneration cycle, it is necessary to turn the device off by pressing the switch. - Page 11 3. Displays - display 1 – indicates the rinsing and sanitization temperature; washing cycle length C1 – C2 – C3. - display 2 – indicates the washing temperature. 4. Parameter setting After the first pressing of the display will show .
- Page 12 During the setting of the above parameters the display screen is blinking, and the values of the parameters can be changed using the arrows. RECOMMENDED SETTINGS Function Name Function description Recommended value sanitization (rinsing) temperature 90ºC washing temperature 60ºC minimal sanitization temperature 82ºC time for water release after the activation of 20 seconds (for pressure of 2 bar)
-
Page 13: Problems, Causes, Solutions
Water for washing 60-65°C (140-149°F) Water for rinsing/sanitizing 82-90°C (181-194°F) 7. Emptying of the tank in models equipped with a drain pump Turn the device off by pressing the switch , then open the door of the device, remove the overflow plug and close the door. -
Page 14: Maintenance
Contaminated water inlet filter Clean the filter Low water pressure Clean the pump filter and the solenoid Dishwasher does not rinse valve Broken rinse pump Call the service Leaking solenoid valve Contamination of the solenoid valve Call the service Note: during the installation of the device foreign bodies or unwanted chemical compounds from the water supply could have contaminated the... -
Page 15: Packaging, Loading And Transport
Once a month, please check whether: • all the electrical connections are executed properly all the components of the device are working properly • • it is necessary to remove the nozzles (fig. 14) (lower and upper 2, 6) by unscrewing the screws (4, 3). It is necessary to unscrew the caps (7) located at the both ends of the nozzles. -
Page 16: List Of Spare Parts
10. LIST OF SPARE PARTS PART NAME INDEX Boiler 6000 W M72136 Boiler 4500 W PPB0150 Boiler 2600 W M72105 Power supply cable M70686 Peristaltic pump for the rinse aid M72252 Peristaltic pump for detergent M72087 2-channel solenoid valve M72009 Fuse holder M72051 Magnetic sensor... - Page 17 Drain plug M72133 Drain filter M72015 Door lock M72061 Water t-connector M72057 Water t-connector – rinse aid M72056 pump Rinse arm M72024 Wash arm M72023 Rinse arm M72113 Wash arm M72112 Wash arm feed pipe M72076 Water supply hose M72073 Rinse pump M72091 Temperature sensor...
-
Page 18: Electrical Wiring Diagram
11. ELECTRICAL WIRING DIAGRAM 11.1. Electrical wiring diagram for dishwasher 801400, 801401 - 18 -... -
Page 19: Electrical Wiring Diagram For Dishwasher Ge313, Ge323, Ge333, Ge343, Ge353, Ge363
11.2. Electrical wiring diagram for dishwasher GE313, GE323, GE333, GE343, GE353, GE363 - 19 -... -
Page 20: Electrical Wiring Diagram For Dishwasher Ge413, Ge423, Ge433, Ge443
11.3. Electrical wiring diagram for dishwasher GE413, GE423, GE433, GE443 - 20 -... -
Page 21: Disposing Of Used Equipment
12. DISPOSING OF USED EQUIPMENT Information for users about the proper principles of disposal of waste electric and electronic equipment • Leave the old device in the store where you are buying a new device. Each store has an obligation to take your old equipment free of charge if you buy new equipment of the same type and in the same quantity.
Need help?
Do you have a question about the 801400 and is the answer not in the manual?
Questions and answers