Sign In
Upload
Download
Table of Contents
Contents
Add to my manuals
Delete from my manuals
Share
URL of this page:
HTML Link:
Bookmark this page
Add
Manual will be automatically added to "My Manuals"
Print this page
×
Bookmark added
×
Added to my manuals
Manuals
Brands
Millimar Manuals
Measuring Instruments
C 1208
Operating instructions manual
Millimar C 1208 Operating Instructions Manual
Hide thumbs
1
2
3
4
5
6
Table Of Contents
7
8
9
10
11
12
13
14
15
16
17
18
19
20
21
22
23
24
25
26
27
28
29
30
31
32
33
34
35
36
37
38
39
40
41
42
43
44
45
46
47
48
49
50
51
52
53
54
55
56
57
58
59
60
61
62
63
64
65
66
67
68
69
70
71
72
73
74
75
76
77
78
79
80
81
82
83
84
85
86
87
88
89
90
91
92
93
94
95
96
page
of
96
Go
/
96
Contents
Table of Contents
Bookmarks
Table of Contents
Operating Instructions
Safety Instructions
Table of Contents
Initial Commissioning
1 General Points
2 Control Elements
3 Performing Basic Settings
Selecting the Display Language
Setting the Contrast
Setting the Unit of Measurement
Setting the Resolution/Display Format of the Measured Value
Selecting the Number of Features/Test Results to be Displayed
4 Positioning the Probe in the Measuring Device (Setup)
5 Aligning Probe Sensitivity
Calibrating a Measuring Channel
Aligning the Sensitivity of the Probe
Connected to C1
6 Inputting Settings for Calculation and Display of a Feature
Setting the Factor for Correcting the Indicated Value of a Feature
Selecting a Channel or Channel Connection (Formula)
7 Selecting a Feature
8 Master Measurement
How to Select the Type of Master Measurement
Entering the Nominal Master Value for a One-Point Master Measurement
Entering the Nominal Master Value for a Two-Point Master Mea Sure Ment
Carrying out a One-Point Master
Measurement
Carrying out a Two-Point Master
9 Setting Tolerances and Limit Values
Setting Tolerance Limits
Setting Warning Limits
Setting the Color of the Status Lamps for Warning and Tolerance Limits
Setting Plausibility Limits
10 Setting Parameters for Recor Ding Measured Values
Setting Filter Parameters
Specifying the Measuring Sequence
Operating Mode "NORMAL
Operating Mode "AUTOM
Entering a Start Delay
11 Password Protection
12 Performing Measurements
Performing an Aggregate Measure
Ment
Performing a Differential
Measurement
Performing a Radial Run-Out Measure
Ment
13 Measured Value Memories
14 Using the Serial Interface (RS 232)
Selecting the Interface Protocol
Selecting the Data Transfer Format
Selecting the Handshake
Selecting the Transfer Rate
Selecting How to Initiate Data Transfer
Examples of Interface Configuration
Interface Configuration for Data Transfer to a Printer
Interface Configuration for Data Transfer to a Computer
M1240 Interface Protocol
OPTORSD Interface Protocol
OPTORSS Interface Protocol
MARTALK Interface Protocol
Connecting to a PC Using a Zero- Modem Cable (Circuit Diagram )
15 Using the Parallel (I/O) Interface
Digital Control Output
Digital Control Input
Application Examples for the Use of Digital Control Inputs and Outputs
Analog Output
(C 1216/C 1240 Only !!)
Selecting the Feature to be
Indicated
The Analog Output
16 Restoring the Factory Settings
17 Error Messages
18 Technical Data
19 Mahr Contacts
20 Warranty
21 Index
Navigating the Catalog of Functions and Parameters
Advertisement
Quick Links
1
Operating Instructions
2
General Points
Download this manual
Operating Instructions
3723047
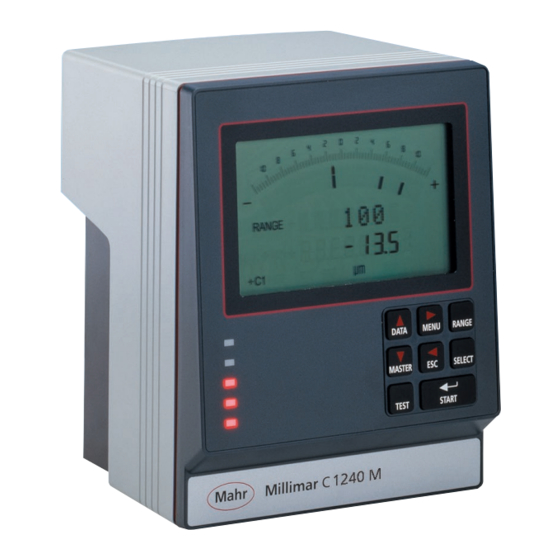
Millimar C 1208 /C 1216 / C 1240
Mahr GmbH, Standort Esslingen, Reutlinger Straße 48, 73728 Esslingen
Tel. +49711 9312-600, Fax +49 711 9312-756 mahr.es@mahr.de, www.mahr.de
Table of
Contents
Previous
Page
Next
Page
1
2
3
4
5
Advertisement
Table of Contents
Need help?
Do you have a question about the C 1208 and is the answer not in the manual?
Ask a question
Questions and answers
Related Manuals for Millimar C 1208
Measuring Instruments Millimar C 1240 Operating Instructions Manual
(96 pages)
This manual is also suitable for:
C 1240
C 1216
Table of Contents
Save PDF
Print
Rename the bookmark
Delete bookmark?
Delete from my manuals?
Login
Sign In
OR
Sign in with Facebook
Sign in with Google
Upload manual
Upload from disk
Upload from URL


Need help?
Do you have a question about the C 1208 and is the answer not in the manual?
Questions and answers