
Subscribe to Our Youtube Channel
Related Manuals for Rockwell powerflex 700s


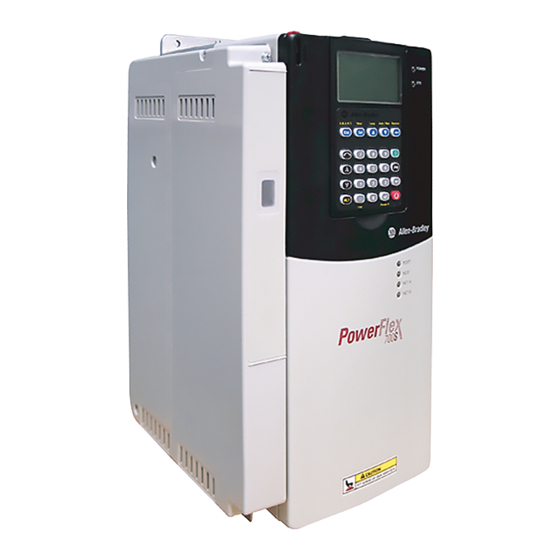
Summary of Contents for Rockwell powerflex 700s
- Page 1 PowerFlex® 700S / 700H Adjustable Frequency AC Drives FRAME 10 HARDWARE SERVICE MANUAL 200-250 kW, 400V 300-450 HP, 480V 250-450 HP, 600V 250-400 kW, 690V...
-
Page 2: Important User Information
Burn Hazard labels may be located on or inside the equipment (e.g., drive or motor) to alert people that surfaces may be at dangerous temperatures. PowerFlex, DriveExplorer, DriveExecutive, DPI, and SCANport are either trademarks or registered trademarks of Rockwell Automation, Inc. -
Page 3: Current Revision
Diode Tests for Major Power Components” (brake option not available on PowerFlex 700H/S Frame 10 drives) Added Removal of PowerFlex 700S Phase II Control Added the Removal of the Common Mode Filter Board Updated the Circuit Board Connections Schematics to include the X50 Terminal Block... - Page 4 soc-ii Summary of Changes Notes:...
-
Page 5: Table Of Contents
Table of Contents Important User Information ..........1-2 Summary of Manual Updates Current Revision . - Page 6 Chapter 3 Access Procedures Torque Specifications........... . . 3-2 Removing Power from Drive .
- Page 7 Appendix A Service Tools and Equipment Software Tools............A-1 Service Tools .
-
Page 9: Preface
What is in this Manual This manual contains hardware service information for Frame 10 PowerFlex 700S and 700H drives only. Verify that you are working on a Frame 10 drive by checking the data nameplate on the Control Frame. The frame number is printed just above the serial number. -
Page 10: What Is Not In This Manual
Title Publication Programming Manual - PowerFlex 700H AC Drive 20C-PM001... User Manual - PowerFlex 700S Drive with Phase I Control 20D-UM001... User Manual - PowerFlex 700S Drive with Phase II Control 20D-UM006... Installation Instructions - Hi-Resolution Feedback Option Card for 20D-IN001... -
Page 11: Understanding Manual Conventions
Overview Understanding Manual Terms Conventions The following words are used throughout the manual to describe an action: Word Meaning Possible, able to do something Cannot Not possible, not able to do something Permitted, allowed Must Unavoidable, you must do this Shall Required and necessary Should... -
Page 12: General Precautions
AC supply, or excessive ambient temperatures may result in malfunction of the system. ATTENTION: Only qualified personnel familiar with high power PowerFlex 700S and 700H Drives and associated machinery should plan or implement the installation, start-up and subsequent maintenance of the system. Failure to comply may result in personal injury and/or equipment damage. -
Page 13: Chapter 1 Troubleshooting And Error Codes
“Guarding Against Electrostatic Damage” or any other applicable ESD protection handbook. ATTENTION: Only qualified personnel familiar with high power PowerFlex 700S and 700H Drives and associated machinery should plan or implement the installation, start-up and subsequent maintenance of the system. Failure to comply may result in personal injury and/or equipment damage. -
Page 14: Creating Fault Reports
Troubleshooting and Error Codes Creating Fault Reports Clear and complete fault reports are critical for analysis and repair of modules returned to the factory. At a minimum, perform and record the following: • Record the contents of the fault queue (faults and times of occurrence) •... - Page 15 Troubleshooting and Error Codes No. Name Description Action (if appropriate) • Reconnect encoder or replace Opt Port 0 Loss A fault on port 0 of the Hi-Resolution Encoder Feedback Option Card, MDI encoder Option Card, Heidenhain, or Resolver • Reconnect option feedback card Feedback Option Card has occurred.
- Page 16 Troubleshooting and Error Codes No. Name Description Action (if appropriate) • Reduce the mechanical load 11 Motor OLoad Trip A motor overload trip has occurred. Parameter 308 [Output Current] is • Enter the correct motor nameplate squared, scaled and integrated over full load amps in parameter 2 time.
- Page 17 • Verify the AC Line. 24 DC Bus Overvolt Refer to “Protection” in Appendix A in the PowerFlex 700S Phase II Drive - • Verify that either the brake or bus User Manual, publication regulator is enabled (parameter 20D-UM006…, for DC Bus...
- Page 18 Troubleshooting and Error Codes No. Name Description Action (if appropriate) • Check the motor and external 26 Ground Fault A current to earth exceeds 35% of the peak drive rating. wiring to the drive output terminals for a grounded condition. •...
- Page 19 Troubleshooting and Error Codes No. Name Description Action (if appropriate) • Cycle power 35 Parameter The checksum read from the Chksum EEPROM does not match the • Replace Main Control Board checksum calculated • Verify actual temperature of 38 Brake OL Trip The calculated temperature of the dynamic braking resistor is too high.
- Page 20 Troubleshooting and Error Codes No. Name Description Action (if appropriate) • Cycle power. 47 MC CML Task Fail Current Minor Loop (CML) task has been delayed or run with incorrect interval. • Reconnect the controlling device. 48 No Ctrl Device The controlling device (HIM or controller) has been disconnected while the drive was running.
- Page 21 Troubleshooting and Error Codes No. Name Description Action (if appropriate) • Verify network connection. 59 Net Loss DPI P5 A communications fault has occurred between the communication adapter • Verify status of network. at DPI port 5 and the network. •...
- Page 22 1-10 Troubleshooting and Error Codes No. Name Description Action (if appropriate) 68 HiHp Bus CRC Er Bus Communication CRC Error - too Check the communication bus lines many CRC errors have occurred in • 10 pin connector between the the communication bus. Main Control board and High Power Fiber Optic Interface board A fast power cycle may cause the...
- Page 23 Troubleshooting and Error Codes 1-11 No. Name Description Action (if appropriate) 73 HiHp PrChrg Cntc Precharge Contactor Fault - the On drives with DC input: precharge contactor did not send • Check for loose or incorrect back the active feedback. connections from the external precharge circuit to the X50 terminal block and to the ASIC...
- Page 24 1-12 Troubleshooting and Error Codes No. Name Description Action (if appropriate) • Reconnect encoder or replace 88 Stahl Optics Linear Stahl Encoder detected a fault. Parameter 291 [Lin1Stahl encoder. Status] shows the details of the fault. • Reconnect option feedback card. •...
-
Page 25: Addressing 700H Faults
Troubleshooting and Error Codes 1-13 Addressing 700H Faults No. Name Description Action (if appropriate) Auxiliary In The auxiliary input interlock is open. Check all remote wiring. Power Loss The DC bus voltage remained below Monitor the incoming AC line for low the value set in parameter [Power voltage or line power interruption. - Page 26 1-14 Troubleshooting and Error Codes No. Name Description Action (if appropriate) 14 InverterFault A hardware problem exists in the 1. Cycle the power. power structure. 2. Contact Technical Support. See Technical Support Options on page 1-19 for more information. 3. If the problem persists, replace the drive.
- Page 27 Troubleshooting and Error Codes 1-15 No. Name Description Action (if appropriate) 32 Fan Cooling Fan is not energized at start 1. Check the status LEDs on the fan command. inverter(s). 2. Verify that the fan(s) and fan inverter(s) are running. 33 AutoReset Lim The drive unsuccessfully attempted Correct the cause and manually clear...
- Page 28 1-16 Troubleshooting and Error Codes No. Name Description Action (if appropriate) 71 Periph Loss The communications card has a fault 1. Check the DPI device event queue on the network side. and corresponding fault information for the device. 81 Port DPI Loss The DPI port has stopped 1.
-
Page 29: Common Drive Conditions And Corrective Actions
Troubleshooting and Error Codes 1-17 No. Name Description Action (if appropriate) 114 AutoT Enable Autotune is enabled but has not Press the Start key within 20 seconds started. of enabling autotune. 120 I/O Change An option board has been replaced. Reset the fault. 121 I/O Comm Loss An I/O Board lost communications 1. - Page 30 2. Measure the DC voltage supply at connector If the DC voltage is incorrect: X4 on the DPI circuit board on the back of the • PowerFlex 700S drives - Replace the High HIM cradle. The voltage should be Power Fiber Optic Interface circuit board approximately 12V DC.
-
Page 31: Technical Support Options
Troubleshooting and Error Codes 1-19 Technical Support Options Technical Support Wizards If you are connected to a drive via DriveExplorer™ or DriveExecutive™, you can run a Tech Support wizard to gather information that will help diagnose problems with your drive and/or peripheral device. The information gathered by the wizard is saved as a text file and can be emailed to your remote technical support contact. - Page 32 1-20 Troubleshooting and Error Codes What You Need When You Call Tech Support When you contact Technical Support, please be prepared to provide the following information: • Order number • Product catalog number and drives series number (if applicable) • Product serial number •...
-
Page 33: Chapter 2 Component Test Procedures
Chapter Component Test Procedures ATTENTION: To avoid an electric shock hazard, ensure that all power to the drive has been removed before performing the following. ATTENTION: To avoid an electric shock hazard, verify that the voltage on the bus capacitors has discharged completely before servicing. -
Page 34: Performing Visual Inspections
Component Test Procedures LED visible through this hole Indication Steady The drive is operational and has no faults • Switching power supply Flashing Quickly overload • Rectifier Board fault • Fan or fan inverter fault • Brake Chopper fault • Fiber Optic Adapter Board Fault Flashing Slowly Bad connection between circuit boards, check all connections... -
Page 35: Conducting Forward And Reverse Biased Diode Tests For Major Power Components
Component Test Procedures Inspecting the Power Structure 1. Remove power from the drive. Refer to Removing Power from Drive on page 3-3. 2. Remove the covers from the power structure. Refer to Removing the Covers from the Power Structure on page 3-15. - Page 36 Component Test Procedures Figure 2.1 Measurement Points for Forward and Reverse Diode Tests V/T2 Cat No. FIELD INSTALLED OPTIONS: FIELD INSTALLED OPTIONS: DANGER DANGER DC BUS CONDUCTORS AND CAPACITORS OPERATE AT HIGH VOLTAGE. REMOVE POWER AND WAIT 5 MINUTES BEFORE SERVICING U/T1 W/T3 Series A Rectifying Circuit Board - Rectifying Module Tests...
- Page 37 Component Test Procedures Series B Rectifying Circuit Board - Rectifying Module Tests Table 2.C Forward Biased Diode Tests on Rectifying Module Meter Leads Nominal meter reading The value should gradually rise to about 1.0V The value should gradually rise to about 0.35V The actual voltage reading may vary depending upon your equipment.
- Page 38 Component Test Procedures Series B Rectifying Circuit Board - Output Power Module Tests Table 2.G Forward Biased Diode Tests on Output Power Modules Meter Leads Nominal meter reading The value should gradually rise to about 1.0V The value should gradually rise to about 0.35V The actual voltage reading may vary depending upon your equipment.
-
Page 39: Conducting Gate Driver Board Gate Interface Resistance Measurements
Component Test Procedures Conducting Gate Driver 1. Remove power from the drive. Refer to Removing Power from Drive on page 3-3. Board Gate Interface Resistance Measurements 2. Remove the covers from the power structure. Refer to Removing the Covers from the Power Structure on page 3-15. - Page 40 Component Test Procedures 4. Measure the gate interface resistance for each output power transistor. The resistance from each gate and collector pin to the branch emitter pin should be about 500 ohms. If any of the gate interfaces fails this test, replace both Output Power modules.
-
Page 41: Checking The Rectifying Module (On Ac Input Drives Only)
Component Test Procedures Checking the Rectifying Important: This procedure requires special equipment and training. Only qualified and trained personnel should perform these Module (on AC Input Drives procedures. Only) There is a series A and series B Rectifying circuit board. The tests you can perform and the results of those tests vary depending on which series of board is in your drive. - Page 42 2-10 Component Test Procedures Table 2.I Series A Rectifying Circuit Board Resistance Measurements Measurement points Resistance X10: red to X10: black 18Ω ± 1Ω X11: red to X11: black X12: red to X12: black Table 2.J Series B Rectifying Circuit Board Resistance Measurements Measurement points Resistance X10: red to X10: black...
- Page 43 Component Test Procedures 2-11 Table 2.K Rectifying Board Charge Relay Test Results No Power on X13 Meter Leads Results 0Ω...
-
Page 44: Checking The Fan Inverters And Main Fans
2-12 Component Test Procedures Checking the Fan Inverters Checking the Fan Inverter LEDs and Main Fans A frame 10 drive has two fans and two fan inverters. Each fan inverter has a red and a green diagnostic LED. ATTENTION: The inverter LEDs are only operational when the drive is energized, and only visible with the covers removed from the power structure. - Page 45 Component Test Procedures 2-13 Isolating a Faulty Fan Inverter The ASIC Board controls both fan inverters. A cable connects X11 on the ASIC Board to X8 on the left-hand inverter. Another cable connects X3 of the left-hand inverter to X8 on the right-hand inverter. A jumper terminates X3 on the right-hand inverter.
- Page 46 2-14 Component Test Procedures...
-
Page 47: Access Procedures
Chapter Access Procedures ATTENTION: To avoid an electric shock hazard, ensure that all power to the drive has been removed before performing the following. ATTENTION: To avoid an electric shock hazard, verify that the voltage on the bus capacitors has discharged completely before servicing. -
Page 48: Torque Specifications
Access Procedures Torque Specifications Understanding Torque Figures in Assembly Diagrams Icons and numbers in the assembly diagrams indicate how to tighten hardware: Tool Type and Size Fastener Type PZ indicates POZIDRIV screwdriver bit POZIDRIV Screw P indicates Phillips screwdriver bit Phillips Screw Hexagonal Bolt or Standoff... -
Page 49: Removing Power From Drive
Access Procedures Removing Power from Drive ATTENTION: To avoid an electric shock hazard, verify that the voltage on the bus capacitors has discharged completely before servicing. Check the DC bus voltage at the Power Terminal Block by measuring between the +DC and -DC terminals, between the +DC terminal and the chassis, and between the -DC terminal and the chassis. -
Page 50: Removing The Dpi / Him Assembly
Access Procedures Removing the DPI / HIM 1. Remove power from the drive. Refer to Removing Power from Drive on page 3-3. Assembly Important: Before removing connections and wires, mark the connections and wires to avoid incorrect wiring during assembly. 2. -
Page 51: Installing The Dpi / Him Assembly
Access Procedures Installing the DPI / HIM Install the DPI / HIM assembly in reverse order of removal, while referring Torque Specifications on page 3-2. Assembly Removing the 700S Phase I 1. Remove power from the drive. Refer to Removing Power from Drive on page 3-3. -
Page 52: Installing The 700S Phase I Control Assembly
Access Procedures 4. Remove the three screws that hold the control bracket and Phase I Main Control circuit board to the control frame. Remove Three screws Loosen captive screw 5. Remove the control bracket and Phase I Main Control circuit board. Installing the 700S Phase I Install the 700S Phase I Control assembly in reverse order of removal, while referring to... - Page 53 Access Procedures 3. Unplug any remaining I/O and communications cables from the Control assembly and set them aside. 4. Loosen the captive screw on the Control assembly mounting plate and swing the Control assembly away from the drive. Captive screw...
-
Page 54: Installing The 700S Phase Ii Control Assembly
Access Procedures 5. Carefully disconnect the ribbon cables from the sockets on the High Power Fiber Optic Interface circuit board on the back of the control mounting plate. Disconnect ribbon cables. Note: Control mounting plate not shown for clarity only. 6. -
Page 55: Removing The Common Mode Filter Circuit Board
Access Procedures Removing the Common 1. Remove power from the drive. Refer to Removing Power from Drive on page 3-3. Mode Filter Circuit Board 2. Loosen the captive screw on the control assembly mounting plate and swing the control assembly away from the drive. Important: Before removing connections and wires, mark the connections and wires to avoid incorrect wiring during assembly. -
Page 56: Installing The Common Mode Filter Circuit Board
3-10 Access Procedures 5. Remove the four screws that secure the Common Mode Filter circuit board to the four standoffs on the control assembly mounting plate and remove the Common Mode Filter circuit board. Remove screws Installing the Common Install the Common Mode Filter Circuit Board in the reverse order of removal. -
Page 57: Removing The 700S High Power Fiber Optic Interface Circuit Board
Access Procedures 3-11 Removing the 700S High 1. Remove power from the drive. Refer to Removing Power from Drive on page 3-3. Power Fiber Optic Interface Circuit Board 2. Loosen the captive screw and swing the Control assembly away from drive. -
Page 58: Installing The 700S High Power Fiber Optic Interface Circuit Board
3-12 Access Procedures 5. Disconnect the 24V power supply cable from connector J5 on the High Power Fiber Optic Interface circuit board. 6. Remove the five screws that secure the High Power Fiber Optic Interface circuit board to the Control Frame and remove the circuit board from the Control Frame. -
Page 59: Installing The 700H I/O Circuit Boards And Control Assembly
Access Procedures 3-13 4. Unplug the serial connection from X7 on the Control circuit board. Serial Port (Slot C) (Slot D) (Slot A) (Slot B) (Slot E) 5. Remove the three screws that secure the Control assembly to the control frame and remove the control assembly. -
Page 60: Removing The 700H Fiber Optic Adapter Circuit Board
3-14 Access Procedures Removing the 700H Fiber 1. Remove power from the drive. Refer to Removing Power from Drive on page 3-3. Optic Adapter Circuit Board 2. Remove the I/O circuit boards and Control assembly. Refer to Removing the 700H I/O Circuit Boards and Control Assembly on page 3-12, 3. -
Page 61: Installing The 700H Fiber Optic Adapter Circuit Board
Access Procedures 3-15 6. Remove the four screws which secure the Fiber Optic Adapter bracket to the stand-offs on the back of the Control Frame. Remove 4 screws 0.9 N-m (8 lb.-in.) 7. Remove the Fiber Optic Adapter Board from the Control Frame. Installing the 700H Fiber Install the 700H Fiber Optic Adapter circuit board in reverse order of removal, while referring to... - Page 62 3-16 Access Procedures Screws Frame 10 drives, from early production runs, have holes instead of slots for these screws. You must completely remove the screws from these drives in order to swing-open the control frame.
- Page 63 Access Procedures 3-17 Removing the Airflow Plate The drive is equipped with a plate, just above the Control Frame, that manages airflow through the drive. You must remove this plate in order to remove the protective covers. 1. Remove power from the drive. Refer to Removing Power from Drive on page 3-3.
- Page 64 3-18 Access Procedures Removing the Protective Covers from Power Structure 1. Remove power from the drive. Refer to Removing Power from Drive on page 3-3. 2. Move the Control Frame away from the power structure. Refer to Removing the Covers from the Power Structure on page 3-15.
-
Page 65: Installing The Protective Covers
Access Procedures 3-19 6. Remove the side protective covers. Installing the Protective Install the Protective Covers in reverse order of removal, while referring to Torque Specifications on page 3-2. Covers... -
Page 66: Removing The 700S Voltage Feedback Circuit Board
3-20 Access Procedures Removing the 700S Voltage 1. Remove power from the drive. Refer to Removing Power from Drive on page 3-3. Feedback Circuit Board 2. Remove the covers from the power structure. Refer to Removing the Covers from the Power Structure on page 3-15. -
Page 67: Installing The 700S Voltage Feedback Circuit Board
Access Procedures 3-21 5. Remove the five screws that secure the Voltage Feedback circuit board to the drive and remove the circuit board from the drive. 0.9 N-m (8 lb.-in.) Screws Installing the 700S Voltage Install the 700S Voltage Feedback circuit board in reverse order of removal, while referring to Torque Specifications on page 3-2. -
Page 68: Removing The Gate Driver And Adapter Circuit Boards
3-22 Access Procedures Removing the Gate Driver 1. Remove power from the drive. Refer to Removing Power from Drive on page 3-3. and Adapter Circuit Boards 2. Remove the covers from the power structure. Refer to Removing the Covers from the Power Structure on page 3-15. - Page 69 Access Procedures 3-23 5. Carefully disconnect the fiber-optic cables from sockets along the top of the Gate Driver circuit board and carefully set them aside. ATTENTION: Hazard of permanent eye damage exists when using optical transmission equipment. This product emits intense light and invisible radiation.
- Page 70 3-24 Access Procedures 7. Remove the six screws that secure the brackets to the drive and remove the brackets.
- Page 71 Access Procedures 3-25 8. Remove eight of the stacker connectors from the Gate Driver board, leaving the two smaller ones which are third from the top. 9. Carefully remove the Gate Driver board and the remaining connectors. 10. Remove the cable ties that secure the Adapter board to the circuit boards on the Output Power Modules and remove the Adapter board.
-
Page 72: Installing The Gate Driver And Adapter Circuit Boards
3-26 Access Procedures Installing the Gate Driver 1. Replace the Adapter board and install the cable ties that secure it to the circuit boards on the Output Power Modules. and Adapter Circuit Boards 2. Plug the old stacker connectors into the new Gate Driver board so the pins do not protrude through the connectors on the back of the board. -
Page 73: Removing The Power Structure From The Drive Enclosure
5. Remove the AC power wiring from the incoming terminals at the top of the power structure. 6. Follow the instructions in publication PFLEX-IN014…, Installation Instructions - PowerFlex 700S /700H High Power Maintenance Stand, to install the Maintenance Stand. Remove the power structure by sliding it onto the rails of the Maintenance Stand. -
Page 74: Removing The Main Fans
3-28 Access Procedures Removing the Main Fans 1. Remove power from the drive. Refer to Removing Power from Drive on page 3-3. 2. Remove the covers from the power structure. Refer to Removing the Covers from the Power Structure on page 3-15. -
Page 75: Removing The Asic Circuit Board
Access Procedures 3-29 Removing the ASIC Circuit Board ATTENTION: The sheet metal cover and mounting screws on the ASIC circuit board located on the power structure are energized at (-) DC bus potential high voltage. Risk of electrical shock, injury, or death exists if someone comes into contact with the assembly. -
Page 76: Installing The Asic Circuit Board
3-30 Access Procedures 8. Slide the ASIC board assembly out of its chassis. 9. Remove the plastic board holder. 10. Carefully disconnect the fiber-optic cables from sockets (H8, - H13) along the back of the ASIC board and carefully set them aside. 11. -
Page 77: Removing The Rectifying Circuit Board
Access Procedures 3-31 Removing the Rectifying 1. Remove power from the drive. Refer to Removing Power from Drive on page 3-3. Circuit Board 2. Remove the covers from the power structure. Refer to Removing the Covers from the Power Structure on page 3-15. -
Page 78: Removing The Precharging Resistors From Series B Drives
3-32 Access Procedures Removing the Precharging 1. Remove power from the drive. Refer to Removing Power from Drive on page 3-3. Resistors from Series B Drives 2. Remove the covers from the power structure. Refer to Removing the Covers from the Power Structure on page 3-15. -
Page 79: Installing The Precharging Resistors On Series B Drives
Access Procedures 3-33 5. Remove the two screws that secure each of the Precharging Resistors to the drive frame and remove the Precharging Resistors. 6-Pulse Drive Remove screws from resistors 12-Pulse Drive Remove screws from resistors Installing the Precharging Install the Precharging Resistors in reverse order of removal. Resistors on Series B Drives... -
Page 80: Removing The Left-Side Output Power Module
3-34 Access Procedures Removing the Left-Side Important: Do not attempt to disassemble the Output Power Module. Output Power Module Important: Always replace the Output Power Modules in pairs (do not replace just one module). 1. Remove power from the drive. Refer to Removing Power from Drive on page 3-3. - Page 81 Access Procedures 3-35 7. Remove the balancing resistor wires from the bus bars. Balancing Resistors Balancing Resistor Wires Snubber Capacitors Snubber Capacitor Fastening Screws 8. Remove the screws that secure the Snubber Capacitors and remove the Snubber Capacitors from the power structure. 9.
-
Page 82: Installing The Left-Side Output Power Module
3-36 Access Procedures 12. Remove the Output Power Module from the drive. Installing the Left-Side Important: If you replace the Output Power Modules in a 700H drive, you must load information about the Power Modules into the Power Output Power Module EEPROM (refer to Loading the 700H EEPROM on page 4-1). - Page 83 Access Procedures 3-37 4. Carefully disconnect the fiber-optic cables from the Gate Driver board and carefully set them aside. ATTENTION: Hazard of permanent eye damage exists when using optical transmission equipment. This product emits intense light and invisible radiation. Do not look into fiber-optic ports or fiber-optic cable connectors.
- Page 84 3-38 Access Procedures 10. Remove the balancing resistor wires from the bus bars. Balancing Resistors AC Input Terminals Balancing Resistor Wires (L1, L2, L3) 11. Disconnect all wiring from the circuit board on the Rectifying Module. 12. Disconnect the cables from the AC input terminals on the Rectifying Module.
- Page 85 Access Procedures 3-39 15. Remove the screws that secure DC bus bars to right side of power structure and remove the DC bus bars. 16. Remove the screws that secure the Rectifying Module to the power structure and remove the Rectifying Module.
-
Page 86: Installing The Right-Side Output Power Module And Rectifying Module
3-40 Access Procedures 17. Remove the screws that secure the Output Power Module to the power structure and remove the Output Power Module. Installing the Right-Side Important: If you replace the Output Power Modules in a 700H drive, you must load information about the Power Modules into the Power Output Power Module and EEPROM (Refer to Loading the 700H EEPROM on page... - Page 87 Access Procedures 3-41 4. Prepare the Power Structure for Inverter assembly removal. Task Description Remove the cable-ties that secure the cables with orange insulation (on both left-hand and right-hand sides). This will allow you to move the cables while removing the inverter assemblies. Left-hand Inverter Right-hand...
- Page 88 3-42 Access Procedures 5. Remove the Inverter assemblies. Task Description Remove the two M5 POZIDRIV screws that secure the front of the fan inverter to the drive. Disconnect the fan motor cable under the inverter. Remove the four M5 POZIDRIV screws that secure the bottom of the fan inverter to the drive.
-
Page 89: Installing The Fan Inverters
Access Procedures 3-43 6. Remove the Inverter from the old Inverter assembly. Task Description Disconnect the cables at connectors X4 (Blue) and X5 (Black). Right-hand Inverter Shown right_assy_upright.jpg Task Description Remove two M5 POZIDRIV screws that secure the inverter board and heatsink to the assembly carriage. -
Page 90: Removing The Dc Bus Capacitors
3-44 Access Procedures Removing the DC Bus 1. Remove power from the drive. Refer to Removing Power from Drive on page 3-3. Capacitors 2. Remove the covers from the power structure. Refer to Removing the Covers from the Power Structure on page 3-15. -
Page 91: Installing The Dc Bus Capacitors
Access Procedures 3-45 6. Remove the four screws that secure the capacitor to the power structure and remove the capacitor. Installing the DC Bus Install the DC bus capacitors in reverse order of removal, while referring to Torque Specifications on page 3-2. - Page 92 3-46 Access Procedures Notes:...
-
Page 93: Chapter 4 Start-Up After Repair
Under Contact Customer Support, click on Phone Support ⇒ Internet Go to http://www.ab.com/support/abdrives/ ⇒ E-mail support@drives.ra.rockwell.com Be prepared to provide the following information when you contact technical support: • Product Catalog Number • Product Serial Number • Firmware Revision Level... -
Page 94: Before Applying Power To The Drive
Start-Up After Repair Before Applying Power to 1. Check the DC bus voltage at the Power Terminal Block by measuring between the +DC and -DC terminals, between the +DC terminal and the the Drive chassis, and between the -DC terminal and the chassis. The voltage must be zero for all three measurements. -
Page 95: Performing The Power Circuit Diagnostic Test On A 700S Drive
Start-Up After Repair Performing the Power The Power Circuit Diagnostic Test on the 700S drive allows you to diagnose problems in the drive’s power structure without applying large amounts of Circuit Diagnostic Test on a power. 700S Drive 1. Verify that input power wiring and grounding is connected. 2. -
Page 96: Testing With The Motor Without A Mechanical Load
Start-Up After Repair Testing With the Motor This test allows you to measure several operating parameters and diagnose problems without connecting the motor to its mechanical load. Without a Mechanical Load 1. Verify that input power wiring and grounding is connected. 2. -
Page 97: Appendix A Service Tools And Equipment
Appendix Service Tools and Equipment ™ ™ ™ Software Tools DriveTools SP, DriveExecutive, DriveExplorer and DriveObserver software tools for uploading, downloading and monitoring system parameters. Service Tools This list of basic service tools which will cover needs of tools for repair and maintenance measurements. - Page 98 Service Tools and Equipment Notes:...
-
Page 99: List Of Schematic Diagrams
Appendix Schematics List of Schematic Diagrams For a Schematic Diagram on… See... Power Circuitry for Drives with AC Input page B-2 Power Circuitry for Drives with DC Input page B-3 Circuit Board Connections for 700S Drives with Phase I Control page B-4 Circuit Board Connections for 700S Drives with Phase II Control page B-5... -
Page 100: Appendix B Schematics
Schematics Power Circuitry for Drives with AC Input W_LO W_LO W_HI W_HI TERM W TERM W V_LO V_LO V_HI V_HI TERM V TERM V U_LO U_LO U_HI U_HI TERM U TERM U... -
Page 101: Power Circuitry For Drives With Dc Input
Schematics Power Circuitry for Drives with DC Input W_LO W_LO W_HI W_HI TERM W TERM W V_LO V_LO V_HI V_HI TERM V TERM V U_LO U_LO U_HI U_HI TERM U TERM U... -
Page 102: Circuit Board Connections For 700S Drives With Phase I Control
Schematics Circuit Board Connections for 700S Drives with Phase I Control... - Page 103 Schematics Circuit Board Connections for 700S Drives with Phase II Control...
-
Page 104: Circuit Board Connections For 700H Drives
Schematics Circuit Board Connections for 700H Drives... -
Page 105: Fan Power Supply Connections
Schematics Fan Power Supply Connections... - Page 106 Schematics Notes:...
-
Page 107: Appendix C Disassembly / Assembly Diagrams
MFD. in 2005 on Feb 29 Serial Number: 2622381652 2622381652 MADE IN THE USA (FAC 1B) MADE IN THE USA (FAC 1B) A complete list of spare parts for PowerFlex 700S drives is available on the Allen-Bradley web site at: http://www.ab.com/support/abdrives/powerflex70/PF7ReleasedParts.pdf... - Page 108 Disassembly / Assembly Diagrams Figure C.1 Main Power Structure Assembly ATTENTION: The sheet metal cover and mounting screws on the ASIC Board located on the power structure are energized at (-) DC bus potential high voltage. Risk of electrical shock, injury, or death exists if someone comes into contact with the assembly.
- Page 109 Disassembly / Assembly Diagrams Table C.A Main Power Structure Assembly Part Numbers Part Name Part Number Bus Bar Insulator For Bus Bar Input Terminal Cable Insulator Input Terminal Assembly Plastic Cover Base Top Left Plastic Cover Base Top Right Left Side Board Bracket Right Side Board Bracket Touch Cover Front Touch Cover Side Plate...
- Page 110 Disassembly / Assembly Diagrams Figure C.2 Right-Hand Side of Power Structure Air Flow Guide, Right Snubber Capacitor Assembly Rectifying Board DC Bus Bar DC Bus Bar Insulator DC Bus Bar DC Bus Bar Insulator DC Bus Bar DC Bus Bar Insulator Output Power Module Rectifying Module Discharging Resistor...
- Page 111 Disassembly / Assembly Diagrams Table C.B Right-Hand Side of Power Structure Part Numbers Part Name Part Number Frame DC Bus Bar Insulator 20-FR10027 DC Bus Bar Insulator 20-FR10028 DC Bus Bar 20-FR100044 DC Bus Bar 20-FR10052 DC Bus Bar Insulator 20-FR100143 Air Flow Guide, Right DC Bus Bar...
- Page 112 Disassembly / Assembly Diagrams Figure C.3 Left-Hand Side of Power Structure ATTENTION: ASIC Sheet Metal and Mounting Screws are at DC Bus Potential. Contact may cause electric shock, injury or death. Disconnect all sources of power before touching any metal parts. ASIC Assembly Snubber Capacitor Assembly DC Bus Bar...
- Page 113 Disassembly / Assembly Diagrams Table C.C Left-Hand Side of Power Structure Part Numbers Part Name Part Number Cover Plate Frame DC Bus Bar Insulator 20-FR10026 DC Bus Bar Insulator 20-FR10028 DC Bus Bar 20-FR10048 DC Bus Bar 20-FR10052 DC Bus Bar Insulator 20-FR100143 Insulation Support DC Bus Bar...
- Page 114 Disassembly / Assembly Diagrams Figure C.5 ASIC Assembly ATTENTION: ASIC Sheet Metal and Mounting Screws are at DC Bus Potential. Contact may cause electric shock, injury or death. Disconnect all sources of power before touching any metal parts. ASIC Assembly Cover ASIC Board ASIC Assembly Bracket ASIC Assembly Bracket...
- Page 115 Disassembly / Assembly Diagrams Figure C.6 Main Fan Assembly Right Side Fan Main Fan 230W Main Fan Housing Intake Cone Left Side Fan Main Fan 230W Main Fan Housing Intake Cone Table C.F Main Fan Assembly Part Numbers Part Name Part Number Intake Cone Main Fan Housing...
- Page 116 C-10 Disassembly / Assembly Diagrams Notes:...
- Page 117 Index Numerics 700H Fiber Optic Adapter Circuit Board DC Bus Capacitors Installing 3-15 Installing 3-45 Removing 3-14 Removing 3-44 700H I/O Circuit Boards and Control De-energizing the Drive 3-3 Assembly DPI/HIM Assembly Installing 3-13 Installing 3-5 Removing 3-12 Removing 3-4 700S High Power Fiber Optic Interface Circuit Board Installing 3-12...
- Page 118 Index-2 Main Fans Software Tools A-1 Installing 3-28 Spare Part Numbers Removing 3-28 ASIC Assembly C-8 Tests 2-12 Fan Inverter Assembly C-7 Moving the Control Frame 3-15 Left-Hand Side of Power Structure C-7 Main Fan Assembly C-9 Main Power Structure Assembly C-3 Right-Hand Side of Power Structure C-5 Output Power Modules Forward Biased Diode Tests on 2-5, 2-6...
- Page 120 Europe/Middle East/Africa: Rockwell Automation, Vorstlaan/Boulevard du Souverain 36, 1170 Brussels, Belgium, Tel: (32) 2 663 0600, Fax: (32) 2 663 0640 Asia Pacific: Rockwell Automation, Level 14, Core F, Cyberport 3, 100 Cyberport Road, Hong Kong, Tel: (852) 2887 4788, Fax: (852) 2508 1846 Publication PFLEX-TG002B-EN-P –...
Need help?
Do you have a question about the powerflex 700s and is the answer not in the manual?
Questions and answers