
Related Manuals for Smarttech SBID-7075


Summary of Contents for Smarttech SBID-7075
- Page 1 SMART Board® 7000 series interactive displays INSTALLATION AND MAINTENANCE GUIDE FOR INTERACTIVE DISPLAYS (SBID-7075) AND INTERACTIVE DISPLAYS WITH iQ (SBID-7275)
- Page 2 The Bluetooth word mark is owned by the Bluetooth SIG, Inc. and any use of such marks by SMART Technologies ULC is under license. Trademark notice SMART Board, SMART Notebook, SMART Ink, SMART kapp, SMART kapp iQ, HyPr Touch, Pen ID, smarttech, the SMART logo and all SMART taglines are trademarks or registered trademarks of SMART Technologies ULC in the U.S. and/or other countries. Microsoft and Windows are either registered trademarks or trademarks of Microsoft Corporation in the United States and/or other countries.
-
Page 3: Important Information
Use the power cable provided with the display. If a power cable is not supplied, contact your supplier. Use only power cables that match the AC voltage of the power outlet and that comply with your country’s safety standards. smarttech.com/kb/171164... - Page 4 The accessory slot’s maximum available power is 60 W. The slot is not a limited power source. To reduce the risk of fire, make sure that accessories connecting to the slot satisfy the fire enclosure requirements of IEC 60950-1. smarttech.com/kb/171164...
-
Page 5: Federal Communication Commission Interference Statement
Any changes or modifications not expressly approved by the party responsible for compliance could void the user’s authority to operate this equipment. Radiation exposure statement – model SBID-7075 This equipment complies with FCC radiation exposure limits set forth for an uncontrolled environment. This equipment should be installed and operated with minimum distance of 20 cm between the antenna of this device and all nearby persons. -
Page 6: Innovation, Science And Economic Development Canada Statement
EU declaration of conformity: Interactive Display SBID-7075 Hereby, SMART Technologies ULC declares that the radio equipment type Interactive Display SBID-7075 and the interactive pen, SBID-7000-PEN, are in compliance with Directive 2014/53/EU. The full text of the EU declaration of conformity is available at the following Internet address: smarttech.com/compliance... -
Page 7: Eu Declaration Of Conformity: Am40
Hereby, SMART Technologies ULC declares that the radio equipment type OPS, AM40 is in compliance with Directive 2014/53/EU. The full text of the EU declaration of conformity is available at the following internet address: smarttech.com/compliance The frequency band and the maximum transmitted power in EU are listed below: Transmitting Band (MHz) Maximum Transmit Power EIRP (dBm) 2400–2483.5... -
Page 9: Table Of Contents
Contents Important information Federal Communication Commission interference statement Innovation, Science and Economic Development Canada statement EU declaration of conformity: Interactive Display SBID-7075 EU declaration of conformity: AM40 Chapter 1: Welcome About this guide About the display Components Related products More information... - Page 10 Connecting a computer to the display Connecting multiple displays Configuring the computer’s serial interface settings Power states Commands and responses Command inventory Resolving issues with remote management Appendix C: Hardware environmental compliance Waste Electrical and Electronic Equipment (WEEE) Batteries viii smarttech.com/kb/171164...
- Page 11 CONTENTS More information smarttech.com/kb/171164...
-
Page 13: About This Guide
How to install the display How to connect power and devices How to turn on the display for the first time and configure the iQ appliance How to maintain the display for years of use How to troubleshoot issues with the display smarttech.com/kb/171164... -
Page 14: Chapter 1 Welcome
Up to four users can write or draw digital ink on the screen at the same time. Each pen writes and draws in its own color. The Pen ID™ feature enables you to assign different ink appearances to each pen. Audio support The display includes integrated speakers for presenting audio from connected input sources. smarttech.com/kb/171164... -
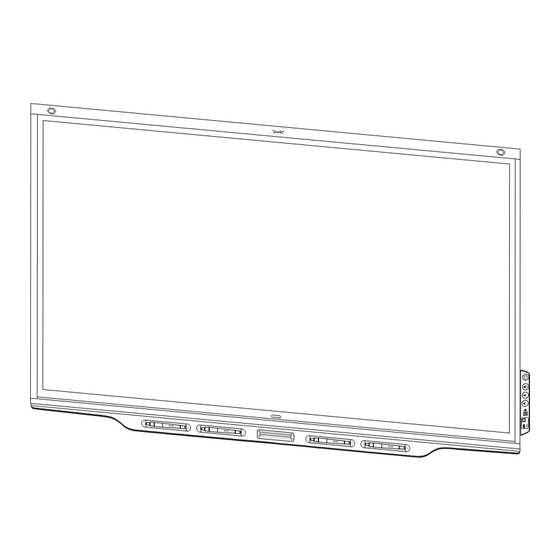
Page 15: Components
WELCOME Models The following models of SMART Board 7000 series interactive display are available: Model Description SBID-7075 SMART Board 7075 interactive display SBID-7275 SMART Board 7075 interactive display with iQ Refer to the specifications for detailed technical information for this model, including product dimensions and weights (see More information on page 9). -
Page 16: Iq Appliance
The following are the dimensions and aspect ratio for the display: Models Diagonal Width Height Aspect ratio SBID-7075 75" (190.5 cm) 65" (165.2 cm) 38 5/8" (93 cm) 16:9 SBID-7275 The display’s HyPr Touch™ (Hybrid Precision Touch) technology enables you to interact with objects on the screen and write and draw in digital ink. -
Page 17: Pens
CAUTION When you return a pen to the magnetic holder, make sure it’s centered in its holder to keep it from falling and being damaged. The pen’s light turns on to indicate that it’s properly positioned in the holder. smarttech.com/kb/171164... -
Page 18: Eraser
When you return the eraser to the magnetic holder, make sure it’s centered in its holder to keep it from falling and being damaged. Convenience panel The convenience panel contains buttons for turning the display on and off and controlling the volume. It also includes connectors for USB peripherals and a computer or other input source. smarttech.com/kb/171164... -
Page 19: Presence Detection Sensors
To turn on the display, press the Power button or pick up a pen or eraser. If the room is empty for a specified period, the display returns to Standby mode. smarttech.com/kb/171164... -
Page 20: Related Products
For more information, see the SBA-100 projection audio system specifications (smarttech.com/kb/171146). SMART Audio 400 classroom amplification system The SMART Audio 400 classroom amplification system provides high-quality audio amplification. -
Page 21: More Information
These documents are available in the Support section of the SMART website (smarttech.com/support). Scan the QR code on the cover of this guide to view the SMART Board 7000 series interactive display with iQ pages in the Support section. smarttech.com/kb/171164... -
Page 23: Transporting The Display
On occasion, you might also need to move the display to another location after initially installing it. IMPORTANT Transport the display at your own risk. SMART cannot accept liability for damages or injury that occur during the display’s transportation. smarttech.com/kb/171164... -
Page 24: Chapter 2: Installing The Display
You might also need to rotate the display so that its top frame faces to the side. You can do this during transportation, but when you install the display, it must be in landscape orientation (with the top frame facing up). smarttech.com/kb/171164... -
Page 25: Installing The Display On A Wall
NOTE If the original packaging isn’t available, you can purchase the same packaging directly from your authorized SMART reseller (smarttech.com/where). Installing the display on a wall Typically, you install the display on a wall in a classroom or meeting space. -
Page 26: Choosing A Location
Stand in different parts of the room and count to ten loudly. If you hear anything other than your own voice (such as a rattle, buzzing from elsewhere in the room or echoes), the room may require some modifications to improve the acoustics. Work with an audio specialist to improve the acoustics. smarttech.com/kb/171164... -
Page 27: Choosing A Height
Choosing a height Consider the general height of the user community when you choose the height for the display. SMART recommends that you mount the display so that its top is 6' 5" (1.9 m) from the floor. smarttech.com/kb/171164... -
Page 28: Mounting The Display
Mount the display vertically (90° relative to the floor plus or minus 2° for tolerance) and in landscape orientation. SMART doesn’t support mounting the display at other angles or in portrait orientation. Use a standard VESA mounting plate. smarttech.com/kb/171164... - Page 29 Because the receptacles might not be easily accessible after you mount the display, consider connecting cables for power, room computer and other devices while the display is still in its packaging (see Chapter 3: Connecting power and devices on page 19). smarttech.com/kb/171164...
-
Page 30: Installing The Display On A Stand
IMPORTANT If you install the display on a stand, do not move the stand while the display is on. For information on selecting and using a third-party stand, see SMART installation standards (smarttech.com/kb/171035). smarttech.com/kb/171164... - Page 31 By installing cables in advance, you make use of connectors that might not be accessible after the display is wall-mounted. You can then run the cables across floors or behind walls as needed. WARNING Ensure that any cables that cross the floor to the display are properly bundled and marked to avoid a trip hazard. smarttech.com/kb/171164...
-
Page 32: Chapter 3: Connecting Power And Devices
Wi-Fi connection or one of the RJ45 jacks on the display (pictured). For more information about the display’s network connection and configuration, see Connecting to a network on page 30. IMPORTANT Do not use the RJ45 jack on the iQ appliance to connect to a network. smarttech.com/kb/171164... -
Page 33: Connecting Cables For Room Computers, Guest Laptops And Other Input Sources
Do not connect computers or other devices to the iQ appliance. SMART Board 7000 series interactive displays do not support the use of this connector. NOTE For information about configuring connected computers, see Chapter 5: Configuring connected computers on page 41. smarttech.com/kb/171164... -
Page 34: Using Recommend Cables
DisplayPort: This set of connectors can accommodate a USB cable for touch control and a DisplayPort cable for video and audio. The performance of cables longer than 23' (7 m) is highly dependent on the cable’s quality. smarttech.com/kb/171164... -
Page 35: Connecting External Speakers
Users can use the Input app to view the computer or other device’s input on the display. For information about the Input app, see the SMART Board 7000 series interactive display user’s guide (smarttech.com/kb/171163). Connecting external speakers The display includes two 10 W speakers, which are designed to provide sound at the front of a room. -
Page 36: Connecting Other Devices
SMART offers a classroom audio system that includes microphones (see SMART Audio 400 classroom amplification system on page 8). Room control Although SMART doesn’t offer room control equipment, the display supports systems RS-232 communication for remote management (see Appendix B: Remotely managing the display on page 73). smarttech.com/kb/171164... -
Page 37: Connector Reference
HDMI 1 input (touch) See page 21. HDMI in HDMI 1 input See page 21. (video and audio) USB Type-B DisplayPort input (touch) See page 21. DisplayPort in DisplayPort input See page 21. (video and audio) USB Type-A [N/A] This connector is a service port. RJ45 (×2) Network See page 20. smarttech.com/kb/171164... -
Page 38: Display Convenience Panel
The following diagram and table present the connectors on the iQ appliance: Connector Connects to Notes RJ45 Network Do not use this connector. Use the connectors on the display instead. See page 20. USB Type-A (×2) Supported peripherals [N/A] smarttech.com/kb/171164... -
Page 39: Other Connectors
See page 21. USB Type-B [N/A] This connector is a service port. Other connectors There are additional connectors on the bottom of the display (see Mounting multiple displays on page 18 and Appendix B: Remotely managing the display on page 73). smarttech.com/kb/171164... -
Page 41: Chapter 4: Configuring The Display
After you have mounted the display and connected power and devices, you can start it for the first time and configure the apps as described in this chapter. Turning on the display for the first time Turn on the display after mounting it and connecting power and devices. smarttech.com/kb/171164... -
Page 42: Connecting To A Network
7. Select the list of applications that will appear in the launcher, and then tap Next. For more information about the apps, see the SMART Board 7000 series interactive displays user’s guide (smarttech.com/kb/171163) 8. Tap Finish. The Welcome screen appears. Connecting to a network You can connect the display to a network using either Wi-Fi or an Ethernet connection. -
Page 43: Configuring The Network For Iq Functions
Configuring the network for iQ functions Network administrators need to configure the network so users can update the display’s firmware and system software automatically over the air and to allow apps to function properly. smarttech.com/kb/171164... - Page 44 Automatic iQ system software update NOTE Block access to https://ws.kappboard.com to prevent automatic iQ system software updates https://*.mixpanel.com iQ system software *.hockeyapp.net iQ system software https://*.smarttech-prod.com SMART Notebook® Player http://*.loggly.com SMART Notebook Player http://*.smarttech.com iQ system software, Workspaces, app, Activities app, SMART Notebook Player https://*.smarttech.com SMART Notebook Player...
- Page 45 2. Configure the network to allow Bonjour and mDNS (multicast). 3. Configure the network to allow Network Time Protocol (NTP) requests to Internet time servers. NOTE Using a 5 GHz network connection may provide a better experience with the Screen Share app. smarttech.com/kb/171164...
-
Page 46: Connecting The Display To A Network
6. If the network requires a password, enter the Wi-Fi password and tap Connect. If the network requires a user name and password, enter the user name and Wi-Fi password and tap Connect. Use the crosshairs to move the on-screen keyboard. smarttech.com/kb/171164... - Page 47 9. Tap Save. To install a certificate NOTE Certificates must be PFX format. 1. Copy a PFX format certificate to a USB drive. 2. Tap the Home button on the screen. The launcher appears. 3. Tap Settings The Settings window appears. smarttech.com/kb/171164...
-
Page 48: Evaluating The Impact Of Screen Share On Your Network Data Usage
Content being shared Data rate transmission Static content with minor screen movement 20 kb/sec Static content with periodic scrolling or Spikes briefly to 500–600 kb/sec, returns to 20 refreshes kb/sec Gaming or streaming video with major screen 700 kb/sec–1.2 Mbps changes smarttech.com/kb/171164... -
Page 49: Updating System Software
If there is an update for the pen firmware, the pen’s indicator light will flash green or amber. Leave the pen in the tray until the pen’s light is a solid color. Updating system software manually You can download system software updates at smarttech.com/downloads and update your display using a USB drive. smarttech.com/kb/171164... -
Page 50: Switching To The Beta Channel
The Beta channel is meant for advanced users who are comfortable using pre-release software. System software releases in the Beta channel contain new features that are still in development. Sign up to receive Beta channel announcements at smarttech.com/SMARTBetaProgram. IMPORTANT You may encounter bugs or other unexpected behavior in pre-release software. -
Page 51: Adding Or Removing Apps From The Launcher
SMART appreciates your willingness to use Beta channel releases and values all types of feedback. Report issues with Beta channel releases at smarttech.uservoice.com. Provide feedback to SMART about new features at smarttech.uservoice.com. Suggest new features to SMART at smarttech.uservoice.com. Adding or removing apps from the launcher You can add or remove apps from the launcher. -
Page 52: Enabling The Whiteboard Library
To enable the Library 1. Tap the Home button on the screen. The launcher appears. 2. Tap Settings The Settings window appears. 3. Tap Applications, and then tap Whiteboard 4. Switch the Library option ON. smarttech.com/kb/171164... -
Page 53: Chapter 5: Configuring Connected Computers
You can download SMART software from smarttech.com/downloads and install it on a room computer. You can purchase additional licenses of SMART Learning Suite to install on guest laptops and other computers. Contact your authorized SMART reseller (smarttech.com/where) for more information. smarttech.com/kb/171164... -
Page 54: Setting Connected Computers' Resolutions And Refresh Rates
Input source Resolution Refresh rate HDMI 1 3840 × 2160 60 Hz HDMI 2 1920 × 1080 60 Hz DisplayPort 1920 × 1080 60 Hz 1920 × 1080 60 Hz If possible, set any connected computers to these resolutions and refresh rates. See the connected computers’ operating system documentation for instructions. smarttech.com/kb/171164... -
Page 55: Checking The Display Installation
Do not use permanent or dry-erase markers on the screen. If dry-erase markers are used on the screen, remove the ink as soon as possible with a lint-free, non-abrasive cloth. Do not rub the screen with dense or rough material. Do not apply excessive pressure to the screen. smarttech.com/kb/171164... -
Page 56: Chapter 6: Maintaining The Display
Rapid changes in humidity, which can occur when you operate the product near water (such as a pool, kettle or air conditioner ventilator) To evaporate condensation from the display 1. Remove the humidity source from the display, if possible. 2. Turn off the display. smarttech.com/kb/171164... -
Page 57: Replacing The Pens And Eraser
In most situations, you can put the display to sleep when not using it following the instructions in the SMART Board 7000 series interactive displays user’s guide (smarttech.com/kb/171163). In some situations, such as when you need to transport the display or clean its screen, you need to turn off the display for a period of time. -
Page 58: Resetting The Display
2. Turn off the display (see Turning the display off and back on on the previous page). 3. Flick the switch beside the AC power inlet to the OFF (O) position. 4. Remove all accessible cables and connectors. 5. Remove the iQ appliance from the accessory slot. smarttech.com/kb/171164... - Page 59 Do not leave the display face up, face down or upside down for an extended period. This could cause permanent damage to the screen. 7. Remove the mounting brackets. To transport the display See Transporting the display on page 11. smarttech.com/kb/171164...
-
Page 61: Troubleshooting The Display
Locating the iQ appliance serial number This chapter explains how to troubleshoot issues with the display and its software. Troubleshooting the display The following information helps you resolve a variety of common issues with the display, including issues with: Power Video smarttech.com/kb/171164... -
Page 62: Chapter 7 Troubleshooting
Restart the display. See Turning the display off and back on on page 45. You’re experiencing other issues See Referring to the SMART knowledge base for additional troubleshooting with video or the solutions above information on page 63. don’t resolve the issue. smarttech.com/kb/171164... -
Page 63: Resolving Issues With Audio
If you’re using the S/PDIF out connector to connect a sound bar or receiver for external speakers, see Connecting external speakers on page 23. You’re experiencing other issues See Referring to the SMART knowledge base for additional troubleshooting with audio or the solutions above information on page 63. don’t resolve the issue. smarttech.com/kb/171164... -
Page 64: Troubleshooting The Display's Software
See Referring to the SMART knowledge base for additional troubleshooting with touch and digital ink or the information on page 63. solutions above don’t resolve the issue. Troubleshooting the display’s software This section explains how to troubleshoot the display’s software. smarttech.com/kb/171164... -
Page 65: Resolving General Issues
If Activities can’t visit secure (https) websites, make sure the display’s date and time are correct. See Date & time on page 70. Make sure the network firewall isn’t blocking services required for Activities. See Configuring the display's network connection on page 30. Contact your system administrator. smarttech.com/kb/171164... -
Page 66: Resolving Issues With Workspaces
You need to share a SMART Notebook file with the display. files in the mobile app. See the SMART Board 7000 series interactive displays user’s guide (smarttech.com/kb/171163) and your computer’s documentation. The mobile device or Notebook The display or the mobile device is unable to connect to the Internet. Check the Player is no longer connected to the settings for display and the mobile device and try connecting again. -
Page 67: Resolving Issues With Input
If touch interactivity is slow, close some open applications on the computer. Make sure the latest version of SMART Product Drivers is installed on your computer. See smarttech.com/downloads. Remove any USB cable extenders. For best results, use a 16' (5 m) or shorter USB cable. -
Page 68: Resolving Issues With Screen Share
Ensure you have the latest operating software on your Android mobile device. Make sure no system updates are pending for your Android mobile device. See the mobile device’s user guide for more information. smarttech.com/kb/171164... - Page 69 Touch interactions are not supported while using Screen Share. touch or you’re unable to write or draw with the pens. The issues persist even after you’ve Contact your system administrator. restarted your Android mobile device and ensured it is on the same network as the display. smarttech.com/kb/171164...
-
Page 70: Resolving Issues With Apple Devices
Make sure your computer or device has the latest operating system software. The display’s name appears in the Open the Screen Share app. list of available devices but you’re a. On the display, open the launcher. unable to connect to it. The launcher appears. b. Tap Screen Share smarttech.com/kb/171164... - Page 71 The issues persist even after you’ve Contact your system administrator. restarted your Mac computer or iOS mobile device and ensured they are on the same network as the display. smarttech.com/kb/171164...
-
Page 72: Resolving Issues With Chrome Browser And Chromebook
On the computer, disconnect and then reconnect the Ethernet cable or turn Wi-Fi off and then back on to try to connect to a closer access point. Make sure the antenna is attached to the iQ appliance. smarttech.com/kb/171164... -
Page 73: Resolving Issues With Windows Computers
SMART Board 7000 series interactive displays user’s guide video to the display. (smarttech.com/kb/171163) for more information. The screen is not responding to Touch interactions are not supported while using Screen Share. touch or you’re unable to write or draw with the pens. -
Page 74: Advanced Troubleshooting For Screen Share
Wait several minutes and attempt to connect again. You’re using Miracast or an unsupported wireless screen casting method. See the SMART Board 7000 series interactive displays user’s guide (smarttech.com/kb/171163). smarttech.com/kb/171164... -
Page 75: Referring To The Smart Knowledge Base For Additional Troubleshooting Information
5 GHz network. Select a less congested Wi-Fi channel. Referring to the SMART knowledge base for additional troubleshooting information Refer to the SMART knowledge base for additional troubleshooting information not include in this guide: community.smarttech.com smarttech.com/kb/171164... -
Page 76: Contacting Your Reseller For Additional Support
If an issue you’re experiencing with the display persists or isn’t covered in this guide or the knowledge base, contact your authorized SMART reseller (smarttech.com/where). Your reseller might ask you for the serial number for the display or the iQ appliance. -
Page 77: Appendix A: Using Settings
Option Values Function Notes Product information Board name [N/A] Select a name for your [N/A] display Help [N/A] Shows the SMART support [N/A] site for the display Send Feedback [N/A] Send feedback to SMART [N/A] about the display experience smarttech.com/kb/171164... -
Page 78: Diagnostics
Shows visual feedback of touches [N/A] on the screen [N/A] Shows touch feedback [N/A] Pointer location Language Option Values Function Notes Language [Languages] Sets the language for the settings To select a different language for menu the on-screen display menu, see <XREF>. smarttech.com/kb/171164... -
Page 79: Country
Saves the Whiteboard session to [N/A] the Library and erases the whiteboard Whiteboard Clean up the browser [N/A] Closes the browser tabs and clears [N/A] the history, cache and cookies Clean up other [N/A] Closes open applications [N/A] applications smarttech.com/kb/171164... -
Page 80: Wi-Fi
Wi-Fi is turned off Wi-Fi frequency band Auto Wi-Fi frequency band [N/A] 5 Ghz 2.4 Ghz Install certificates [N/A] Install certificates to connect to a [N/A] network Wi-Fi optimization [N/A] Minimize battery usage when Wi-Fi [N/A] is enabled smarttech.com/kb/171164... -
Page 81: Ethernet
[N/A] Shows the display’s time using the [N/A] 24-hour clock Choose date format [N/A] Sets the display’s date format [N/A] Usage Data Option Values Function Notes [N/A] Sends usage statistics and error [N/A] Share Usage Data reports to SMART smarttech.com/kb/171164... -
Page 82: Auto Update
[N/A] Contrast 0–100 Sets the display’s contrast level [N/A] Audio Option Values Function Notes Speakers Built-in Speakers Enables or disables the display’s When analog speakers are internal speakers connected to the display, it automatically disables the display’s internal speakers. smarttech.com/kb/171164... -
Page 83: Launcher
Sharing Whiteboards Enables or disables the Invite If this is off, you’re unable to invite function on the SMART kapp app people to your session. smarttech.com/kb/171164... -
Page 84: Screen Share
Values Function Notes Screen Share Reset [N/A] Closes and restarts Screen Share You can restart Screen Share as a app and its discovery services troubleshooting step if a mobile device or computer can’t find or connect to the display. smarttech.com/kb/171164... - Page 85 Resolving issues with remote management You can connect a computer to the room control input on the display to remotely select video inputs, turn the display on or off and get information about the display’s current settings, such as contrast and power state. smarttech.com/kb/171164...
-
Page 86: Appendix B: Remotely Managing The Display
Connect an RS-232 cable from the computer’s serial output to the RS-232 IN connector on the bottom of the display. IMPORTANT Use only a standard RS-232 cable. Do not use a null modem cable. Null modem cables typically have ends of the same type. smarttech.com/kb/171164... -
Page 87: Connecting Multiple Displays
Configure the computer’s serial interface before sending commands to the display. To configure the computer’s serial interface 1. Turn on the display. 2. Turn on the computer, and then start the serial communications program or terminal emulation program. smarttech.com/kb/171164... -
Page 88: Power States
You send the set powerstate=on command. POWERSAVE The screen is off, and the display is a very low power state. The display enters READY state when the following occurs: A user presses the Power button on the convenience panel. You send the set powerstate=on command. smarttech.com/kb/171164... -
Page 89: Commands And Responses
> NOTES Use ASCII formatted commands. Commands aren’t case-sensitive. You can use the BACKSPACE key when typing commands. Review each entry carefully before you press ENTER. Don’t send another command until you receive the response and the next command prompt. smarttech.com/kb/171164... - Page 90 > This example decreases the volume by 15: >set volume-15 volume=55 > To identify or assign a value for a specific display Start the command with [Display],@, where [Display] is the display you want to apply the command to. smarttech.com/kb/171164...
-
Page 91: Command Inventory
Where [Value] is one of the following: Where [Value] is one of the following: =ready ready =standby standby =powersave powersave updateon NOTE updateready If the display is in UPDATEON or UPDATEREADY state, it might not change power states after receiving the command. smarttech.com/kb/171164... -
Page 92: Input
Where [Value] is one of the following: Where [Value] is a number between 5 and 100 +[Value] -[Value] =[5–100] Freeze Get command Set command Response get videofreeze set videofreeze[Value] videofreeze=[Value] Where [Value] is one of the following: Where [Value] is one of the following: =off smarttech.com/kb/171164... -
Page 93: Volume
[Display] is the display’s label (A, B, and so on). [Value] is the firmware version. Serial number Get command Response get serialnum serialnum=[Value] Where [Value] is the serial number. NOTE If multiple display are connected, the response includes the serial numbers for all displays separated by commas. smarttech.com/kb/171164... -
Page 94: Resolving Issues With Remote Management
For example, requesting power status every 0.5 seconds can cause issues. computer, but the display is only Make sure the remote management system waits for the command prompt accepting commands intermittently from the previous command before sending the next command. or is ignoring some commands. smarttech.com/kb/171164... -
Page 95: Appendix C: Hardware Environmental Compliance
The crossed-out wheeled bin symbol indicates that products should be disposed of in the appropriate recycling stream and not as regular waste. Batteries The pens contain rechargeable lithium batteries. Recycle or dispose of batteries properly. More information smarttech.com/compliance for more information. smarttech.com/kb/171164... - Page 96 SMART TECHNOLOGIES smarttech.com/support smarttech.com/contactsupport smarttech.com/kb/171164...
Need help?
Do you have a question about the SBID-7075 and is the answer not in the manual?
Questions and answers