Table of Contents
Advertisement
Quick Links
Download this manual
See also:
Technical Manual
Advertisement
Table of Contents
Troubleshooting

Related Manuals for horiba ABX Micros ES60


Summary of Contents for horiba ABX Micros ES60
- Page 1 ABX Micros ES60 User manual P/n: RAB237AEN Explore the future...
- Page 3 ABX MICROS ES60 OT/CT User Manual P/n: RAB237AEN HORIBA ABX SAS B.P. 7290 34184 MONTPELLIER Cedex 4 - FRANCE...
- Page 4 When a subsequent software version is released, only the electronic version (CD-ROM and/or online help) of this user manual is updated and supplied by HORIBA ABX. To update a paper document, please contact your local HORIBA ABX Technical Support Representative.
- Page 5 Other product names mentioned within this publication may be registered trademarks of other companies. Copyright 2008 HORIBA ABX SAS All rights reserved. No part of this book may be reproduced or transmitted in any form or by any means, electronic, mechanical, photocopying, recording, or otherwise, without the prior written permission of HORIBA ABX SAS.
- Page 6 User Manual - RAB237AEN...
-
Page 7: Table Of Contents
Contents Introduction 1. Warning and precautions ..................1-3 1.1. Recommendations ..................1-3 1.2. Limited guarantee ...................1-3 1.3. Safety Precautions ...................1-4 1.3.1. Electronic and moving parts...............1-4 1.3.2. Biological risks ..................1-4 2. Operational conditions ..................1-5 2.1. Environment....................1-5 2.2. Location ......................1-5 2.3. Grounding ......................1-5 2.4. Humidity/temperature conditions ..............1-5 2.5. - Page 8 ABX Micros ES60 OT/CT 8.1.3. ABX Micros ES60 "Pack" installation kit ........... 1-20 8.2. Reagent installation..................1-20 8.3. Instrument connectors................... 1-21 8.4. Printer......................1-22 8.4.1. Integrated ticket printer................1-22 8.4.2. External printer (optional) ................ 1-22 User Manual - RAB237AEN...
- Page 9 Contents Specifications 1. Specifications .......................2-2 1.1. Introduction ....................2-2 1.2. Parameters ......................2-2 1.3. Instrument specifications .................2-4 1.4. Technical specifications ..................2-5 2. Summary of performance data ................2-6 2.1. Precision (Reproducibility) ................2-6 2.2. Precision (Repeatability) ................2-10 2.3. Linearity ......................2-10 2.4. Carry-over .....................2-11 2.5. Normal ranges ....................2-11 2.6.
- Page 10 ABX Micros ES60 OT/CT Description & Technology 1. ABX Micros ES60 OT/CT description ..............3-2 1.1. ABX Micros ES60 CT description ..............3-2 1.1.1. Overview ....................3-2 1.1.2. Front view (covers opened)................ 3-2 1.1.3. Left side view (covers opened)..............3-2 1.2.
- Page 11 Contents Workflow 1. Checks and startup....................4-3 1.1. Reagent level checks ..................4-3 1.1.1. Bottle units ....................4-3 1.1.2. Pack unit ....................4-3 1.2. Printer power and on-line checks ..............4-3 1.3. Instrument startup ...................4-3 1.4. User identification...................4-4 1.4.1. User profile selection.................4-4 1.4.2. Entering user password ................4-6 1.4.3.
- Page 12 ABX Micros ES60 OT/CT 7.3. Flags linked to linearity range and rejected analysis ........4-28 7.3.1. Results exceeding linear range..............4-28 7.3.2. Results rejected ..................4-28 7.3.3. Result comparison ................... 4-28 7.3.4. HGB blank reference................4-29 7.4. Morphology flags ..................4-29 7.4.1.
- Page 13 Contents Quality assurance 1. "Quality control" menu ..................5-2 2. QC tab .........................5-3 2.1. Introduction ....................5-3 2.2. "QC" tab description ..................5-4 2.3. Control management..................5-4 2.3.1. Control status icons ...................5-4 2.3.2. Control creation..................5-5 2.3.3. Control closing ..................5-8 2.4. QC results .......................5-9 2.4.1. Displaying QC results ................5-9 2.4.2.
- Page 14 ABX Micros ES60 OT/CT Setup 1. Accessing the "Settings" menu................6-2 2. System settings..................... 6-3 2.1. System tab description ..................6-3 2.2. System date/time settings ................6-3 2.3. Sleep mode settings ..................6-4 2.4. Sound settings....................6-4 3. Localization settings..................... 6-5 3.1.
- Page 15 Contents Maintenance & Troubleshooting 1. Introduction ......................7-3 2. Daily maintenance ....................7-3 2.1. Startup and shutdown cycles ................7-3 2.2. Automatic cleaning ..................7-4 3. Maintenance procedures..................7-5 3.1. General cleaning of the instrument..............7-5 3.2. Cover dismantling ...................7-6 3.3. Service ......................7-7 3.3.1. Service menu description................7-7 3.3.2.
- Page 16 ABX Micros ES60 OT/CT 5.3. Troubleshooting parameters................7-32 5.3.1. Problems on all parameters ..............7-32 5.3.2. Problems on RBC/PLT parameters only............ 7-33 5.3.3. Problems on WBC/HGB parameters only ..........7-35 5.4. Troubleshooting system operations ............... 7-36 6. Alarms and error messages ................7-37 6.1.
- Page 17 Introduction 1. Warning and precautions ..................1-3 1.1. Recommendations ..................1-3 1.2. Limited guarantee ..................1-3 1.3. Safety Precautions..................1-4 1.3.1. Electronic and moving parts ..............1-4 1.3.2. Biological risks ..................1-4 2. Operational conditions ..................1-5 2.1. Environment ....................1-5 2.2. Location .......................1-5 2.3. Grounding ....................1-5 2.4. Humidity/temperature conditions ..............1-5 2.5.
- Page 18 ABX Micros ES60 OT/CT 8.4.1. Integrated ticket printer ..............1-22 8.4.2. External printer (optional) ..............1-22 1–2 User Manual - RAB237AEN...
-
Page 19: Introduction
Work safety reliability and general characteristics are guaranteed by HORIBA ABX under the following conditions: ◆ User manual must be entirely read and personnel trained by HORIBA ABX before attempting to operate instrument. ◆ The user always operates with full knowledge and appreciation of instrument warnings, alarms and flags. -
Page 20: Safety Precautions
◆The battery may explode if it is not replaced correctly! Ask your local HORIBA ABX Technical Support Representative, replace only with the same or equivalent type recommended by the manufacturer. Dispose of used batteries according to the battery manufacturer's instructions. -
Page 21: Operational Conditions
OT/CT is designed for safety from voltage surges according to INSTALLATION CATEGORY II and POLLUTION DEGREE 2 (IEC 61010-1 (2002)). Please contact your local HORIBA ABX Technical Support Representative if use conditions do not comply with the recommended specifications. 2.2. Location ◆... -
Page 22: Environmental Protection
In accordance with the European Directive (2002/96/CE, known also as W.E.E.E) instruments having this symbol and sold into a European country by HORIBA ABX or an authorised representative must be disposed of and recycled correctly at the end of its useful life. -
Page 23: Graphics And Symbols
Introduction 4. Graphics and symbols Switch off position Switch on position Alternating current Manufacturer This product conforms to the EC In Vitro Diagnostic Medical Directives named in the Device Declaration of Conformity. Caution, consult accompanying Biological risks documents Reagent Fragile, handle with care Keep dry Do not stack Temperature limitation... -
Page 24: Labels
ABX Micros ES60 OT/CT 5. Labels 5.1. Instrument rear view labels Diag.1-1 ABX Micros ES60 OT/CT rear view Identification label Output label Supply module label Diluent and waste connection labels 5.1.1. Identification label Diag.1-2 ABX Micros ES60 Diag.1-3 ABX Micros ES60 5.1.2. -
Page 25: Supply Module Label
Introduction 5.1.3. Supply module label Diag.1-5 Supply module label ON/OFF switch Fuses location Power supply connector To replace the 2 fuses located on the left of the power supply connector on the back of the analyser, carry out the following procedure: ◆... -
Page 26: Biological Risks" Label
ABX Micros ES60 OT/CT 5.2. "Biological risks" label ◆ This label is located on the reagent compartment cover (See 1.3.2. Biological risks, page 1-4). Diag.1-7 Biological risk label 5.3. Internal label ◆ This label is located on the WBC chamber cover (main covers must be opened to reach it). Diag.1-8 ESD label Electrostatic Sensitive Device (ESD). -
Page 27: Presentation
Introduction 6. Presentation The ABX Micros ES60 OT/CT, which is small in size, has 8 main parts: ◆ The electrical supply, ◆ The electronic main board, ◆ The dilution pneumatics, ◆ The control panel, including the touch screen, ◆ A reagent compartment, ◆... -
Page 28: Software Overview
ABX Micros ES60 OT/CT 7. Software overview 7.1. Generic screen The generic screen is composed of: Menu access buttons: See 7.2. Menu access buttons description, page 1-12. Exit button: See 7.3. "Exit" button and "Exit" screen, page 1-12. Status area: See 7.4. -
Page 29: Status" Button Description
Introduction Diag.1-11 Exit screen Press radio button corresponding to the action to perform (See Tab.1-1 Exit screen icons description, page 1-13). Press "OK" button. Tab.1-1 Exit screen icons description Button Name Description Logout Disconnects current user and displays the "Login" screen. Restart Restart the analyser. -
Page 30: Contextual Help" Button Description
ABX Micros ES60 OT/CT 7.5. "Contextual help" button description ◆ The "Contextual help" button (Diag.1-13) opens the help file corresponding to the current screen (context sensitive help). If no help topic is available for the current screen, the following message is displayed: "No help available for this screen."... -
Page 31: Data Transmission Buttons
Introduction Tab.1-4 Virtual keyboard specific keys Button Name Action Description Valid Validation It validates entry and moves to the next text field. Delete Deletion It allows to delete entries. It moves the pointer backward (to the left) in the selected Previous Navigation text field. -
Page 32: Miscellaneous
ABX Micros ES60 OT/CT 7.8. Miscellaneous 7.8.1. Navigation buttons Arrows ◆ The four arrow buttons described hereafter, allow the user to scroll between table lines and pages. Button Name Description Scrolls the upper line of the table. Down Scrolls the next line of the table. Page up Scrolls the previous page of the table. -
Page 33: Check Box
Introduction Diag.1-15 Dialog box Dialog box icons description Button Name Description Displays an information message: Press "OK" button to close the Information dialog box. Action Press "OK" button to confirm. Ask user confirmation for an action: Press "OK" button to continue Confirmation or "Cancel"... -
Page 34: Combo Box
ABX Micros ES60 OT/CT 7.8.4. Combo box ◆ A combo box is composed of a field and up and down buttons (Diag.1-21). The user can scroll between a list of values defined for the combo box. Diag.1-21 Combo box 7.8.5. Radio button Radio buttons allow to select a software option (single choice): ◆... -
Page 35: Installation
Introduction 8. Installation An HORIBA ABX representative will install your instrument. 8.1. Package contents 8.1.1. Package contents check A thorough inspection is carried out on the instrument before sending it. We, nevertheless, recommend checking the total system as soon as it is received to report any anomalies to the carrier. -
Page 36: Abx Micros Es60 "Pack" Installation Kit
ABX Micros ES60 OT/CT Part number Designation EAC019A Diluent/Waste male connector EAE011A 4 ML Tubing, Crystal 3x6 FBL001A Rubber stopper 2 holes XDA566A Red reagent bottle stopper XEA017A Reagent straw L=270mm 8.1.3. ABX Micros ES60 "Pack" installation kit The ABX Micros ES60 "pack"... -
Page 37: Instrument Connectors
Never type data with the external keyboard when reading barcode label with the external barcode reader. Risk of erroneous data entries! Do not connect any printer which has not been recommended by an HORIBA ABX qualified engineer. ◆External barcode reader on USB port validated by HORIBA ABX is... -
Page 38: Printer
◆A non exhaustive list of printers that can be used with the instrument can be found on the website: http://www.horiba-abx.com/documentation: Other/printers/instrument printer list/abx micros es60. ◆For more detailed information, please contact your local HORIBA ABX Technical Support Representative. 1–22 User Manual - RAB237AEN... - Page 39 Specifications 1. Specifications .......................2-2 1.1. Introduction....................2-2 1.2. Parameters....................2-2 1.3. Instrument specifications ................2-4 1.4. Technical specifications................2-5 2. Summary of performance data ................2-6 2.1. Precision (Reproducibility)................2-6 2.2. Precision (Repeatability) ................2-10 2.3. Linearity .....................2-10 2.4. Carry-over ....................2-11 2.5. Normal ranges ....................2-11 2.6. Accuracy ....................2-11 3.
-
Page 40: Introduction
ABX Micros ES60 OT/CT Specifications 1. Specifications 1.1. Introduction ◆ WBC, RBC and PLT histograms ◆ Quantitative flags ◆ Parameter selection by software settings The ABX Micros ES60 OT/CT performs automated blood counts and requires no manual operations for aspirating blood, dilutions, measuring, calculations, print-outs and computer transfer of data. - Page 41 Specifications Parameter Definition Hemoglobin Hematocrit Mean Corpuscular Volume Mean Corpuscular Hemoglobin MCHC Mean Corpuscular Hemoglobin Concentration Red cell Distribution Width Platelets Mean Platelet Volume WBC, RBC and PLT Distribution Curves PDW and PCT have not been established as indications for this product, in the United States.
-
Page 42: Instrument Specifications
ABX Micros ES60 OT/CT 1.3. Instrument specifications Tab.2-3 Instrument specifications ABX Micros ES60 CT/ABX Micros ES60 OT OT: 60 samples/hour Throughput analysis* CT: 50 samples/hour Minimum blood sample requirement: 50µl Minimum sample volume Analyser sample volume: 10µl WBC: approximately 1/260... -
Page 43: Technical Specifications
Specifications 1.4. Technical specifications Tab.2-4 Technical specifications ABX Micros ES60 CT/ABX Micros ES60 OT Software Designed by HORIBA ABX, installed on a Flash EPROM Memory capacity 1000 results Display Operated touch screen, LVDS screen: 8 4, 640x480, 256000 colours Hard copy printing (integrated or external printer) -
Page 44: Summary Of Performance Data
ABX Micros ES60 OT/CT 2. Summary of performance data 2.1. Precision (Reproducibility) ◆ The ABX Micros ES60 OT/CT was initially calibrated with Minocal calibrator (lot N° MCAL058). ◆ Three levels of ABX Minotrol 16 control material (lot N°: MX058) were run in duplicate twice daily for 20 days. - Page 45 Specifications Tab.2-6 Precision SD (ABX Micros ES60 MINOTROL 16 SD of runs SD of daily Total imprecision Parameters Within run SD Control means means (SD) MX058 High 0.19 0.16 0.22 0.28 MX058 Normal 0.09 0.09 0.09 0.13 MX058 Low 0.04 0.05 0.04 0.06...
- Page 46 ABX Micros ES60 OT/CT Precision CV% Tab.2-7 Precision CV% (ABX Micros ES60 MINOTROL 16 Within run CV% of run CV% of daily Total imprecision Parameters Control means means (CV%) MX058 High 1.35% 0.97% 1.01% 1.55% MX058 Normal 1.56% 1.25% 1.05% 1.76% MX058 Low 2.96%...
- Page 47 Specifications Tab.2-8 Precision CV% (ABX Micros ES60 MINOTROL 16 Within run CV% of run CV% of daily Total imprecision Parameters Control means means (CV%) MX058 High 0.95% 0.82% 1.08% 1.40% MX058 Normal 1.22% 1.25% 1.15% 1.69% MX058 Low 2.06% 2.58% 1.97% 3.05% MX058 High...
-
Page 48: Precision (Repeatability)
ES60 OT/CT 2.2. Precision (Repeatability) ◆ Based on 10 consecutive samplings from 1 fresh normal whole blood, without any alarms. Tab.2-9 Precision (Repeatability) Precision table: N=10 ABX Micros ES60 OT ABX Micros ES60 CT Parameters 1.48% 1.65% 0.96% 1.19% 0.51% 1.00%... -
Page 49: Carry-Over
µm 0.983 0.986 Lymphocytes 0.997 0.989 Monocytes 0.920 0.868 Granulocytes 0.990 0.989 Reference analyzers ABX Micros 60 ABX Micros 60 n: number of specimens analyzed. : correlation coefficient from the regression curve Reference/ABX Micros ES60. User Manual - RAB237AEN 2–11... -
Page 50: Limitations
ES60 OT/CT 3. Limitations Whilst every effort is taken by HORIBA ABX to investigate and indicate all known interferences, it is by no means possible to guarantee that all interferences have been identified. At all times, results should be validated and communicated only once all information relating to the patient has been assessed and taken into account. -
Page 51: Anti-Coagulants And Their Effects (On Whole Blood)
Specifications 3.2.3. Anti-coagulants and their effects (on whole blood) This is a list of commonly used anti-coagulants used for whole blood collections: ◆ Heparin - Causes an increase in cell clumping (WBCs and PLTs) and modifies cytoplasmic color with Romanowsky staining (blue background). An increase in HCT and MCV with high heparin concentrations >... -
Page 52: Rbc Red Blood Cells (Erythrocytes)
ABX Micros ES60 OT/CT ◆ Multiple myeloma - The precipitation of proteins in multiple myeloma patients may give elevated WBC counts. ◆ Hemolysis - Hemolyzed specimens contain red cell stroma which may elevate WBC counts. ◆ Leukemia - A very low WBC count may result in this disease state because of possible increased fragility of the leukocytes leading to some destruction of these cells during counting. -
Page 53: Hct (Hematocrit)
Specifications 3.3.4. HCT (Hematocrit) ◆ Red Blood cell Agglutination - May produce erroneous HCT and MCV values. Red blood cells agglutination may be detected by observing abnormal MCH and MCHC values, as well as examination of a stained blood smear in such cases. Manual laboratory methods may be required to obtain an accurate HCT value. -
Page 54: Mpv (Mean Platelet Volume)
ABX Micros ES60 OT/CT ◆ Platelet agglutination - Clumped platelets due to poor collection techniques or platelet satellitosis caused by EDTA activation of immunoglobulins may cause a low platelet count and/or an elevated WBC count. ◆ These types of specimens should be re-collected in sodium-citrate anticoagulant and re-analyzed "For Platelets Only"! 3.3.10. -
Page 55: Reagent
Support Representative for all information regarding the recommended products. ◆ The HORIBA ABX reagents specified for this instrument have been approved in accordance with the European Directive 98/79/CE (Annex III) for in-vitro medical devices. ◆ Refer to reagent leaflets for all reagent specifications. -
Page 56: Waste Handling Procedure
ABX Micros ES60 OT/CT Tab.2-16 Reagent consumption on ABX Micros ES60 OT (software version V1.1.X) Cycle Diluent Lyse Cleaner ABX Minoclair Startup 23.2 Shutdown 13.0 Analysis 15.2 Prime all reagents 26.8 10.3 Automatic cleaning 16.1 12.6 Concentrated cleaning 16.1 Cal photometer 16.1 Backflush 5. - Page 57 Description & Technology 1. ABX Micros ES60 OT/CT description ..............3-2 1.1. ABX Micros ES60 CT description ..............3-2 1.1.1. Overview .....................3-2 1.1.2. Front view (covers opened)..............3-2 1.1.3. Left side view (covers opened)..............3-2 1.2. ABX Micros ES60 OT description..............3-3 1.2.1. Overview .....................3-3 1.2.2.
-
Page 58: Abx Micros Es60 Ot/Ct Description
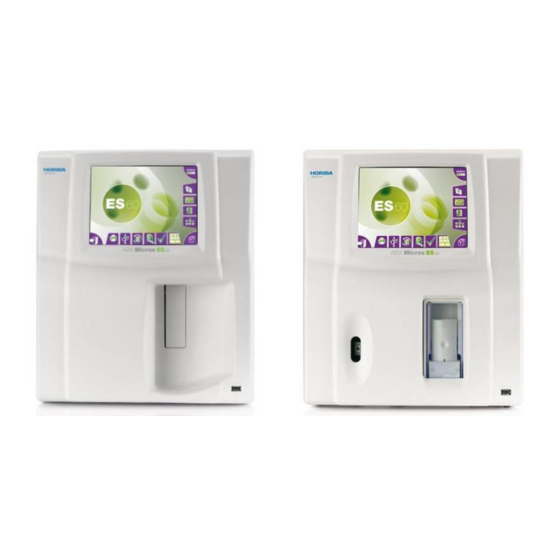
ABX Micros ES60 OT/CT Description & Technology 1. ABX Micros ES60 OT/CT description 1.1. ABX Micros ES60 CT description 1.1.1. Overview Diag.3-1 ABX Micros ES60 LCD display & touchscreen Cap piercing mechanism & tube holder Reagent compartment Printer Barcode reader USB port 1.1.2. -
Page 59: Abx Micros Es60 Ot Description
Description & Technology 1.2. ABX Micros ES60 OT description 1.2.1. Overview Diag.3-4 ABX Micros ES60 LCD display & touchscreen Manual sampling needle Reagent compartment Printer USB port 1.2.2. Front view (door opened) Diag.3-5 ABX Micros ES60 OT front side Carriage assembly Sampling needle and manual sample bar WBC/HGB chamber RBC/PLT chamber... -
Page 60: Software Menus Description
ABX Micros ES60 OT/CT 2. Software menus description Diag.3-7 User menu Creation Suppression QC results Historic Creation LJ statistics Coefficient edition Sample identification Calibration results XB (data or curves) consultation, Quality control printing Calibration Result history Patient results research/consult./printing/sending Prime Maintenance Reagents Creation... -
Page 61: Technology
Description & Technology 3. Technology 3.1. Sampling 3.1.1. ABX Micros ES60 Blood collection tube is placed into the tube holder. The tube holder door is then closed by the operator. The cap-piercing mechanism moves the tube holder up and pierces the sample tube. Aspiration of 10µl of blood. -
Page 62: Rbc/Plt
ABX Micros ES60 OT/CT Tab.3-3 HGB measurement HGB measurement Method Photometry Wavelength 550nm Count period 2x5 seconds Temperature reaction Ambient ◆ 10µl of blood sample contained in the sampling needle is pushed with 1.2ml of ABX Minidil LMG along with 0.5ml of ABX Minidil LMG from the outer needle into the WBC/HGB chamber. ◆... -
Page 63: Cbc Measurement Principles
Description & Technology Diag.3-9 Sample dilution ABX Micros ES60 CT/ABX Micros ES60 Sample ABX Diluent ABX Lyse 3.3. CBC measurement principles 3.3.1. RBC/PLT ◆ The RBCs and PLTs are measured by an electronic impedance variation principle. This means that an electronic field is generated around the micro-aperature in which the blood cells pass through. The cells create a resistance in the electronic field as they pass through the calibrated micro- aperture. -
Page 64: Es60 Ot/
ABX Micros ES60 OT/CT Results ◆ A certain amount of cells will pass through the calibrated micro-aperture within a specific time frame. They are then measured by pulse height, thresholded, grouped by size and mathematically calculated along with the calibration coefficient to give a final numerical value for both RBCs and PLTs. -
Page 65: Hgb
Description & Technology 3.3.2. HGB ◆ The hemoglobin measurement is based on a startup cycle. This cycle includes an hemoglobin blank test sequence which includes 2 hemoglobin blank measurements. Each analysis cycle run after start-up also has a HGB blank measurement which is compared to the initial start-up HGB blank. Each analysis cycle run thereafter compares the HGB blank reading to the previous cycle HGB blank reading. -
Page 66: Pdw
ABX Micros ES60 OT/CT 3.3.8. PDW ◆ The PDW (Platelet Distribution Width) is calculated from the platelet histogram/distribution curve. ◆ The PDW is represented by the width of the curve between 15% of the number of platelets starting from the low threshold 2fl (S1) and 15% of the number of platelets begining with the variable high threshold (S2). - Page 67 Description & Technology The granulocytes subpopulation of the WBC's contains 3 sub-populations within itself, which are somewhat the same in nature. They all contain cytoplasmic granuler material which stain various colors. when viewed microscopically. These 3 sub-populations are as followed: ◆Neutrophils ◆Eosinophils ◆Basophils...
- Page 68 ABX Micros ES60 OT/CT 3–12 User Manual - RAB237AEN...
-
Page 69: Workflow
Workflow 1. Checks and startup....................4-3 1.1. Reagent level checks ..................4-3 1.1.1. Bottle units ...................4-3 1.1.2. Pack unit ....................4-3 1.2. Printer power and on-line checks ..............4-3 1.3. Instrument startup ..................4-3 1.4. User identification ..................4-4 1.4.1. User profile selection................4-4 1.4.2. Entering user password .................4-6 1.4.3. - Page 70 ABX Micros ES60 OT/CT 7.3.4. HGB blank reference................4-29 7.4. Morphology flags ..................4-29 7.4.1. Flags on PLT distribution curve............4-29 7.4.2. Flags on WBC distribution curve ............4-29 4–2 User Manual - RAB237AEN...
-
Page 71: Checks And Startup
1.1. Reagent level checks 1.1.1. Bottle units ◆ The system manages automatically the HORIBA ABX reagents (reagent level and expiry date). If this function is configured, you will be informed on the reagents status at the end of instrument startup. See Section 7, 4.2. -
Page 72: User Identification
- The "Lab tech" corresponds to the laboratory technician who runs the analyses. - The "Scientist" correponds to the person in charge of the laboratory. He manages the system. The "Technician" profile is dedicated to the HORIBA ABX local representative technician only. - Page 73 "Valid" key of the virtual keyboard. ◆For each "Scientist" profile connection, a password will be required. Ask your local HORIBA ABX Technical Support Representative to know the default "Scientist" password. ◆...
-
Page 74: Entering User Password
ABX Micros ES60 OT/CT 1.4.2. Entering user password Once the user profile login button is pressed the login password screen is displayed. Enter password into the "Password" field using the keyboard or the virtual keyboard and press "Valid" key. ◆When an erroneous password is entered the following error message is displayed: "Invalid password. -
Page 75: Status Area
Workflow 1.5. Status area 1.5.1. Introduction ◆ The "Status" button (Diag.4-1) is blinking to indicate that an alarm has been raised. Press the "Status" button. Diag.4-1 Status button ◆ The "Status" area (Diag.4-2) is displayed showing automatically the category concerned by the alarm. -
Page 76: Functions Checked By The Instrument
ABX Micros ES60 OT/CT Help message corresponding to the system alarm message selected in the table above. This help message gives corrective actions to perform (See Section 7, 6.1. System alarms, page 7-37). System alarm messages are displayed in the "Status" area until the problem is solved. - Page 77 Workflow QC status ◆ To select the QC category, press the "QC status" button Diag.4-4. Diag.4-4 QC Status button Tab.4-4 QC category alarm messages Status according to Status according to Locking alarm user profile user profile Alarm message options Lab tech Scientist Lab tech Scientist...
- Page 78 ABX Micros ES60 OT/CT Archive status ◆ To select the archive category, press the "Archive status" button Diag.4-6. Diag.4-6 Archive status button Tab.4-6 Archive category alarm messages Status according to Status according to Locking alarm user profile user profile Alarm message options Lab tech Scientist...
-
Page 79: Daily Quality Control
Perform a repeatability and a calibration (See Section 5, 4.2. Calibration procedure, page 5-22). Re-run the control blood. Open a new vial of control material. If the problem persists, call your local HORIBA ABX Technical Support Representative. User Manual - RAB237AEN 4–11... -
Page 80: Blood Sample Collection
ABX Micros ES60 OT/CT 3. Blood sample collection ◆ See Section 2, 3.2. Blood specimens, page 2-12 for collection requirements. Blood samples must be gently and thoroughly mixed with a rocking or tilting motion just before placing the sample into the tube holder for the analysis cycle. ◆... -
Page 81: Entering Patient Sample Information
Workflow 4.1. Entering patient sample information 4.1.1. Sample ID ◆ Sample ID is the sample identification number (16 alphanumeric characters maximum). ◆ It is a mandatory field. If it is not entered, the "OK" button is disable. ◆ It could be entered as follows: Press "Sample ID"... -
Page 82: Patient First Name
ABX Micros ES60 OT/CT 4.1.4. Patient first name ◆ The patient first name has up to 20 alphabetic characters maximum. ◆ To enter patient first name, press "First name" field to select it and type in the patient first name using the virtual keyboard (See 4.2. -
Page 83: Sample Identification Using The Virtual Keyboard
Workflow 4.2. Sample identification using the virtual keyboard ◆ Press "Virtual keyboard" button to open the virtual keyboard (Diag.4-11). Diag.4-11 Virtual keyboard button ◆ Press the text field (located above the virtual keyboard) corresponding to the requested item ◆ Use "Previous" and "Next" keys to move backward or forward in the selected text field Diag.4-12). Diag.4-12 Previous/Next keys ◆... -
Page 84: Running Analysis
ABX Micros ES60 OT/CT 5. Running analysis A patient analysis cannot be run if the instrument is locked. The "Status" button is red and the "OK" button is disable. Press "OK" button to validate sample identification. If a blank counting has to be done, the following message is displayed: "A reference cycle hemoglobin has to be carried out, press the manual sample bar to run this cycle."... - Page 85 Workflow Tube holder selection: The sample tube holder has 4 positions according to the sample tube characteristics. The required position is selected when it is at the 12:00 o'clock position inside the sampling compartment. Turn the tube holder either "Right" or "Left". A "Clicking" sound will be heard once it is correctly placed. The tube holder is associated with 3 switches located on the inside "Right-hand"...
-
Page 86: Results
ABX Micros ES60 OT/CT 6. Results 6.1. Results from analyser ◆ Once analysis is completed, the data are treated by the instrument calculation software which allows the display of results in accordance with the instrument settings (parameters, units, curves, alarms, etc.). ◆... -
Page 87: Patient Information
Workflow 6.2.2. Patient information ◆ A summary of patient information is displayed at the top of the "Result display" screen: sample ID, patient ID, patient name, analysis date and time. ◆ More detailed information on the patient can be displayed by pressing the "Patient identification"... -
Page 88: Detailed Results
ABX Micros ES60 OT/CT 6.2.5. Detailed results ◆ To display detailed results of one parameter family, press the corresponding histogram area. Diag.4-19 Histogram area ◆ The "Detailed results" screen is displayed. Diag.4-20 Detailed results It gives for each parameter of the selected family the following information: ◆... -
Page 89: Results Sending And Transmitting
Workflow 6.3. Results sending and transmitting 6.3.1. Printing results Results can be printed: ◆ Automatically: See Section 6, 7.2. Result settings, page 6-15 to set this option. ◆ Manually. Integrated printer accepts "latin characters" only. Please use an external printer when non "latin characters" are used. In the results screen, press "Print"... - Page 90 ABX Micros ES60 OT/CT Result printout on external printer A result printout on external printer contains (Diag.4-21) Headers set in the "Settings" menu. Patient demography and analysis information (date, operator). Analyser and analysis alarms, if any were reported. WBC parameters and associated results. WBC flags, if any were reported (See 7.
- Page 91 Workflow Result printout on integrated ticket printer A result printout on integrated ticket printer contains (Diag.4-22) Printout information (date, user name) Patient demography and analysis information (date, operator). Analyser and analysis alarms, if any were reported. WBC parameters and associated results. WBC flags, if any were reported (See 7.
-
Page 92: Sending Results
ABX Micros ES60 OT/CT 6.3.3. Sending results The instrument can be linked to the LIS using an ABX or an ASTM format. Results can be sent to the LIS: ◆ Automatically: See Section 6, 7.2. Result settings, page 6-15 to set this option. The automatic sending of results is blocked if the following alarms and flags are triggered: ◆Alarms: "QCtl"... -
Page 93: Analysis Run With The Simplified Identification
Workflow 6.4. Analysis run with the simplified identification ◆ Simplified identification allows to run a control blood or a patient analysis directly from the result screen and without entering all the sample information in the "Sample identification" menu. Diag.4-24 Simplified identification ◆... -
Page 94: Result History
ABX Micros ES60 OT/CT 6.5. Result history 6.5.1. Result history menu description ◆ To access the "Result history" menu, press "Result history menu" button (Diag.4-26). Diag.4-26 Result history menu button ◆ The "Result history" menu displays all stored results. Diag.4-27 Result history The "Result history"... -
Page 95: Filtering Results With The Filter Check Box
Workflow 6.5.2. Filtering results with the filter check box ◆ The results can be filtered by 4 different items: "Date", "Sample ID", "Patient ID" and/or "Name". Check the filter check box (Diag.4-28). Diag.4-28 Filter check box Filter check box Filter parameters Enter date in the "Date"... -
Page 96: Flags
ABX Micros ES60 OT/CT 7. Flags 7.1. Introduction These instrument flags can be classified into 3 different groups: Results exceeding normal limits: See 7.2. Normal limits, page 4-28. Flags linked to results that exceed the linear range of the instrument or leading to "Rejected Analysis": See 7.3. -
Page 97: Hgb Blank Reference
Workflow 7.3.4. HGB blank reference ◆ A suspicious flag, shown by an exclamation mark (!) located next to the hemoglobin result shows that the HGB blank carried out during the analysis differs from the previous cycle s HGB blank. This (!) means that both HGB blanks were outside the instrument precision limits. ◆... - Page 98 ABX Micros ES60 OT/CT ◆ Platelet aggregates ◆ Nucleated red blood cells ◆ This flag corresponds to the number of cells counted in the first channels, out of the total number of lymphocytes. The "M2" flag indicates an excessive number of cells in the 130fl to 160fl zone. The pathological elements which may be found in this area will include: ◆...
-
Page 99: Quality Assurance
Quality assurance 1. "Quality control" menu ..................5-2 2. QC tab .........................5-3 2.1. Introduction....................5-3 2.2. "QC" tab description ..................5-4 2.3. Control management ..................5-4 2.3.1. Control status icons ................5-4 2.3.2. Control creation ...................5-5 2.3.3. Control closing ..................5-8 2.4. QC results.....................5-9 2.4.1. Displaying QC results................5-9 2.4.2. -
Page 100: Quality Control" Menu
ABX Micros ES60 OT/CT Quality assurance 1. "Quality control" menu ◆ The Quality Control allows to monitor a set of analyses based on known sample values and ranges over a period of several months. Statistical computations performed on these populations allow the extraction of qualitative information related to the stability of the instrument. -
Page 101: Qc Tab
Quality assurance 2. QC tab 2.1. Introduction ◆ The "QC" tab is the control blood management menu: lot information and status, QC results, and statistical results. ◆ The "QC" tab displays a succinct view of all activated controls. To access the "QC" tab: Press "Quality control menu"... -
Page 102: Qc" Tab Description
ABX Micros ES60 OT/CT 2.2. "QC" tab description The "QC" tab is composed of the following elements: ◆ 3 fields, located at the top of the tab, give information on the selected control: - the "Name" field displays the control name. - the "Lot number"... -
Page 103: Control Creation
Quality assurance 2.3.2. Control creation Introduction A new lot of control blood can be created by two different ways: ◆ Importation of control information from USB key: See Control importation, page 5-5. ◆ Creation with the "Control Modification" screen: See Control creation, page 5-6. - Page 104 ES60 OT/CT Control file downloading Connect to HORIBA ABX website: http://www.horiba-abx.com/documentation: hematology/ quality control target. In the "quality control target" page, click the control name ("minotrol 16" for example ). In the control page, click the instrument name "micros es 60".
- Page 105 Quality assurance Control identification Press "Lot number" field to select it and enter the control lot number. Read the contol label by means of barcode reader or type the control lot number using the virtual keyboard or an external keyboard (if one is connected). Press "Name"...
-
Page 106: Control Closing
ABX Micros ES60 OT/CT Enter "Target" and "Tolerance" values for each parameter in the corresponding fields: - Press value fields to select them. - Type the control target values in the fields using the virtual keyboard or an external keyboard (if one is connected). -
Page 107: Qc Results
Quality assurance 2.4. QC results ◆ Results are compared with the entered target values (See Entering control target values, page 5- 7) to establish if the QC run is passed or invalid (See 2.4.1. Displaying QC results, page 5-9). ◆ The current QC results can be printed and sent to the LIS: See 2.4.2. - Page 108 ABX Micros ES60 OT/CT Control information ◆ A summary of control information is displayed at the top of the "QC result display" screen: sample ID (= QC lot number), control name, control expiration date, analysis date and time. ◆ The "Control information" button (located at the top of the screen, Diag.5-10) allows to display a dialog box containing the following information (press "OK"...
-
Page 109: Qc Results Printing And Transmitting
Quality assurance results printing and transmitting 2.4.2. QC Printing QC results QC results can be printed: ◆ Automatically: See Section 6, 7.2. Result settings, page 6-15 to set this option. ◆ Manually. Integrated printer accepts "latin characters" only. Please use an external printer when non "latin characters"... - Page 110 ABX Micros ES60 OT/CT QC result printout on an external printer A result printout contains (Diag.5-13) Headers set in the "Settings" menu. Control ID, control name and analysis information (date, operator). Analyser and analysis alarms, if any were reported. Parameters and associated results. WBC, RBC and PLT flags, if any were reported (See Section 4, 7.
- Page 111 Quality assurance QC result printout on integrated ticket printer A result printout on integrated ticket printer contains (Diag.5-14) Printout information (date, user name) Control ID, control name Analysis information (date, operator). Analyser and analysis alarms, if any were reported. WBC parameters and associated results. WBC flags, if any were reported (See Section 4, 7.
- Page 112 ABX Micros ES60 OT/CT Sending results The instrument can be linked to the LIS using an ABX or an ASTM format. QC results can be sent to the LIS: ◆ Automatically: See Section 6, 7.2. Result settings, page 6-15 to set this option. The automatic sending of results is blocked if the following alarms and flags are triggered: ◆Alarms: "QCtl"...
-
Page 113: Qc Result History
Quality assurance 2.4.3. QC result history ◆ The "QC" tab allows to display the 100 latest QC results. Accessing the "QC result history" screen Press "Quality control menu" button to access the "Quality control" menu. Press corresponding radio button to select the control. Press "History"... -
Page 114: Levey Jennings Graphs
ABX Micros ES60 OT/CT 2.5. Levey Jennings graphs ◆ Levey Jennings (LJ) curves are graphical representations of Quality control data based on the daily value for each control parameter, its target value and range that are plotted on a graph for periodic review. -
Page 115: Printing Levey Jennings Statistics
Quality assurance 2.5.3. Printing Levey Jennings statistics To print LJ statistics, an external printer must be configured as default printer. If integrated printer is selected, the "Print" button is not available. To configure printer: See Section 6, 4.3.2. Printer settings, page 6-8. - Page 116 ABX Micros ES60 OT/CT Diag.5-21 LJ graphs printout (example) 5–18 User Manual - RAB237AEN...
-
Page 117: Patient Quality Control (Xb)
Quality assurance 3. Patient Quality Control (XB) 3.1. Introduction ◆ The (XB) Patient Quality Control is used to detect any change in the quality of results by using patient data only. ◆ This data monitoring is performed without any user intervention and is applied to 3 parameters: MCV, MCH and MCHC. -
Page 118: Xb Printing
ABX Micros ES60 OT/CT 3.3. XB printing ◆ XB statistics can be printed on the integrated ticket printer or on an external printer. ◆ It depends on which printer is selected by default. To set the default printer: See Section 6, 4.3.2. -
Page 119: Calibration
4. Calibration 4.1. General recommendations General recommendations on calibration: ◆The calibration on HORIBA ABX instruments is an exceptional procedure, which must be carried out, particularly in the case of certain technical interventions (installation, maintenance, service intervention). ◆The calibration should not be carried out to compensate a drift on a result due for example to clogging of the instrument. -
Page 120: Calibration Procedure
ABX Micros ES60 OT/CT 4.2. Calibration procedure 4.2.1. Startup cycle ◆ Run a startup cycle from the "Status area" before calibration creation. The startup cycle must be successfully run before starting any calibration. 4.2.2. Repeatability check ◆ Before carrying out a calibration, it is essential to make sure that the instrument is in perfect operating condition and to follow the steps bellow: Carry out a concentrated cleaning procedure (See Section 7, 3.3.5. - Page 121 Quality assurance Calibrator identification Enter the calibrator lot number: ◆ Press "Lot number" field to select it. ◆ Type the calibrator lot number using the virtual keyboard or an external keyboard (if one is connected). Enter the calibrator name: ◆ Press "Name"...
- Page 122 The system will automatically re-set itself to re- run that sample. If you acquire 3 rejects continuously on the same number sample, abort calibration and contact your local HORIBA ABX Technical Support Representative! Place the cap back onto the vial, gently and thoroughly mix the material for the next calibration sample run.
-
Page 123: Calibration Results
5-27), the calibration coefficients are rejected and the previous coefficients will remain unchanged in memory. When the calibration fails, the operator may restart the calibration again or call local HORIBA ABX Technical Support Representative for further instructions. "Calibration result" screen description To access "Calibration result"... - Page 124 ABX Micros ES60 OT/CT the "Manu" line allows the user to enter coefficients manually (See 4.7.1. Changing calibration coefficients, page 5-29). Diag.5-28 Calibration result summary view ◆ In detailed view (Diag.5-29), the result table displays for each parameter (WBC, RBC, HGB, HCT, PLT and MPV) the analysis results of the last calibration procedure.
-
Page 125: Calibration Passed
Quality assurance 4.4. Calibration passed ◆ For the instrument to pass calibration, the data must meet the statistical criteria which has 2 conditions: The coefficient of variations must be within their limits (See Tab.5-2 Coefficient of variation limits, page 5-27). The difference between the target value and the average for each parameter calibrated, must be less than 20%. -
Page 126: Rdw Calibration
ABX Micros ES60 OT/CT 4.6. RDW calibration Introduction ◆ The RDW calibration is a separate calibration outside the calibration menu. ◆ The RDW calibration coefficient default value is normally set at 1.00. The RDW calibration is normally performed by taking blood samples from 100 healthy, normal and drug free individuals. -
Page 127: Calibration Coefficients
Should any variation of quality control results outside the assayed ranges occur after calibration, it is highly recommended that you contact your local HORIBA ABX Technical Support Representative before manually editing the calibration coefficients! 4.7.1. Changing calibration coefficients In the "Calibration result"... - Page 128 ABX Micros ES60 OT/CT 5–30 User Manual - RAB237AEN...
- Page 129 Setup 1. Accessing the "Settings" menu ................6-2 2. System settings .....................6-3 2.1. System tab description ..................6-3 2.2. System date/time settings ................6-3 2.3. Sleep mode settings ..................6-4 2.4. Sound settings....................6-4 3. Localization settings.....................6-5 3.1. Localization tab description................6-5 3.2. Language setting ...................6-5 3.3.
-
Page 130: Accessing The "Settings" Menu
ABX Micros ES60 OT/CT Setup 1. Accessing the "Settings" menu Press "Maintenance menu" button to access the "Maintenance" menu (Diag.6-1). Diag.6-1 Maintenance button Press "Serv." tab. Press "Settings" button (Diag.6-2). Diag.6-2 Settings button The "Settings" menu is displayed. Diag.6-3 Settings menu 6–2 User Manual - RAB237AEN... -
Page 131: System Settings
Setup 2. System settings 2.1. System tab description ◆ Enter menu "Maintenance\Serv.\Settings\Syst." The "Syst." tab allows to set: ◆ System date and time: See 2.2. System date/time settings, page 6-3. ◆ Sleep mode: See 2.3. Sleep mode settings, page 6-4. ◆... -
Page 132: Sleep Mode Settings
ABX Micros ES60 OT/CT 2.3. Sleep mode settings ◆ The "Sleep" screen allows to set the inactivity time from which the sleep mode is activated and the screen contrast level during sleep mode. ◆During sleep mode, the analyser reduces the screen luminance. ◆The sleep mode does not stop cycles programmed or in progress. -
Page 133: Localization Settings
Setup 3. Localization settings Localization settings can only be done by a user with a "Scientist" profile. 3.1. Localization tab description ◆ Enter menu "Maintenance\Serv.\Settings\Local.". The "Local." tab allows to set: ◆ The system language: See 3.2. Language setting, page 6-5. -
Page 134: Update Contextual Help
3.6. Update contextual help Help files are provided on a CD-ROM and have to be pasted onto your USB key. Please contact your local HORIBA ABX Technical Support Representive to have detailed information on procedure to follow. Once help files are pasted onto your USB key: In the "Local."... -
Page 135: Peripheral Settings
◆A non exhaustive list of printers that can be used with the instrument can be found on the website: http://www.horiba-abx.com/documentation: Other/printers/instrument printer list/abx micros es60. ◆For more detailed information, please contact your local HORIBA ABX Technical Support Representative. User Manual - RAB237AEN... -
Page 136: Printer Settings
ABX Micros ES60 OT/CT 4.3.2. Printer settings In the "Periph." tab: Press "Printer" radio button. Press "Edit" button. Press one of the three radio buttons to select "Internal", "Local" or "Remote" printer. "Internal" printer (integrated ticket printer) is selected by default. If "Local"... -
Page 137: User Settings
The user name is displayed in the "Login name" field. ◆ The user profile is represented with the correponding icon: Lab tech, Scientist or Technician (for HORIBA ABX technician only). See Section 4, 1.4.1. User profile selection, page 4-4. This tab allows to create, delete or modify a user account: ◆... -
Page 138: User Account Modification
ABX Micros ES60 OT/CT 5.3. User account modification In the "User" tab: Press a user account in the table to select it. Press "Edit" button. It is possible to: ◆ Ask for a new password on next user connection using the "Change password" check box. If this option is selected, when the user logs for the first time on the instrument, a new password is required. -
Page 139: Analysis Settings
Setup 6. Analysis settings Analysis settings can only be done by a user with a "Scientist" profile. 6.1. Analysis tab description ◆ Enter menu "Maintenance\Serv.\Settings\Analys." The "Analys." tab allows to set: ◆ Units: See 6.2. System units settings, page 6-11. ◆... -
Page 140: Analysis Limits
ABX Micros ES60 OT/CT Japan Standard mmol International µm µm PCT* PDW* PDW and PCT have not been established as indications for this product, in the United States. The use of PDW and PCT should be restricted to research and Investigational measurements only. -
Page 141: Alarm Sensitivity Settings
Setup ◆ Bibliography for man and woman: AIDE MEMOIRE D HEMATOLOGIE (1998) Prof : C. SULTAN / M. GOUAULT - HELMANN / M. IMBERT Service Central d'Hématologie de l'Hôpital Henri Mondor Faculté de médecine de Créteil (Paris XII) ◆ Bibliography for child (male, from 4 to 10 years old) : Lecture critique de l'hémogramme: valeurs seuils à... -
Page 142: Analysis Running
ABX Micros ES60 OT/CT Tab.6-2 Default values of XB alarms Alarm Min. value Max. value MCV (µm3) MCH (pg) MCHC (g/dl) 6.5. Analysis running ◆ The "Running" screen allows to set analysis running modes. In the "Analys." tab: Press "Running" radio button. Press "Edit"... -
Page 143: Parameter Settings
Setup 7. Parameter settings Parameter settings can only be done by a user with a "Scientist" profile. 7.1. Parameters tab description ◆ Enter menu "Maintenance\Serv.\Settings\Param." The "Param." tab allows to set: ◆ Which results can be printed and/or uploaded: See 7.2. -
Page 144: Report Header Settings
ABX Micros ES60 OT/CT ◆Use the scroll bar, "Up", "Down", "Page up" and "Page down" buttons to scroll up and down table content if it does not fit in the screen (See Arrows, page 1-16). ◆The RUO parameters (PCT and PDW) can only be set if the "With RUO data"... -
Page 145: Analyser Settings
Setup 8. Analyser settings Analyser settings can only be done by a user with a "Scientist" profile. 8.1. Cycles tab description ◆ Enter menu "Maintenance\Serv.\Settings\Cycles". The "Cycles" tab allows to: ◆ set the automatic run of startup and cleaning cycles: See 8.2. -
Page 146: Instrument Startup And Shutdown Programming
ABX Micros ES60 OT/CT 8.3. Instrument startup and shutdown programming The time programming is the same for each selected day. 8.3.1. Instrument startup programming In the "Cycles" tab: Press "On / Off" radio button. Press "Edit" button. In "Starting", set the instrument startup time: ◆... -
Page 147: Printing Settings
Setup 9. Printing settings To print settings, an external printer must be set as default printer: See 4.3.2. Printer settings, page 6-8. ◆ Settings printout contains all the settings. ◆ If integrated ticket printer is selected, the "Print" button is not available. In the "Settings"... - Page 148 ABX Micros ES60 OT/CT 6–20 User Manual - RAB237AEN...
- Page 149 Maintenance & Troubleshooting 1. Introduction ......................7-3 2. Daily maintenance ....................7-3 2.1. Startup and shutdown cycles ................7-3 2.2. Automatic cleaning..................7-4 3. Maintenance procedures..................7-5 3.1. General cleaning of the instrument ...............7-5 3.2. Cover dismantling..................7-6 3.3. Service......................7-7 3.3.1. Service menu description ..............7-7 3.3.2. Prime....................7-8 3.3.3.
- Page 150 ABX Micros ES60 OT/CT 5.3.3. Problems on WBC/HGB parameters only ........... 7-35 5.4. Troubleshooting system operations............. 7-36 6. Alarms and error messages ................7-37 6.1. System alarms..................... 7-37 6.1.1. Instrument alarms................7-37 6.1.2. QC alarms..................7-38 6.1.3. Reagent alarms................... 7-38 6.1.4.
-
Page 151: Maintenance & Troubleshooting
Maintenance & Troubleshooting Maintenance & Troubleshooting 1. Introduction ◆ One of the principal factors contributing to accurate and reliable results is a well-maintained instrument. The ABX Micros ES60 OT/CT is designed to keep this maintenance automatically to a minimum providing that the operator is aware of its schedule. This section of the manual will describe the daily and periodic maintenance procedures. -
Page 152: Automatic Cleaning
ABX Micros ES60 OT/CT 2.2. Automatic cleaning ◆ Automatic cleaning cycle is automatically performed when a programmable number of analysis cycles has been reached. It is recommended to perform at least one automatic cleaning cycle during a day. Setup the frequency according to the workload of the laboratory (See Section 6, 8.2.2. -
Page 153: Maintenance Procedures
- Active on Aspergillus fumigatus - Active on Mycobacterium tuberculosis (B.K) - Antiviral (VIH, HBV and rotavirus) Product example validated by HORIBA ABX: ANIOS detergent disinfectant; WIP ANIOS; ref: 1316.424 Please also refer to the W.H.O (World Health Organization) guidelines: "Laboratory Biosafety Manual, 2nd edition", for further information. -
Page 154: Cover Dismantling
ABX Micros ES60 OT/CT 3.2. Cover dismantling ◆ Using the key from the installation kit, turn the locker (Diag.7-5-A) to open the pneumatic protection door. Diag.7-5 Cover dismantling ◆ Unscrew the 3 cover fixation screws (Diag.7-5-B) and loosen the 2 screws (Diag.7-5-C) under the reagent flap. -
Page 155: Service
Maintenance & Troubleshooting 3.3. Service 3.3.1. Service menu description ◆ Several service functions are available for the operator to clean and check the instrument. See "Service" menu overview (Tab.7-1). Tab.7-1 Service menu Service menu Sub-menus level 1 Sub-menus level 2 Settings (See Section 6, Setup, page 6-2) -
Page 156: Prime
ABX Micros ES60 OT/CT 3.3.2. Prime ◆ This service function will allow the operator to prime all reagents or pack. In "Service" menu, press "Customer services" button (Diag.7-9). Diag.7-9 Customer services button The "Hydrau." tab is displayed. Diag.7-10 Hydrau. tab Press "All reagents priming"... -
Page 157: Chambers Draining
Maintenance & Troubleshooting 3.3.4. Chambers draining ◆ This service function will allow the operator to check for proper chamber draining and to maintain some of the parts of the hydraulic manifold as it flushes waste out of the instrument. In "Service" menu, press "Customer services" button (Diag.7-9). The "Hydrau."... -
Page 158: Automatic Cleaning
ABX Micros ES60 OT/CT 3.3.6. Automatic cleaning ◆ Provides an automatic cleaning cycle to run at any time when the operator wishes to clean the instrument. In "Service" menu, press "Customer services" button (Diag.7-9). The "Hydrau." tab is displayed. Press "Automatic cleaning" radio button. Press "Start cycle"... - Page 159 Maintenance & Troubleshooting Sensor state check The "Moves" tab also allows to know the state of needle and carriage sensors. To know the needle sensor state: Press "Needle" radio button. Press "Needle sensor" button (Diag.7-14). Diag.7-14 Needle sensor button A dialog box displays the needle sensor state (See Tab.7-2 Needle sensor state description, page 7-11).
-
Page 160: Extended Concentrated Cleaning
◆ If the problem still persists, repeat steps <1> through <11> again. ◆ If the problem still persists after the second cleaning, call your local HORIBA ABX Technical Support Representative. 7–12 User Manual - RAB237AEN... -
Page 161: Reagent Installation
3.5.2. Alphalyse 360 Required products: ◆ Lyse straw (P/n: G0166740). Contact your local HORIBA ABX Technical support to order it. Open the pack pulling the flap A and open the level window B (Diag.7-17). Diag.7-17 Opening Replace the rigid straw by the Lyse straw and install the Alphalyse 360 as shown on Diag.7-18. -
Page 162: Reagent Pack Connection
ABX Micros ES60 OT/CT Diag.7-18 Alphalyse 360 installation 3.5.3. Reagent pack connection Remove the 3 reagent output protections (Diag.7-19). Diag.7-19 Reagent output protections Install the pack into the compartment of the instrument (Diag.7-20). Push the pack down in order to plug correctly the pack onto the male connectors. Diag.7-20 Pack installation Cut the seal then remove the waste input protection (Diag.7-21). -
Page 163: Abx Diluent & Waste Connections (Bottle Version Only)
Maintenance & Troubleshooting The free male connector must be plugged onto the pack upper valve in order to receive the waste liquids (Diag.7-22). Diag.7-22 Waste connector It is recommended not to remove the pack several times before the reagents are totally used to avoid leak problems. 3.3.2. -
Page 164: Integrated Ticket Printer Paper Changing
ABX Micros ES60 OT/CT 3.6. Integrated ticket printer paper changing Lift the lever (Diag.7-24-A) then the printers cover (Diag.7-24-B). Diag.7-24 Printer's cover opening Remove the old roll. Load the new paper roll (Diag.7-25). Diag.7-25 Paper roll loading Close the printer by pressing simultaneously on both sides of the cover (Diag.7-26). Diag.7-26 Printer's paper closing 7–16 User Manual - RAB237AEN... -
Page 165: Unblocking Sampling Needle
Maintenance & Troubleshooting 3.7. Unblocking sampling needle Concerns: ◆ Unblocking sampling needle in case of fibrin clot. Instrument response/problem type: ◆ Low results on all parameters in any analysis mode ◆ No results on all parameters in any analysis mode ◆... - Page 166 ABX Micros ES60 OT/CT Procedure on ABX Micros ES60 Open the main door (See 3.2. Cover dismantling, page 7-6). Hold the sampling needle mounting bracket on the upper right edge and move the sampling needle downwards until you can see the top of the needle and sample tubing. Remove the tubing from the top of the sampling needle.
-
Page 167: Replacing Sampling Needle
Maintenance & Troubleshooting 3.8. Replacing sampling needle Concerns: ◆ Replacing sampling needle. Instrument response/problem type: ◆ Low results on all parameters in any analysis mode ◆ No results on all parameters in any analysis mode ◆ Possible high reference blanks on startup Required tools: ◆... - Page 168 ABX Micros ES60 OT/CT Procedure on ABX Micros ES60 Open the main door (See 3.2. Cover dismantling, page 7-6). Hold the sampling needle mounting bracket on the upper right edge and move the sampling needle downwards until you can see the top of the needle and sample tubing. Remove the tubing from the top of the sampling needle.
-
Page 169: Service Functions
4.6. Version, page 7-30. 4.2. Reagent management ◆ ABX Micros ES60 OT/CT offers an automatic reagent management if HORIBA ABX reagents are configured. ◆ The management of reagents is carried out through the Reagent tab. ◆ To access the Reagent tab: See 4.2.1. -
Page 170: Reagent Creation
ABX Micros ES60 OT/CT For each reagent type, it displays the following information: ◆ The reagent name in the "Name" field. ◆ A graphical representation of the reagent level (in percentage). ◆ The number of remaining cycles in the "Remain" field. In pack mode: It displays the following information: ◆... -
Page 171: Reagent Replacement
Maintenance & Troubleshooting Pack unit In the "Reag." tab: Press "View" button (Diag.7-29). The "Edit reagent" screen is displayed. Press "Edit" button. Press "Lot" field to select it. Read the reagent pack label by means of barcode reader or type the reagent pack lot number using the virtual keyboard or an external keyboard (if one is connected). -
Page 172: Reagent Priming
ABX Micros ES60 OT/CT 4.2.4. Reagent priming This function primes all reagents of the pack in pack mode and the selected reagent in the bottle mode. In the "Reag." tab: Press "Prime" button (Diag.7-31). Diag.7-31 Prime button A priming cycle must be done after each reagent installation (creation or replacement). -
Page 173: Archives Management
Maintenance & Troubleshooting 4.3. Archives management 4.3.1. Archives tab access and description ◆ Enter "Maintenance\Arch". ◆ For each kind of archive, the last archiving operation date is displayed. ◆ One icon, for each type of archive, displays the archive status: No archive needed. -
Page 174: Archives Creation
ABX Micros ES60 OT/CT Logs archives ◆ Logs archives can only be created (See 4.3.2. Archives creation, page 7-26). A log archive can be full or partial. It is required when the last logs archive dates from more than 1 month. QC archives ◆... -
Page 175: Consulting Result Archives On External Computer
Maintenance & Troubleshooting Never remove the USB key from the front slot before the progress indication window closes. ◆ During the archive creation, the following message is displayed: "Archive creation in progress. Please wait." 4.3.3. Consulting result archives on external computer Consulting result with a spreadsheet application Paste the result archive files on your external computer. -
Page 176: Restoring Archive
ABX Micros ES60 OT/CT 4.3.4. Restoring archive ◆Only "Settings" and "Analyser" archives can be restored. ◆Archives can only be restored by user with a "Scientist" profile. In the "Arch." tab: Press "Settings" or "Analyser" radio button. Press "Restore" button (Diag.7-38). Diag.7-38 Restore button ◆... -
Page 177: Logs
Maintenance & Troubleshooting 4.5. Logs 4.5.1. Logs tab access and description ◆ Enter menu "Maintenance\Logs." ◆ The "Logs" tab contains all of the notifications made automatically by the software while instrument is in operation. Each log contains the following information: ◆... -
Page 178: Version
ABX Micros ES60 OT/CT 4.6. Version ◆ Enter menu "Maintenance\Vers." ◆ The "Vers." tab contains all of the version numbers (application, analyser, help, etc.). 7–30 User Manual - RAB237AEN... -
Page 179: Troubleshooting
Before coming to the conclusion that the instrument has malfunctioned and needs repair, check the following points of operation. After checking these points and verifying that the problem still occurs, contact your local HORIBA ABX Technical Support Representative for further assistance. -
Page 180: Calibration
Blocked sampling needle 3.7. Unblocking sampling needle, page 7-17) Sampling needle depth not No results in analysis adjusted correctly Contact your local HORIBA ABX Technical Possible defective Pre-amp on Support Representative for assistance main board Perform a concentrated cleaning (See 3.3.5. -
Page 181: Problems On Rbc/Plt Parameters Only
7-9), rerun sample Alarm flags on most Possible fibrin clot in "T" fitting parameters below WBC chamber possible tube Contact your local HORIBA ABX Technical cap debris in "T" fitting below Support Representative WBC chamber Perform a concentrated cleaning (See 3.3.5. - Page 182 Concentrated cleaning, page 7-9), rerun sample No results in analysis Check for diluent delivering into chamber, Has diluent been delivered contact your local HORIBA ABX Technical correctly into RBC chamber? Support Representative Perform a concentrated cleaning (See 3.3.5. Possible dirty aperture...
-
Page 183: Problems On Wbc/Hgb Parameters Only
Remove and flush out sampling needle (See sampling needle 3.7. Unblocking sampling needle, page 7-17) Check syringe block for leakage and contact Possible leakage from syringe Startup failed your local HORIBA ABX Technical Support block Representative Possible contaminated Check and/or replace reagent(s) if necessary reagent(s) (See 3.5. -
Page 184: Troubleshooting System Operations
3.3.5. Possible dirty apertures Concentrated cleaning, page 7-9), rerun sample Check syringe blocks for leakage and contact Possible leakage from syringe your local HORIBA ABX Technical Support blocks Representative Perform a concentrated cleaning (See 3.3.5. Possible dirty chamber Concentrated cleaning, page... -
Page 185: Alarms And Error Messages
Shutdown / Restart). - Check version numbers (See 4.6. Version, page 7-30). - Contact your local HORIBA ABX Technical Support Representative for assistance. Analyser Run a Startup cycle directly from this A communication error with the analyser occurred: communication failed status screen. -
Page 186: Qc Alarms
ABX Micros ES60 OT/CT 6.1.2. QC alarms Diag.7-43 QC status button System alarm Help message Possible cause / Corrective action message A QC analysis is out of normality limits: - Check the last control results. Check the last QC "lot number" result Invalid QC "lot - Run an analysis for this control (See Section 4, 2.2. -
Page 187: Archive Alarms
Maintenance & Troubleshooting System alarm Help message Possible cause / Corrective action message Check DILUENT level in Maintenance menu / DILUENT reagent is almost empty Low reagent level Reagent screen. If necessary, replace the (counter of tests lower than 10): DILUENT appropriate reagent, run priming cycle from - Replace the DILUENT reagent. -
Page 188: Application Alarms
Check the connection with the LIS or LIS connection failed - Restart the instrument. its availability or its configuration. - Contact your local HORIBA ABX Technical Support Representative for assistance. More than 3 print jobs pending. Printer queue full Please wait or check the status of - Check if printer is on line. -
Page 189: Logs
- Restart the instrument. - Check version numbers (See 4.6. Version, page 7-30). - Contact your local HORIBA ABX Technical Support Representative for assistance. Critical cycle error - Run a startup cycle by pressing the "Startup" button. A software problem occurs during data saving or file opening... -
Page 190: Errors Logs
- Check if LIS connection cable is correctly plugged. Cannot upload result - Restart the instrument. - Contact your local HORIBA ABX Technical Support Representative for assistance. A QC analysis is out of normality limits: - Check the last control results. - Page 191 Error during XB loading or No parameter for XB calculation or Cannot update XB statistics, the Corrupted datas or Recording error application must be reinstalled, - Contact your local HORIBA ABX Technical Support contact your local technical support. Representative for assistance. Cannot send calibration factors, try to Internal communication error.
- Page 192 Possible cause/Corrective action - Check if LIS connection cable is correctly plugged. - Restart the instrument. Send result failed. - Contact your local HORIBA ABX Technical Support Representative for assistance. Internal read/write error. Minor error (key not found in %s).
- Page 193 Maintenance & Troubleshooting Printer Message Possible cause/Corrective action No report, missing printer, no printer selected, printer initialization error. - Check if printer is on line. If not, switch it on. Printing calibration report failed. - Check if there is enough paper. If not, See 3.6.
- Page 194 Analyser Message Possible cause/Corrective action Internal communication error: Analyser connection failed (internal - Contact your local HORIBA ABX Technical Support RS232). Representative for assistance. Internal communication error: Analyser com port initialisation failed - Contact your local HORIBA ABX Technical Support Representative for assistance.
-
Page 195: Qc Logs
6.2.3. QC logs Message Possible cause/Corrective action Cannot open control configuration QC list recovery impossible. file, the application must be - Contact your local HORIBA ABX Technical Support reinstalled, contact your local Representative for assistance. technical support. 6.2.4. Maintenance logs Message... - Page 196 ABX Micros ES60 OT/CT 7–48 User Manual - RAB237AEN...
- Page 197 Index Index Accuracy Chap 2-11 Anti-coagulants Chap 2-13 Archives Chap 7-25 Creation Chap 7-26 Restoring archive Chap 7-28 Automatic cleaning Chap 7-4 Calibration Chap 5-21 Carry-over Chap 2-11 Check box Chap 1-17 Combo box Chap 1-18 Contextual help button Chap 1-14 Contextual toolbar Chap 1-14 Control blood runnning Chap 4-11 Cover dismantling Chap 7-6...
- Page 198 ABX Micros ES60 OT/CT Known interfering substances Chap 2-13 Labels Chap 1-8 Linearity Chap 2-10 LJ graphs Chap 5-16 Logs Chap 7-29 Measurement principles Chap 3-7 Menu access buttons Chap 1-12 Navigation buttons Chap 1-16 Normal ranges Chap 2-11 Operational conditions Chap 1-5 Electromagnetic environment Chap 1-5 Environment Chap 1-5 Grounding Chap 1-5...
- Page 199 Index Radio button Chap 1-18 Reagents Closing Chap 7-24 Creation Chap 7-22 Replacement Chap 7-23 Results Chap 4-18 Display Chap 4-18 Flags Chap 4-28 History Chap 4-26 Printing Chap 4-21 Sending Chap 4-24 Sample collection Chap 4-12 Requirements Chap 2-12 Tube caps Chap 2-13 Sample identification Chap 4-12 Sample stability Chap 2-12...
- Page 200 ABX Micros ES60 OT/CT Specifications Instrument specifications Chap 2-4 Technical specifications Chap 2-5 Startup Chap 4-3 Chap 7-3 Status area Chap 4-7 Status button Chap 1-13 Text field Chap 1-18 User account Creation Chap 6-9 Deletion Chap 6-10 Modification Chap 6-10 User profile Chap 4-4 Virtual keyboard Chap 1-14 Work session Chap 4-6...
Need help?
Do you have a question about the ABX Micros ES60 and is the answer not in the manual?
Questions and answers
How to calculate RDW -SD
To calculate RDW-SD for the Horiba ABX Micros ES60, use the formula:
RDW (%) = K × SD / MCV
Where:
- K is the calibration coefficient for RDW.
- SD is the standard deviation of red blood cell size distribution.
- MCV is the mean cell volume of the erythrocytes.
This formula calculates RDW based on the RBC histogram.
This answer is automatically generated
I have a question about is the device is closed system or open system