Table of Contents
Advertisement
Quick Links
To buy, sell, rent or trade-in this product please click on the link below:
http://www.avionteq.com/Anritsu-S332D-Cable-and-Antenna-Analyzer.aspx
Site Master
S331D/S332D
Cable and Antenna Analyzer
Site Master is the preferred cable and antenna analyzer of
wireless providers, contractors and installers.
S331D
Site Master
SiteMaster
MS2712
SiteMaster
SpectrumMaster
www.avionteq.com
Color display option shown
MS2711D
Spectrum Master
MT8212A
Cell Master
CellMaster
SpectrumMaster
MS2712
MS2712
CellMaster
™
User's Guide
Advertisement
Table of Contents

Related Manuals for Anrtisu Site Master S331D


Summary of Contents for Anrtisu Site Master S331D
- Page 1 To buy, sell, rent or trade-in this product please click on the link below: http://www.avionteq.com/Anritsu-S332D-Cable-and-Antenna-Analyzer.aspx www.avionteq.com Site Master ™ S331D/S332D Cable and Antenna Analyzer Site Master is the preferred cable and antenna analyzer of wireless providers, contractors and installers. Color display option shown S331D Site Master SiteMaster...
- Page 2 WARRANTY The Anritsu product(s) listed on the title page is (are) warranted against defects in materials and workmanship for one year from the date of shipment. Anritsu's obligation covers repairing or replacing products which prove to be defec- tive during the warranty period. Buyers shall prepay transportation charges for equipment returned to Anritsu for warranty repairs.
-
Page 4: Table Of Contents
Table of Contents Chapter 1 - General Information Introduction ........1-1 Description . - Page 5 Changing the Units ......3-16 Changing the Language......3-16 Adjusting Markers .
- Page 6 Chapter 9 - T1 Measurements Introduction ........9-1 T1 Fundamentals.
- Page 7 Chapter 16 - Handheld Software Tools Introduction ........16-1 Features .
-
Page 8: Chapter 1 - General Information
Chapter 1 General Information Introduction This chapter provides a description, performance specifications, optional accessories, pre- ventive maintenance, and calibration requirements for the Site Master™ models S331D and S332D. Throughout this manual, the term Site Master will refer to the S331D and S332D. Model Frequency Range S331D... -
Page 9: Options
· NOTE: For the Site Master S331D, Options 5 and 50 are mutually exclusive. That is, the Site Master S331D can be configured with either Option 5, Power Monitor, or Option 50, T1/E1, but not both. For the Site Master S332D, Options 5 and 6 are mutually exclusive. That is, the Site Master S332D can be configured with either Option 5, Power Monitor, or Option 6, Frequency Converter Interface, but not both. -
Page 10: Printers
Chapter 1 General Information Printers The following printer and accessories are available for use with the Site Master S33xD. 2000-1214 HP DeskJet Printer, Model 450 w/Interface Cable, Black Print · Cartridge, and U.S. Power Cable 2000-1215 Color Print Cartridge for HP450 DeskJet ·... -
Page 11: Optional Accessories
Chapter 1 General Information Optional Accessories Part Number Description 10580-00100 S33xD Programming Manual (available on disk or at www.us.anritsu.com) 10580-00101 S331D Maintenance Manual 10580-00102 S332D Maintenance Manual 760-243-R Transit Case 633-27 Rechargeable Battery, NiMH 2000-1029 Battery Charger with universal power supply, NiMH only 48258 Soft Carrying Case 40-168... - Page 12 Chapter 1 General Information Part Number Description 15NDF50-1.5C Armored Test Port Extension Cable, 1.5 meter, N (m) to 7/16 DIN (f) 6 GHz 15ND50-1.5C Armored Test Port Extension Cable, 1.5 meter, N (m) to 7/16 DIN (m) 6 GHz 2000-1030 Portable Antenna SMA (m), 50W, 1.71 to 1.88 GHz 2000-1031 Portable Antenna SMA (m), 50W, 1.85 to 1.99 GHz...
-
Page 13: Performance Specifications
Chapter 1 General Information Performance Specifications Performance specifications are provided in Table 1-1. All specifications apply when cali- brated at ambient temperature after a five minute warm up. Typical values are given for ref- erence, and are not guaranteed. Table 1-1. Performance Specifications (1 of 6) Cable and Antenna Analyzer Frequency Range:... - Page 14 Chapter 1 General Information Table 1-1. Performance Specifications (2 of 6) Sweep Time: £1.1 seconds, full span; £ 50 mseconds to 20 seconds, zero span Resolution Bandwidth (–3 dB): 100 Hz to 1 MHz in 1-3 sequence ± 5% Accuracy Video Bandwidth (–3 dB): 3 Hz to 1 MHz in 1-3 sequence ±...
- Page 15 Chapter 1 General Information Table 1-1. Performance Specifications (3 of 6) High Accuracy Power Meter (Option 19, with PSN50 Power Sensor) Sensor: Measurement Range: –30 to +20 dBm Frequency Range: 50 MHz to 6 GHz Input Connector: Type N, male, 50W Max Input Without Damage: +33 dBm, ±...
- Page 16 Chapter 1 General Information Table 1-1. Performance Specifications (4 of 6) Channel Scanner (Option 27) Frequency Range: 100 kHz to 3.0 GHz Frequency Accuracy: ± 10 Hz + Time base error, 99% confidence level| Measurement Range: +20 dBm to –110 dBm Channel Power: ±...
- Page 17 Chapter 1 General Information Table 1-1. Performance Specifications (5 of 6) E1 Analyzer (Option 50, S331D only) Line Coding: AMI, HDB3 Framing Modes: PCM30, PCM30CRC, PCM31, PCM31CRC Connection Configurations: Terminate (75W, 120W) Bridge (³1000W) Monitor (Connect via 20 dB pad in DSX) Receiver Sensitivity: 0 to –43 dB Clock Sources:...
- Page 18 Chapter 1 General Information Table 1-1. Performance Specifications (6 of 6) Electromagnetic Meets European community requirements for CE marking Compatibility Safety Conforms to EN 61010-1 for Class 1 portable equipment Temperature: Operating –10°C to 50°C, 85% humidity or less Storage –50°C to +80°C Power Dissipation 850 mW maximum...
-
Page 19: Preventive Maintenance
Chapter 1 General Information Preventive Maintenance Site Master preventive maintenance consists of cleaning the unit and inspecting and clean- ing the RF connectors on the instrument and all accessories. Clean the Site Master with a soft, lint-free cloth dampened with water or water and a mild cleaning solution. -
Page 20: Instacal Module
Chapter 1 General Information InstaCal Module The Anritsu InstaCal module can be used in place of discrete components to calibrate the Site Master. The InstaCal module can be used to perform an Open, Short and Load (OSL) or a FlexCal calibration procedure. Calibration of the Site Master with the InstaCal takes approximately 45 seconds (see Calibration, page 3-2). - Page 21 Chapter 1 General Information Table 1-2. Anritsu Service Centers UNITED STATES FRANCE KOREA ANRITSU COMPANY ANRITSU S.A ANRITSU CORPORATION LTD. 490 Jarvis Drive 9 Avenue du Quebec Service Center: Morgan Hill, CA 95037-2809 Zone de Courtaboeuf 8F Hyunjuk Building Telephone: (408) 776-8300 91951 Les Ulis Cedex 832-41, Yeoksam Dong 1-800-ANRITSU...
-
Page 22: Chapter 2 - Functions And Operations
Chapter 2 Functions and Operations Introduction This chapter provides a brief overview of the Site Master functions and operations, provid- ing the user with a starting point for making basic measurements. For more detailed infor- mation, refer to the specific chapters for the measurements being made. The Site Master is designed specifically for field environments and applications requiring mobility. - Page 23 NOTE: For the Site Master S331D, Options 5 and 50 are mutually exclusive. That is, the Site Master S331D can be configured with either Option 5, Power Monitor, or Option 50, T1/E1, but not both. For the Site Master S332D, Options 5 and 6 are mutually exclusive. That is, the Site Master S332D can be configured with either Option 5, Power Monitor, or Option 6, Frequency Converter Interface, but not both.
-
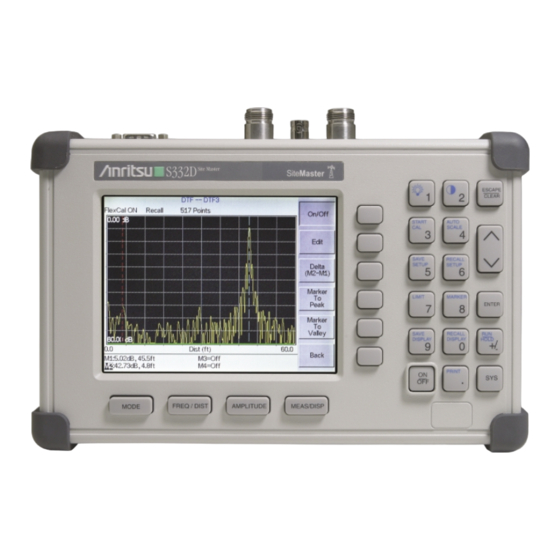
Page 24: Display Overview
Chapter 2 Functions and Operations Display Overview Figure 2-2 illustrates some of the key information areas of the S331D display. TITLE BAR SWEEP DATA TIME POINTS CALIBRATION STATUS CURRENT MENU MESSAGE AREA Figure 2-2. S331D Display Overview Figure 2-3 illustrates some of the key information areas of the S332D display. TITLE BAR SWEEP MODE... -
Page 25: Front Panel Overview
Chapter 2 Functions and Operations Front Panel Overview The Site Master menu-driven user interface is easy to use and requires little training. Hard keys on the front panel are used to initiate function-specific menus. There are four function hard keys located below the status window: Mode, Frequency/Distance, Amplitude and Measure/Display. -
Page 26: Function Hard Keys
Chapter 2 Functions and Operations Function Hard Keys MODE Opens the mode selection box (below). Use the Up/Down arrow key to select a mode. Press the key to implement. ENTER o Measurement Mode Freq - SWR Return Loss Cable Loss - One Port DTF - SWR Return Loss Power Monitor (External Detector) -
Page 27: Keypad Hard Keys
Chapter 2 Functions and Operations Keypad Hard Keys This section contains an alphabetical listing of the Site Master front panel keypad controls along with a brief description of each. More detailed descriptions of the major function keys follow. The following keypad hard key functions are printed in black on the keypad keys. These keys are used to enter numerical data as required to setup or per- form measurements. - Page 28 Chapter 2 Functions and Operations The following keypad hard key functions are printed in blue on the keypad keys. This key is used to adust the display brightness. Use the Up/Down arrow key and ENTER to adjust the brightness. AUTO Automatically scales the status window for optimum resolution in cable SCALE and antenna analyzer mode.
-
Page 29: Soft Keys
Chapter 2 Functions and Operations Soft Keys Each keypad key opens a set of soft key selections. Each of the soft keys has a correspond- ing soft key label area on the status window. The label identifies the function of the soft key for the current Mode selection. - Page 30 Chapter 2 Functions and Operations FREQ/DIST AMPLITUDE MEAS/DISP MODE=DTF: Resolu- SOFTKEYS: tion Single Bottom Sweep Trace DTF Aid Math Trace Overlay Fixed More On/Off Loss Select Trace Prop Cable List Window Page Up Page Back Down Back Bottom List Delete Trace Delete Traces...
- Page 31 Chapter 2 Functions and Operations FREQ/DIST MODE=SPECTRUM ANALYZER: AMPLITUDE SOFTKEYS: Center Level Span Scale Atten/ Start Preamp Edit Stop Auto Full Signal Units Standard Manual Zero Level Span Select Offset Dynamic Standard 1-2-5 Span Select Down Channel 1-2-5 List Preamp Uplink dBmV Control...
- Page 32 Chapter 2 Functions and Operations On/Off Select Method Standard Antenna MODE = SPECTRUM ANALYZER: MEAS/DISP Select Center Custom Freq Antenna SOFTKEYS: Band- width Auto Channel Trace Manual Span Zoom Measure Measure Back Auto Channel Hold Trigger Back Measure Manual Field Detec- Strngth tion...
- Page 33 Chapter 2 Functions and Operations Auto Terminate D4 SF Bridged Monitor B8ZS +20 dB MODE=T1 Tester: SOFTKEYS: Setup Back BERT Back Framing Mode Display Receive Raw Data/ Input Histogram Channel Back Start / Access Start / Stop Pattern Stop Measure Measure Line Insert...
- Page 34 Chapter 2 Functions and Operations Auto Terminate PCM30 PCM30 Bridged Monitor HDB3 PCM31 +20 dB MODE=T1 Tester: PCM31 SOFTKEYS: Setup Back BERT Back Framing Mode Display Receive Raw Data/ Input Histogram Channel Back Start / Access Start / Stop Pattern Stop Measure Measure...
- Page 35 Chapter 2 Functions and Operations MODE = TRANSMISSION MEASUREMENT FREQ/SPAN AMPLITUDE MEAS/DISP SOFTKEYS: Band- Center width Level Span Scale Trace Auto Atten/ Calibrate Start Preamp Edit Manual Stop Auto Full Auto Signal Standard Manual Manual Select Channel Span Dynamic 1-2-5 Span Down Back...
- Page 36 Chapter 2 Functions and Operations MODE=POWER METER: FREQ/DIST AMPLITUDE MEAS/DISP SOFTKEYS: Center Units Acquisition Span Offset Edit Zero Edit Medium Full Signal Standard Calibrate High Offset Zero Recall Span Select Offset Standard 1-2-5 Span Select Back Down Channel 1-2-5 List Uplink Back Page...
- Page 37 Chapter 2 Functions and Operations System Options Application Options Clock Self Test Printer Mode Hour Status Units Minute Change Date Format Language Month English On/Off Back Location Year Back Quality Back Reset Back Figure 2-16. SYS Key Menu in Cable and Antenna Analyzer Mode System Options Application...
- Page 38 Chapter 2 Functions and Operations System Options Application Options Clock Self Test External Printer Freq Hour Status Bias Units Minute Change Impedance Date Format Language Month English On/Off Back Location Anritsu Year 12N50-75B Back Quality Other Adapter Back Offset Reset Back Back Figure 2-18.
- Page 39 Chapter 2 Functions and Operations FREQ/DIST Displays the frequency and distance menu depending on the measurement mode. Frequency The frequency and distance menu for cable and antenna analyzer measurements Menu provides for setting sweep frequency end points when mode is selected. Se- Freq lected frequency values may be changed using the keypad or Up/Down arrow key.
- Page 40 Chapter 2 Functions and Operations — Returns to the Distance Menu. Back Choosing FREQ/DIST in Spectrum Analyzer mode causes the soft keys, below, to be dis- played and the corresponding values to be shown in the message area. ¾ Sets the center frequency of the Spectrum Analyzer. Enter a value Center using the Up/Down arrow key or keypad, press ENTER to accept, ESCAPE to restore previous value.
- Page 41 Chapter 2 Functions and Operations AMPLITUDE Displays the amplitude or scale menu depending on the measurement mode. Amplitude Provides for changing the status window scale. Selected values may be changed Menu using the Up/Down arrow key or keypad. Choosing in cable and antenna analyzer measurement modes AMPLITUDE causes the soft keys, below, to be displayed and the corresponding values to be shown in the message area.
- Page 42 Chapter 2 Functions and Operations MEAS/DISP Displays the Meas/Disp soft key menu for the current operating mode. Meas/Disp Provides for changing the status window resolution, single or continuous sweep, Menu and access to the Trace Math functions. Choosing MEAS/DISP in cable and antenna analyzer freq or DTF measurement modes causes the soft keys below to be displayed.
- Page 43 Chapter 2 Functions and Operations — The unit reads and displays the highest measured Positive Peak data point within a display point. — The unit reads and displays the RMS average of the RMS Average measured data. RMS average is calculated by taking the log of the av- erage power within a display point and the power is calculated from the voltage.
- Page 44 Chapter 2 Functions and Operations - Activates the center frequency function and sets the Site Center Freq Master to the center frequency. A specific center frequency can be en- tered using the keypad or Up/Down arrow key. — Enter the integration bandwidth frequency appropriate for Int BW the application.
- Page 45 Chapter 2 Functions and Operations — Opens carrier to interference measurement menu. - Opens a menu to select the signal type. Selections Signal Type are narrow band FHSS, wide band FHSS or a broadband signal. - Activates the center frequency function and sets the Site Center Master to the center frequency.
- Page 46 Chapter 2 Functions and Operations — Places the selected marker at the frequency or dis- Marker To Peak tance with the maximum amplitude value. — Places the selected marker at the frequency or dis- Marker To Valley tance with the minimum amplitude value. —...
- Page 47 Chapter 2 Functions and Operations — Returns to the Main Markers Menu. Back through — Selects the marker parameter and opens the marker second level menu. — Turns the selected marker on or off. On/Off — Opens the selected marker parameter for data entry. Press Edit ENTER when data entry is complete or ESCAPE to restore the previous value.
- Page 48 Chapter 2 Functions and Operations — Measures the signal level at the point of the marker in Regular Marker the unit type selected in the Amplitude - Units menu. When the regular marker option is selected, all markers are regular markers. —...
- Page 49 Chapter 2 Functions and Operations — Sets multiple user-defined upper limits, and can be Multiple Upper Limits used to create an upper limit mask for quick pass/fail measurements. An up- per limit will result in a failure when the data falls above the limit line. Menu choices are: —...
- Page 50 Chapter 2 Functions and Operations In cable and antenna analyzer or optional power meter mode, pressing the SYS key displays the following System menu soft key selections: — Displays a second level of system option functions: System Options — Displays a second level of functions: Clock —...
- Page 51 Chapter 2 Functions and Operations French, German, Spanish, Chinese, and Japanese. The default language is English. In Spectrum Analyzer mode, pressing the SYS key displays the following Sys- tem menu soft key selections: — Displays a second level of system option functions: System Options —...
- Page 52 Chapter 2 Functions and Operations — Start an instrument self test. Self Test — In cable and antenna analyzer freq or dist measurement mode, dis- Status plays the current instrument status, including calibration status, temperature, and battery charge state. Press ESCAPE to return to operation. GPS —...
- Page 53 Chapter 2 Functions and Operations — Selects Bias Tee on or off. Bias Tee — Sets the input impedance of the instrument Impedance W — Sets the input impedance of the instrument to 50W, which is the default setting. W Anritsu 12N50-75B — Displays measurements as if the input impedance was 75W.
- Page 54 Chapter 2 Functions and Operations — Enter the year (2003-2036) using the Up/Down arrow key or Year the keypad. Press ENTER when data entry is complete or ESCAPE to restore the previous value. — Returns to the top-level SYS menu. Back —...
- Page 55 Chapter 2 Functions and Operations — Enter the year (2003-2036) using the Up/Down arrow key or Year the keypad. Press ENTER when data entry is complete or ESCAPE to restore the previous value. — Returns to the top-level SYS menu. Back —...
- Page 56 Chapter 2 Functions and Operations — Displays a menu of supported printers. Use the Up/Down arrow Printer key and ENTER key to make the selection. — Select the unit of measurement (metric or English). Units — Toggles the date format between Change Date Format MM/DD/YYYY, DD/MM/YYYY, and YYYY/MM/DD.
- Page 57 Chapter 2 Functions and Operations In Channel Scanner mode, pressing the SYS key displays the following System menu soft key selections: — Displays a second level of system option functions: System Options — Displays a second level of functions: Clock —...
- Page 58 Chapter 2 Functions and Operations — Opens the GPS soft key menu. Press the soft key to turn the GPS feature on or off. GPS On/Off Press the soft key to view the latitude, longitude and altitude in- Location formation and UTC timing. Press the soft key to display the number of tracked satellites and Quality...
-
Page 59: Power Monitor, External Detector (Option 5)
Chapter 2 Functions and Operations Power Monitor, External Detector (Option 5) Selecting from the mode menu causes the soft keys, de- Power Monitor (External Detector) scribed below, to be displayed and the corresponding values shown in the message area. — Toggles between dBm and Watts. Units —... -
Page 60: Transmission Measurement (Option 21)
Chapter 2 Functions and Operations Transmission Measurement (Option 21) Selecting from the mode menu causes the soft keys, described Transmission Measurement below, to be displayed and the corresponding values shown in the message area. FREQ/DIST Pressing the FREQ/DIST key in Transmission Measurement mode activates a menu of frequency-related choices in the active function block. - Page 61 Chapter 2 Functions and Operations Scale — Activates the scale function in a 1 through 15 dB per division loga- rithmic amplitude scale. Enter the desired scale using the keypad or Up/Down arrow key. Press ENTER to accept. Atten/Preamp — Sets the Anritsu Spectrum Master input attenuator so that it is either coupled automatically to the reference level ( ), manually adjust- Auto...
- Page 62 Chapter 2 Functions and Operations — Sets the video bandwidth manually, independent of the VBW Manual RBW. — Returns to the previous menu level. Back — Activates a menu of trace related functions. Use the corresponding Trace soft key to select the desired trace function. —...
- Page 63 Chapter 2 Functions and Operations Pressing SYS on the data keypad in Transmission Measurement mode activates a menu of system-related functions. Use the corresponding soft key to select the system function. — Displays a second level of system option functions: System Options —...
- Page 64 Chapter 2 Functions and Operations — In cable and antenna analyzer freq or dist measurement mode, dis- Status plays the current instrument status, including calibration status, temperature, and battery charge state. Press ESCAPE to return to operation. GPS — Opens the GPS soft key menu. Press the soft key to turn the GPS feature on or off.
- Page 65 Chapter 2 Functions and Operations Segment 1-5 — View/edit lower limit segment 1-5. On/Off — Turns the segment on or off. Edit — Opens the segment parameters for editing (see Adjusting Seg- mented Limits, page 3-17). Prev Segment — Edit or view the parameters of the previous segment. Next Segment —...
- Page 66 Chapter 2 Functions and Operations — Turns the selected marker on or off. On/Off — Opens the selected marker parameter for data entry. Enter the Edit desired marker frequency using the keypad or Up/Down arrow key. Select the , or soft key to accept the marker fre- quency input.
-
Page 67: Interference Analyzer Mode (Option 25)
Chapter 2 Functions and Operations Interference Analyzer Mode (Option 25) The Interference Analyzer option provides several different ways to determine the nature and source of an interfering signal. Selecting from the mode menu Interference Analyzer causes the soft keys, described below, to be displayed and the corresponding values shown in the message area. - Page 68 Chapter 2 Functions and Operations — Activates the scale function which sets the dB/division value from 1 Scale dB/div to 15 dB/div in 1 dB steps. This soft key is not active if the units are set to linear. — Sets the internal input attenuator so that it is either coupled Atten/Preamp automatically to the reference level ( ), manually adjustable (...
- Page 69 Chapter 2 Functions and Operations side of the display translates color into power level. The highest power level is displayed in red with the lowest power levels in dark blue and black. — Sweep Interval allows for the amount of time between Sweep Interval sweeps to be set from a minimum of zero seconds up to 660 seconds (11 minutes).
- Page 70 Chapter 2 Functions and Operations — RSSI provides a way to see the scrolling display of received signal RSSI strength in zero span. Once a full screen of data has been acquired, the oldest data disappears off the left edge of the display. —...
- Page 71 Chapter 2 Functions and Operations — Sets the video bandwidth so that it is automatically cou- VBW Auto pled to the RBW. — Sets the video bandwidth manually, independent of VBW Manual the RBW, from 3 Hz to 1 MHz. —...
- Page 72 Chapter 2 Functions and Operations — Selects the M3 marker parameter and opens the Markers second level menu with M3 highlighted. — Selects the M4 marker parameter and opens the Markers second level menu with M4 highlighted. — Turns off all markers. All Off —...
- Page 73 Chapter 2 Functions and Operations NOTE: If either marker M3 or marker M4 is off, the Peak and Valley functions above are executed across the entire span. LIMIT Pressing the LIMIT key activates a menu of limit related functions. Use the cor- responding soft key to select the desired limit function.
- Page 74 Chapter 2 Functions and Operations — Returns to the previous menu level. Back Limit Beep — Turns the audible limit beep indicator on or off. When the limit beep indica- tor is on, an audible beep will occur at every data point that appears above the upper limit or below the lower limit.
- Page 75 Chapter 2 Functions and Operations — Returns to the top-level SYS menu. Back — Start an instrument self test. Self Test — In cable and antenna analyzer freq or dist measurement mode, dis- Status plays the current instrument status, including calibration status, temperature, and battery charge state.
-
Page 76: Channel Scanner Mode (Option 27)
Chapter 2 Functions and Operations Channel Scanner Mode (Option 27) The Channel Scanner option provides the choice of a bar graph or a text display showing the amplitude of selected channels for a given air interface standard. The interface settings can be manually entered if none of the available air interface standards meet the measure- ment need. - Page 77 Chapter 2 Functions and Operations AMPLITUDE Choosing AMPLITUDE causes the soft keys, below, to be displayed and the corresponding values to be shown in the message area. — Reference Level sets the power level at the top of the display. Ref Level Enter a value from +20.0 to –120.0 dBm, in 0.1 dB steps, using the Up/Down arrow key or the keypad and press ENTER to accept the input.
- Page 78 Chapter 2 Functions and Operations — Toggles the date format between Change Date Format MM/DD/YYYY, DD/MM/YYYY, and YYYY/MM/DD. — Returns to the top-level SYS menu. Back — Application options displays options applicable to par- Application Options ticular mode. — Set the external reference frequency from 2 MHz to External Ref Freq 20 MHz.
-
Page 79: Cw Signal Generator Mode (Option 28)
Chapter 2 Functions and Operations CW Signal Generator Mode (Option 28) To select CW Signal Generator mode, press the MODE key and use the down arrow to highlight and press ENTER. CW Signal Generator The CW Signal Generator option provides a CW signal from the instrument. The primary purpose of this signal is for sensitivity testing of receivers. - Page 80 Chapter 2 Functions and Operations — Enter the minute (0-59) using the Up/Down arrow key or Minute the keypad. Press ENTER when data entry is complete or ESCAPE to restore the previous value. — Enter the month (1-12) using the Up/Down arrow key or the Month keypad.
- Page 81 Chapter 2 Functions and Operations Press the soft key to display the number of tracked satellites and Quality the GPS quality. Press the soft key to reset the GPS. Reset — Returns to the previous menu. Back — Pressing this soft key immediately changes the language used to Language display messages on the Site Master status window.
-
Page 82: Power Meter Menus (Option 29)
Chapter 2 Functions and Operations Power Meter Menus (Option 29) Selecting from the mode menu causes the soft keys, described below, to be Power Meter displayed and the corresponding values shown in the message area. The following soft keys are available when the FREQ/DIST key is pressed. —... - Page 83 Chapter 2 Functions and Operations The following soft key is available when the MEAS/DISP key is pressed. — The RMS Acquisition menu adjusts the number of ac- RMS Acquisition quisitions the instrument will collect. — Turns off RMS Acquisition. Medium High Back —...
-
Page 84: T1 Tester Mode Menus (Option 50)
Chapter 2 Functions and Operations T1 Tester Mode Menus (Option 50) In T1 Tester mode (Option 50, S331D only), the FREQ/DIST and AMPLITUDE hard keys are not used. Pressing the MEAS/DISP key in T1 Tester mode causes the soft keys, below, to be displayed: —... - Page 85 Chapter 2 Functions and Operations — Opens the error insert menu which allows inser- Setup Error Insert tion of the following errors in the transmitting signal. — Configures the unit to insert bit errors. — Configures the unit to insert Bipolar Violations. —...
- Page 86 Chapter 2 Functions and Operations — When histogram is selected, the time scale can be set Time Scale from one second to one hour in the following steps: 1 second, 15 sec- onds, 30 seconds, 45 seconds, 1 minute, 15 minutes, 30 minutes, 45 minutes, 60 minutes, or AUTO.
-
Page 87: E1 Tester Mode Menus (Option 50)
Chapter 2 Functions and Operations E1 Tester Mode Menus (Option 50) In E1 Tester mode (Option 50, S331D only), the FREQ/DIST and AMPLITUDE hard keys are not used. Pressing the MEAS/DISP key in E1 Tester mode causes the soft keys, below, to be displayed: —... - Page 88 Chapter 2 Functions and Operations — Configures the unit to send a Remote Alarm Indication (yellow alarm). — Configures the unit to send an Alarm Indication Signal (blue alarm). Back — Returns to the previous menu. — Sets the Tx and Rx impedance. Impedance W —...
-
Page 89: Symbols
Chapter 2 Functions and Operations Symbols Table 2-1 provides a listing of the symbols used as condition indicators on the LCD status window. Table 2-1. LCD Icon Symbols Icon Symbol Site Master is in Hold for power conservation. To resume sweeping, press key. -
Page 90: Self Test
Chapter 2 Functions and Operations Self Test At turn-on, the Site Master runs through a series of quick checks to ensure the system is functioning properly. Note that the voltage and temperature are displayed in the lower left corner below the self test message. If the battery is low, or if the ambient temperature is not within the specified operational range, Self Test will fail. -
Page 91: Error Messages
Chapter 2 Functions and Operations Error Messages Self Test Error Messages A listing of Self Test Error messages is provided in Table 2-2. Table 2-2. Self Test Error Messages Error Message Description Battery Low Battery voltage is less than 9.5 volts. Charge battery. If condition per- sists, call your Anritsu Service Center. - Page 92 Chapter 2 Functions and Operations Range Error Messages A listing of Range Error messages is provided in Table 2-3. Table 2-3. Range Error Messages Error Message Description RANGE The start (F1) frequency is greater than the stop (F2) frequency. ERROR:F1 > F2 RANGE The start (D1) distance is greater than the stop (D2) distance.
- Page 93 Chapter 2 Functions and Operations Spectrum Analyzer Error Messages A listing of Spectrum Analyzer Error Messages is provided in Table 2-4. Table 2-4. Spectrum Analyzer Error Messages Error Message Description OVER LOAD This error message is displayed when there is too much input power. Decrease Input Power OVER RANGE! The ADC is over range.
- Page 94 Chapter 2 Functions and Operations InstaCal Error Messages If the serial number of the connected InstaCal module does not match the serial number stored in the Site Master, the following message is displayed: The InstaCal characterization data stored in the Site Master is for a module different than the one currently connected.
- Page 95 Chapter 2 Functions and Operations High Accuracy Power Meter (Option 19) Error Messages The following error messages could be displayed on the Site Master when using the High Accuracy Power Meter mode with Power Sensor PSN50. If any error condition persists, contact your local Anritsu Service Center.
-
Page 96: Battery Information
Chapter 2 Functions and Operations Battery Information Charging a New Battery The NiMH battery supplied with the Site Master has already completed three charge and discharge cycles at the factory and full battery performance should be realized after your first charge. NOTE: Use only Anritsu approved batteries, adapters and chargers with this in- strument. -
Page 97: Determining Remaining Battery Life
Chapter 2 Functions and Operations A blinking red light indicates less than 13 VDC is being supplied to the charger stand. Check that the correct AC charger adapter is connected to the charger stand. If the battery fails to charge, contact your nearest Anritsu Service Center. Determining Remaining Battery Life When the AC-DC adapter is unplugged from the Site Master, the battery indicator symbol will be continuously displayed at the top left corner of the Site Master display (Figure... - Page 98 Chapter 2 Functions and Operations Selftest Temperature ... . 24°C Memory ....PASSED RTC Battery... . . 3.1V Voltage .
- Page 99 Chapter 2 Functions and Operations It is normal for NiMH batteries to self-discharge during storage (Figure 2-21) and to de- grade to 80% of original capacity after 12 months of continuous use. Figure 2-21. NiMH Battery Storage Characteristics The battery can be charged and discharged 300 to 500 times, but it will eventually wear out. The battery may need to be replaced when the operating time between charging is notice- ably shorter than normal.
-
Page 100: Important Battery Information
Chapter 2 Functions and Operations Important Battery Information The NiMH battery supplied with the Site Master has already completed three charge and · discharge cycles at the factory and full battery performance should be realized after the first charge. Recharge the battery only in the Site Master, or in an Anritsu approved charger. ·... -
Page 101: Chapter 3 - Getting Started
Chapter 3 Getting Started Introduction This chapter provides a brief overview of the Anritsu Site Master. The intent of this chapter is to provide the user with a starting point for making basic cable and antenna analyzer, spectrum analyzer, and power meter measurements. Procedures that are specific to cable and antenna analyzer mode (page 3-2), Spectrum Analyzer mode (page 3-11), and common to all modes (page 3-15) are presented. -
Page 102: Cable And Antenna Analyzer Mode
Chapter 3 Getting Started Cable and Antenna Analyzer Mode Selecting the Frequency For the OSL or FlexCal calibration method the frequency range for the desired measure- ment must be set. The Site Master will automatically set the frequency when a particular signal standard is selected, or the frequency can be manually set using the F1 and F2 soft keys. - Page 103 Chapter 3 Getting Started If a Test Port Extension Cable is to be used, the Site Master must be calibrated with the Test Port Extension Cable in place. The Test Port Extension Cable is a phase stable cable and is used as an extension cable on the test port to ensure accurate and repeatable measure- ments.
- Page 104 Chapter 3 Getting Started OSL Calibration Procedures In Cable and Antenna Analyzer Mode, if the message is displayed, or the test port Cal Off cable has been changed, a new calibration is required. The following procedures detail how to perform the OSL calibration. OPEN CALIBRATION SHORT...
- Page 105 Chapter 3 Getting Started FlexCal OSL Calibration Step 8. The currently selected calibration method can be viewed by pressing the SYS key, followed by the soft key. To change the calibration method, select Status the SYS key, followed by the soft key.
- Page 106 Chapter 3 Getting Started Step 6. Press the MARKER key and set the M1 marker to . The M1 Marker To Peak value should be less than 35 dB return loss. Step 7. Press SAVE DISPLAY (page 3-15) name the trace, and press ENTER.
- Page 107 Chapter 3 Getting Started Offset Method An alternative to the termination method is to measure the return loss of a 20 dB offset. This is similar to measuring an antenna that has been specified to have a 20 dB return loss across the frequency of operation.
- Page 108 Chapter 3 Getting Started Standard InstaCal Calibration Step 1. Select OSL Cal by pressing the SYS key, followed by the Application Options soft key. The currently selected calibration method is indicated at the bottom of the status window. Use the soft key to select the OSL calibration CAL Mode method.
- Page 109 Chapter 3 Getting Started Auto Scale The Site Master can automatically set the scale to the minimum and maximum values of the measurement on the y-axis of the graph. This function is particularly useful for measure- ments in SWR mode. To automatically set the scale, press the AUTO SCALE key. The Site Master will automatically set the top and bottom scales to the minimum and maximum values of the measurement with some margin on the y-axis of the LCD.
- Page 110 Chapter 3 Getting Started Step 6. Using the arrow key, select the and press ENTER. Use the Up/Down Cable = arrow key to select the cable types stored in the standard Site Up/Down Standard Master cable lists (which cannot be edited) or choose , for additional ca- Custom bles.
-
Page 111: Spectrum Analyzer Mode
Chapter 3 Getting Started Spectrum Analyzer Mode Selecting Spectrum Analyzer Mode Step 1. Press the ON/OFF key. Step 2. Press the MODE key and use the Up/Down arrow key to select Spectrum Ana- mode. Press ENTER to set the mode. lyzer Making a Measurement Step 1. - Page 112 Chapter 3 Getting Started Selecting the Signal Standard and Channel Step 1. Press the soft key and select the appropriate signal standard for Signal Standard the measurement. Step 2. Press the soft key and select the appropriate channel for the Select Channel measurement.
- Page 113 Chapter 3 Getting Started Selecting Sweep Parameters Max Hold To toggle maximum hold on or off, press the MEAS/DISP key, the soft key and the Trace soft key. Maximum hold displays the maximum response of the input signal over Max Hold multiple sweeps.
- Page 114 Chapter 3 Getting Started Auto Coupling Auto coupling of the attenuation links the attenuation to the reference level. That is, the higher the reference level, the higher the attenuation. Auto coupling is indicated on the display as Atten XX dB Manual Coupling When manually coupled, the attenuation can be adjusted independently of the reference level.
-
Page 115: All Modes
Chapter 3 Getting Started All Modes Save and Recall a Setup Saving a Setup Saving a cable and antenna analyzer setup configuration in memory will preserve the cali- bration information. Step 1. To save the configuration in one of the available user setup locations, press SAVE SETUP. -
Page 116: Changing The Units
Chapter 3 Getting Started NOTES: More than one trace can be saved using the same alphanumeric name, as traces are stored chronologically, using the time/date stamp. Pressing the SAVE DISPLAY key will bring up the last saved trace name on the input line. -
Page 117: Adjusting Limits
Chapter 3 Getting Started Adjusting Limits The Site Master offers two types of limits: a single horizontal limit line and segmented lim- its. Adjusting a Single Limit Step 1. Press the LIMIT key. Step 2. Press the soft key. Single Limit Step 3. -
Page 118: Adjusting The Display Brightness
Chapter 3 Getting Started Step 6. Press the soft key to move on to Segment 2. If the status of Seg- Next Segment ment 2 is OFF, pressing the soft key will automatically set the Next Segment start point of segment 2 equal to the end point of Segment 1. Step 7. -
Page 119: Printing
Chapter 3 Getting Started Printing Printing is accomplished by selecting an available printer and pressing the print key as de- scribed below. Refer to the particular printer operating manual for specific printer settings. Printing a Screen Step 1. Obtain the desired measurement display. Step 2. -
Page 120: Using The Soft Carrying Case
Chapter 3 Getting Started Using the Soft Carrying Case The soft carrying case has been designed such that the strap can be unsnapped to allow the case to be easily oriented horizontally; thus allowing the Anritsu controls to be more easily accessed (Figure 3-5). -
Page 121: Chapter 4 - Cable And Antenna Analyzer Measurements
Chapter 4 Cable and Antenna Analyzer Measurements Introduction This chapter provides a description of cable and antenna analyzer measurements, including line sweeping fundamentals and line sweeping measurement procedures, available when the Site Master is in frequency or DTF mode. Line Sweep Fundamentals In wireless communication, the transmit and receive antennas are connected to the radio through a transmission line. -
Page 122: Cw Mode/Rf Immunity
Chapter 4 Cable & Antenna Measurements The performance of a transmission feed line system may be affected by excessive signal re- flection and cable loss. Signal reflection occurs when the RF signal reflects back due to an impedance mismatch or change in impedance caused by excessive kinking or bending of the transmission line. -
Page 123: Information Required For A Line Sweep
Chapter 4 Cable & Antenna Measurements Use this feature with caution, as the later introduction of an interfering signal might be mis- taken for a problem with the antenna or cable run. If CW is on during a normal RL or SWR measurement, the Site Master will be more sus- ceptible to interfering signals. - Page 124 Chapter 4 Cable & Antenna Measurements NOTE: The antenna must be connected at the end of the transmission feed line when conducting a System Return Loss measurement. Figure 4-2 is an example of a typical system return loss measurement trace using a FlexCal calibration: Figure 4-2.
- Page 125 Chapter 4 Cable & Antenna Measurements Procedure - Cable Loss Mode Step 1. Press the MODE key. Step 2. Select using the Up/Down arrow key and press ENTER. Freq-Cable Loss Step 3. Set the start and stop frequencies, automatically by selecting a signal standard or manually using the F1 and F2 soft keys, as described on page 3-2.
- Page 126 Chapter 4 Cable & Antenna Measurements Distance-To-Fault (DTF) Transmission Line Test The Distance-To-Fault transmission line test verifies the performance of the transmission line assembly and its components and identifies the fault locations in the transmission line system. This test determines the return loss value of each connector pair, cable component and cable to identify the problem location.
- Page 127 Chapter 4 Cable & Antenna Measurements Figure 4-4 shows an example of a typical DTF return loss measurement trace using a FlexCal calibration. Figure 4-4. Typical DTF Return Loss Trace In the above example: Marker M1 marks the first connector, the end of the Site Master phase stable Test Port Extension cable.
- Page 128 Chapter 4 Cable & Antenna Measurements Increasing the data points increases the sweep time and increases the accuracy of the mea- surement. CW mode On or Off can also affect sweep speed (see CW Mode, page 4-2 for details). Antenna Subsystem Return Loss Test Antenna Subsystem return loss measurement verifies the performance of the transmit and receive antennas.
- Page 129 Chapter 4 Cable & Antenna Measurements The following trace is an example of an antenna return loss measurement trace using a FlexCal calibration.. Figure 4-5. Antenna Return Loss Trace Calculate the threshold value and compare the recorded Lowest Return Loss to the calcu- lated threshold value.
-
Page 130: Chapter 5 - Spectrum Analyzer Measurements
Chapter 5 Spectrum Analyzer Measurements Introduction This chapter provides a description of Spectrum Analyzer measurements and procedures when the Site Master S332D is in Spectrum Analyzer Mode. Measurement Fundamentals Measurement fundamentals include the use of additional spectrum analyzer functions be- yond frequency, span, amplitude and marker functions. - Page 131 Chapter 5 Spectrum Analyzer Measurements With a wide bandwidth, more noise is included in the measurement. With a narrow band- width, less noise enters the resolution bandwidth filter, and the measurement is more accu- rate. If the resolution bandwidth is narrower, the noise floor will drop on the display of the spectrum analyzer.
-
Page 132: Preamplifier
Chapter 5 Spectrum Analyzer Measurements IMPORTANT! Attenuation is normally a coupled function and is automatically adjusted when the reference level changes. The reference level does not change however, when the attenuator changes. The attenuator should be ad- justed so that the maximum signal amplitude at the input mixer is –25 dBm or less. -
Page 133: Preamplifier Measurement Example
Chapter 5 Spectrum Analyzer Measurements Preamplifier Measurement Example This section provides an overview of how to detect a low-level signal with the help of the preamplifier of a S332D Site Master. Required Equipment S332D Site Master Test Port extension cable, Anritsu 15NNF50 – 1.5C A signal source (Anritsu 69xxxB Synthesized Signal Generator or equivalent) Procedure Step 1. - Page 134 Chapter 5 Spectrum Analyzer Measurements Figure 5-1 shows the measurement results with the preamplifier off. Figure 5-1. Preamplifier Off Step 14. Turn the preamplifier on. When the preamplifier is ON, the word should appear in the lower left corner of the display. The displayed noise level should be lowered by approximately 20 dB on the dis- play, and the signal should appear on top of the displayed noise.
-
Page 135: Dynamic Attenuation Control
Chapter 5 Spectrum Analyzer Measurements Dynamic Attenuation Control The dynamic attenuation control feature tracks the peak input signal level and automatically adjusts the attenuator to protect the S332D in situations of high RF signal levels. This fea- ture also enhances the instrument sensitivity in situations of low-level RF signals by deacti- vating and activating the internal preamplifier resulting in improved measurement accuracy. -
Page 136: Frequency Converter Interface (Option 6)
Chapter 5 Spectrum Analyzer Measurements Frequency Converter Interface (Option 6) Introduction Option 6 provides added circuitry and a connector to provide power, control signals and a local oscillator signal to a frequency converter. The Anritsu FCN4760 4.7 GHz to 6.0 GHz Frequency Converter can be used with this op- tion. -
Page 137: Selecting The Signal Standard And Channel
Chapter 5 Spectrum Analyzer Measurements Selecting the Signal Standard and Channel Before making measurements, the Site Master must be set to the appropriate wireless net- work air interface standard and channel number. The most common standards and channel numbers are stored in the Site Master and, when selected, the Site Master automatically se- lects the correct frequency and span. -
Page 138: Field Strength Measurements
Chapter 5 Spectrum Analyzer Measurements Field Strength Measurements All antennas have loss or gain that can cause errors in measurements. The Site Master can correct for antenna loss or gain errors using Field Strength Measurements. The antenna fac- tors must be uploaded to the Site Master using the Anritsu Handheld Software Tools pro- vided with the unit. -
Page 139: Occupied Bandwidth
Chapter 5 Spectrum Analyzer Measurements Occupied Bandwidth A common measurement performed on radio transmitters is that of occupied bandwidth (OBW). This measurement calculates the bandwidth containing the total integrated power occupied in a given signal bandwidth. There are two different methods of calculation de- pending on the technique to modulate the carrier. - Page 140 Chapter 5 Spectrum Analyzer Measurements Figure 5-4 shows the occupied bandwidth results using the % of power method of a CDMA signal. Figure 5-4. Occupied Bandwidth Occupied bandwidth is calculated at the end of a sweep. An hourglass is displayed as the calculations are performed.
-
Page 141: Channel Power Measurement
Chapter 5 Spectrum Analyzer Measurements Channel Power Measurement Channel power measurement is one of most common measurements for a radio transmitter. This test measures the output power, or channel power, of a transmitter over the frequency range in a specific time interval. Out-of-specification power measurements indicate system faults, which can be in the power amplifiers and in filter circuits. - Page 142 Chapter 5 Spectrum Analyzer Measurements Figure 5-5. Channel Power Meassurement When the channel power measurement is on, a icon appears to the left of the CH PWR graph. Channel power is calculated at the end of a sweep. An hourglass is displayed as the calculations are performed.
-
Page 143: Adjacent Channel Power Ratio
Chapter 5 Spectrum Analyzer Measurements Adjacent Channel Power Ratio Another common transmitter measurement is that of adjacent channel leakage power. This is defined as the ratio of the amount of leakage power in an adjacent channel to the total transmitted power in the main channel. This measurement can be used to replace the tradi- tional two-tone intermodulation distortion (IMD) test for system non-linear behavior. - Page 144 Chapter 5 Spectrum Analyzer Measurements Figure 5-6 shows the results of the measurement. Figure 5-6. Adjacent Channel Power Measurement Adjacent Channel Power Ratio is a continuous measurement. Once it is turned on, it will re- main on until it is turned off by pressing the key again.
-
Page 145: Interference Analysis
Chapter 5 Spectrum Analyzer Measurements Interference Analysis Multiple wireless networks often operate in complicated signal environments. Three or four base station antennas may be located on the same tower, and can create interference prob- lems. Interference is one of the most common problems affecting wireless network systems capacity and coverage. -
Page 146: Am/Fm Demodulation
Chapter 5 Spectrum Analyzer Measurements AM/FM Demodulation The Spectrum Master built-in demodulator for AM, narrowband FM, wideband FM and single sideband (selectable USB and LSB) allows a technician to hear an interfering signal for easy identification. The demodulated signal can be heard using either the built-in speaker, or through a monaural headset connected to the 1/8-inch jack on the test panel. - Page 147 Chapter 5 Spectrum Analyzer Measurements Figure 5-9. SSB Demodulation Step 5. Press the On/Off soft key to enable the measurement. will appear to the AM/FM left of the graph. Figure 5-10. AM Demodulation Step 6. Use the soft key and the Up/Down arrow key to change the audio vol- Volume ume from 0% to 100%.
-
Page 148: Carrier To Interference Ratio (C/I)
Chapter 5 Spectrum Analyzer Measurements Carrier to Interference Ratio (C/I) Carrier to Interference Ratio (C/I) Measurement is a two-step process, first measuring the carrier level and then, with the carrier turned off, measuring the remaining signals and noise in the band of interest. After the two measurements are complete, the ratio of the carrier level to the noise plus interference is displayed using three assumptions: The interferer is a narrowband frequency hopping signal source (NB FHSS) The interferer is a wideband frequency hopping signal source (WB FHSS) - Page 149 Chapter 5 Spectrum Analyzer Measurements Step 4. Press the MEAS/DISP key followed by the soft key, the soft key Measure More and the soft key. Figure 5-12. Carrier to Interference Ratio Measurement Screen Step 5. Press the soft key and select the correct carrier signal type from the Signal Type three choices, , or...
- Page 150 Chapter 5 Spectrum Analyzer Measurements Step 10. Press the soft key and follow the on-screen prompts to complete the Measure measurement. NOTE: Access to the transmitter is required to complete this procedure as the transmitted carrier must be turned off for the second portion of the measure- ment.
-
Page 151: Chapter 6 - Internal Power Meter Mode
Chapter 6 Internal Power Meter Mode Introduction The Site Master S33xD can make power measurements based on the spectrum analyzer measurements, and can display the measured power in dBm or Watts. Power Measurement Required Equipment The following equipment is required to make a power measurement with the Site Master. Site Master Model S331D/S332D with Option 29 Test Port Extension Cable, Anritsu 15NNF50 –... -
Page 152: Offset Calibration
Chapter 6 Power Measurement Offset Calibration One of the main contributors to measurement error when measuring the power coming out of a base station is to assume that the combined loss of the phase stable cable and the at- tenuator connected to the output of the instrument is exactly the same as the specified value of the attenuator. - Page 153 Chapter 6 Power Measurement Step 7. Press the ENTER key. Step 8. Disconnect the 18" (46cm) Test Port Extension Cable from the connector RF In and connect the phase stable cable and attenuator between the connector RF In and the 18" (46cm) Test Port Extension Cable. 30 dB Attenuator 42N50A-30 18"...
- Page 154 Chapter 6 Power Measurement Changing the Display Units The power reading can be displayed in dBm or Watts. Step 1. Press the AMPLITUDE key. Step 2. Press the soft key to toggle the display between Watts and dBm. Units Step 3. Press the FREQ/DIST key to return to the Power Meter menu. Displaying Relative Power Relative power can be selected through the AMPLITUDE menu.
-
Page 155: Chapter 7 - Power Monitor Mode
Chapter 7 Power Monitor Mode Introduction The Site Master with Option 5 installed can be used for making power measurements with broadband RF detectors, such as the 10 MHz to 20 GHz Anritsu 560-7N50B. See the table of available RF detectors on page 1-3. The power monitor displays the measured power re- sults in dBm or Watts. - Page 156 Chapter 7 Power Monitor Displaying Relative Power Step 9. With the desired base power level input to the Site Master, press the REL soft key. The message area will show REL: ON and the power reading will indicate 100%. Step 10. Press the UNITS soft key to display power in dBm. Since REL is ON, the power reading will be in dBr, relative to the base power level.
-
Page 157: Chapter 8 - High Accuracy Power Meter
Chapter 8 High Accuracy Power Meter Introduction The S33XD Site Master with Option 19 and sensor PSN50 can be used to make High Accu- racy Power Measurements from 50 MHz to 6 GHz. This high performance sensor provides true RMS measurements from –30 to +20 dBm providing accurate measurements for both CW and complex digitally modulated signals. -
Page 158: Power Measurement
Chapter 8 High Accuracy Power Meter Power Measurement Required Equipment S33XD Site Master RS232 Serial Cable, Anritsu P/N 800-441 Power Supply, Anritsu P/N 40-168 High Accuracy Power Sensor Anritsu P/N PSN50 30 dB, 50W, bi-directional, DC-8.5 GHz, N(m)-N(f), Attenuator, 3-1010-123 DC SUPPLY PSN50 SENSOR ATTENUATOR... - Page 159 Chapter 8 High Accuracy Power Meter NOTE: The channel number is not required because the cal factor frequencies are rounded to the nearest 500 MHz. Step 8. With no power applied to the sensor, press the AMPLITUDE key then the Zero soft key to zero the sensor.
- Page 160 Chapter 8 High Accuracy Power Meter Transferring Data to Handheld Software Tools The Site Master has only one serial port, so it is not possible to communicate with both the PSN50 sensor and a PC running Handheld Software Tools (HHST) at the same time. There- fore, only saved measurements can be viewed in HHST when using the PSN50.
-
Page 161: Chapter 9 - T1 Measurements
T1 Measurements Introduction This chapter provides a brief description of a T1 circuit and T1 measurements, and also ex- plains how to setup and measure T1 performance using the Anritsu Site Master S331D with Option 50 installed. T1 Fundamentals Wireless service providers use wired T1 circuits as the backhaul links to connect a Base Transceiver Station (BTS) to a Mobile Switching Center (MSC). -
Page 162: G.821 Measurement Definitions
Chapter 9 T1 Measurements G.821 Measurement Definitions ¾The count of available seconds since the beginning of the test. Available Seconds (AS) Available seconds equals the total test time minus any unavailable seconds. ¾The count of Degraded Minutes since the start of the test. A Degraded Minutes (DGRM) Degraded Minute occurs when there is a 10-6 bit error rate during 60 available, non-se- verely bit errored seconds. - Page 163 Chapter 9 T1 Measurements Another possible configuration between BTS and MSC is shown in Figure 9-3. T1 BACKHAUL CIRCUIT REPEATER REPEATER Figure 9-3. BTS and MSC Configuration This configuration uses a High-speed Digital Subscriber Line (HDSL) in the T1 circuit, which enables full duplex T1 service over a single pair of wires without repeaters.
-
Page 164: Testing T1 Circuits
Chapter 9 T1 Measurements Testing T1 Circuits T1 circuit testing can be done with either of two methods: In service and Out of service testing. In service testing is done during routine maintenance and troubleshooting phase. This can be done on live data without removing the T1 circuit from service or done on live data. Monitoring live data allows wireless service provider technicians to detect alarms, bipolar violations (BPV) and frame errors but bit errors cannot be measured. - Page 165 Chapter 9 T1 Measurements BERT Measurement Setup Step 1. Press the MODE key, select , and press ENTER. T1 Tester Step 2. Select the soft key. Setup Step 3. Press the soft key and choose the framing Framing Mode Auto D4 SF type.
- Page 166 Chapter 9 T1 Measurements BERT Measurement Step 1. Press the MEAS/DISP key and then the soft key. BERT Step 2. Press the soft key and use the arrow key to select Measure Duration Up/Down the duration of the measurement, and press ENTER. Figure 7-5 shows the T1 measurement display.
-
Page 167: Out-Of-Service Testing
Chapter 9 T1 Measurements Figure 7-6 displays the T1 measurement data in Histogram mode. Figure 9-6. T1 BERT Measurement Display with Histogram Out-Of-Service Testing Out-of-service measurements are performed when the T1 circuit is not in service or inac- tive. Typically these tests are done during initial installation, during circuit acceptance by the wireless service provider or when the results of the in-service measurements indicate er- rors. - Page 168 Chapter 9 T1 Measurements Measurement Procedure Step 1. Press the MODE key, select , and press ENTER. T1 Tester Step 2. Select the soft key. Vp-p Step 3. Press the soft key and select mode. Terminate/Bridged Terminate Step 4. Press the soft key to start or stop the peak to peak voltage Start/Stop Measure measurement.
- Page 169 Chapter 9 T1 Measurements Figure 9-7 illustrates some of the key information of the T1 measurement setup. Figure 9-7. T1 Out-of-Service Measurement...
- Page 170 Chapter 9 T1 Measurements BERT Measurement Procedure Step 1. Press the MEAS/DISP key and then the soft key. BERT Step 2. Press the soft key and use the arrow key to select Measure Duration Up/Down the duration of the measurement, and press ENTER. Figure 7-8 displays the T1 measurement in raw data mode.
- Page 171 Chapter 9 T1 Measurements Inserting Errors Step 9. To insert a setup error, press the soft key to inject errors in the Insert Errors transmit signal. Figure 7-9 displays the T1 measurement when errors are in- serted. The errors are displayed on the right side at the bottom of the display. Figure 9-9.
-
Page 172: Ds0 Testing
Chapter 9 T1 Measurements DS0 Testing The DS0 test feature enables testing on each of the 24 channels of the T1 line. The receive channel is decoded and the VF level and frequency are measured and displayed. The signal is also connected to a speaker, enabling the tester to make an audible assessment of the sig- nal quality of the circuit. -
Page 173: Chapter 10 - E1 Measurements
E1 Measurements Introduction This chapter provides a brief description of an E1 circuit and E1 measurements, and also explains how to setup and measure E1 performance using the Anritsu Site Master S331D with Option 50 installed. E1 Fundamentals Wireless service providers use wired E1 circuits as the backhaul links to connect a Base Transceiver Station (BTS) to a Mobile Switching Center (MSC). -
Page 174: G.821 Measurement Definitions
Chapter 10 E1 Measurements G.821 Measurement Definitions ¾The count of available seconds since the beginning of the test. Available Seconds (AS) Available seconds equals the total test time minus any unavailable seconds. ¾The count of Degraded Minutes since the start of the test. A Degraded Minutes (DGRM) Degraded Minute occurs when there is a 10-6 bit error rate during 60 available, non-se- verely bit errored seconds. -
Page 175: Testing E1 Circuits
Chapter 10 E1 Measurements Testing E1 Circuits E1 circuit testing can be done with either of two methods: In Service and Out of Service testing. In Service testing is done during a routine maintenance and troubleshooting phase. This can be accomplished without removing the E1 circuit from service on live data. Monitoring live data allows the wireless service provider technician to detect alarms, bipolar violations (BPV) and frame errors, but bit errors cannot be measured. - Page 176 Chapter 10 E1 Measurements NOTE: The Vpp measurement can be displayed in dBdsx format by pressing the Vpp/dBdsx soft key. Step 5. Press the soft key to start or stop the peak to peak voltage Start/Stop Measure measurement. BERT Measurement Setup Step1.
- Page 177 Chapter 10 E1 Measurements Figure 10-3 illustrates some of the key information of the E1 setup measurement display. Figure 10-3. E1 BERT Setup Measurement Display 10-5...
- Page 178 Chapter 10 E1 Measurements BERT Measurement Step 1. Press the MEAS/DISP key and then the soft key. BERT Step 2. Press the soft key and use the arrow key to select Measure Duration Up/Down the duration of the measurement, and press ENTER. Figure 9-4 displays the E1 measurement display in raw data mode.
- Page 179 Chapter 10 E1 Measurements Figure 8-5 shows the E1 measurement display in histogram mode. Figure 10-5. E1 BERT Measurement Display with Histogram 10-7...
-
Page 180: Out-Of-Service Testing
Chapter 10 E1 Measurements Out-Of-Service Testing Out-of-service measurements are performed when the E1 circuit is not in service or inac- tive. Typically these tests are done during initial installation, during circuit acceptance by the wireless service provider or when the performance of the in service measurements indi- cates extensive errors. - Page 181 Chapter 10 E1 Measurements Step 7. Press the soft key and choose W or W. Press to return to Impedance Back the previous menu. Step 8. Select the soft key to access more menu selections. More Step 9. Press the soft key and select clock.
- Page 182 Chapter 10 E1 Measurements Step 3. To display the measurement data in a histogram format, press the Display Raw soft key. Data/Histogram Step 4. Press the soft key to set the duration of the measurement, and Measure Duration press ENTER. The maximum measurement duration is two days. Step 5.
-
Page 183: Vf Channel Access Testing
Chapter 10 E1 Measurements VF Channel Access Testing The VF Channel Access test feature enables testing on each of the 32 channels of the E1 line. The receive channel is decoded and the VF level and frequency are measured and dis- played. -
Page 184: Chapter 11 - Transmission Measurement
Chapter 11 Transmission Measurement Introduction The Transmission Measurement option (Option 21) provides the capability to perform two-port measurements of passive devices over the 25 MHz to 3 GHz frequency range. Transmission Measurement can also be used to make antenna isolation measurements and repeater measurements. - Page 185 Chapter 11 Transmission Measurement NOTE: The START CAL key (number 3 on the keypad) does not start calibra- tion when the unit is in Transmission Measurement mode. Step 4. Following the on-screen prompt, connect a phase-stable cable between the RF Out port and the RF In port.
-
Page 186: Transmission Measurement Procedure
Chapter 11 Transmission Measurement Transmission Measurement Procedure Step 1. Connect the filter between the Site Master ports. RF In RF Out DUPLEXER S312D ESCAPE CLEAR START AUTO SCALE SAVE RECALL SETUP SETUP LIMIT MARKER ENTER RECALL SAVE DISPLAY DISPLAY HOLD PRINT MODE FREQ/DIST... -
Page 187: Bias Tee (Option 10A)
Chapter 11 Transmission Measurement Bias Tee (Option 10A) Option 10A provides a bias tee installed inside the S33xD Site Master. The bias arm is con- nected to a 12-24 Vdc (variable in 1V increments) power source that can be turned on as needed to place the voltage on the center conductor of the port. -
Page 188: Chapter 12 - Gps Feature
Chapter 12 GPS Feature Introduction The S331D/S332D Site Master is available with a built-in GPS receiver feature (Option 31) that can provide latitude, longitude and altitude information and UTC timing. The following GPS antennas and accessories are available from Anritsu: 2000-1410 Magnet Mount GPS Antenna with 15-foot cable ·... - Page 189 Chapter 12 GPS Feature NOTE: The Site Master retains the current GPS location information until the unit is turned off. This feature allows measurement traces to be saved with the retained GPS location information even when the GPS is inactive or the instru- ment is indoors.
-
Page 190: Saving With Gps Information
Chapter 12 GPS Feature Saving with GPS Information Site Master measurement traces can be saved with the GPS coordinates of the location where the measurement was taken. The following procedure saves a display to memory. Step 1. Press the SAVE DISPLAY key to activate the alphanumeric menu for trace storage. - Page 191 Chapter 12 GPS Feature Figure 12-3. Saved GPS Location Information 12-4...
-
Page 192: Chapter 13 - Interference Analyzer Mode
Chapter 13 Interference Analyzer Mode Introduction This chapter presents Interference Analyzer (Option 25) information and procedures. Interference Analysis Multiple wireless networks often operate in complicated signal environments. Three or four base station antennas may be located on the same tower, and can create interference prob- lems. - Page 193 Chapter 13 Interference Analyzer Step 1. Press the MEAS/DISP key followed by the soft key to set the Spectrogram spectrogram sweep parameters. There are two ways to set up spectrogram time parameters: set the time between sweeps or set the total time for a full spectro- gram display.
-
Page 194: Signal Strength
Chapter 13 Interference Analyzer Signal Strength Signal Strength is useful for tracking down the source of an interfering signal. This mea- surement is done at a single frequency in zero span. Signal Strength displays the power at a single frequency (in dBm) along with an optional audible indicator. Connect a directional antenna and the frequency of the audible indicator increases as the measured signal strength increases. -
Page 195: Rssi
Chapter 13 Interference Analyzer RSSI RSSI is useful to observe signal strength at a single frequency over time. Procedure: The following procedure demonstrates a common Interference Analyzer RSSI setup. To se- lect Interference Analyzer mode: Step 1. On the Site Master, press the MODE key, use the Up/Down arrow key to select mode and press ENTER. -
Page 196: Signal Id
Chapter 13 Interference Analyzer Signal ID Signal Identification is used to determine, if possible, the air interface standard of a signal. If the instrument is unable to determine the modulation format, it will display the estimated bandwidth of the signal. Procedure: The following procedure demonstrates a common Interference Analyzer Signal ID setup. -
Page 197: Chapter 14 - Channel Scanner Mode
Chapter 14 Channel Scanner Mode Introduction This chapter presents Channel Scanner (Option 27) information and procedures. Channel Scanner The Channel Scanner option measures the output power of multiple transmitted signals. The output power can be displayed as a bar graph or a text display showing the amplitude of selected channels for a given air interface standard. - Page 198 Chapter 14 Channel Scanner Mode Step 4. Press the MEAS/DISP key and select the soft key. Use the Number of Channels keypad to enter and press the ENTER key. The channels will be displayed as bar graphs. Figure 14-1. Example of Channels Displayed as Bar Graphs Step 5.
- Page 199 Chapter 14 Channel Scanner Mode Step 6. To set up the channel step size, press the FREQ/DIST key and select the Chan- soft key. Use the keypad to enter and press the ENTER key. nel Step Size Figure 14-3. Example of Channels Displayed as Bar Graphs with Channel Step Size = 5 Step 7.
-
Page 200: Chapter 15 - Signal Generator Mode
The ex- ternal splitter feeds the signal into the RF input of the instrument. The display shows the output power and frequency. Required Equipment Site Master S331D/S332D with Option 28 Attenuator Splitter Procedure Step 1. -
Page 201: Softkeys
Chapter 15 Signal Generator Mode Step 4. Connect the receiver cable to the output of the power splitter. Step 5. Adjust the power using the attenuator knobs until the receiver being tested drops the signal. Softkeys The following soft keys are available in CW Signal Generator mode: —... -
Page 202: Chapter 16 - Handheld Software Tools
Chapter 16 Handheld Software Tools Introduction This chapter provides a description of the Anritsu Handheld Software Tools program. Handheld Software Tools is a Windows 95/98/NT4/2000/ME/XP/Vista program for trans- ferring measured traces, along with markers and limit lines, to the PC display. The program help function provides on screen instructions on display modification, trace overlay, up- loading and downloading traces, and multiple plot printing. -
Page 203: Installation
Chapter 16 Handheld Software Tools A serial (COM) port or a USB port and USB power adapter cable for communi- cation with the instrument NOTE: It is recommended that Windows NT 4.0 users install NT 4.0 Service Pack 3 (SP3) or above. In addition, Windows 2000 (SP1 or higher) and Win- dows ME may require installation of the latest Service Pack. -
Page 204: Using Handheld Software Tools
Chapter 16 Handheld Software Tools Interface Cable Installation Communication between the instrument and the PC is accomplished over a null modem se- rial cable provided with the instrument (Anritsu part number 800-441, and optional USB to serial adapter, part number 551-1691, if required). Step1. -
Page 205: Plot Capture To The Pc
Chapter 16 Handheld Software Tools Plot Capture to the PC To open the plot capture menus, select the capture icon on the button bar, or select the Capture drop down menu from the menu bar. Select Capture to Screen to download traces to the PC. Select a folder, or individual traces within a folder, to be downloaded to the PC. - Page 206 Chapter 16 Handheld Software Tools Manual adjustment sets the upper and lower limits of the display under the Scale/Limit Submenu. Auto Scale automatically adjusts the scale for maximum and minimum mea- surement readings. Limit Line Off turns off all limit lines. Single Limit Line can be activated to help identify faults.
- Page 207 Chapter 16 Handheld Software Tools Refer to the Handheld Software Tools HELP function for more information on the steps necessary to perform a trace overlay. Saving Traces Once the plots are captured to the PC they can be saved as individual files or as a block of files to a database.
- Page 208 Chapter 16 Handheld Software Tools Creating a Database A single trace or a block of traces can be transferred from the instrument to the PC. A sepa- rate database can be created for each cellular site. The site name can be used as the database name.
- Page 209 Chapter 16 Handheld Software Tools Antenna used for radiated emissions testing are individually calibrated (the antenna factors can be measured directly) at all appropriate distances. The calibrations produce values that are defined the “equivalent free space antenna factor.” The calibration procedure corrects for the presence of the reflection of the antenna in the ground plane, giving the value that would be measured if the antenna were in “free space.”...
- Page 210 Chapter 16 Handheld Software Tools Downloading Antennas All ten antennas can be downloaded to the PC from the instrument. This allows for modifi- cations to the antenna factors of an antenna or the addition or deletion of available antennas from the list. The antennas can then be uploaded to the instrument. To download the antennas: Step1.
- Page 211 Chapter 16 Handheld Software Tools Querying the Site Master Cable List Query Cable List allows the user to check and review the contents of the custom cable list in the Site Master. In the Cable Editor, select . The software will download the ca- Tools Query Cable List ble list from the Site Master to the PC.
-
Page 212: Signal Standards Editor
Chapter 16 Handheld Software Tools Signal Standards Editor The Signal Standards Editor is a software application for viewing, editing and creating sig- nal standards files. Select a signal standard entry from the list to make it active. The Signal Standards Editor can: Create new signal standards files ·... - Page 213 Chapter 16 Handheld Software Tools To retrieve a Signal Standards file, select from the Retreive Signal Standards Connection menu, or use the short-cut icon on the button bar. The retrieved Signal Standards data will replace all existing Signal Standards data in the Signal Standards Editor. To store the cur- rent Signal Standards data locally, select from the menu and save the current Sig-...
-
Page 214: Appendix A Reference Data
Appendix A Reference Data Coaxial Cable Technical Data Table A-1 provides a standard listing of common coaxial cables along with their Relative Propagation Velocity and Nominal Attenuation values in dB/m @1000, 2000, and 2500 MHz. (N/A indicates that the specification is not applicable to the listed cable.) Table A-1. - Page 215 Appendix A Reference Data Table A-1. Coaxial Cable Technical Data (2 of 4) Nominal Nominal Nominal Relative Attenuation Attenuation Attenuation Manufacturer Cable Type Propagation dB/m @ dB/m @ dB/m @ Velocity (Vf) 1000 MHz 2000 MHz 2500 MHz Belden RG8, 8A 0.659 0.262 Belden...
- Page 216 Appendix A Reference Data Table A-1. Coaxial Cable Technical Data (3 of 4) Nominal Nominal Nominal Relative Attenuation Attenuation Attenuation Manufacturer Cable Type Propagation dB/m @ dB/m @ dB/m @ Velocity (Vf) 1000 MHz 2000 MHz 2500 MHz Eupen EC7-50 1-5/8 0.88 0.025 0.038...
- Page 217 Appendix A Reference Data Table A-1. Coaxial Cable Technical Data (4 of 4) Nominal Nominal Nominal Relative Attenuation Attenuation Attenuation Manufacturer Cable Type Propagation dB/m @ dB/m @ dB/m @ Velocity (Vf) 1000 MHz 2000 MHz 2500 MHz Times LMR100 0.792 1.15 1.31...
-
Page 218: Appendix B Windowing
Appendix B Windowing Introduction The FREQ/DIST menu (page 2-18) provides for setting the cable loss and relative propa- gation velocity of the coaxial cable. The key opens a menu of FFT windowing Window types for the DTF calculation. The theoretical requirement for inverse FFT is for the data to extend from zero frequency to infinity. - Page 219 Appendix B Windowing D i s t a n c e T o F a u l t - 1 0 - 1 5 - 2 0 - 2 5 - 3 0 R e t u r n L o s s ( d B ) - 3 5 - 4 0 - 4 5...
- Page 220 Appendix B Windowing D i s t a n c e T o F a u l t - 1 0 - 1 5 - 2 0 - 2 5 - 3 0 R e t u r n L o s s ( d B ) - 3 5 - 4 0 - 4 5...
-
Page 221: Appendix C Signal Standards
Appendix C Signal Standards Introduction Table C-1 provides a listing of common Spectrum Analyzer signal standards. Table C-1. Spectrum Analyzer Signal Standards AMPS / EIA 553 - Uplink C-450(P) - Uplink C-450(P) - Downlink C-450(SA) - Uplink C-450(SA) - Downlink CDMA China 1 - Uplink CDMA China 1 - Downlink CDMA China 2 - Uplink... - Page 222 Appendix C Signal Standards GSM 450 - Uplink GSM 450 - Downlink GSM 480 - Uplink GSM 480 - Downlink GSM 850 - Uplink GSM 850 - Downlink GSM 900 - Uplink GSM 900 - Downlink P-GSM 900 - Uplink P-GSM 900 - Downlink E-GSM 900 - Uplink E-GSM 900 - Downlink...
- Page 223 Appendix C Signal Standards PHS - Downlink SMR 800 - 12.5 kHz - Uplink SMR 800 - 12.5 kHz - Downlink SMR 800 - 25 kHz - Uplink SMR 800 - 25 kHz - Downlink SMR 1500 - Uplink SMR 1500 - Downlink TACS - Uplink TACS - Downlink Digital Terrestrial TV Japan...
-
Page 224: Index
Index case ....3-20 channel . . 2-19, 2-39, 2-46, 2-55, 2-58, 2-61, accessories ....1-1, 1-4 3-12, 5-8, 6-1 ACPR . - Page 225 LEC ....9-1 limits ... . . 2-27, 2-43, 3-17 FFT ....B-1 line sweep .
- Page 226 power indicator....2-75 static ....1-13 power meter sweep ....3-13, 5-2 high accuracy .
- Page 227 zero span ... 1-6, 2-19, 2-72 zoom ....2-23 Index-4...
Need help?
Do you have a question about the Site Master S331D and is the answer not in the manual?
Questions and answers