Advertisement
Advertisement

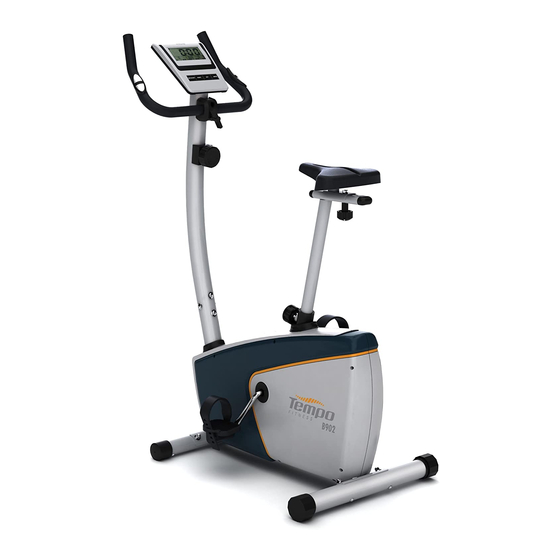
Related Manuals for Tempo Fitness B902


Summary of Contents for Tempo Fitness B902
- Page 1 FOR MODEL : B902 B903 UPRIGHT BIKE OWNER’S MANUAL...
-
Page 2: Table Of Contents
CONGRATULATIONS and THANK YOU for your purchase of this Tempo Fitness Upright Bike! Whether your goal is to win a race or simply enjoy a fuller, healthier lifestyle, a Tempo Fitness Upright Bike can help you attain it with the ergonomics and innovative features you need to get stronger, healthier and faster. -
Page 3: Important Precautions
IMPORTANT PRECAUTONS BEFORE YOU BEGIN SAVE THESE INSTRUCTIONS CONGRATULATIONS! on choosing your bike. You’ve taken an important step in developing When using an electrical product, basic precautions should always be followed, including the following: and sustaining an exercise program! Your bike is a tremendously effective tool for achieving your Read all instructions before using this bike. -
Page 4: Bike Operation
BIKE OPERATION B902 CONSOLE DISPLAY WARNING Do not operate the bike if the power cord or plug is damaged. MOVING Your bike has a pair of transport wheels built into the FRONT STABILIZER TUBE. To move, first remove the power supply and firmly grasp the CONSOLE MAST Handle Bar, carefully tilt and roll. - Page 5 QUICK START B903 CONSOLE DISPLAY 1) Turn on console by pressing any key. 2) Press MODE key to set target values, then start. 3) When you exercise without setting any target values, the console display will count up from ZERO. 4) The resistance level can be adjusted during your workout by using the resistance Knob.
- Page 6 BASIC OPERATION B903 PRESET WORKOUT PROFILES 1) Make sure the power is on. 2) Scroll the UP/DOWN key to select workout between manual, preset programs, user and T.H.R., press • P1 WEIGHT LOSS: Promotes weight loss • P7 AFTER BURNER: Recover your heart and by raising and lowering the resistance level, muscles after intensive workout.
-
Page 7: Assembly Instructions
M8 2 pcs A. Open hardware for step 1. B. Attach the Front Stabilizer Tube to the Main Frame using 2 Long Bolts (A), 2 Wave MAIN FRAME Washers (B) & 2 Nuts (C). FRONT STABILIZER TUBE (B902) (B903) STEP 2 MAIN PARTS: HARDWARE CONTENTS: Long Bolt (A) wave Washer (B) Nut (C) - Page 8 STEP 3 STEP 5 A. Remove Pre-assembled Screws from Console. HARDWARE CONTENTS: B. Connect sensor cable & hand pulse grip cable CONSOLE Wave Washer (B) Hex Screw (E) at the rear of Console. Φ8.5xΦ22xT1.5 4 pcs M8x15 4 pcs C. Carefully tuck away all cables into Console Mast and fix Console in place using A.
- Page 9 D. Fix Seat to seat stem using Seat Adjusting PRE-ASSEMBLED NUT Knob and 1 Flat Washer. FLAT WASHER B902 SEAT ADJUSTING KNOB Max. User Weight: 130 kg / 286 lbs Product Weight: 30 kg / 66 lbs Overall Dimension: 104 x 55 x 133 cm / 41” x 35” x 52”...
- Page 10 STEP 1 STEP 3 HARDWARE CONTENTS: HARDWARE CONTENTS: Wave Washer (B) Hex Screw (E) Long Bolt (A) wave Washer (B) Nut (C) M8x70 2 pcs Φ8.5xΦ22xT1.5 2 pcs M8 2 pcs Φ8.5xΦ22xT1.5 4 pcs M8x15 4 pcs A. Open hardware for step 3. A.
- Page 11 STEP 5 STEP 7 A. Remove Pre-assembled Screws from Console. HARDWARE CONTENTS: B. Connect sensor cable & hand pulse grip cable CONSOLE Flat washer (F) at the rear of Console. Φ8.5xΦ16xT1.5 C. Carefully tuck away all cables into Console Mast and fix Console in place using A.
-
Page 12: Conditioning Guidelines
CONDITIONING GUIDELINES ASSEMBLY COMPLETE! ALWAYS CONSULT YOUR PHYSICIAN BEFORE BEGINNING AN EXERCISE PROGRAM. HOW OFTEN? (Frequency of Workouts) The American Heart Association recommends that you exercise at least 3 to 4 days per week to maintain cardiovascular fitness. If you have other goals such as weight or fat loss, you will achieve your goal faster with more frequent exercise. -
Page 13: Heart Rate
HEART RATE TIP S STRETCHING HANDLEBARS Place the palm of your hands directly on the grip pulse handlebars. Both hands must grip the bars for your STRETCH FIRST heart rate to register. It takes 5 consecutive heart beats (15-20 seconds) for your heart rate to register. When Before using your product, it is best to take a few minutes to do a few gentle stretching exercises. -
Page 14: Weekly Log Sheets
WEEKLY LOG SHEETS T I PS THE IMPORTANCE OF A WARM-UP & COOL DOWN WARM UP WE EK # WE EK LY GOA L The first 2 to 5 minutes of a workout should be devoted to warming up. The warm-up will limber your D AY DATE DISTAN CE... - Page 15 SOLUTION: Verify the following: • The correct adapter is being used. Only use the adapter provided or authorized by Tempo Fitness. • Reset the console and allow the resistance to reset to the default position. Restart and retry the resistance levels.
-
Page 16: Common Product Questions
• Does the problem occur when using the handlebars? Without using the handlebars? Answering these and other questions will give the technicians the ability to send proper replacement parts and the service necessary to get you and your Tempo Fitness upright bike running again! - Page 17 Clean with soap and water cleaners only. Never use solvents on plastic parts. Cleanliness of your bike and its operating environment will keep maintenance problems and service calls to a minimum. For this reason, Tempo Fitness recommends that the following preventive maintenance schedule be followed.
- Page 19 B902 B903 102711’ © 2011 Tempo Fitness Products | Made in China...
Need help?
Do you have a question about the B902 and is the answer not in the manual?
Questions and answers
When you are cycling there is noise coming for inside the frame of the bicycle
The noise coming from inside the frame of the Tempo Fitness B902 bicycle while cycling could be due to the bike not being on a level surface or bolts that were attached during assembly becoming loose. To fix this, ensure the bike is on a level surface, loosen all bolts attached during assembly, grease the threads, and tighten them again.
This answer is automatically generated