
Related Manuals for Topcon X30


Summary of Contents for Topcon X30
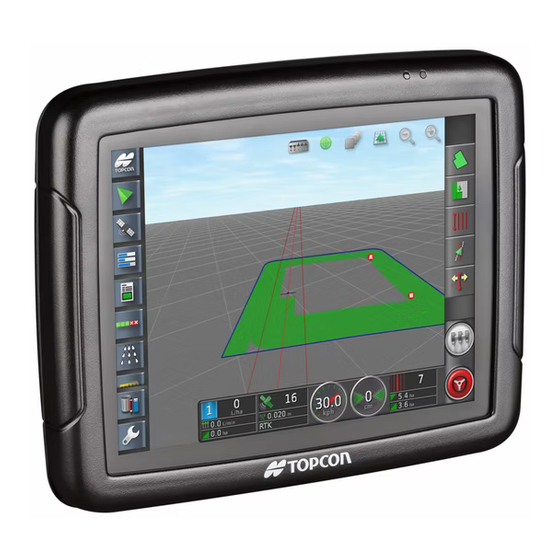
- Page 1 • Console Athene Spreader Control Operator’s Manual www.topconpositioning.com...
- Page 3 © Copyright Topcon Precision Agriculture June 2016 All contents in this manual are copyrighted by Topcon. All rights reserved. The information contained herein may not be used, accessed, copied, stored, displayed, sold, modified, published or distributed, or otherwise reproduced without express written consent from Topcon.
-
Page 5: Terms And Conditions
- No statement contained at the website of TPA or WEBSITE AND OTHER STATEMENTS any other Topcon Group company or in any other advertisements or TPA literature or made by an employee or independent contractor of TPA modifies these Terms and Conditions. - Page 6 RETURN AND REPAIR - During the respective warranty periods, any of the above items found defective may be shipped to TPA for repair. TPA will promptly repair or replace the defective item at no charge, and ship it back to you. You must pay the shipping and handling charges in respect of the same.
- Page 7 Other These Terms and Conditions may be amended, modified, superseded or cancelled, at any time by TPA. These Terms and Conditions will be governed by, and construed in accordance with: the laws of South Australia if the product is sold and supplied to you in Australia (in which case the courts of South Australia or the Federal Court of Australia (Adelaide Registry) have exclusive jurisdiction in respect of any claim or dispute) or the laws of the State of California if the product is sold and supplied to you outside of Australia...
- Page 8 You can check if interference is being caused by this equipment by turning the Topcon equipment off to see if the interference stops. If the equipment is causing interference to a radio or other electronic device, try: Turning the radio antenna until the interference stops...
- Page 9 Good safety practices not only protect you, but also the people around you. Study this manual as part of your safety program. This safety information only relates to Topcon equipment and does not replace other usual safe work practices. WARNING: Ensure power is removed from the Topcon equipment prior to maintenance or repair of the vehicle or implements.
- Page 10 However, it is always advisable not to handle damaged elec- tronic equipment. This Topcon product may contain a sealed lithium battery. Always dispose of any electronic equipment thoughtfully and responsibly.
-
Page 11: Important Safety Information
Topcon accepts no responsibility or liability for damages to property, personal injuries, or death resulting from the misuse or abuse of any of its products. Further, Topcon accepts no responsibility for the use of Topcon equipment or the GNSS signal for any purpose other than the intended purpose. - Page 12 Operation and Risk of Obstacles The following list is not exhaustive or limited. To use the console for assisted steering along a defined wayline, the operator must ensure that it is used: Away from people and obstacles Away from high voltage power lines or other overhead obstructions (identify any clearance problems before activating the console) On private property without public access Within cleared fields...
- Page 13 Be aware of file format compatibility. Discuss compatible formats with the dealer. Topcon Agricultural Products are hardy and designed to work in tough conditions. However, if equipment is unused for a length of time, store away from water and direct heat sources.
-
Page 14: Table Of Contents
Table of contents Chapter 1 – Introduction Chapter 2 – Implement Setup 2.1. Enabling ISOBUS 2.2. Setting up a new implement 2.3. Setting implement geometry 2.4. Setting up section control 2.4.1. Enabling section control 2.4.2. Setting timing 2.4.3. Setting up the section switch 2.5. - Page 15 Chapter 4 – Calibration 4.1. Product calibration modes 4.1.1. Dynamic mode 4.2. Performing calibration (with or without load cells) 4.2.1. Product flow factor – check calibration routine 4.3. Nudge calibration 4.4. Static mode calibration 4.5. Valve calibration Chapter 5 – Operation 5.1.
-
Page 17: Chapter 1 - Introduction
Chapter 1 – Introduction The Athene spreader controller is an ISOBUS UT-compliant monitoring and application control system for self-propelled / trailed belt spreaders spreading lime / granular materials. Forward speed measurement and cutout sensing enables full proportional control, to maintain (within limits) a set application irrespective of changes in forward speed. - Page 18 Machines without load cells: The system relies on volumetric calculation from the known gate height and width, and a known product density (or selecting the product from a pre-defined list). It works best for relatively free-flowing material of consistent density. Machines with load cells: Load cells enable fully-automatic, continuous calibration.
-
Page 19: Chapter 2 - Implement Setup
Chapter 2 – Implement Setup This chapter explains how to setup and configure the console for use with the Spreader Controller features. Note: When the system is new, the following Setup screen displays. -
Page 20: Enabling Isobus
2.1. Enabling ISOBUS 2.1. Enabling ISOBUS Enables the ISOBUS Universal Terminal server that allows interaction with the Athene ISOBUS compliant ECU. To enable ISOBUS / Universal Terminal: 1. Select System / Features / Console 2. Select FILE SERVER and select Enabled. 3. - Page 21 Chapter 2 – Implement Setup Universal terminal: Controls whether the UT server is actively receiving connections from other devices. This may be useful if there are multiple UTs on the bus and multiple UTs claim to be the primary UT (in which case the UT will go offline automatically and require the UT Number to be changed before it will go online again), or to temporarily deactivate the UT on the console.
- Page 22 2.1. Enabling ISOBUS Working set key location: Sets the visibility and location of the keys that switch the interface between ECUs (if more than one ISOBUS compliant ECU is connected). Note: This should be set to Hidden.
-
Page 23: Setting Up A New Implement
Chapter 2 – Implement Setup 2.2. Setting up a new implement Creates a new implement profile for the attached implement. Note: Existing implement files can be imported from a USB. Refer to the Guidance and Auto Steering manual. To create a new implement: 1. - Page 24 2.2. Setting up a new implement front mount double pivoted (tow between) A message displays stating that the console will restart once the implement has been created. A default name for the implement is displayed. Note: It is highly recommended that items are named in a thoughtful and structured way to allow easy use in future seasons.
-
Page 25: Setting Implement Geometry
Chapter 2 – Implement Setup 2.3. Setting implement geometry Sets the implement measurements so that guidance can work accurately. Note: Measure the implement dimensions as accurately as possible. The recommended tolerance is +/- 5 cm. When an ISOBUS implement is connected, some of the geometry items are provided by the implement and cannot be altered in the console user interface. - Page 26 2.3. Setting implement geometry Working Length: Length from the start to the finish of the working area of the boom. Together with swath width, it defines the ‘Working Area’, which is the region that product is applied over for that boom. Overlap: Measures the width of the overlap between two adjacent passes.
-
Page 27: Setting Up Section Control
Chapter 2 – Implement Setup 2.4. Setting up section control Follow these steps to set up section control for the implement. 2.4.1. Enabling section control To use Auto Section Control, this must be enabled. 1. Select System / Features / Implement and set AUTO SECTION CONTROL to Enabled. -
Page 28: Setting Up The Section Switch
2.4. Setting up section control 2. Use a stop watch to time the delay between switching a section on and the application of product. This is the ON TIME. 3. When the section is switched off, time the delay between switching it off and the product ceasing to flow. This is the OFF TIME. -
Page 29: Setting Up Master Switch And Speed
Chapter 2 – Implement Setup 2.5. Setting up master switch and speed 1. Select Implement / Master Switch 2. Set MASTER SWITCH to Virtual. 3. Select Implement / Speed 4. Set ISO GROUND SPEED to Disabled. 5. Set GPS NMEA2000 to Enabled. - Page 30 2.5. Setting up master switch and speed...
-
Page 31: Chapter 3 - Athene Setup
Chapter 3 – Athene Setup 3.1. Switching between setup and operation screen The console has two main screens; the Setup screen and the Operation screen. Use the highlighted buttons to switch between the screens. -
Page 32: Opening The Athene Ut Window
3.2. Opening the Athene UT window 3.2. Opening the Athene UT window To view the Athene UT window: 1. Select the Athene UT icon on the left of the operation screen. 2. Expand the mini-view by selecting the arrow in the top right corner, or by swiping left to right across the mini-view (ending the swipe to the right of the mini-view screen). - Page 33 Chapter 3 – Athene Setup...
-
Page 34: Athene Primary Screens
3.3. Athene primary screens 3.3. Athene primary screens Athene has three primary screens: Main, Totals and Spreader Settings. 1. Press to cycle between the primary screens. Note: The appearance of the screens will vary depending on the selections made on the ISOBUS UT setup screen. Refer to Enabling ISOBUS, page 4. - Page 35 Chapter 3 – Athene Setup target rate is entered on the main screen. The floor (belt) speed is automatically adjusted to maintain the correct rate based on the forward speed and working width. The floor speed is manually controlled using .
- Page 36 3.3. Athene primary screens Main screen fields Forward speed. Calibration mode (see Product calibration modes, page 45). Product remaining (actual weight measurement from load cells for dynamic calibration, a theoretical calculation otherwise). Live, current application rate. Target application rate. Working width (see Setting up working width, page 32). Job information.
- Page 37 Chapter 3 – Athene Setup Function. Default is OFF (see Variable screen display, page 21). Gate height. Belt speed (% of max). Variable screen display The bottom left area of the screen can toggle between job information and spinner speed by pressing the right button, and gate height and auxiliary function by pressing the left button.
- Page 38 3.3. Athene primary screens Manual / auto spinner speed control. Press to toggle between AUTO and MAN mode. In AUTO mode, press to set the spinner speed. Spinners will automatically run at the set speed. In manual mode, they can be adjusted on-the-go. Note: Please refer to the machinery manufacturer's manual to establish the correct spinner RPM for the product / desired spread width.
-
Page 39: Spreader Settings Screen
Chapter 3 – Athene Setup 3.3.1. Spreader settings screen Technician, factory and diagnostics menu should not need to be used during normal use. Technician menu. Requires a password for access. See below for details. Factory menu. Requires a password for access. Diagnostics menu. - Page 40 3.3. Athene primary screens Select calibration mode (see page 45), add weight / tare (see page 42). Set full working width. See Setting up working width, page 32. Used to test the machine in the factory or if there is a problem with the normal forward speed signal.
- Page 41 Chapter 3 – Athene Setup Average weight: Sets whether the average weight is visible on the INFO screen. Info weight: Selects whether the INFO page is based on theorical weight (rotations of floor) or the weight reduction from the load cells.
- Page 42 3.3. Athene primary screens LCI diagnostics: Voltage and weight from the load cell interface. Angle sensor: View the current machine angle. Dynamic calibration: View the actual weight vs. theory weight during each dynamic calibration. Machine: View other miscellaneous input status. There are no user settable options.
-
Page 43: Totals Screen
Chapter 3 – Athene Setup 3.3.1. Totals screen Records the grand total and part totals 1 and 2 of area, weight and the number of loads. Note: The Reset button is used to reset the selected total. -
Page 44: Setting Up Units
3.4. Setting up units 3.4. Setting up units The measurement system is set from the console setup menu, however the units (e.g. kg/ha, tonnes/ha) are set from the Athene setup menu. 1. Select User / Region / Units 2. Select the required UNITS (metric or imperial). 3. -
Page 45: Load Cell Configuration
Chapter 3 – Athene Setup 3.5. Load cell configuration 1. To ensure the software is set to communicate with the load cell interface, from the Spreader Settings screen select Factory Loadcell Interfaces. 2. If the machine is not fitted with load cells, set Function to NOT USED. - Page 46 3.5. Load cell configuration 6. With the spreader parked on flat ground, press the TARE button and this will zero the angle sensor. 7. To set the zero point for the load cell, with the spreader empty select Factory / Loadcell Interfaces / Loadcell Calibration.
-
Page 47: Load Cell Calibration
Chapter 3 – Athene Setup 10. Select Factory / Loadcell Interfaces / Loadcell Calibration. 11. When prompted ‘Is spreader empty?’ select NO and enter the actual weight in the spreader. 3.5.1. Load cell calibration Load cells may drift out of calibration after an initial period of 'bedding in' on a new machine. -
Page 48: Setting Up Working Width
3.6. Setting up working width 3.6. Setting up working width This sets the full working width of the spreader. Note: Please refer to the machinery operators manual to establish the correct spinner RPM for the product / desired spread width. 1. -
Page 49: Setting Up Pre-Start
Chapter 3 – Athene Setup 3.7. Setting up pre-start Pre-start is used to start the floor moving when there is no forward speed. This ensures that there is good coverage at the start of each run, and that irrespective of how the product has been loaded, the spreader does not have to start moving until a suitable amount of product has reached the spinners. -
Page 50: Operating Pre-Start
3.7. Setting up pre-start Default = 8 sec 3.7.1. Operating pre-start 1. Engage hydraulics and/or press on the main screen. Product automatically moves towards spinners. 2. Once the spread pattern is observed, start to drive forward. -
Page 51: Setting Up Boundary Reduction
Chapter 3 – Athene Setup 3.8. Setting up boundary reduction The RPM of a selected spinner can be slowed down (using a hydraulic diverter valve) to reduce the spread width when traversing the field boundary. Note: The boundary should be driven clockwise if the left spinner is selected and anticlockwise if right spinner is selected. -
Page 52: Operating Boundary Reduction
3.8. Setting up boundary reduction 3.8.1. Operating boundary reduction 1. Select the boundary reduction icon to activate. The boundary reduction indicator displays in red below the spreader image when operating. The instrument will beep every 15 seconds to remind the operator that this function is enabled. -
Page 53: Setting Up Products
Chapter 3 – Athene Setup 3.9. Setting up products The system can store 10 different products with customizable names. 1. From the Spreader Settings screen, select Products 2. Select the Product button and the left / right arrows to change the selected product. - Page 54 3.9. Setting up products are theoretically calculated as a result of the volumetric calibration routine (see Calibration, page 45), or an approximate gate height can be entered here if known. Flow Factor: This accounts for any product flow inconsistencies that may come from pelletized (prilled) or low friction products. It can be established either by carrying out a calibration nudge after spreading a certain amount of product (see Nudge calibration, page 52) or by following the check calibration routine...
-
Page 55: Setting Up Alarms
Chapter 3 – Athene Setup 3.10. Setting up alarms 1. From the Spreader Settings screen, select Alarms 2. Select the alarm field to enter the value beyond which the alarm should sound. The system can be set to show an alarm in the following conditions: RPM Lo / High: Spinners 1 and 2 RPM too slow / too fast. -
Page 56: Setting Up Forward Speed
3.11. Setting up forward speed 3.11. Setting up forward speed 1. From the Spreader Settings screen, select General Setup Speed Factor. There are four preset options for the forward speed signal: (0): Magnetic sensor (1 pulse per rev) (1): Magnetic sensor (2 pulses per rev) (2): Radar sensor (0.00778 metres per pulse) (3): GPS (NMEA VTG message) With the exception of option (3), the factors can be manually edited if... -
Page 57: Simulated Speed
Chapter 3 – Athene Setup Note: If you overrun the marker, do not reverse - repeat the Auto Cal procedure from the beginning. 3.11.2. Simulated speed If the speed sensor is not providing a signal, a simulated speed can be set to continue operation. -
Page 58: Adding Product / Tare
3.12. Adding product / tare 3.12. Adding product / tare The main screen displays the current weight remaining in the hopper (a theoretical calculation if volumetric calibration is in effect, or the actual weight measurement from load cells for dynamic calibration). The weight setup screen varies, depending on whether the system has load cells fitted or not (see Load cell configuration, page 29). - Page 59 Chapter 3 – Athene Setup the hopper to capacity, then press OK to reset to full. Now: The current (theoretical) weight remaining in the hopper. To add: The weight required to replenish the hopper (MAX – NOW). When this weight has been added to the hopper, press OK to confirm it has been loaded.
- Page 60 3.12. Adding product / tare...
-
Page 61: Chapter 4 - Calibration
Chapter 4 – Calibration 4.1. Product calibration modes If using load cells, there are two calibration modes: Dynamic: Constant, automatic re-calibration on-the-move. Static: Calibration over a set distance. This mode may be useful if spreading at low application rates or if the product is not flowing freely. - Page 62 4.1. Product calibration modes operator should only have to enter the target rate and working width and all other factors are adjusted in the background to ensure the correct rate is applied. As dynamic calibration is constantly self-correcting, the calibration routine is there to assist in determining the appropriate gate height and to calculate the forward speed range for applying a new product.
-
Page 63: Performing Calibration (With Or Without Load Cells)
Chapter 4 – Calibration 4.2. Performing calibration (with or without load cells) This procedure is applicable if not using load cells and to Dynamic mode if using load cells. See Static mode calibration, page 53 for calibration in Static mode. The calibration factor is called the ‘T’... - Page 64 4.2. Performing calibration (with or without load cells) 4. Confirm the recommended gate height or enter a different gate height if desired. The operating speed range is displayed based on the above calculations. 5. If you have not previously done so, select Check Calibration to determine the 'flow factor' for the product (continue to the next section).
-
Page 65: Product Flow Factor - Check Calibration Routine
Chapter 4 – Calibration 6. Otherwise select Start Spreading to end the calibration sequence and return to the main operating screen. 4.2.1. Product flow factor – check calibration routine The flow factor accounts for any product flow inconsistencies that may come from pelletized (prilled) or low friction products. - Page 66 4.2. Performing calibration (with or without load cells) The system will run the belt for that much product and can then be calibrated once this has been weighed. The greater the volume of product dispensed for calibration, the greater the accuracy. 4.
- Page 67 Chapter 4 – Calibration 9. If dispensing a large volume of product (1000 kg) back in to a bulk store, then enter the Live Kg that is shown from the load cells. Note: To check application rate accuracy, dispense the TOTAL amount of product that is shown in the hopper.
-
Page 68: Nudge Calibration
4.3. Nudge calibration 4.3. Nudge calibration Some discrepancy between the target weight and the actual weight can occur, often due to variations in the actual density of the product from the theoretical density programmed. The calibration factor can be fine tuned to account for any discrepancy. 1. -
Page 69: Static Mode Calibration
Chapter 4 – Calibration 4.4. Static mode calibration The calibration factor is calculated by doing a 'Static Test' routine. This factor remains the same throughout subsequent spreading until either manually adjusted, or another static test is done. Static calibration assumes that the product density will be consistent, therefore results may not be as accurate as with dynamic calibration. -
Page 70: Valve Calibration
4.5. Valve calibration 4.5. Valve calibration This procedure sets the minimum and maximum PWM to move the spreader belt. 1. From the Main Menu select Factory / Channels / Valve Setup. The Belt Valve Setup screen summarizes the current valve settings. 2. - Page 71 Chapter 4 – Calibration 5. With Max Duty selected, increase the belt speed to the maximum it can go. 6. Press to set the maximum PWM output. The Belt Valve Setup screen displays a summary of the new settings.
- Page 72 4.5. Valve calibration...
-
Page 73: Chapter 5 - Operation
Chapter 5 – Operation 5.1. Opening auto section control Auto section control is available when an implement and ECU have been set up and Auto Section Control has been enabled in the Setup screen (System / Features / Implement 1. Select Auto Section Control . - Page 74 5.1. Opening auto section control chosen, some overlap of application is likely near boundaries. The default (50) is a compromise. Boundary limit: Sets which type of boundary limit will turn off spraying when using auto section control. Field Boundary and Headland are defined using the Field menu on the Operation screen.
-
Page 75: Using The Master Switch
Chapter 5 – Operation 5.2. Using the master switch When Virtual has been selected in the Setup screen (Implement / Master Switch), the Spreader Master Switch on the Operation screen turns the spreader system on. This switch does not work if External ECU Sense is selected as the Master Switch. -
Page 76: Variable Rate Control
Importing prescription maps (shapefiles and ISO XML files) into created jobs using the VRC import wizard. Using real-time sensor data from nitrogen sensors mounted on the tractor (for example: Topcon CropSpec). Using Task Data based prescription maps. The following instructions describe the first two methods. If using task data, refer to AGA4084 Guidance Manual. - Page 77 Chapter 5 – Operation Shapefiles ISO XML CropSpec (if enabled) Note that shapefiles and ISO XML cannot be used at the same time. However CropSpec can be used in conjunction with shapefiles or ISO XML If Shapefiles or ISO XML are selected at step 2, all maps previously imported to the current field are displayed so that previously used maps can be recalled.
- Page 78 5.3. Variable rate control Select next. 6. If ISO XML was selected in step 2, select the task that you wish to run. The file may have several tasks listed. Select the task that matches the implement that is hooked up. 7.
- Page 79 Chapter 5 – Operation rescale of 1.1 will apply 110 percent of the rate defined in the source. Default: Defines the rate to use if the source doesn’t specify a rate for that region of the paddock. 8. Select next. 9.
- Page 80 5.3. Variable rate control...
-
Page 81: Chapter 6 - Updating Athene Software
Chapter 6 – Updating Athene Software 1. Copy the folder named 'Apollo' onto the root directory of a USB memory stick, and insert at the rear of the console. 2. From the Main Menu select Factory / Software Info & Reset and confirm. - Page 82 to trigger the new software to be reset. 7. When the console has restarted and the Athene UT screen is available, select the Load Factors button to restore the previous settings from the USB. 8. When ‘Loading Factors’ is complete, switch the console off and back on for the restored settings to take effect.
-
Page 83: Chapter 7 - Index
Chapter 7 – Index alarms 39 SSF Autocal 40 angle sensor 29 static mode 53 ASC 57 tare 42 auto section control 57 technician menu 24 boundary reduction 35 totals screen 27 calibration units setup 28 check 49 update software 65 modes 45 valve calibration 54 nudge 52... - Page 86 Topcon Precision Agriculture Europe Avenida de la Industria 35 Tres Cantos 28760, Spain Phone: +34-91-804-92-31 Fax: +34-91-803-14-15 Topcon Corporation 75-1 Hasunuma-cho, Itabashi-ku Tokyo 174-8580 Japan Phone: +81-3-5994-0671 Fax: +81-3-5994-0672 © 2016 Topcon Precision Agriculture All rights reserved Specifications subject to change without notice...
Need help?
Do you have a question about the X30 and is the answer not in the manual?
Questions and answers
X30 master switch cuts in and out while seedinng
The master switch on the Topcon X30 may cut in and out while seeding if there is an issue with the connection between the bridge and the X30 monitor. If the connection is unstable, the system may not properly synchronize with the ECU, causing interruptions. A flashing blue light on the bridge indicates that the X30 is searching for the connection, and an orange warning suggests a connection issue. This process can take up to 15 minutes to resolve.
This answer is automatically generated