Table of Contents
Advertisement
Quick Links
Download this manual
See also:
Instruction Manual
Art Release for Production (Mechanical)
Sky Instructions Domestic
File Name: SV_Nano_Drone_IS_050215_F1.ai
Revision:
Licensor Approval Date:
Production Release Date: 05/02/15
Production Artist: Hanjin Park
Colors: Pantone 294
Trim Size:
Notes:
TROUBLESHOOTING
PROBLEM
Drone is unresponsive or
behaving erratically
All blades spin, but Drone
will not y properly
Drone drifts in any
direction during ight
without direction from the
remote
Drone crashes
immediately
Drone crashes when
attempting stunt functions
www.skyrockettoys.com/products/sky-viper
Customer Service :
888-674-5650
©2015 Skyrocket Toys LLC, Los Angeles, CA 90066 USA. All Rights Reserved.
Sky Viper is a registered tradmark and the Skyrocket logo are trademarks of Skyrocket Toys LLC.
1A
SOLUTION
• Drone may be miscalibrated by launching from an unlevel
surface. Turn the remote off. Turn off the Drone for 30
seconds, then turn them back on and try again from a at,
level launching surface.
• Ensure your remote is within unobstructed view of Drone and
you are within 30 feet range.
• Ensure the remote has fresh batteries and the LiPo battery
is fully charged.
• Inspect Drone for any possible damage. Turn the remote off
and turn off the Drone for 30 seconds then turn them back
on and try again from a at, level launching surface.
• Drone's blade may have been installed incorrectly. Reinstall
and remember that the GREEN blades point forward.
• Adjust the trim controls until drifting ceases, see page 7.
• Propellers may be installed in the wrong position. Ensure
proper installation.
• Ensure that Drone is ying a minimum distance of 6 feet
from the ground with a minimum 6 feet clearance in all
directions.
#skyviper
#skyviper
™
MADE IN CHINA.
SIZE: 297 x 210mm (folds to 148.5 x 210mm)
BACK COVER / FRONT COVER
200
200
INSTRUCTION GUIDE
CONTENTS
Remote Control
4 Replacement Blades
Remove all packaging attachments before giving the toy to a child.
Not suitable for children under 3 years due to small parts that could be swallowed.
Conforms to product safety standards ASTM F963.
Keep instructions for future reference. Do not discard.
This device complies with PART 15 of the FCC Rules. Operation is subject to the following two conditions. (1) This device may not cause
harmful interference, and (2) this device must accept any interference received, including interference that may cause undesired operation.
CAUTION: Changes or modi cations to this unit not expressly approved by the party responsible
for compliance could void the user's authority to operate the equipment.
NOTE: This equipment has been tested and found to comply with the limits for a Class B digital device, pursuant to Part 15 of the FCC Rules.
These limits are designed to provide reasonable protection against harmful interference in a residential installation. This equipment
generates, uses and can radiate radio frequency energy and, if not installed and used in accordance with the instructions, may cause
harmful interference to radio communications. However, there is no guarantee that interference will not occur in a particular installation. If
this equipment does cause harmful interference to radio or television reception, which can be determined by turning the equipment off and
on, the user is encouraged to try to correct the interference by one or more of the following measures: Reorient or relocate the receiving
antenna - Increase the separation between the equipment and receiver - Connect the equipment into an outlet on a circuit different from
that to which the receiver is connected - Consult the dealer or an experienced radio/TV technician for help.
12
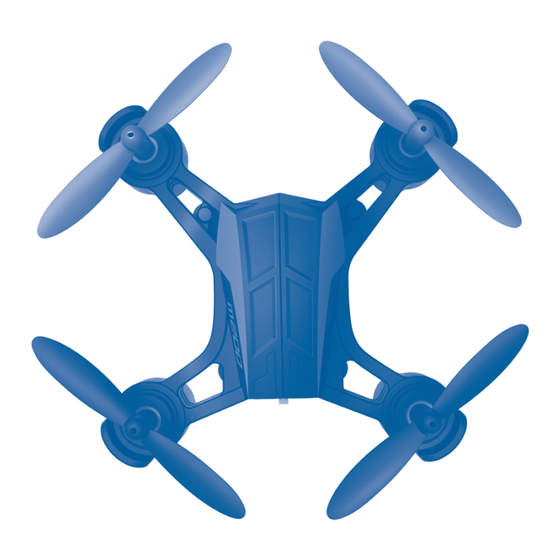
RC Nano Drone
USB Charging Cable
™
Advertisement
Table of Contents

Related Manuals for sky viper M200


Summary of Contents for sky viper M200
- Page 1 Reorient or relocate the receiving Sky Viper is a registered tradmark and the Skyrocket logo are trademarks of Skyrocket Toys LLC.
- Page 2 ADULT SUPERVISION REQUIRED CHANGING DAMAGED PROPELLERS Before each use, an adult should check this product and the LiPo battery to ensure no damage or Turn off the Nano Drone. GREEN hazards exist. Drone has rotating blades that move at high speed, posing danger of damage BLADES Make note of the blade color and and injury.
- Page 3 CHARGING & CARING FOR LIPO BATTERY ONE TOUCH STUNTS IN THE Drone BARREL ROLL Turn OFF Remote Control & Drone. While ying forward (or reverse), press the STUNT BUTTON. Plug small end of the CHARGING CORD into the back of the Drone.
- Page 4 INSTALLING REMOTE BATTERIES FLYING TIPS Loosen screw in the Remote Control battery • When launching the Drone, face the same direction as the Drone. Green blades and compartment door with Philips screw driver and Green LEDs should be in front. insert batteries as shown.
- Page 5 CALIBRATING & LAUNCHING FLIGHT SENSITIVITY ADJUSTMENT Drone responsiveness may be adjusted on the Controller Turn OFF Remote Control. HIGH to match your ying skills. Move the switch on the rear of the Drone to the There are two choices: OFF position. 1- LOW SENSITIVITY 2–...
- Page 6 FLIGHT CONTROLS Familiarize yourself with Drone’s controls before ying! THROTTLE/ROTATION STICK • To make the Nano Drone LIFT, push the Throttle stick FORWARD. • The further you PUSH the Throttle stick, the faster you LIFT. • To make the Nano Drone HOVER, nd the sweet spot on the throttle stick (somewhere in the middle).
Need help?
Do you have a question about the M200 and is the answer not in the manual?
Questions and answers