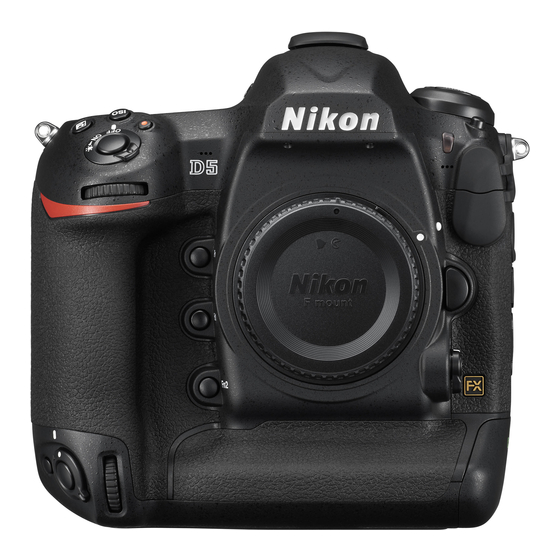
Nikon D5 Professional Setting Manual
Hide thumbs
Also See for D5:
- User manual (512 pages) ,
- Network manual (92 pages) ,
- Menu manual (207 pages)
Table of Contents
Advertisement
Quick Links
Advertisement
Table of Contents

Subscribe to Our Youtube Channel
Related Manuals for Nikon D5


Summary of Contents for Nikon D5
- Page 1 Professional Setting Guide — Movie Edition — Revision 1.0...
-
Page 2: Table Of Contents
Table of Contents Movie-Related Camera Controls ........4 Recording Movies ............... 6 Before Recording ..............8 • Frame Size/Frame Rate ..............8 • Movie ISO Sensitivity Settings ............10 • Set Picture Control.................11 • White Balance .................12 • Microphone Sensitivity ..............13 • Frequency Response ..............13 • Wind Noise Reduction ..............13 More on Movies .............. - Page 3 Restrictions on Available Settings ..........36 • Keeping the Camera Cool ............36 • Image Artifacts ................37 • Ending Recording ................37 Movie Playback Tips and Tricks ........38 • Ten-Second Advance/Rewind ............38 • Skipping to an Index or the Last/First Frame ......38 • Using the Touch Screen ..............39 Joining Movie Files Together ....40 D5 Movie Specifications ..........42...
-
Page 4: Movie-Related Camera Controls
Movie-Related Camera Controls Stereo microphone S (Q) Top control panel USB connector button MODE button E button Headphone Shutter- connector release button Power switch Movie-record button Focus-mode selector HDMI connector AF-mode button Connector for external microphone Sub-command dial Pv button Fn1 button Guide pin Fn2 button... - Page 5 Movie-Related Camera Controls Monitor Sub-selector AF-ON button Main O (Q) button command K button dial G button L (Z/Q ) button X button W (M) button J button Fn3 button Rear control panel T button U button a button i button R button Live view selector Multi selector...
-
Page 6: Recording Movies
Recording Movies 1 Start movie live view. Rotate the live view selector to 1 and press the a button. a button 2 Focus. Frame the opening shot and AF-ON button press the AF-ON button or press the shutter-release button half- way to focus. - Page 7 4 End recording. Press the movie-record button again to end recording and then press a to exit live view.
-
Page 8: Before Recording
Before Recording Before recording, adjust settings in the movie shooting menu. Frame Size/Frame Rate Choose an option according to how you will use the movie. Maximum length Option (★ high quality/Normal) 3840 × 2160 (4K UHD); 30p 3840 × 2160 (4K UHD); 25p 3840 ×... - Page 9 The Movie Crop The movie crop varies with frame size and, at frame sizes of 1920 × 1080 and 1280 × 720, the option selected for Image area > Choose image area in the movie shooting menu. 1920 × 1080 or 3840 × 2160 1280 ×...
-
Page 10: Movie Iso Sensitivity Settings
Movie ISO Sensitivity Settings ISO sensitivity can be adjusted in movie mode (in live view or during recording). • ISO sensitivity (mode M): Choose the ISO sensitivity for exposure mode M from values between ISO 100 and Hi 5. Auto ISO sensitivity control is used in other exposure modes. -
Page 11: Set Picture Control
Before Recording Set Picture Control Choose a Picture Control for movies. • Same as photo settings: Use the Picture Control settings currently selected in the photo shooting menu. • Q Standard: Standard processing for balanced results. Recommended for most situations. •... -
Page 12: White Balance
White Balance Adjust white balance according to lighting conditions. Choose Same as photo settings to use the white balance settings currently selected in the photo shooting menu. Measuring Preset Manual White Balance Instead of using a specially-prepared reference object, you can measure white balance from any white or grey object in the frame. -
Page 13: Microphone Sensitivity
Before Recording Microphone Sensitivity Adjust settings for the built-in stereo microphone or optional ME-1 stereo or ME-W1 wireless microphones. Choose Auto sensitivity to adjust sensitivity automatically, Microphone off to turn sound recording off. To select sen- sitivity manually, select Manual sensitivity and choose a value between 1 and 20 (higher values indicate increased sensitivity). -
Page 14: More On Movies
More on Movies Read this section for information on functions you may find useful when filming movies. The Information Display To hide or display indicators in the monitor, press the R button. Information on Information off Framing guides Virtual Histo- horizon gram... - Page 15 Warnings Temperature warning (displayed in red 30 s before live view ends) Low battery No memory card...
- Page 16 Indicators The following indicators appear in the information display in movie mode (in live view and during recording):...
- Page 17 More on Movies Headphone volume: Volume of audio output to headphones. Dis‑ played when third‑party headphones are connected. Microphone sensitivity: Microphone sensitivity. Sound level: Sound level for audio recording. Displayed in red if level is too high; adjust microphone sensitivity accordingly. Frequency response: The current frequency response.
-
Page 18: Custom Control Assignments
Custom Control Assignments Use Custom Setting g1 (Custom control assignment) to choose the roles played by camera controls during movie recording. Press To choose the roles played by the following controls, high- light an option and press the center of the multi selector: Pv button Fn1 button Fn2 button... - Page 19 More on Movies 0 v x z 1 Record movies — — — — — x Live frame grab — — — — — None — Power Aperture Power aperture is available only in exposure modes A and M and can not be used while photo shooting info is displayed (a 6 icon indicates that power aperture can not be used).
- Page 20 Silent Exposure Compensation At default settings, exposure com- pensation can be adjusted by press- ing the E button and rotating the main command dial. The sound of the dial may however be audible in the audio recorded with movies. This can be prevented by using Custom Setting g1 (Cus- tom control assignment) to assign Exposure compensa- tion + to the Pv button and Exposure compensation −...
- Page 21 More on Movies Starting Recording with the Shutter-Release Button If Record movies is assigned to the shutter-release button and the live view selector is rotated to 1, you can start live view by pressing the shutter-release button halfway and start and end recording by pressing it all the way down. To prevent camera shake, you can mount the camera on a tri- pod and start and end recording using an optional remote cord (such as the MC-36A or MC-30A) or wireless remote...
-
Page 22: Electronic Vibration Reduction
Electronic Vibration Reduction To enable electronic vibration reduction in movie mode, select On for Electronic VR in the movie shooting menu. Electronic vibration reduction is best with hand-held cine- matography; select Off when the camera is on a tripod. Note that if electronic vibration reduction is on, the angle of view will be reduced and the edges of the frame cropped out. -
Page 23: The Movie I-Button Menu
More on Movies The Movie i-Button Menu Pressing the i button in movie mode displays the following options: • Choose image area: Choose an image area for movie recording (page • Frame size/frame rate: Select a frame size and rate (page i button •... -
Page 24: White Balance
White Balance In movie mode, white balance can be set by pressing the U button and rotating a command dial. The Main Command Dial Choose a white balance option. The effect can be previewed in the moni- tor. The Sub-command Dial Fine-tune white balance on the amber (A)–blue (B) axis in increments of 0.5. -
Page 25: Choosing A Picture Control In Live View
More on Movies If Preset manual is selected for white balance, you can use the U button and sub-command dial to choose a preset. Choosing a Picture Control in Live View To choose a Picture Control in live view, press the L (Z/Q) button. The effect of the selected control can be previewed in the monitor. -
Page 26: Photos And Frame Grabs
Photos and Frame Grabs You can interrupt filming and take photos without leaving movie mode or take photos at the current frame size while filming (live frame grab). Taking Photos In movie mode, photos can be taken by keeping the shut- ter-release button pressed all the way down (note that photos will not be taken if the camera is unable to focus). - Page 27 More on Movies Live Frame Grab If Live frame grab is selected for Custom Setting g1 (Custom con- trol assignment) > Shutter-release button, pressing the shutter-release button all the way down during filming will soundlessly take a photo without ending recording. Live Frame Grab Photos are recorded at the current movie frame size (page...
-
Page 28: Creating Stills From 4K Uhd Movies
Creating Stills from 4K UHD Movies During movie playback, you can use Save selected frame to save selected frames of 4K UHD movies as JPEG images. 1 Pause playback on the desired frame. Press 3 to pause playback. 2 Choose Save selected frame. -
Page 29: Hdmi Output
More on Movies HDMI Output The camera can be connected to HDMI devices for high- definition movie playback and recording. Connecting to an HDMI Device The camera can be connected to high-definition video devices using an optional High-Definition Multimedia In- terface (HDMI) cable or a third-party type C HDMI cable. - Page 30 The HDMI Cable Clip When using the optional Nikon HDMI cable, attach the sup- plied clip as shown to prevent accidental disconnection. Do not use cable clips with non-Nikon cables.
-
Page 31: Hdmi Options
More on Movies HDMI Options The HDMI option in the setup menu controls output reso- lution and offers a variety of advanced HDMI options. Output Resolution Choose the format for images out- put to the HDMI device. If Auto is selected, the camera will automati- cally select the appropriate format. -
Page 32: Time-Lapse Movies
Time-Lapse Movies Time-lapse movies can be created from photos shot using time-lapse photography, the interval timer, or unlimited continuous release. In the first case, the camera generates the movie automatically, while the last two methods re- quire third-party movie-editing software, a powerful com- puter, and advanced image-processing skills. -
Page 33: Table: Time-Lapse Movie Techniques Compared
Unlimited Continuous Release Selecting a shutter speed of 4 s or slower in exposure mode S or M lets you take an unlimited number of photo- graphs in continuous release mode (C , or Q ): shooting can continue as long as the battery lasts and there is space on the memory card, regardless of the option selected for Custom Setting d2 (Max. -
Page 34: Filming 4K Uhd Time-Lapse Movies
Filming 4K UHD Time-Lapse Movies Filming 4K UHD time-lapse movies is simple: just select a frame size of 3840 × 2160 for Frame size/frame rate in the movie shooting menu and then follow the steps below. The crop (page 9) is the same as for 4K UHD movies. ... - Page 35 Time-Lapse Movies • Exposure smoothing: Select On to smooth abrupt chang- es in exposure in modes other than M (note that exposure smoothing only takes effect in mode M if auto ISO sensitivity control is enabled in the photo shooting menu). Highlight Exposure Highlight an option and smoothing and press 2.
-
Page 36: Things To Note
Things to Note Some things to note when filming: Restrictions on Available Settings The exposure settings available in movie mode (in live view or during recording) vary with the exposure mode selected. Aperture Shutter speed ISO sensitivity P, S — —... -
Page 37: Image Artifacts
Image Artifacts Flicker, banding, or distortion may be visible in the moni- tor and in the final movie under fluorescent, mercury va- por, or sodium lamps, when power aperture is in use, or if the camera is panned horizontally or an object moves at high speed through frame. -
Page 38: Movie Playback Tips And Tricks
Movie Playback Tips and Tricks Some tips for viewing movies: Ten-Second Advance/Rewind Rotate the main command dial one click to advance or rewind 10 sec- onds. Skipping to an Index or the Last/First Frame If you added index markers during recording, you can skip to the next or previous index frame by rotating the sub-command dial during play-... -
Page 39: Using The Touch Screen
Using the Touch Screen The touch screen offers the following movie playback con- trols: Play/Pause/Resume Tap the a icon to start playback and tap the monitor to pause or resume. a icon Skip Tap the progress bar to skip to the selected position and pause play- back. -
Page 40: Joining Movie Files Together
Joining Movie Files Together Each movie recorded with the D5 may consist of up to 8 files of up to 4 GB in size. These files can be joined together in ViewNX-i. 1 Select the files in the movie. Right-click any of the files in the movie and choose Se- lect Set of Continuous Movies to select all the movie’s... - Page 41 2 Launch ViewNX-Movie Editor. Click the (movie) button to launch ViewNX-Movie Editor. 3 Click Combine movies. The options at right will be displayed. Click Combine Movies. 4 Save the movie. Choose a destination and file name and click Out- put.
-
Page 42: D5 Movie Specifications
D5 Movie Specifications Image sensor Image sensor 35.9 × 23.9 mm CMOS sensor Total pixels 21.33 million Dust-reduction Image sensor cleaning, Image Dust Off reference data (Capture system NX-D software required) Storage Media • Models for use with XQD cards: XQD cards •... -
Page 43: Picture Control
Movies ∶ ∶ Sampling rate • Internal storage: 4 0, 8 bit ∶ ∶ • HDMI output: 4 2, 8 bit File format Video compression H.264/MPEG-4 Advanced Video Coding Audio recording format 48 kHz, 16-bit linear PCM Audio recording Built-in stereo microphone; external microphone (imped- device ance 2.2K Ω);... -
Page 44: Power Source
D5 Movie Specifications Monitor 8-cm/3.2-in., approx. 2359k-dot (XGA) TFT touch-sensitive LCD with 170 ° viewing angle, approximately 100% frame coverage, and manual monitor brightness control Interface SuperSpeed USB (USB 3.0 Micro-B connector); connection to built-in USB port is recommended HDMI output...
Need help?
Do you have a question about the D5 and is the answer not in the manual?
Questions and answers