Nikon D5200 Installation Manual
Hide thumbs
Also See for D5200:
- User manual (370 pages) ,
- Reference manual (264 pages) ,
- Quick setup manual (4 pages)
Table of Contents
Advertisement
Quick Links
Vizoo xTex
INSTALLATION MANUAL
Please read the safety instructions before using the
!
device. Read this Quick Setup Guide for the correct setup
and installation.
Technical data of the equipment and general safety:
Mains connection
Voltage:
Eletrical Safety:
Climatic conditions
ONLY use in dry rooms!
Temperature: 0 to max. 40 °C
Operating humidity: 0% bis 80 % r.F, non-condensing
Operating altitude: 0 to 2000m above sea level
Additional Safety Information:
o
Place the appliance on a flat, stable, and vibration-free surface such as a desk. Choose a dry,
well-ventilated area out of direct sunlight. Do not place the device on a carpet to protect it
from dust.
o
DO NOT place objects on the device .
o
DO NOT slide in any objects through the slots of the device
They may touch dangerous current carrying parts or cause a short circuit and resulting in a
fire or electric shock.
If objects made of metal, water or other liquids get into the unit, unplug the power cord
immediately.
rev. 1.1
100VAC to 240VAC 50/60 Hz
CE conformity
1
Advertisement
Table of Contents

Related Manuals for Nikon D5200


Summary of Contents for Nikon D5200
- Page 1 Vizoo xTex INSTALLATION MANUAL rev. 1.1 Please read the safety instructions before using the device. Read this Quick Setup Guide for the correct setup and installation. Technical data of the equipment and general safety: Mains connection Voltage: 100VAC to 240VAC 50/60 Hz Eletrical Safety: CE conformity Climatic conditions...
- Page 2 DO NOT use flammable substances, spray, or organic solvent / liquids containing alcohol or ammonia to clean the inside or outside of the device. Otherwise fire or electric shock can occur. Turn off the device when it is not in use for more than an hour. Unplug the power cord when not using the unit for more than one day.
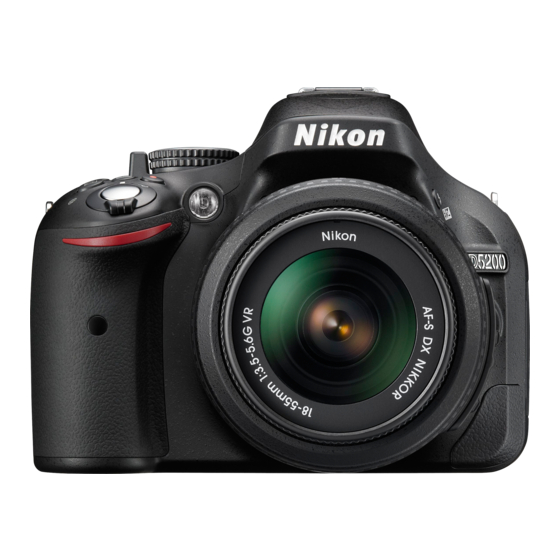
- Page 3 For packaging plastic bags and other packaging elements made of plastic were used. Keep them out of reach from babies and children to prevent suffocation. Housing Camera (Nikon D5200, Nikon D800, Nikon D810 or Nikon D850) Lens (model might differ...
- Page 4 Camera Manual (Nikon, possibly no paper copy available) Download link: https://customers.vizoo3d.com/manual_d5200_en https://customers.vizoo3d.com/manual_d800_en https://customers.vizoo3d.com/manual_d810_en https://customers.vizoo3d.com/manual_d850_en Camera Mount Power cable (Inlet connector) USB Connector cable to PC...
- Page 5 Camera Power Adapter (Nikon EP-5A or Nikon EP-5B, can be pre-installed) Camera Screw (with or without seal) Fixing Screw (for Camera Mount) Calibration chart (model might differ from image)
-
Page 6: Device Overview
2. Device Overview Camera mount guide Lens bracket Power indication light Pullout Device housing Capturing surface Pullout (open) - Page 7 Power supply (camera) USB port (camera) USB port (PC) Main Power switch (on/off) Mains connection Electronics...
- Page 8 3. Installation of the Camera mount • First, set the camera mount into the guide on top of the housing. Make sure that the shorter side of the bracket is in the guide. • Then turn the fixing screw into the thread of the guide. Tighten the screw slightly so that the camera position can still be moved in the guide.
-
Page 9: Mounting The Camera
4. Mounting the Camera Please carefully read the safety instructions and the instructions on how to attach the lens in the camera's manual before you start with the installation. • Assemble the lens to the camera as described in the camera's manual. •... -
Page 10: Connecting The Device
This can cause serious damage to the xTex device. • Connect the camera USB cable. Nikon D5200 only: (In case the cable is not already installed) Connect the plug of the USB cable with the female connector of the USB extension cable. -
Page 11: Before Initial Operation
Set it to "OFF" • Set the focus mode of the camera / lens to autofocus. Nikon D5200 only: Switch the A-M switch of the lens (Autofocus / man. Focus) to "A". Nikon D800/D810/D850 only: Switch the A-M switch of the camera to „AF“. - Page 12 Switch the M/A-M switch of the lens (Autofocus/man. Focus) to „M/A“. • Turn on the power with the main power switch. → The power indication light on the front of the device should now be light green. • Turn on the camera. •...
-
Page 13: Regular Operation
7. Regular operation After the unit has been set up as described above, it is now ready for normal operation. Please repeat the steps of section 6 whenever you change the device setup, e.g. by removing the camera, changing the lens or using the zoom ring of the lens (not available on all models). - Page 15 Vizoo GmbH Johann-Karg-Str. 30 85540 Haar © 2017 Printed in Germany...
Need help?
Do you have a question about the D5200 and is the answer not in the manual?
Questions and answers