
Subscribe to Our Youtube Channel
Related Manuals for Mother's Choice ebony


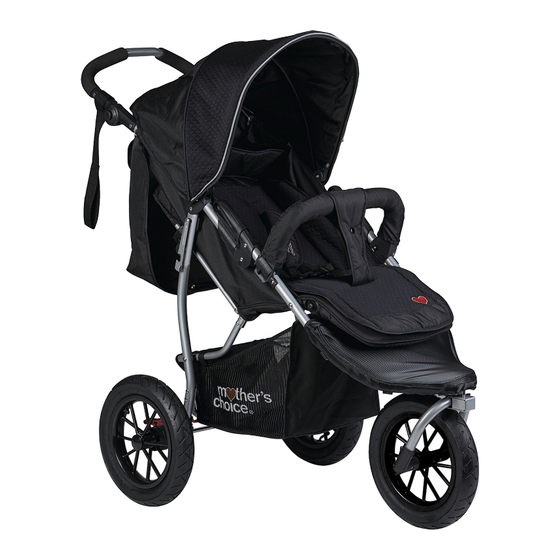
Summary of Contents for Mother's Choice ebony
- Page 1 3 wheel stroller manual Illustrations and designs may vary. follow us on the only choice motherschoice.com.au...
-
Page 2: Table Of Contents
assembling the stroller Components list ........4 Opening stroller ........5 Rear wheels assembly ......6 contents Front wheel assembly ......7 Bumper bar ..........8 Crotch pad ..........9 using the stroller Using canopy ........9 Front swivel wheel ......10 Operating brakes ......... - Page 3 These instructions detail the safe use, assembly and maintenance of your product. Please read these instructions carefully and ensure that they are followed at all times. Failure to do so could result in serious injury or death. WARNING TO AVOID INJURY OR DEATH: ALWAYS APPLY THE BRAKES WHENEVER THE STROLLER IS STATIONARY.
-
Page 4: Components List
3 wheel stroller components list Handle Adjustable legrest Brake lever Handle adjustment Safety harness Rear wheel (both sides) Crotch pad Carry basket Tether strap Bumper bar Front wheel assembly Folding lock Canopy Front wheel swivel lock (both sides) Storage lock... -
Page 5: Opening Stroller
3 wheel stroller assembling stroller storage latch unclip Step 1: opening stroller • If the stroller has a security tie, please remove it. • Release the storage latch (Figure 1a). • To unfold the stroller, simultaneously lift handle ) while resting your foot on the bar beneath... -
Page 6: Rear Wheels Assembly
3 wheel stroller assembling stroller Step 2: attach rear axle push push • Align the rear axle over the rear leg tubes (Figure 2a). • Push the rear axle on the rear leg tubes until the locking pin mechanism engages (Figure 2b). -
Page 7: Front Wheel Assembly
3 wheel stroller assembling stroller Step 4: fit front wheel assembly • Lay the open stroller with the handle on the floor and the fork facing upwards (Figure 4a). • Align the wheel assembly to the front forks. • Push the two black plastic connectors over the front wheel fork tubes (Figure 4b). -
Page 8: Bumper Bar
3 wheel stroller assembling stroller align step 5: bumper bar • Open the swivel clips fitted to each side of the bumper bar. • Align bumper bar with the frame (Figure 5a). • Clip the ends of the bumper bar onto the frame (Figure 5b) • Close the clips on both sides (Figure 5c) -
Page 9: Crotch Pad
3 wheel stroller assembling / using stroller step 6: attaching crotch pad • Wrap the crotch pad around the bumper bar and attach the press stud (Figure 6). removing crotch pad • To remove, detach the press stud press and unwrap from the crotch pad from the bumper bar. -
Page 10: Front Swivel Wheel
3 wheel stroller using stroller operating front swivel wheel • TO LOCK: Press the swivel lock in the middle of the unit upwards locked press up in each wheel (Figure 8a). straight to lock • TO UNLOCK: Press the swivel lock downwards in each wheel (Figure 8b). -
Page 11: Operating Brakes
3 wheel stroller using stroller Operating brakes • To apply the brake, press down firmly on the red brake pedal (Figure 9a). press down to apply • To release the brake, lift the brake pedal until the brakes have fully disengaged (Figure 9b). WARNING Apply all brakes whenever you park the stroller. -
Page 12: Adjusting Handle
3 wheel stroller using stroller multiple positions swivel press adjusting handle • Press both adjustment buttons simultaneously and rotate to the desired position (Figure 10). • Listen for ‘click’. -
Page 13: Adjusting Backrest
3 wheel stroller using stroller to adjust backrest 4 positions • To lower the backrest, hold the top of the backrest adjuster located at the top of the seat and pull up on the lower lock (Figure 11), then release the backrest to desired position. -
Page 14: Attaching Raincover
3 wheel stroller using stroller raincover • Spread the raincover over the stroller and around the handle. • Attach the velcro tabs in 3 places , and , Figure 13), and attach front hook ( • Repeat steps for both sides. -
Page 15: To Fold The Stroller
3 wheel stroller using stroller to fold the stroller • Apply all brakes. • Remove all items in the shopping basket. press • Fold the canopy. down pull • Unlock front swivel wheel. • Adjust the seat backrest to full layback position (see page 13). -
Page 16: Folding Stroller
3 wheel stroller using stroller pull to unfold to unfold the stroller • Prior to unfolding, make sure storage latch is release (Figure 15a). • Simultaneously lift handle ( while resting your foot on the bar clip beneath the back of the shopping... -
Page 17: Securing Your Child
3 wheel stroller using stroller WARNING Securing your child Use this harness at all times. • The harness strap can be adjusted by moving each strap’s slider ( A five-point harness is provided to secure your child. • The buckle is released by pressing the centre button. -
Page 18: Adjusting Harness Height
3 wheel stroller using stroller adjusting harness height lower slot • The harness can be set at two heights, as upper slot displayed in Figure 16a and 16b. • To use the lower slot, undo the buckle and feed the shoulder straps in through the loop (Figure 16c) before securing harness. -
Page 19: Tether Strap
3 wheel stroller using stroller tether strap • Whenever a child is in the stroller and brakes are NOT engaged, the large loop should be around your wrist (Figure 16). WARNING Correct use of the tether strap will prevent stroller runaway and possible injury to your child. -
Page 20: Care And Maintenance
3 wheel stroller care and maintenance • Always store in a clean and dry place. • Clean the frame by wiping with a damp cloth. • Do not use abrasives, bleach or strong detergents. • Spot clean fabrics with warm water and mild soap. -
Page 21: Notes
notes:... - Page 22 notes:...
-
Page 23: Product Registration
mother’s choice tip... follow us on motherschoice.com.au Visit us online to register your new Mother’s Choice product. www.motherschoice.com.au/product-registration benefits of registration • Your safety - allows us to contact you with important product notifications. • Confirmation of ownership - provides a record in case of product loss or theft. • Improved product development - helps us continue to design products that meet your needs. to prevent loss or fading, please attach your receipt here:... -
Page 24: Customer Service
motherschoice.com.au DOREL AUSTRALIA PTY LTD 655-685 Somerville Road Sunshine West Victoria 3020 Email: customerservice@dorel.com.au Phone: 1300 809 526 Hours: 8:30 am - 5:00 pm Monday to Friday IGC DOREL NEW ZEALAND LTD 14 Sir William Avenue East Tamaki Auckland 2013 Email: customerservice@igc.co.nz Phone: 0800 628 000 (toll free) Hours: 8:00 am - 5:00 pm Monday to Friday...
Need help?
Do you have a question about the ebony and is the answer not in the manual?
Questions and answers