Table of Contents
Advertisement
Advertisement
Table of Contents

Related Manuals for PYLE Audio PPTCM80BT


Summary of Contents for PYLE Audio PPTCM80BT
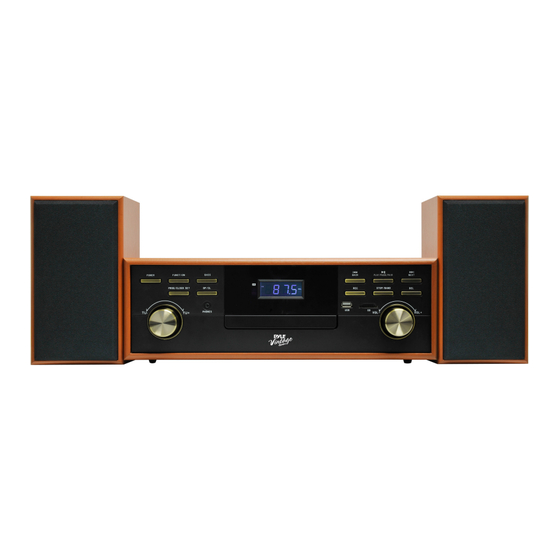
- Page 1 Vintage Bluetooth Turntable Speaker System User Manual PPTCM80BT...
-
Page 2: Accessories Included
CAUTION RISK OF ELECTRIC SHOCK DO NOT OPEN CAUTION: TO REDUCE THE RISK OF ELECTRIC SHOCK, DO NOT REMOVE THE COVER (OR BACK). NO USER-SERVICEABLE PARTS INSIDE. REFER ALL SERVICING TO QUALIFIED SERVICE PERSONNEL. The lightning bolt with an arrowhead within a triangle indicates the presence of non-insulated dangerous voltage within the product enclosure that may be of sufficient magnitude to constitute a risk of electric shock to persons. - Page 3 PARTS / BUTTONS MAIN UNIT 18. Tuning control knob 1. Turntable platter 19. Programme/Clock set button 2. 45 rpm adapter 20. Headphone jack 3. Tone arm 21. CD door Open/Close button 4. Speed selector 22. CD door 5. Auto-stop (ON/OFF) switch 23.
-
Page 4: Getting Started
REMOTE CONTROL Before use remote control, you have to install two “AAA” battery (not included) 1. POWER button 2. MUTE button 3. FUNCTION button 4. PLAY/PAUSE/PAIR button 5. BACK- button 6. STOP/BAND button 7. NUMBER buttons 8. PROGRAM/CLOCK SET button 9. -
Page 5: Operating The Radio
SPEAKER CONNECTION FOR EXTERNAL SPEAKERS - RCA JACK Before using main unit, You should connect the external speakers (4 ohm) via the “Speaker output” L, R sockets (cables and external speakers are included), as shown below (line drawing for reference, not actual product): 1. -
Page 6: Line-Out Connection
OPERATING THE GRAMOPHONE Before use, please make sure to: Remove the stylus protector. Ensure the Tone Arm is free to move from the Tone Arm rest. Lock the Tone Arm in place again when not in use. Listening to records 1. - Page 7 OPERATING THE COMPACT DISC/MP3 PLAYER LOADING AND UNLOADING COMPACT DISCS 1. Set the FUNCTION button (12) to CD mode. 2. Open the disc compartment by pressing the CD door Open/Close button (21). 3. When the disc compartment has opened, carefully place the CD in the compartment with the label facing up.
- Page 8 RECORDING FROM CD You can record your favourite CD songs in MP3 format and store them on a memory device via the USB port or SD/MMC card slot. 1. Set the FUNCTION button (12) to CD mode. 2. Insert the USB flash drive into the USB slot. Press the RECORD button (24). “CHE” will flash on the display for around 3 seconds and then show “ONE”.
- Page 9 3. Press the PAIR button (16) on the unit. The pairing indicator will flash quickly. When pairing, remain within 10 metre of the unit. 4. Using the native controls on your Bluetooth device, select the network name Pyle Audio in your Bluetooth settings to pair. Bluetooth version 2.1 +EDR, with a range of 30+ feet.
-
Page 10: Auxiliary Input
AUXILIARY INPUT 1. Set the FUNCTION button (12) to PHONO mode and then use an audio cable (not included) with a 3.5 mm stereo plug on each end of the cable. 2. Plug one end of the cable into the AUX-IN jack (30) on the back of the unit (“Aux” will be displayed) and the other end into the Line-out jack or Headphone jack of your external audio device to be able to listen to the external source through that system‟s speakers. -
Page 11: Troubleshooting Guide
TROUBLESHOOTING GUIDE Problem Possible cause Solution The unit is disconnected from Connect to the AC outlet. The unit does not the AC outlet. respond (no power) Try the unit on another outlet. The AC outlet has no power. Volume not adjusted. Adjust the volume level. - Page 12 Specifications AMPLIFIER Output power……………………………………………..…… 2W+2W Frequency response…………………………………………..60 TO 20,000 Hz GRAMOPHONE Motor……………………………………………………….……DC servo motor Drive system……………………………………………………Belt drive Speed………………………………………………………….. 33-1/3 rpm, 45 rpm and 78 rpm Wow & Flutter…………………………………………………..Less than 0.3% (WTD) SNR ……………………………………………………………..More than 35 dB Cartridge type…………………………………………………..Ceramic stereo cartridge Output level……………………………………………………..1 KHz -500 mV SPEAKER SYSTEM Impedance………………………………………………………4 ohm...
Need help?
Do you have a question about the PPTCM80BT and is the answer not in the manual?
Questions and answers