Table of Contents
Advertisement
Quick Links
31331
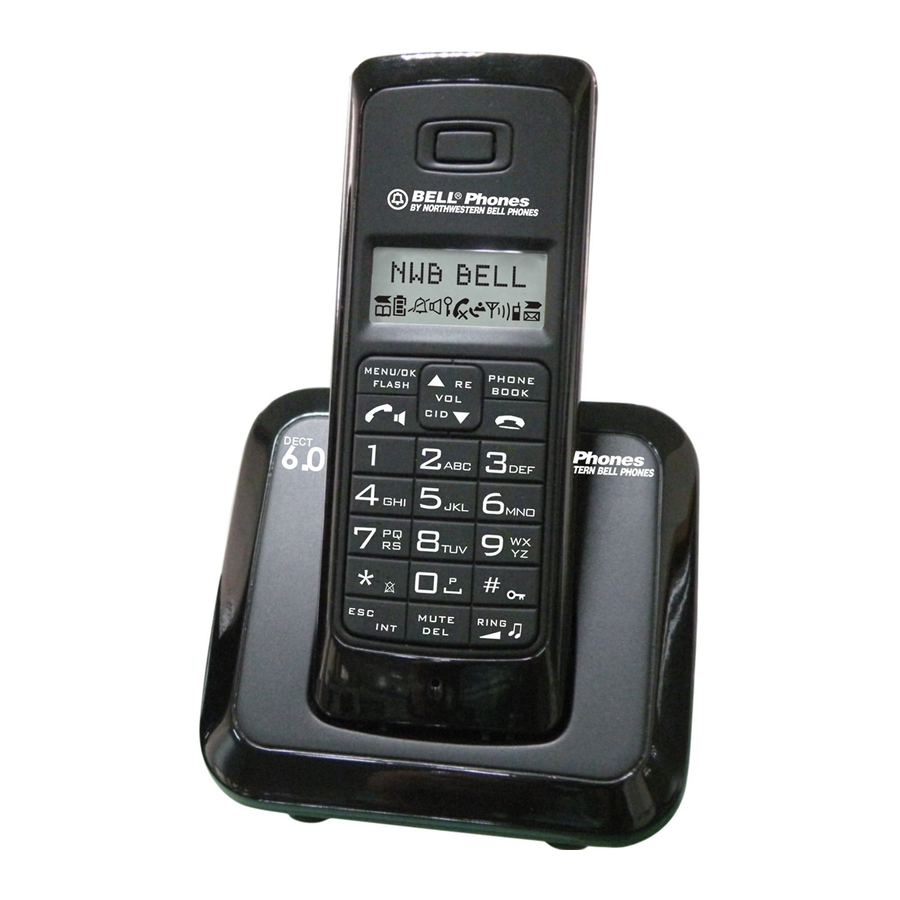
Call Waiting Caller ID
Cordless Telephone
Congratulations on your selection of DECT 6.0 Digital
Cordless Telephone from Northwestern Bell Phones. This
quality DECT 6.0 Call Waiting Caller ID Cordless
®
Telephone, like all Genuine BELL
products has been
designed to give you many years of continuous service
and represents the best value for your money. It requires
little maintenance and is easy to setup and operate.
Advertisement
Table of Contents

Related Manuals for Bell Phones 31331

Summary of Contents for Bell Phones 31331
- Page 1 31331 Call Waiting Caller ID Cordless Telephone Congratulations on your selection of DECT 6.0 Digital Cordless Telephone from Northwestern Bell Phones. This quality DECT 6.0 Call Waiting Caller ID Cordless ® Telephone, like all Genuine BELL products has been designed to give you many years of continuous service and represents the best value for your money.
-
Page 2: Important Service Information
THIS SYMBOL IS INTENDED TO ALERT THE USER OF THE PRESENCE OF IMPORTANT OPERATING AND MAINTENANCE (SERVICING) INSTRUCTIONS IN THE OWNER'S MANUAL CARTON CONTENTS 31331-4 Base Unit Handset Unit Rechargeable Battery Pack (2.4V Ni-MH AAA) Base Adapter... -
Page 3: Table Of Contents
TABLE OF CONTENTS Important Service Information................... 1 Warning ..........................1 Carton Contents........................1 Important Safety Instructions .................... 4 Installation Precautions ..................... 5 Maintenance........................5 Battery Cautionary Instruction ..................5 FCC Notice .......................... 6 Caller ID Question & Answer .................... 7 CONTROLS DIAGRAM ....................... - Page 4 MENU Function Programming 1 - PHONEBOOK SETTING........... 18 Add a Phonebook Entry ....................18 Dial a Phonebook Entry ....................18 Edit a Name and Number ..................... 18 Delete an Entry from the Phonebook Directory ............18 Delete All Entry from the Phonebook Directory............19 MENU Function Programming 2 - HANDSET SETTING..........
-
Page 5: Important Safety Instructions
product where people will step on SAVE THESE INSTRUCTIONS the cord. IMPORTANT SAFETY 9. Do not overload wall outlets and extension cords as this can result INSTRUCTIONS in the risk of fire or electric shock. 10. Never push objects of any kind When using your telephone equipment, into this product through cabinet basic safety precautions should always... -
Page 6: Installation Precautions
E. If the product has been equivalent type by the manufacturer. dropped or the cabinet has Dispose of used batteries according been damaged. to the manufacturer's instructions. F. If the product exhibits a 1. Use only the battery pack type distinctive change in provided with the unit. -
Page 7: Fcc Notice
Changes or modifications not expressly approved in writing by Northwestern Bell Phones may void the user’s authority to operate this equipment. Some cordless phones operate at frequencies that may cause interference to nearby TVs and VCRs;... -
Page 8: Caller Id Question & Answer
CALLER ID Question & Answer Caller ID devices allow you to take advantage of the Caller Identification Delivery service offered by your local telephone company. For more information, you can refer to the following Questions and Answers table: Questions Answers A Caller ID is a device that identifies the calling What is party before you answer a call. -
Page 9: Controls Diagram
CONTROLS DIAGRAM... -
Page 10: Controls Description
(Volume DOWN) – After pressing CONTROLS DESCRIPTIONS: the VOLUME button, you can press SCROLL DOWN button to adjust the Handset Volume. HANDSET CONTROLS: RINGER ON-OFF / * TEMPORARY LCD Display - Shows caller information, TONE Button: phone status, prompts and phonebook (RINGER ON-OFF) - Press and Hold directory items and other Function menu a few seconds to turn the RINGER... -
Page 11: Base Unit Controls
KEYPAD LOCK-UNLOCK / # / DIAL 6V DC Adaptor Jack (Bottom of BACK OPTION key Button: Base Unit): - Press and Hold to lock or unlock the - A jack located on the rear side of functions of the NUMERIC and the base unit used for connecting the FUNCTION Key buttons. -
Page 12: Power Connection
Setting to TONE/PULSE Mode 3. Place the battery compartment • If your home is equipped with cover by sliding it up towards the tone-dialing service set the handset. TONE/PULSE setting to TONE NOTE: Use the type and size of Ni- (default setting of your phone is MH battery pack, 2.4V AAA battery TONE). -
Page 13: Telephone Operation
LEFT Arrow scroll TELEPHONE OPERATION display RIGHT Arrow scroll To Place a Call: display 1. Press the [TALK BUTTON], the Phone Book call timer starts to count. 2. Wait until you hear a dial tone Battery Charge Level and then dial the phone number. 3. -
Page 14: Activating Mute Feature During Calls
Activating MUTE feature during Calls: the number you last called This function allows you to temporarily appears on the LCD display. deactivate the phone microphone during Press the [SCROLL UP or DOWN BUTTON] to select one a conversation. You can speak in private without being heard on the other phone of the last three dialed number line. -
Page 15: Function Feature For Two Or More Handsets
transfer the phone call. The NOTE: The call timer will start to count selected extension handset will once you press the [TALK BUTTON]. beep to alert the extension handset for Intercom call. 2. When the other handset takes (Call Timer Display) the line, you can talk internally (via INTERCOM mode). -
Page 16: Flash Function
Flash Function: the numbers are saved in a Call List. While in TALK mode, Press the [FLASH This list can hold 20 Caller ID BUTTON] to access custom calling telephone numbers (each with maximum 23 digits). If you have the features such as Call Waiting or Three- number is longer than 14 digits, you Way Calling provided by your local... -
Page 17: Calling A Number From The Call List
3. You can scroll from name to number 10 Digit Phone Number Option: and date by pressing [PHONEBOOK - Press [# BUTTON] to add the BUTTON]. Three Digit Area Code before 4. Press the [SCROLL UP BUTTON] to the 7 digit phone number. review the next call. -
Page 18: Delete All Number From The Caller List
Delete ALL Numbers from the Caller 1. When you receive a “Call Waiting” call and you want to List: connect the call, press the [FLASH BUTTON] and start NOTE: You can only delete the Caller ID talking with the second caller. numbers which are already reviewed 2. -
Page 19: Menu Function Programming 1 - Phonebook Setting
NOTE: When no active buttons are 2. Enter the first letter of the pressed for 20 seconds, the LCD Screen desired name or phonebook will automatically return to STANDBY entry via the alphanumeric mode. keypad. 3. The first name in the list with this letter appears on the display. -
Page 20: Delete All Entry From The Phonebook Directory
3. Press [OK BUTTON] to enter the - OFF phonebook Menu. > Select Base 4. Press [SCROLL UP or DOWN - Auto BUTTON], to select “DELETE - Manual ENTRY” and press [OK BUTTON] to > Reset confirm and the handset will prompt - Reset? you to reconfirm the delete all - Pin_ _ _ _ (enter 4 digit pin... -
Page 21: Handset Ringer Volume
desired Melody (selection 1 to 9) by 1. While in STANDBY mode. means of [SCROLL UP or DOWN Press [MENU BUTTON]. BUTTON]. 2. Press the [SCROLL UP or 2. Press the [MELODY BUTTON] DOWN BUTTON] to go to the again to confirm the setting. “HANDSET”... -
Page 22: Handset Key Pad Beep Tone On/Off
2. Press [SCROLL UP or DOWN 3. Press the [SCROLL UP or BUTTON] to scroll to “AREA CODE” DOWN BUTTON] to go to the and press [OK BUTTON]. “SELECT BASE” Setting, press 3. The current Area code number will [OK BUTTON]. be displayed. -
Page 23: Menu Function Programming 3 - Base Setting
“HANDSET” Setting and press [OK and press [SCROLL UP or BUTTON]. DOWN BUTTON] to scroll to 2. Press [SCROLL UP or DOWN “BASE SETTING” and press [OK BUTTON] to scroll to “LANGUAGE” BUTTON]. and press [OK BUTTON]. 2. Press [SCROLL UP or DOWN 3. -
Page 24: Menu Function Programming 4 - Date Time Setting
Setting and press [OK BUTTON]. Enter YEAR? 2. Press [SCROLL UP or DOWN - Press the TELEPHONE BUTTON] to scroll to “SYSTEM PIN” KEYPAD button (selection from and press [OK BUTTON]. 00 to 31) to enter the year and 3. Enter the OLD PIN and press [OK press [OK BUTTON]. -
Page 25: Base
You can purchase additional extra MENU Function Programming 6 handset to expand your DECT 6.0 DE-REGISTER (HANDSET phone system to maximum of Four DE-REGISTRATION to BASE): Handsets. DE--REGISTER You only need to register (subscribe) the handset if: 1. The Handset registration (subscription) is disrupted and >... -
Page 26: Technical Information
Improving Cordless Reception: TECHNICAL INFORMATION Follow these guidelines to improve cordless sound quality: This DECT 6.0 cordless phone uses radio frequencies to allow mobility. • It is closest to the center of your There are certain difficulties in using home or office. This will improve radio frequencies with a DECT 6.0 the operating range of the unit. -
Page 27: Character Entry Table
CHARACTER ENTRY TABLE If you are assigning names for stored phone numbers into memory, please follow the table below to determine the equivalent keypad keystrokes are needed for a certain character. Please refer to “STORING PHONE NUMBERS” on how to store phone numbers. -
Page 28: Troubleshooting
TROUBLESHOOTING TELEPHONE UNIT TROUBLESHOOTING TABLE SYMPTOM SOLUTION • No dial tone Check for the telephone line cord connectors at both ends that they are pushed in firmly until they click. • Does not ring Check to see if the programmable ringer volume is set to OFF. -
Page 29: Caller Id Troubleshooting
CALLER ID SYSTEM TROUBLESHOOTING TABLE SYMPTOM SOLUTION • The Caller ID LCD Check the power connections. • Check the telephone line cord connections. panel is blank • Check the batteries for proper installation. • The handset LCD panel will only start displaying information after the first call is received. - Page 30 31331/181010...
Need help?
Do you have a question about the 31331 and is the answer not in the manual?
Questions and answers