Table of Contents
Advertisement
Quick Links
Advertisement
Table of Contents

Related Manuals for B&G H3000


Summary of Contents for B&G H3000
- Page 1 www.bandg.com...
-
Page 3: Table Of Contents
Liability and Safety Warnings ................8 About B&G ....................... 9 About this Handbook ..................9 SYSTEM INTRODUCTION H3000 System Example .................. 11 H3000 Pilot ACP ..................... 12 Graphical Pilot Display (GPD) ............... 13 Hand-Held Controller ..................14 Joystick ......................15 Man Overboard Button .................. - Page 4 H3000 Pilot Handbook Show Alarms on this Display ..............43 Favourites ....................44 Units......................45 Unit Information ..................46 Key Lock ....................46 Commission ..................... 46 Use SOG as Speed Input ................46 Heading ...................... 47 Pilot ......................47 System ....................... 48 PILOT OPERATION Engaging the Pilot ...................
- Page 5 H3000 Pilot Handbook Checking the Boat Lag ................71 Boat Lag Response ..................71 Setting the Boat Lag Value ................ 72 Advanced Settings ................... 72 Speed Source ..................... 73 Automatic Response .................. 73 Recovery Mode ..................74 Nav Source ....................75 Magnetic Dip Zone ..................
- Page 6 H3000 Pilot Handbook Steering System Orientation ..............103 RRF Position.................... 104 Drag-Link & RRF Position..............104 Linear Feed Back Unit ................105 Diagnostic Data Fault Diagnosis ....................107 HB-3001-03...
-
Page 7: Notification
H3000 Pilot Handbook B&G NOTIFICATION The information contained in this document is subject to change without prior notice. Navico UK Ltd. shall not be liable for errors contained herein or for incidental or consequential damages in connection with the furnishing, performance or use of this document. -
Page 8: Liability And Safety Warnings
Warning: Operational Hazard The H3000 system is an Electronic Navigation aid and is designed to assist in the navigation of your yacht. It is not designed to totally replace conventional navigation procedures and precautions and all necessary precautions should be taken to ensure that the yacht is not placed into danger. -
Page 9: About B&G
ABOUT THIS HANDBOOk Instructions in this handbook describe the controls and calibration of your H3000 Pilot system. You can also use the controls on the RemoteVision. All functions described in this handbook refer to the standard Hydra processor settings unless indicated with a Hercules logo as shown below. -
Page 10: System Introduction
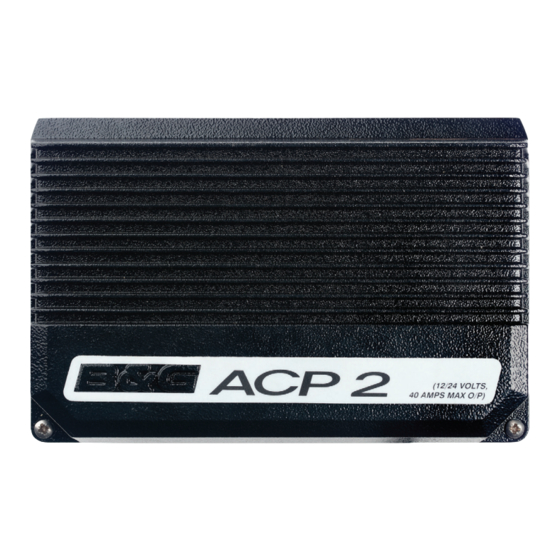
Control Program) Pilot computers are supplied in two specifications ACP1 or ACP2 (Advanced Control Programming) depending on the size of vessel, power requirements and options in use. The H3000 Pilot can be used for both sailing and power boats that have a H3000 System installed. HB-3001-03... -
Page 11: H3000 Pilot Acp
Sensors H3000 System example with Pilot Processor H3000 ACP Above is an example of a typical H3000 system. At the centre of the system is the Central Processor Unit (CPU). All sensor information is fed back to the CPU and can be easily controlled and configured via the Graphical Function Display (GFD). -
Page 12: Graphical Pilot Display (Gpd)
H3000 Pilot Handbook H3000 PILOT ACP The B&G H3000 Pilot Processor has been proven in the world's most testing environments. Used by bluewater cruisers, single handed sailors and record breakers alike the ACP takes on the role of an extra crew member who never tires and can be called upon 24 hours a day to take control of your boat and sail it in your desired direction. - Page 13 GFD. It is possible to display a number of user configurable instrument pages, and access the main H3000 setup and control menus as per the GFD. Index matched bonded display technology is used to give the dual benefits of increased display clarity in all lighting conditions and complete elimination of the possibility of condensation obscuring the display.
-
Page 14: Hand-Held Controller
H3000 Pilot Handbook HAND-HELD CONTROLLER 24.0 mm 56.5 mm The Hand-held Controller provides a wired remote control of the H3000 Pilot. The six keys used for dedicated functions are as follows: • 10 degree course change (Port/Starboard) • 1 degree course change (Port/Starboard). -
Page 15: Joystick
H3000 Pilot Handbook JOYSTICk 36.0 º ø 21.0 mm 48.0 mm The Joystick allows direct control of the rudder via the Pilot control electronics. The unit is deck-mountable, allowing it to be used internal or external steering positions. A 10m (30ft) 6-core screened cable connects the unit directly into the ACP. -
Page 16: Man Overboard Button
H3000 Pilot Handbook MAN OvERBOARD BUTTON Ø 41 mm 30 mm 40 mm 44 mm The Man Overboard (MOB) button is an optional extra that activates the Pilot’s Man Overboard procedure to assist in the recovery of the person, or persons, that may have been lost overboard. - Page 17 H3000 Pilot Handbook Manual Recovery procedure: WARNING This procedure is in addition to standard MOB practices, ensure that you and your crew are familiar with normal MOB procedures. Press the MOB button as soon as the person is lost overboard. The alarm will sound (if fitted) and the displays will show the Man Overboard message.
- Page 18 H3000 Pilot Handbook Maintain a lookout and keep visual contact with the person in the water. Reduce the boat speed to less than 8 knots. Ensure that the area is clear of other boats and obstacles. Press the MOB three times in quick succession to initiate an Automatic Recovery.
-
Page 19: Operating Information
OPERATING INFORMATION SWITCHING ON The H3000 Pilot has two power supplies (instrument and heavy duty rudder drive supply) these are normally connected via circuit breaker. The Pilot computer and Pilot displays are powered via the Fastnet network cable and share the same source of power supply as the H3000 instrument system. -
Page 20: Getting Started
H3000 Pilot Handbook GETTING STARTED GRAPHIC DISPLAY (GPD) kEYS ExPLAINED Power / Lights To power on/off the GFD press and hold the Power key until the unit powers up/powers down. At start up the last page used on the previous operation will be displayed. - Page 21 H3000 Pilot Handbook Pilot function keys These are dedicated function keys that will control the Pilot regardless of which menu you are navigating. Pressing one of these keys whilst in any menu will bring up the Pilot screen and perform the relevant function at the same time.
- Page 22 H3000 Pilot Handbook 1º Keys These function keys change the Pilot course by 1º Port or 1ºStarboard as applicable. When in compass mode you can use these keys to pre-set the course. When navigating menus they perform as left and right action keys.
-
Page 23: Gpd Menu Structure
H3000 Pilot Handbook GPD MENU STRUCTURE The central concept to the operation of the GPD is the menu system; once this is grasped operation very quickly becomes familiar. The idea of structured layers of menus is seen everywhere in modern software, and regular mobile phone or computer users should have a head start. - Page 24 H3000 Pilot Handbook At any time during the navigation of the GPD, press the key to return to the Pilot screen, and engage the Pilot. At any time during the navigation of the GPD, press the key to return to the Pilot screen, and disengage the Pilot.
- Page 25 H3000 Pilot Handbook Example 5 ~ Watch Alarm The Pilot will sound an alarm (if an audible alarm is installed to the Instrument system) and cause all the system displays to display a warning at a pre-set time interval to keep the helmsman and crew alert. There are two selections: OFF: The alarm is disabled (default).
-
Page 26: Gpd Main Menu
H3000 Pilot Handbook GPD MAIN MENU Pressing the key will display the main menu. Below is a list of the menu options, their functions, or setup information. TIMER The timer is designed as a start / elapsed timer; it will count up from zero and will count down to zero if a time value is set. - Page 27 Instrument Data • Displays one item of data from the H3000 Instrument system. TWS is the default but this can be changed to show any of the H3000 systems instruments data. Rudder Angle • Graphic in 1-degree resolution, to Port or Starboard.
- Page 28 H3000 Pilot Handbook Response Mode • ECON – Economy: The rudder movement is limited; this reduces the overall consumption of the autopilot system. • NORM – Normal course keeping and rudder response. • DWIND – Downwind: More active steering control especially for downwind steering in demanding conditions.
-
Page 29: Instruments
H3000 Pilot Handbook INSTRUMENTS There are six pre-set pages of instrument data. INSTRUMENTS Use the key to step through each of the instrument pages. Page 1: Boat Speed - Velocity Made Good (VMG) Page 2: Boat Speed - True Wind Angle ... - Page 30 H3000 Pilot Handbook Page 4: Apparent Wind Angle - Apparent Wind Speed - True Wind Angle - True Wind Speed Page 5: Boat Position – Speed Over Ground – Boat Speed – Distance to Waypoint – Course Over Ground – Heading – Bearing to Waypoint - Local Time ...
-
Page 31: Gps
Track Error – Bearing to Waypoint. Both shown below. GPS GPS Data Page 1 GPS Data Page 2 Note: This Information relies on a suitable GPS interfaced to the H3000 via NMEA 0183, or the USB port. HB-3001-03... -
Page 32: Trip Control
H3000 Pilot Handbook TRIP CONTROL This page shows all trip functions in one menu including the stored log that allows easy access to reset and start operations. The stored log is also displayed but cannot be reset. When any trip function is started, all other trip functions that have been reset start simultaneously, except when the timer countdown is started. -
Page 33: Remote Units
H3000 Pilot Handbook REMOTE UNITS This option provides remote control of any 20/20 or 40/40 type display. Below is an example of how to change the data shown on display 1. REMOTE UNITS Display 1 Boat Speed Select one of the 14 preset data pages ... -
Page 34: Setup
H3000 Pilot Handbook SETUP The Setup menu provides access to system alarms, calibration, damping, this display, and commissioning. Alarms SETUP ALARMS You can preset alarm parameters to trigger a warning when the set limits are reached. This will fl ash a message on the display to warn you. An audible alarm can also be installed. - Page 35 H3000 Pilot Handbook Note: Only the common alarms are listed. For other available alarms go to ALARMS OTHER ALARMS Example 1 ~ Setting Depth Low Alarm SETUP ALARMS Depth (Low) Set Lo limit Switch On/Off Example 2 ~ Accessing Alarm History SETUP ...
-
Page 36: Calibration
To this end the process has been simplifi ed as far as possible, so that all you require for accurate instrument data is some background knowledge together with a few simple techniques. Note: Information regarding calibrating your H3000 system can be found in the H3000 Instrument Handbook. Compass Calibration B&G's Autoswing compasses contain software that allows them to record the... -
Page 37: Halcyon 2000 Compass Calibration
H3000 Pilot Handbook The rate of change of heading must not fall below 0.2 of a degree per second during the 360° turn, i.e. the turn must not take longer than 12 minutes. The rate of change in heading is reasonably constant. -
Page 38: Halcyon Gyro Compass Calibration And Setup
Halcyon Gyro Compass Calibration and Setup This section describes the setup and calibration of the Halcyon Gyro compass connected to the H3000 system via the Halcyon Gyro Processor unit. The conditions and preparations for performing an Auto swing are the same as described in the previous section for the Halcyon 2000 Compass. -
Page 39: Heading Source Selection
–4 from the current set value Heading Source Selection The H3000 System can accept heading data from a variety of different sources. These different sources are known as Nodes and allow the system to identify which heading devices are connected to the system. - Page 40 H3000 Pilot Handbook needs to be more real-time. With Dynamic Damping, the damping value applied will reduce to almost zero during conditions when the data is changing rapidly and then settles again after the tack. The Damping value is set (in seconds) to a steady state value, the Dynamic Damping...
-
Page 41: This Display
H3000 Pilot Handbook THIS DISPLAY SETUP THIS DISPLAY THIS DISPLAY menu is where you can modify the general settings of the GPD. Any changes to the default settings will be saved. To return to default settings go SETUP SYSTEM RESET OPTIONS THIS DIDSPLAY. This will only affect the individual display unit. -
Page 42: Screen
H3000 Pilot Handbook Select which page format you desire ↵ Highlight the display pane you wish to reconfigure ↵ Select the new data you wish to be displayed ↵ Note: reconfiguring the page key in this manner will permanently change the displayed data. -
Page 43: Favourites
H3000 Pilot Handbook Favourites Favourites enables you to confi gure six pieces of the most commonly required instrument data. Normally these are six additional pieces of data that are not already allocated to the page keys. Example 1 ~ Modifying the favourites menu. -
Page 44: Units
H3000 Pilot Handbook Units Allows you to confi gure the units and type of measurement used for Heading, Wind Speed, Depth, Boat Speed, and Nav Mode. Example 1 ~ Changing the Heading reference from Magnetic to True. UNITS HEADING TRUE ºT ↵... -
Page 45: Unit Information
COMMISSION From the commission menu you can setup the H3000 system. From here you can decide to use SOG as boat speed, set which compass is being used, commission the Pilot, start a compass swing and setup a second depth input. -
Page 46: Heading
H3000 Pilot Handbook Example 1 ~ Use SOG as speed input COMMISSION USE SOG AS BOATSPEED ON/OFF ↵ Heading This setting controls the source of heading data used by the instrument and Pilot system. Select the heading source:... -
Page 47: System
H3000 Pilot Handbook completed. If the commission has been successful then the display will show PASS. If unsuccessful the display will show FAIL and the process will need to be repeated. System From this menu you can look up software versions and reset any B&G equipment on the network. -
Page 48: Pilot Operation
H3000 Pilot Handbook PILOT OPERATION ENGAGING THE PILOT From the Pilot Display: Steer the boat on the desired course, press the AUTO key to engage the Pilot. From the Hand-held Controller: Steer the boat on the desired course, press the Auto/Resume Key to engage the Pilot. -
Page 49: Pilot Mode Selection
H3000 Pilot Handbook PILOT MODE SELECTION The Pilot software automatically determines which modes of operation are available depending on the boat type selection and available data. When fi rst switched ON the Pilot will be in Standby and Steer to Compass (COMP) mode. -
Page 50: Steer To Apparent Wind Angle
(WIND A) Steer to Apparent Wind Angle This mode of steering is available to sailing boats that have a H3000 System fitted with a masthead Unit. When WIND A is selected the Pilot will steer a course that maintains a pre-defined Apparent Wind Angle (AWA). - Page 51 H3000 Pilot Handbook It is important to remember that when the Pilot is steering to a waypoint using NMEA data, any erratic data or positional errors generated by the position fixer will be transferred to the Pilot via the NMEA interface and the; instrument system.
-
Page 52: Steer To Target Twa
H3000 Hercules Performance CPU. Data from the H3000 polar tables, stored in the H3000 Hercules Performance CPU allows the boat to sail at the Target TWA and is particularly useful for achieving... -
Page 53: Response Mode
H3000 Pilot Handbook RESPONSE MODE The Response Mode controls the response of the steering. Different selections are available dependent on whether the heading source is from the Halcyon Gyro- Stabilised Compass, or from standard heading source. Response Mode: Halcyon Gyro-Stabilised Compass NORM ~ Normal course keeping and rudder response (default). -
Page 54: Action
H3000 Pilot Handbook ACTION The action fi eld will be populated with the relevant available action associated with the steering mode. To implement the action, highlight the action on the Pilot screen press ↵ select YES, press ↵. The action will be implemented immediately. - Page 55 H3000 Pilot Handbook LAST In compass mode (COMP) As soon as you use the º10 left or right dodge keys to change course LAST will be shown in the action field. When the boat is dodged 10º or a combination of 10º key presses the last course is kept in the Pilots memory and LAST will appear in the action field.
- Page 56 H3000 Pilot Handbook NExT In navigation mode (NAV) NEXT is shown in the action fi eld as soon as you reach each waypoint. Selecting NEXT will change your course to head towards the next waypoint. As the boat passes waypoint 2 NEXT will appear in the action fi eld.
- Page 57 H3000 Pilot Handbook TACk & GYBE In WIND A & WIND T modes depending on whether you are sailing upwind or downwind you will be given the option to TACK or GYBE in the action field. As shown in the diagram, when sailing upwind TACK will be shown in the action field.
- Page 58 H3000 Pilot Handbook In POWER mode MID is shown in the action field at all times. Current Rudder Position "MID" Original Rudder Position When you manoeuvre the boat in power mode via the GPD the rudder will move from the original rudder position, which keeps you on a straight course. To return the rudder to this position highlight the field as shown in the action example and press ↵.
-
Page 59: Commissioning
H3000 Pilot Handbook COMMISSIONING Before the H3000 Pilot can be used, it is necessary to carry out some commissioning procedures. This encompasses the setting and calibration of various parameters, installation and functional checks of the Pilot equipment. These items are listed below. -
Page 60: Hydraulic Pumps
H3000 Pilot Handbook Hydraulic Pumps Pump unit is shielded from the direct effects of the elements. Minimise the lengths of the hydraulic lines from the pump to the cylinder and where possible the pump motor supply cables. Absence of oil leaks. -
Page 61: Compass Installation
H3000 Pilot Handbook Compass Installation Mount the unit according to the installation guidelines. Fitted as near to centre of motion of boat as other factors allow, aft of centre preferred as there is usually less motion than forward of centre. -
Page 62: Parameters To Be Set
H3000 Pilot Handbook Parameters to be Set The following is a list of the parameters that have to be set during commissioning. These parameters must be set and configured prior to using the Autopilot. Parameter Page No. Boat Type: Select Sail, Power Planning or, Power Displacement... -
Page 63: Pilot Commission
H3000 Pilot Handbook PILOT COMMISSION Dockside Setup The following parameters must be set and confi gured before leaving the dockside. When you leave the dockside follow the sea trial instructions before using the Pilot. SETUP COMMISSION PILOT ... - Page 64 H3000 Pilot Handbook Step 3 ~ Select the Drive Type that is fi tted to the boat. This information should be available in the documentation that was supplied with the vessel. We recommend that a visual confi rmation of this is made before proceeding.
- Page 65 H3000 Pilot Handbook TURN RUDDER HARD TO STARBOARD ↵ Step 6 ~ Set the rudder to the mid position. This stores the rudders mid position. This is reset during the sea trial so absolute accuracy is not critical at this stage.
- Page 66 H3000 Pilot Handbook Step 8: Set the waterline boat length. This is the length of the boat in the water from stern to bow. Highlight each number individually and modify using the up and down keys Set the boat length in meters ↵...
-
Page 67: Sea Trial
H3000 Pilot Handbook SEA TRIAL Before using the Pilot the following parameters must be set and confi gured during a sea trial. SETUP COMMISSION PILOT Step 1 ~ Select Sea Trial SEA TRIAL ↵ Step 2 ~ Set Rudder Mid Point. -
Page 68: Checking Rudder Gain Learning
When the Pilot is part of an integrated system; boat speed data is supplied via Fastnet network from the H3000 instruments. By monitoring boat speed and rate of turn the Pilot will automatically 'learn' the correct value for Rudder Gain giving a rate of turn of approximately 6º... -
Page 69: Setting The Rudder Gain Value
H3000 Pilot Handbook Observe the performance of the Pilot when changing course. The rudder gain value is inversely proportional, therefore if the rate of turn is too SLOW, REDUCE the value of rudder gain and the Pilot will use more rudder. If the rate of turn is too FAST, INCREASE the value of rudder gain and the Pilot will use less rudder. -
Page 70: Checking The Boat Lag
H3000 Pilot Handbook Step 4 ~ Boat lag Boat Lag is the time taken for the boat to respond to changes in helm. Heavy displacement hulls require a larger value for boat lag. Checking the Boat Lag At a speed not exceeding 15 knots, change course by 90o in either direction. -
Page 71: Setting The Boat Lag Value
H3000 Pilot Handbook Setting the Boat Lag value BOAT LAG ↵ Adjust value ↵ ADvANCED SETTINGS These are optional settings that can be confi gured to optimise the performance of the Pilot. These settings are not essential for the Pilot to operate correctly. -
Page 72: Speed Source
H3000 Pilot Handbook Speed Source The Speed Source set-up allows the source used for speed data to be selected. To select the desired speed source Highlight the required source ↵ When manual speed is selected you will also need to set the speed value. Use the ... -
Page 73: Recovery Mode
H3000 Pilot Handbook The Automatic Response mode will never reduce the response setting below the manually set value. When the conditions have improved the Pilot will automatically return to the manual response setting. Recovery Mode This function is only available when a Halcyon Gyro Stabilised Compass is connected to the system. -
Page 74: Nav Source
H3000 Pilot Handbook Nav Source Nav Source allows the selection of a NMEA input on the system to use as the primary source of navigation data for the Pilot Steer to Waypoint mode. In most systems, where there is only one source of NMEA navigation data, this can be left on the default setting of zero which will automatically prioritise the navigation data from that source. -
Page 75: Magnetic Dip Zone
H3000 Pilot Handbook Magnetic Dip Zone All magnetic compasses are affected by “northerly turning errors” in the northern hemisphere or “southerly turning errors” in the southern hemisphere, which increase with boat speed and magnetic DIP angle in higher latitudes. These can cause heading instability at boat speeds greater than 20 knots when steering with a Pilot. -
Page 76: Pilot Speed Cal
H3000 Pilot Handbook Pilot Speed Cal The ACP computer unit can take a direct speed input from a paddle wheel with a hall-effect output. Normally the Pilot uses boat speed supplied via the Fastnet network from the instrument system, this facility is only used when the installation does not include a compatible instrument system. -
Page 77: Setting The Speed Calibration Value
H3000 Pilot Handbook Setting the Speed Calibration value The speed cal reading is inversely proportional; i.e. to increase the boat speed, decrease the Hertz/Knot value. Joystick Type The joystick allows direct control of the rudder via the Pilot computer for quick and responsive steering. -
Page 78: Boat Length
H3000 Pilot Handbook Boat Length Use the keys to set the waterline length of your boat. Highlight each digit individually and change it accordingly. Press ↵ when this is completed. Rudder Max Angle This sets the maximum angle of the rudder between 25º and 45º. The default angle is 40º. -
Page 79: Installation Information
H3000 Pilot Handbook INSTALLATION INFORMATION CABLE AND CONNECTION INFORMATION EMC Compliance B&G equipment is designed to be operated in leisure craft. Every care has been taken in the design and testing to ensure compliance with the European EMC Directive. Provided the equipment is installed and operated in accordance with the instructions supplied and the units and cables are used unmodified no problems should be encountered. -
Page 80: Pilot Drive Unit Cables
H3000 Pilot Handbook To minimise interference avoid routing Network cables alongside high power radio or Radar cables, allow 3m/(10ft) spacing, or within 1m/(3ft) of engine starter motors and cables and other cables carrying heavy current. To prevent damage to cabling always secure in position using cable clips or tie- wraps. -
Page 81: Network Installation
H3000 Pilot Handbook NETWORk INSTALLATION The Fastnet network installation shown below should be installed in a linear fashion and ideally run in a line from one end to another with short ‘spurs’ to displays and processors etc. A ‘star’ network with many network spurs off one point will not work correctly, and must be avoided. - Page 82 H3000 Pilot Handbook Example 2~ Single network cable. Processor switch to ON. Terminated at processor unit via switch as shown. Add a network terminator to the last junction box at the end. Switch to ' ' (On Position) Processor Fastnet Cable...
-
Page 83: Pilot Display Connections
H3000 Pilot Handbook PILOT DISPLAY CONNECTIONS Fastnet TERMINAL COLOUR FUNCTION GREEN Network Data -ve WHITE Network Data +ve SHIELD Network Cable Shield BLACK Ground Supply +ve (Normal 12V) HB-3001-03... -
Page 84: Acp Unit Terminal Details
H3000 Pilot Handbook ACP UNIT TERMINAL DETAILS Wire Colour Coding/Abbreviations Black Blue Brown Green Silver Violet White Yellow Blank Not Used HB-3001-03... -
Page 85: Clutch Voltage Selection
H3000 Pilot Handbook Clutch voltage Selection The ACP computer unit can output different clutch/solenoid voltages depending upon the size of the rudder drive unit fitted. The clutch/solenoid valve is only required for rams or rotary drive units. This is achieved by setting dip switches on the computer drive PCB in the lid of the computer unit. -
Page 86: Dip Switch Location
H3000 Pilot Handbook DIP Switch Location DIP Switches HB-3001-03... -
Page 87: Acp Wiring Connections
H3000 Pilot Handbook ACP WIRING CONNECTIONS Network & Alarm Alarm Unit 130-PK-10 Screen Junction Box 288-00-001 Connect like colours together Note: The maximum rating for the alarm output is 12V, 20mA HB-3001-03... -
Page 88: Man Overboard Button & Hand-Held Controller
H3000 Pilot Handbook Man Overboard Button & Hand-held Controller Hand-Held Controller PLHH-ACP M.O.B Button 302-00-007 HB-3001-03... -
Page 89: Remote Button & Joystick
H3000 Pilot Handbook Remote Button & Joystick Joystick 545-00-060 Remote Button 302-00-007 HB-3001-03... -
Page 90: Hydraulic Ram Drives
H3000 Pilot Handbook Hydraulic Ram Drives Rudder Reference Unit Heavy Duty RRF-ACP Power Supply Circuit Breaker Hydraulic Ram Drive HB-3001-03... -
Page 91: Rotary Drives
H3000 Pilot Handbook Rotary Drives Rudder Reference Unit Heavy Duty RRF-ACP Power Supply Circuit Breaker Rotart Drive Unit HB-3001-03... -
Page 92: Stern Drives
H3000 Pilot Handbook Stern Drives Rudder Reference Unit Heavy Duty RRF-ACP Power Supply Circuit Breaker Stern Drive Unit (Power Assisted) HB-3001-03... -
Page 93: Proportional Solenoid
H3000 Pilot Handbook Proportional Solenoid Rudder Reference Unit Heavy Duty RRF-ACP Power Supply Clutch Output if Required Circuit Breaker Port Solenoid Valves Starboard Valve Interface Unit HB-3001-03... -
Page 94: Continuous Drives
H3000 Pilot Handbook Continuous Drives Circuit Breaker Heavy Duty Power Supply HB-3001-03... -
Page 95: Linear Feedback
H3000 Pilot Handbook Linear Feedback Heavy Duty Power Supply Circuit Breaker HB-3001-03... -
Page 96: Halcyon 2000 Compass
H3000 Pilot Handbook Halcyon 2000 Compass R Blk HB-3001-03... -
Page 97: Halcyon Gyro Stabilised Compass
H3000 Pilot Handbook Halcyon Gyro Stabilised Compass HB-3001-03... -
Page 98: Direct Speed Input
H3000 Pilot Handbook Direct Speed Input HB-3001-03... -
Page 99: Direct Speed Input
H3000 Pilot Handbook Direct Speed Input You can use a non B&G speed sensor but it must have a speed signal output from a Hall-effect device giving positive pulses up to a maximum of 12V. Locate the cable from the speed sensor to the instrument input, cut cable if necessary and insert a junction box. -
Page 100: Rotary Rudder Reference Sensor
H3000 Pilot Handbook ROTARY RUDDER REFERENCE SENSOR Installation of RRF A number of key points must be considered for optimum performance of the unit: Mount the unit on a flat surface next to the tiller arm or steering quadrant. Construct a small platform if necessary. -
Page 101: Typical System With Tiller Arm And Quadrant
H3000 Pilot Handbook Typical System with Tiller Arm and Quadrant Rudder in Midships Position Drag-link should 90º Approx 90º be at right-angles to Tiller Arm Plan View Rudder Stock and Steering Gear Assembly 90º 90º Construct Platform for RRF so that the Drag-Link is at 90º... -
Page 102: Steering System Orientation
H3000 Pilot Handbook Steering System Orientation The RRF can be mounted in many different positions and orientations depending on the layout of the steering system. 90º 90º HB-3001-03... -
Page 103: Rrf Position
H3000 Pilot Handbook RRF Position If the maximum rudder angle is less than 90º then the position of the RRF or the drag-link must be adjusted so that the operating arm of the RRF swings through a minimum of 90º and the output voltage difference is greater than 1 volt from port to starboard lock. -
Page 104: Linear Feed Back Unit
H3000 Pilot Handbook Linear Feed Back Unit Where installation of the conventional rudder reference unit is difficult or physically impossible, a linear feedback unit (SEN-RUD-LFB) can be used. The linear feedback unit comprises of a tube approximately 23mm (7/8 inch) in diameter and 300mm (12 inch) long. -
Page 105: Diagnostic Data
H3000 Pilot Handbook DIAGNOSTIC DATA The Pilot computer is continually monitoring the Pilot and H3000 System for correct operation. If a fault is detected the Pilot Display will show an error message. If installed the system audible alarm will sound. -
Page 106: Fault Diagnosis
H3000 Pilot Handbook FAULT DIAGNOSIS Fault 100 – Pilot not Commissioned Fault Description The rudder end stops on the Pilot have not been commissioned, or the memory has been corrupted. Remedial Action Has the Pilot ever been successfully commissioned? go to step (4) go to step (2) Carry out the Dockside commissioning procedure (see page 56). - Page 107 H3000 Pilot Handbook Fault 101 – Pilot Compass Failure Fault Description No valid data is being received from the Halcyon Gyro-Stabilised Compass (HGSC) sensor connected directly to the Pilot computer. Remedial Action Is an HGSC sensor in use? go to step (3)
- Page 108 H3000 Pilot Handbook • If the indicator is erratic move to step (3) Check the voltage supply to the rudder reference is 4.5 to 5.0 volts. Check the signal from the rudder reference with a voltmeter at the Pilot computer With someone moving the helm slowly port to starboard (as in step 2) the voltage should change smoothly.
- Page 109 H3000 Pilot Handbook from the Pilot electronics and test its operation when connected directly to the drive power supply. With Pilot engaged in "Power Steer" mode use the 10º and 1º port and starboard keys to move the rudder. If the motor fails to run disconnect the motor from Pilot electronics and test the operation when connected directly to power supply.
- Page 110 H3000 Pilot Handbook Fault 105 - System Compass Failure Fault Description Heading data from an instrument system compass sensor has failed. Remedial Action Check the Heading Source is set correctly for the compass in use, see page 41 Check the heading data on the instrument system updates normally as the boat changes course.
- Page 111 H3000 Pilot Handbook Fault 108 - Poor Quality NMEA Data Fault Description The value of XTE data being received via the instrument system has suddenly changed by more than 0.3 nautical miles. Remedial Action Check that the XTE data displayed on the instrument system is stable, accurate and updating regularly.
- Page 112 H3000 Pilot Handbook Fault 110 - No Optimum Wind Data Fault Description No Optimum Wind Angle data is being received via the Fastnet network. Remedial Action Check the Optimum Wind Angle (OPT W/A) data displayed on the instrument system. Check connections to instrument system.
- Page 113 H3000 Pilot Handbook Fault 112 - Network Communication Error Fault Description No regular messages are being received by the Pilot computer from the GPD via the Fastnet network, either the display is not transmitting messages or the Pilot computer is not receiving them.
- Page 114 H3000 Pilot Handbook Fault 115 – Drive Power Failure: Check Supply Fault Description The Pilot processor PCB is unable to communicate with the drive PCB. Remedial Action Check to ensure the high current drive supply is present and is of the correct voltage.
- Page 115 H3000 Pilot Handbook Pilot Does Not Steer in a Straight Line Fault Description The Pilot seems unable to steer straight, it continually overcorrects course errors; the wake has an "S" like appearance as the boat first steers several degrees off course to port followed by several degrees off course to starboard.
- Page 116 H3000 Pilot Handbook Important Note When dealing with any hydraulic system great care must be taken to ensure that a high degree of cleanliness is observed and no dirt, moisture or foreign objects are allowed to enter the system. Only the recommended fluids must be used. Use Q8 DYNOBEAR or equivalent (10cSt at 40°...
- Page 117 H3000 Pilot Handbook Secure all hoses and cables to prevent damage. Single Station System Example Hydraulic Cylinder Dual Station System Example Hydraulic Cylinder HB-3001-03...
- Page 118 H3000 Pilot Handbook HB-3001-03...
- Page 119 H3000 Pilot Handbook HB-3001-03...
- Page 120 H3000 Pilot Handbook HB-3001-03...
Need help?
Do you have a question about the H3000 and is the answer not in the manual?
Questions and answers