iToma CKS507 User Manual
Alarm clock radio, digital fm radio, dual alarm, cell phone usb charge port, night light, auto & manual dimmer, snooze, sleep timer, auto time setting, aux-in, backup battery
Hide thumbs
Also See for CKS507:
- User manual (11 pages) ,
- Quick start manual (11 pages) ,
- Quick manual (2 pages)
Table of Contents
Advertisement
Advertisement
Table of Contents

Related Manuals for iToma CKS507


Summary of Contents for iToma CKS507
- Page 2 Warning TO PREVENT FIRE OR SHOCK HAZARD , DO NOT USE THIS PLUG WITH AN EXTENSION CORD, RECEPTACLE OR OTHER OUTLET UNLESS THE BLADES CAN BE FULLY INSERTED AND THERE ISNO BLADE EXPOSURE .TO PREVENT FIRE OR SHOCK HAZARD , DO NOT EXPOSE THIS APPLIANCE TO RAIN OR MOISTURE. Important Safety Instructions 1.) Read these instructions .
- Page 3 AC adapter. humid or moist areas. What Inside • CKS507 clock radio x 1 • User Manual x 1 • AC Power Adapter 110V-240AC 50/60Hz,DC 5V x1...
-
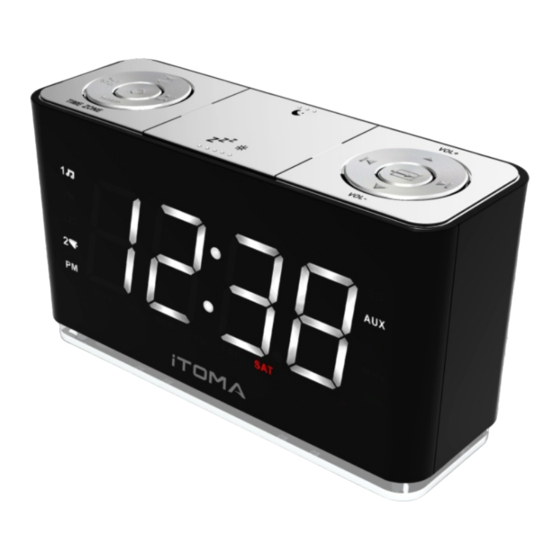
Page 4: Front Panel
Location of Controls and Indications FRONT PANEL TOP PANEL VOL + TIME STO. MEM. SLEEP TIME ZONE BACK PANEL DC 5V IN USB CHAR. ANT. AUX IN ALARM 1 Radio /Buzzer Indicator NIGHT LIGHT Button ALARM 2 Radio /Buzzer Indicator SOURCE Button PM Indicator VOLUME+ Button... -
Page 5: Power Source
Preparation for Use Power Source AC adapter’Plug AC outlet When the clock is connected to the AC outlet for the first time the display will default Stand by mode. Press the button to ON/OFF the unit ON : Radio or Auxiliary mode Display radio frequency “AUX”... - Page 6 Daylight Saving and Leap Year Adjustments All Daylight Saving and Leap Year adjustment are made automati- cally by the InteliSet computer as follow: Start of Daylight Saving time: At 2:00 AM on the 2nd Sunday in March, the clock will automatica- lly advance to 3:00 AM End of Daylight Saving time:...
- Page 7 Setting the Time Please press the Power button to turn OFF the unit before operating Date and Year Display: Year, Month/Date,Time Check the current time: TIME VOL+ TIME ZONE VOL- Press MONTH/DATE Press TIME Press YEAR If you want to change the Time Zone, please refer to "SETTING THE TIME ZONE”...
- Page 8 Setting the Alarm Please press the Power button to turn OFF the unit before operating When it is in standby mode, Adjustment the Wake up times and Alarm Week Mode Hour Minutes Hour Press and hold STO. Minutes VOL+ TIME ZONE VOL- Week mode Press and Hold "AL1"...
-
Page 9: Snooze Setting
Adjust The Alarm Volume Level Press and Hold “AL1”or “AL2”,then press VOL+ or VOL- adjust the alarm volume level. STO. VOL+ UP or DOWN TIME ZONE VOL- AL 1 or AL2 On AL 1 or AL2 Off Keep pressing AL1 or AL2 to turn ON the Alarm Mode. When Buzzer lights on,the wake up Buzzer alarm will be ON. - Page 10 Listen to the Radio Please press the Power button to turn ON the unit and press SOURCE button to change to Radio Mode before operating Power on: Switch to Radio Mode (Press SOURCE button) Press VOL+ TIME ZONE VOL- Tuning the Stations (Either press TUNE UP or TUNE DOWN) VOL+ TIME ZONE...
- Page 11 D:Storing favorable stations to memory (10 stations can be stored) Press STO. VOL+ TIME ZONE VOL- UP or DOWN VOL+ TIME ZONE VOL- At Radio Mode, press and hold TUNE UP or TUNE DOWN button to search for your desired station. Press the AL1/STO.
- Page 12 Sleep Mode Please press the Power button to turn ON the unit to either Radio or Auxiliary Mode before operating Sleep mode setting VOL+ TIME ZONE VOL- Press SLEEP Press the SLEEP button and you will see from 10, 20, to 90 minutes then OFF, Timer will count down from the selected minutes by listening to Radio.
- Page 13 Night Light turn on / off Press VOL+ TIME ZONE VOL- AUX IN (Auxiliary Input) Press SOURCE button until "AUX" appear on LED display, connect your audio or mobile device and play music through the clock with 3.5mm earphone jack. VOL+ TIME ZONE VOL-...
- Page 14 Changing the Lithium Battery When the LOW BATTERY sign blinks , you should change the battery that is used for backup clock and alarm setting . The battery backup is intended for short power outages only.The unit’s primary functions cannot run on the battery backup alone. This unit uses a button cell battery that will last up to 1 year and maintains the time.
- Page 15 Press and Hold “TIME SET” until the Year Display blink Press “ ” “ ” to adjust Year Press “TIME SET” and the Month/Date Display will blink Press “ ” to adjust Month Press “ ” to adjust Date Press “TIME SET” and the Time Display will blink Press “...
- Page 16 1-Year Limited Warranty iTOMA (Hong Kong) Company Limited (iTOMA) warrants to be original consumer of this iTOMA product that it will furnish a replacement for, or, at its sole option, repair any part which proves (upon inspection by iTOMA)to be defective under normal use within 1 year of the original purchase date.This warranty does not...
Need help?
Do you have a question about the CKS507 and is the answer not in the manual?
Questions and answers
How to Change the battery on CKS507 clock?
The iToma CKS507 clock has a built-in lithium battery that maintains time and alarm settings during power interruptions. This battery is not user-replaceable. To maximize its life, keep the clock connected to a live AC outlet at all times.
This answer is automatically generated
How do you change from 24hr to 12 hr setting
To change the time format from 24-hour to 12-hour on the iToma CKS507:
1. Make sure the power is off.
2. Press and hold the VOL+ TIME ZONE ZZZ VOL- button for five seconds.
3. The display will blink "H12" or "H24".
4. Release the button to confirm the mode.
"H12" is the 12-hour format, and "H24" is the 24-hour format.
This answer is automatically generated