Table of Contents
Advertisement
Care & Assembly Instructions
IMPORTANT, RETAIN FOR FUTURE REFERENCE: READ CAREFULLY
Warning:
•
For outdoor use only.
•
This instruction manual contains important information necessary for the proper assembly and
safe use of the appliance.
•
Do not leave the appliance unattended. Keep young children and pets away.
•
Do not move the device during use.
•
Not intended to be installed in or on boats and should never be used as a heater.
•
Close the valve of the gas cylinder after use.
FOR YOUR SAFETY
Do not store or use gasoline or other
flammable vapors and liquids in the vicinity
of this or any other appliance.
Questions, problems, and/or missing parts? Before returning to your retailer, please send an email to
our customer service department: nxrcs@duro-global.com
If you prefer to speak to a live agent; call 1-888-909-8818 (USA/CANADA) Monday-
Friday 9 AM-5 PM PST;
Languages Spoken: English, Spanish, French.
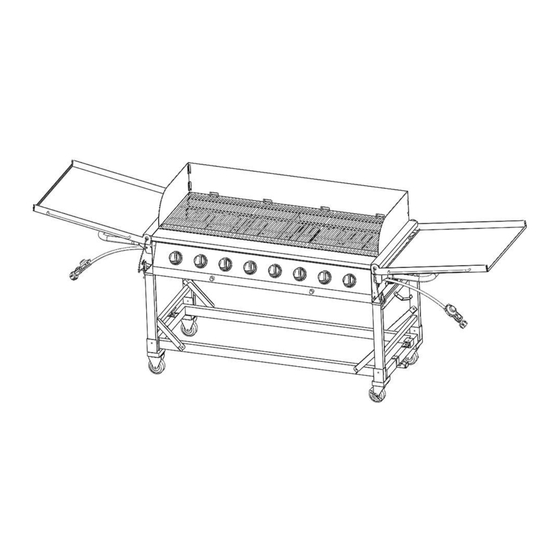
8 Burner Stainless Steel Event Grill
!
Warning: Improper installation, adjustment,
alteration, service or maintenance can cause
property damage, injury or death. Read the
installation, operating and maintenance
instructions thoroughly before installing or
servicing this equipment.
1
ITM. / ART. 1031506
Model: 780-0838
Advertisement
Table of Contents

Subscribe to Our Youtube Channel
Related Manuals for NXR 780-0838


Summary of Contents for NXR 780-0838
- Page 1 8 Burner Stainless Steel Event Grill ITM. / ART. 1031506 Model: 780-0838 Care & Assembly Instructions IMPORTANT, RETAIN FOR FUTURE REFERENCE: READ CAREFULLY Warning: • For outdoor use only. • This instruction manual contains important information necessary for the proper assembly and safe use of the appliance.
-
Page 2: Table Of Contents
CONTENTS EXPLODED VIEW ..............................PART LIST .................................. PACKAGE CONTENT LIST ............................. HARDWARE CONTENT ............................ASSEMBLY INSTRUCTION ............................ ELECTRODE CHECK .............................. 10 INTENDED USE ................................ 12 SAFETY WARNINGS ............................... 12 SCOPE OF DELIVERY ............................. 13 ACCESSORIES ................................13 BEFORE FIRST USE .............................. -
Page 3: Exploded View
EXPLODED VIEW PARTS LIST Part Number Part Description cooking grid 4pcs flame tamer 8pcs fire box division plate fire box left side panel gas valve 8pcs grease tray handle control knob 8pcs flame tamer support control panel pulse ignitor 2pcs left leg assembly fire box bottom panel main tube burner... -
Page 4: Package Content List
Part Number Part Description fire box rear panel fire box front panel fire box right side panel mainfold side handle 2pcs regulator 2pcs gas tank hook 2pcs latch lock 4pcs upside beam 2pcs lightning rod 2pcs fire box heat insulation plate control knob bezel 8pcs cart bottom frame hanger... -
Page 5: Hardware Content
Flame Tamer:8pcs Gas Tank Hook:2pcs Gas Tank Holder:2pcs Cart Bottom Frame Hanger:2pcs Swivel Caster:2pcs Fixed Caster:2pcs HARDWARE CONTENTS for Required Extra Pack Description Total assembly hardware Screw Head Truss mm-12 x 1/4 pcs. 20 pcs. 2 pcs. 22 Washer Locking 1/4 pcs. -
Page 6: Assembly Instruction
ASSEMBLY INSTRUCTIONS 1. Install Casters NOTE: We recommend at least 2 people to assemble grill. • Lift the Cart out of shipping carton and place it on the cardboard work surface. • Install the Casters to the cart leg with Screw #AA, make sure the 2 swivel casters on the right side. Warning: Make sure that all casters have been tightened before unfold the legs of cart. - Page 7 3. Install bottom gas tank holder • Install gas tank Holder to both left and right lower bar of the cart frame and tightly secure with screw$#AA. AA:4pcs 4. Install Handles • Align both left and right handles onto the body of the grill. Then tighten the handles with bolt #DD as shown on diagram below.
- Page 8 5. Install Grill Body • Lift and position Fire Box Assembly to the Cart. • All bottom four corners of grill body must be sitting on the SEAT on the cart beam. • Then lock each leg by closing the latch of each buckle on legs and grill body. •...
- Page 9 7. Install Windshield • Open both left and right side shelf and insert the side handles (Shown on diagram 1). • Open the wind shield (Shown on diagram 2). • Unfold the left and right side panel of wind shield and insert the small flag on bottom edge of panel onto the slot on the grill body frame (Shown on diagram 3).
-
Page 10: Electrode Check
9. Install Main Lid Handle and Ignitor Battery • Twist and remove Ignitor Cap from Control Panel • Place 1 AA battery into the igniter body with + outward and – inward. (Battery not included) • Install the igniter cap and spring over the + end of the battery and tightly screw it onto the control panel. •... - Page 11 Tips prior to using grill • Be sure all Control Knobs are set to “OFF” and open the Grill Lids. • Have your assistant stand behind the right side of the grill and look toward the front of the grill. Never place your face inside the Grill. •...
-
Page 12: Intended Use
SAFETY INSTRUCTION Dear customer, Congratulations on your purchase of this product. Please take a few minutes before starting operation of the appliance and read the following operating instructions. 0051 Many thanks. QA16-0000003148 USE OUTDOORS ONLY! READ THE INSTRUCTIONS BEFORE USING THE APPLIANCE! WARNING! ACCESSIBLE PARTS MAY BE VERY HOT. -
Page 13: Scope Of Delivery
GAS BABRBECUE WARNINGS 1. This appliance is configured to work with low pressure propane & butane liquefied petroleum gas (LPG). Do not use natural gas supply. 2. Open the cover(s) and fold up the wind screen before igniting the appliance. 3. -
Page 14: Before First Use
BEFORE FIRST USE UNPACKING 1. Unpack all parts and lay them on a flat, stable surface. 2. Remove all packing materials and shipping devices (if applicable). WARNING! The appliance and the packaging are not children’s toys! Children must not play with plastic bags, sheets and small parts! There is a danger of choking and suffocation! ASSEMBLING 1. -
Page 15: Operation
Testing for gas leaks WARNING! Risk of explosion! Never check for gas leaks using a match or any other open flame. Test all connections, fittings and all gas hoses for gas leaks every time prior use of the appliance, or each time the gas cylinder(s) is / are changed. Make sure this procedure is carried out in a well ventilated area away from flames, sparks or any heat sources. - Page 16 WARNING! If any burner still does not ignite after a few tries, it could indicate a problem with the gas supply. Turn the gas supply off on the appliance as well as on the gas cylinder(s) and / or the pressure regulator(s). Do not use the appliance until the cause of the problem has been found (→...
-
Page 17: After Use
APPEARANCE OF THE FLAME • The flame should appear blue and stable (Fig. 1). There should be no yellow sparks, loud noises nor should there be distance between the base of the flame and the nozzle. • A yellow flame indicates insufficient oxygen supply. Loud noises and the flame being distant from the nozzle indicate excessive oxygen supply. -
Page 18: Cleaning, Maintenance And Repair
Problem Possible cause and solution • Ensure that the gas valves are open. The appliance does not ignite immediately. • Check if sparks are produced when igniting the appliance. • Push the control knob(s) for 5 seconds before you attempt to ignite the appliance. •... -
Page 19: Storage And Transportation
Stainless steel surfaces 1. Wipe all stainless steel surfaces with a wet soft cloth. Use a mild detergent to remove grease. 2. Remove grease and food remains from the fire box with a plastic or wooden spatula. 3. Remove the burner(s), before cleaning the fire box. Grease tray(s) 1. -
Page 20: Technical Data
TECHNICAL DATA Power supply (control knob 1.5 V (LR6/AA battery x2) (not included) illumination) Nominal heat input Main burner(s) (x8): 4.2 kW Gas consumption Butane: 2443 g/h Total: 33.6 kW Propane: 2400 g/h Cooking area (W x D) 123.0 x 49.0 cm Cooking height (H) 89.5 cm Dimensions folded... -
Page 21: Warranty
LIMITED WARRANTY (Model #780-0838 ) DURO warrants to the original consumer-purchaser only that this product shall be free from defects in workmanship and materials after correct assembly and under normal and reasonable home use for the periods indicated below beginning on the date of purchase. The manufacturer reserves the right to require photographic evidence of damage, or that defective parts to be returned, postage and or freight Pre-paid by the consumer, for review and examination. - Page 22 ITEMS MANUFACTURER WILL NOT PAY FOR: • Service calls to your home. • Repairs when your product is used for other than normal, single-family household or residential use. • Damage resulting from accident, alteration, misuse, lack of maintenance/cleaning, abuse, fire, flood, acts of God, improper installation, and installation not in accordance with electrical or plumbing codes or use of products not approved by the manufacturer.
Need help?
Do you have a question about the 780-0838 and is the answer not in the manual?
Questions and answers