Table of Contents
Advertisement
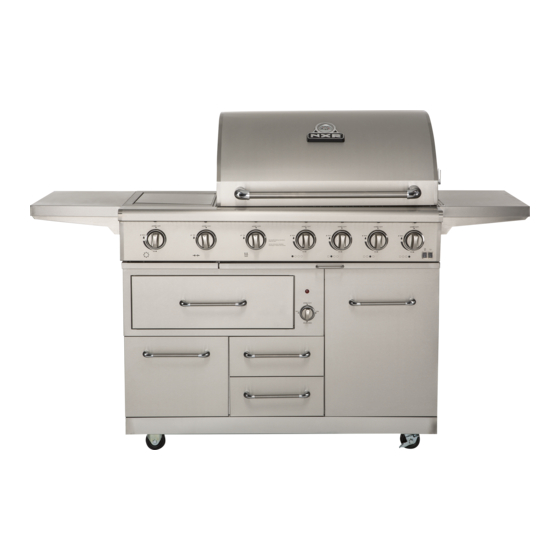
Gas Grill Manual for Installation, Care & Maintenance
0
IMPORTANT, RETAIN FOR FUTURE REFERENCE: READ CAREFULLY
Warning:
For outdoor use only.
This instruction manual contains important information necessary for the proper
assembly and safe use of the appliance.
Do not leave the appliance unattended. Keep young children and pets away.
Do not move the device during use.
Not intended to be installed in or on boats and should never be used as a heater.
Close the valve of the gas cylinder after use.
Questions, problems, missing parts? Before returning to your retailer, call our customer
service department at 1-877-639-7264, 9 a.m.-5 p.m., PST, Monday-Friday. English,
French, and Spanish representatives are available. Send email to: nxrcs@duro-global.com
ITM./ART. 965490
Model: 780-0832C
Advertisement
Table of Contents
Troubleshooting

Related Manuals for NXR 780-0832C


Summary of Contents for NXR 780-0832C
- Page 1 ITM./ART. 965490 Model: 780-0832C Gas Grill Manual for Installation, Care & Maintenance IMPORTANT, RETAIN FOR FUTURE REFERENCE: READ CAREFULLY Warning: For outdoor use only. This instruction manual contains important information necessary for the proper assembly and safe use of the appliance.
-
Page 2: California Proposition 65 Warning
Thank you for purchasing your NXR outdoor grill. We appreciate your business and we recommend that you read this entire User’s Manual before operating your new appliance for the first time. This manual contains instructions on how to properly install and set up your new grill, as well as insights into the unique features that our product offers. -
Page 3: Table Of Contents
Table of Contents Safety Instruction ......4-11 Match Lighting Instruction ..... .32 Exploded View . -
Page 4: Safety Instruction
Safety Instruction If the information in this manual is not followed exactly, a fire or an explosion may result causing property damage, personal injury or even death. Do not store or use gasoline, liquid propane cylinder or other flammable vapors and liquids in the vicinity of this appliance. -
Page 5: Installation Instructions
Safety Instruction WARNING CAUTION: Beware of Flashback Do not try lighting this appliance without reading the CAUTION: Spiders and small insects occasionally “LIGHTING INSTRUCTIONS” section of this manual. spin webs or make nests in the grill TESTED IN ACCORDANCE WITH ANS Z21.58CSA 1.6b-2012 burner tubes during transit and STANDARD FOR OUTDOORCOOKINGGASAPPLIANCE. -
Page 6: Gas Supply Requirements
Safety Instruction Gas Supply Requirements Installation of this grill must conform with local codes, or in the absence of local codes, the national Fuel Gas Code, ANSIZ223.1 / NFPA 54. In Canada, installation must conform to the current natural Gas Installation /code, CAN 1-1.1-M81 and with local codes where applicable. This grill has been design-certified according to ANSIZ21.1a, latest edition. - Page 7 Safety Instruction PROPER PLACEMENT AND CLEARANCE OF GRILL •Never use your gas grill in a garage, porch, shed, breezeway or any other enclosed area. Your gas grill is to be used outdoors only. •Do Not install this unit into combustible enclosures. •Minimum clearance from sides and back of unit to combustible construction, 24 inches (61 cm) from sides and 24 inches (61 cm) from back.
- Page 8 Safety Instruction Do not use the grill to cook excessively fatty meats or Use a covered hand when opening the grill lid. other products which promote flare – ups. Never lean over an open grill. Keep the area surrounding the grill free from When lighting a burner, pay close attention to what combustible materials including fluids, trash, and you are doing.
- Page 9 Safety Instruction Electric Power Supply Requirements Your grill must be electrically grounded in accordance with local codes, or in the absence of local codes, in accordance with the National Electrical Code (ANSI/NFPA 70, latest edition). In Canada, electrical grounding must be in accordance with the current CSA C22.1 Canadian Electrical Code Part 1 and/or local codes.
- Page 10 Safety Instruction 7. Use only a Ground Fault Interrupter (GFI) protected circuit with this outdoor cooking gas appliance. 8. Never remove the grounding plug or use with an adapter of 2 prongs. 9. Use only extension cords with a 3 prong grounding plug, rated for the power of the equipment, and approved for outdoor use with a W-A marking.
-
Page 11: Safety Instruction
ELECTRICAL GROUNDING INSTRUCTIONS Safety Instruction IMPORTANT This outdoor cooking appliance is equipped with a three-prong (grounding) plug for your protection against shock hazard and should be plugged directly into a properly grounded three-pronged receptacle. DO NOT cut or remove the grounding prong from this plug. INSTALLATION INSTRUCTIONS To ensure proper and safe operation, read all instructions before using the product. -
Page 12: Exploded View
Exploded View LP/NG Convertible Gas Grill Parts Diagram... -
Page 13: Part List
Parts List Parts List LP/NG Convertible Gas Grill Parts List Part NO. English name Part NO. English name Main lid Flame tamers Temperature gauge Fire cross Logo/temperature gauge seat Main burners Main lid hinge bolt Main Burner ignitor Wire A Mail lid screw Main Burner ignitor Wire B Main lid hinge rod... -
Page 14: Part List
Parts List Parts List Parts List LP/NG Convertible gas grill Parts list Handle Warming drawer control knob Cooler Rear burner gas corrugated gas pipe Rear burner ignitor wire & orifice cover Rotisserie motor Rear burner Thermocouple Rotisserie kits Rear burner orifice Rotisserie rod Rear burner ignitor wire Halogen lights wire... -
Page 15: Assembly Instruction
Assembly Instruction Please read the instructions carefully and follow step by step. Tools required: Philips head screwdriver -(not provided). Parts list: Grill main body, left side shelf, right side shelf, rotisserie bracket, cooking grid, flame tamer, warming rack. 1. SIDE SHELF ASSEMBLY ①The screws used to attach the side shelf are already screwed into the left side burner and right sides panel (see the figure below). - Page 16 Assembly Instruction Assembly Instruction Assembly Instruction Fit the flame tamers between the notches inside the firebox. Insert warming rack and cooking grids as shown in the figure below. Loosen the 2 screws which are pre-placed on rotisserie bracket, then tighten the bracket into the grill fire box side panel, and insert the rotisserie motor and skewer.
-
Page 17: Assembly Instruction
Assembly Instruction Grounding 1. The power cord is equipped with a three-prong (grounding) plug which mates with a standard three-prong grounding wall receptacle to minimize the possibility of electrical shock hazard from the grill. 2. All cord connected appliances shall include instructions relative to location of the wall receptacle and a warning to the user to disconnect the electrical supply before serving the appliance. -
Page 18: Lp Gas Hook-Up
LP Gas Hook-up NEVER CONNECT AN UNREGULATED GAS SUPPLY LINE TO THE APPLIANCE. USE THE REGULATOR/HOSE ASSEMBLY SUPPLIED Liquid Propane gas For liquid propane configured grill. Do not attempt to Manifold pressure: 28cm(11 inches) water column use a natural gas supply. (W.C.). - Page 19 LP Gas Hook-up 5. When connecting regulator assembly to the valve, To disconnect L.P. gas cylinder: hand tighten the quick coupling nut clockwise to a 1. Turn the burner valves off. complete stop. Do not use a wrench to tighten. Use 2.
-
Page 20: Lp Leak Testing
LP Leak Testing Liquid Propane Gas LEAK TESTING GENERAL Only those parts recommended by the manufacturer Although all gas connections on the grill are leak should be used on the grill. tested at the factory prior to shipment, a Substitution will void the warranty. Do not use the complete gas tightness check must be grill until all connections have been checked and do performed at the installation site due to possible... -
Page 21: Ng Gas Conversion
NG Gas Conversion IMPORTANT: The Natural gas Conversion Kit (see next page parts list) supplied with this grill must be used. If you want to convert to local NG gas supply, contact your local gas company for specific instructions. Conversion must be installed by a qualified gas technician. Natural Gas requirements: Operating pressure: 4”... - Page 22 NG Gas Conversion STEP ONE: Disconnect the LP gas supply system 1. Turn off all burner control valves. 2. Clockwise turn off the main gas supply valve. 3. Disconnect 20 lb LP gas fuel tank (if present) and remove the 20 lb LP gas fuel tank from the grill cabinet.
- Page 23 NG Gas Conversion NG Gas Conversion STEP TWO: Open the conversion kit to check the part list STEP THREE: Change Grill Main Burner Valve Orifices 1. Remove the grates and flame tamers. 2. Remove the 1 screw that holds the burner in place. Set the screws aside. Remove the burner from the grill by lifting the burner out.
- Page 24 NG Gas Conversion 3. Use a 6 mm socket wrench or 6 mm nut driver to remove the brass orifice from the end of gas valve. Place the NG orifice into the end of gas valve, the 4 main burners orifice hole Ø are 1.5mm (Part No.
- Page 25 NG Gas Conversion STEP FIVE: Change the Rotisserie/Infrared Burner Orifice Using a Phillips screw driver, remove the 3 screws and remove the rotisserie/infrared burner wind baffle. 2. Use wrench to remove the nut on the orifice base.
- Page 26 NG Gas Conversion 3. Remove LP orifice, then install the Rear burner NG orifice (side burner NG orifice hole Ø is 1.7mm)( Part 4) MPORTANT: Check that the orifice is properly installed then put on the base nut and install the wind baffle.
-
Page 27: Ng Gas Hook-Up
NG Gas Hook-up STEP SEVEN:Connecting the NG hose Natural Gas Supply For natural gas configured grill. Do not attempt to use a liquid propane supply. Total gas consumption (per hour) of this stainless steel gas grill with all burners on “MAX”: Connect the NG regulator to the Grill (NG Main burner 40,000 Btu/hr. -
Page 28: Ng Leak Testing
NG Leak Testing Natural Gas LEAK TESTING 3. The ignitor battery is not factory installed. 1. Open the manual shutoff valve in the gas supply line. The valve is open An “AA” size alkaline battery is located in when the handle is parallel to the gas the accessory box on the grill grate. -
Page 29: Operating Instruction
Operating Instruction GENERAL USE OF THE GRILL AND ROTISSERIE Each main burner is rated at 10,000 Btu/hr. The main grill burners encompass the entire cooking area and are side ported to minimize blockage from falling grease and debris. Above the burners are stainless steel radiant flame tamers. -
Page 30: Grill Lighting Instruction
Grill Lighting Instruction WARNING: IMPORTANT! USING THE SIDE BURNER: Inspect the gas supply hose prior to turning the gas“MAX”. If there is evidence of cuts, wear or abrasion, it must be replaced prior to use. Do not use the side burner if the odor of gas is present. USING ROTISSERIE BURNER Your grill is capable of performing back burner rotisserie cooking once lit. - Page 31 Grill Lighting Instruction Do not attempt to light the grill if odor of gas is present. C all our customer service department at 1-877-639-7264, 9 a.m.-5 p.m., PST, Monday-Friday. English, French, and Spanish representatives are available. Keep a spray bottle of soapy water near the gas supply valve and check the connections before each use.
-
Page 32: Match Lighting Instruction
Match Lighting Instruction To Match the Light Grill 1. If the burner will not light after several attempts then the burner can be match lit. 2. If you have attempted to light the main burners with the ignitor, allow 5 minutes for any accumulated gas to dissipate. -
Page 33: Light Instruction
Light Instruction Light Operation Instruction Make sure halogen light power switch on the control panel is in the “OFF” position. Connect power plug to properly grounded outlet. Turn the light’s power switch to “ON”. WARNING Keep any electrical supply cord away from any heated surface. - Page 34 Light Instruction Bulb Replacement Bulb Specification Bulb Type: Halogen Wattage: 10 watts per bulb Voltage: 12 volts 1. Make sure the light’s power switch on the control panel is in the “OFF” position and power plug is disconnected from outlet. 2.
-
Page 35: Motor Instruction
Motor Instruction • TO USE MOTOR SAFELY, PLEASE READ WARNING PRIOR TO USE ROTISSERIE DRIVE MOTOR USE ONLY FOR OUTDOORS. DO NOT EXPOSE TO RAIN. CAUTION: TO ENSURE CONTINUED PROTECTION AGAINST RISK OF ELECTRIC SHOCK, CONNECT TO PROPERLY GROUNDED OUTLETS ONLY, TO REDUCE THE RISK OF ELECTRIC SHOCK, KEEP EXTENSION CORD CONNECTION DRY AND OFF THE GROUND. -
Page 36: Care And Maintenance
Care and Maintenance MAIN GRILL BURNER CLEANING Replacing the ignitor Battery Ensure the gas supply is off and the knobs are in the If ignitors stop sparking, the battery should be “OFF” position. Make sure the grill is cool. Clean the replaced. -
Page 37: Uninstall Drawer
Uninstall Drawer HOW TO REMOVE THE DRAWERS Keep left and right rubber wedge lifting up and pressing down simultaneously, then pull out the drawer. Ice Bucket HOW TO TAKE OUT THE PLUG FROM ICE BUCKET... -
Page 38: Grease Tray
Grease Tray HOW TO TAKE OUT THE GREASE TRAY Pull out the grease tray; lift up its end carefully to avoid the oil splashing out. Warning: Please take it out after it cool down. -
Page 39: Cooking Tips
Cooking tips PREHEATING: The grill lid should be in a closed position during the preheat time period. It is necessary to preheat the grill before cooking certain foods, depending on the type of food and the cooking temperature. Food that requires a high cooking temperature needs a pre-heat period of five minutes;... -
Page 40: Trouble Shooting
Trouble Shooting PROBLEM SOLUTION PROBLEM SOLUTION When attempting to light my grill, it will not • Make sure you have a spark while you are trying to light immediately. light the burner (if no spark) •Ensure that the wire is connected to the electrode assembly. -
Page 41: Trouble Shooting
Trouble Shooting Rotisserie motor will not turn • Ensure the motor is connected to a properly grounded power supply. • Ensure the on / off switch is in the on position. • Ensure that the spit is fully inserted into the rotisserie motor •... -
Page 42: Ordering Parts
•Description of replacement part needed. •Quantity of parts needed. To obtain replacement parts, contact NXR Customer Relations. Please call our customer service department at 1-877-639-7264, 9 a.m.-5 p.m., PST, Monday-Friday. English, French, and Spanish representatives are available. Send email to: nxrcs@duro-global.com IMPORTANT Use only factory authorized parts. -
Page 43: Limited Warranty
Limited Warranty LIMITED WARRANTY (Model #780-0832C ) DURO warrants to the original consumer-purchaser only that this product shall be free from defects in workmanship and materials after correct assembly and under normal and reasonable home use for the periods indicated below beginning on the date of purchase. The manufacturer reserves the right to require photographic evidence of damage, or that defective parts to be returned, postage and or freight Pre-paid by the consumer, for review and examination. - Page 44 Limited Warranty ITEMS MANUFACTURER WILL NOT PAY FOR: ■ Service calls to your home. ■ Repairs when your product is used for other than normal, single-family household or residential use. ■ Damage resulting from accident, alteration, misuse, lack of maintenance/cleaning, abuse, fire, flood, acts of God, improper installation, and installation not in accordance with electrical or plumbing codes or use of products not approved by the manufacturer.
Need help?
Do you have a question about the 780-0832C and is the answer not in the manual?
Questions and answers