Table of Contents
Advertisement
D
M
U
ATA
ANAGEMENT
NIT
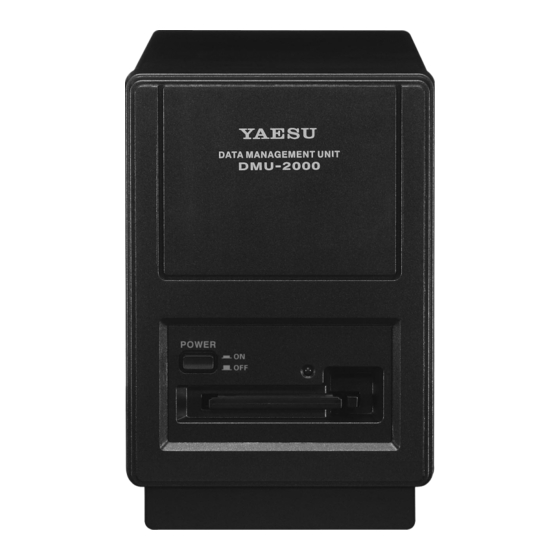
DMU-2000
O
M
PERATING
ANUAL
VERTEX STANDARD CO., LTD.
4-8-8 Nakameguro, Meguro-Ku, Tokyo 153-8644, Japan
VERTEX STANDARD
US Headquarters
10900 Walker Street, Cypress, CA 90630, U.S.A.
YAESU UK LTD.
Unit 12, Sun Valley Business Park, Winnall Close
Winchester, Hampshire, SO23 0LB, U.K.
VERTEX STANDARD HK LTD.
Unit 5, 20/F., Seaview Centre, 139-141 Hoi Bun Road,
Kwun Tong, Kowloon, Hong Kong
VERTEX STANDARD ( AUSTRALIA ) PTY., LTD.
Normanby Business Park, Unit 14/45 Normanby Road
Notting Hill 3168, Victoria, Australia
Advertisement
Table of Contents

Related Manuals for Yaesu DMU-2000


Summary of Contents for Yaesu DMU-2000
- Page 1 4-8-8 Nakameguro, Meguro-Ku, Tokyo 153-8644, Japan VERTEX STANDARD US Headquarters 10900 Walker Street, Cypress, CA 90630, U.S.A. YAESU UK LTD. Unit 12, Sun Valley Business Park, Winnall Close Winchester, Hampshire, SO23 0LB, U.K. VERTEX STANDARD HK LTD. Unit 5, 20/F., Seaview Centre, 139-141 Hoi Bun Road, Kwun Tong, Kowloon, Hong Kong VERTEX STANDARD ( AUSTRALIA ) PTY., LTD.
-
Page 2: Table Of Contents
Switches and Connectors ..............................4 Please Read This First ............................... 6 Before Using an External Monitor ..........................10 About the DMU-2000 Data Management Operation ....................10 About the Monitor Display ............................12 How to Use the World Clock function ........................... 14 About the World Clock .............................. -
Page 3: Installation And Connection (Ft-2000/D)
IGURE SCOPE Unit RX-2 Unit Move the Coaxial plug 14-pin Plug IGURE IGURE Keep an inch (2.5 cm) of space on either side of the DMU-2000 to pre- vent overheating. KEYBOARD MONITOR IGURE Supplied Connection Cable DMU-2000 D Page 1... -
Page 4: Installation And Connection (Ft-950)
Display, and after-market Keyboard (if used) pursuant to Figure 5. SCOPE Unit Mounting Location IGURE Move the Coaxial plug Place the Coaxial cables into the slots of the chassis Plug the 14-pin plug Move the Coaxial plug IGURE IGURE Page 2 DMU-2000 D ANAGEMENT... -
Page 5: Installation And Connection (Ft Dx 5000)
The FT 5000 does not need any modifications. Connect the transceiver, Data Management Unit, after-market Display, and after-market Keyboard (if used) as shown in the following illustration. KEYBOARD MONITOR More than one inch Supplied Connection Cable DMU-2000 D Page 3 ANAGEMENT... -
Page 6: Switches And Connectors
Great Circle map centered on your error message on the after-market monitor, check the location. The DMU-2000 can support the RMC Data position of the CF Card in the slot for proper align- Sentences from the GPS receiver. - Page 7 Unit’s capabilities, but at this time it is not sup- ported. AUDIO IN Jack This jack is audio signal input for the Audio Scope display of the DMU-2000. You can observe the audio wave of a signal provided by external equipment connected to this jack. USB Jack This jack supports the USB 1.1 protocol, for connec-...
-
Page 8: Please Read This First
Please note, there are four power switches that must be turned on for the DMU-2000 to operate. They are (1) rear main power switch of the transceiver, (2) front actual power switch of the transceiver, (3) rear main power switch of the Data Management Unit, and (4) front panel power switch of the Data Management Unit. - Page 9 [ KEY4 ( )] keys, then press the [ KEY7 ( SELECT )] key. Enter the Latitude in the same manner as described above. When entry is complete, press the [ KEY7 ( SELECT )] key again. DMU-2000 D Page 7 ANAGEMENT...
- Page 10 When entry is complete, press the [ KEY7 ( SELECT )] MPORTANT key. When a full reset is performed on the transceiver, FT-950 FT-2000 the DMU-2000’s data will also be reset, if the ANUAL 5000 FT-2000D EFERENCE DMU-2000’s [ POWER ] switch is also on.
- Page 11 Note: The [ KEY1 ( SET )] key is only used when setting the city name and local time. If you make a mistake, press the [ KEY7 ( SELECT )] key for 2 seconds to return to the World Map screen. DMU-2000 D Page 9 ANAGEMENT...
-
Page 12: Before Using An External Monitor
A number of informative and useful displays will appear on the after-market monitor, which is connected to the DISPLAY terminal on the DMU-2000 rear panel. These include the World Clock, Spectrum Scope, Audio Scope and Oscilloscope, Log Book, Temperature and SWR indications, Rotator Control with a Great Circle Map, and Memory Channel List. These various “pages”... - Page 13 EFORE SING AN XTERNAL ONITOR DMU-2000 D BOUT ANAGEMENT PERATION Press and hold in the [ DISPLAY ] key ( FT-2000 ) or [ ENT ] key ( FT-950 and FT 5000 ) The white-lettered tabs disappear “M ” Screen...
-
Page 14: About The Monitor Display
Local Time-2 Field The Local Time-2 time, as programmed, will appear Filter Shift Fields here. These fields graphically depict the positions of the “IF Shift” DSP and RX filter for the Main and Sub VFO. Page 12 DMU-2000 D ANAGEMENT... - Page 15 Oscilloscope page, Log Book page, Temperature Local Time-2 Field and SWR indications page, Rotator Control with a The Local Time-2 time, as programmed, will appear Great Circle Map page, Memory Channel List page, here. and the Menu page. DMU-2000 D Page 13 ANAGEMENT...
-
Page 16: How To Use The World Clock Function
Displays the City setup list. erations between the “Page Select Keys” and the “Function Keys.” Press and hold in this key to disable the DMU-2000 Function keys, and return the Key button controls to the FT-2000/D, FT-950, or FT 5000 operations. -
Page 17: Set (Local-Time1) Setup
[ 21 ( 7 )] [ F7 ( P.BACK )] [ KEY8 ( xxx )] [ 24.5 ( 8 )] [ DISPLAY ] [ KEY6 ( SECADJ )] Key “SELECT” Keys Set to “00” Second DMU-2000 D Page 15 ANAGEMENT... -
Page 18: City Selection
[ 18 ( 6 )] [ F6 ( DEC )] [ KEY7 ( xxx )] [ 21 ( 7 )] [ F7 ( P.BACK )] [ KEY8 ( xxx )] [ 24.5 ( 8 )] [ DISPLAY ] Page 16 DMU-2000 D ANAGEMENT... -
Page 19: Miscellaneous World Clock Setup Options
“Highlight” (YES) is selected, the city name on the world map will be shown in yellow font color. If “NOT Highlighted” (NO) is selected, the city name will be indicated in white. DMU-2000 D Page 17 ANAGEMENT... -
Page 20: Off Timer And Alarm Setup
The Main power (circuit breaker) is not turned off. The Alarm will ring for around 60 seconds. If you want to stop the alarm, press any of the keys located on the front panel. Page 18 DMU-2000 D ANAGEMENT... - Page 21 DMU-2000 D Page 19 ANAGEMENT...
-
Page 22: Spectrum Scope
If the setting is toggled to 2500 kHz, and you press this key once more, the span returns to 25 kHz again. The current span is indicated below the SPAN indica- tion, above the spectrum display. Page 20 DMU-2000 D ANAGEMENT... - Page 23 Press this key briefly to switch the Function key op- erations between the “Page Select Keys” and the “Function Keys.” Press and hold in this key to disable DMU-2000 con- trol, and return the key button control to the FT-2000/ D, FT-950, or FT 5000 operations.
-
Page 24: Using The Ctr (Center) Display Mode
In order to remove the markerfrom the screen, press the [ KEY1 ( MKR ON/OFF )] key. [ KEY1 ( MKR ON/OFF )] Key [ KEY5 ( CF )] Key Page 22 DMU-2000 D ANAGEMENT... - Page 25 013 DISP QMB MKR 013 DISP QMB MKR FT-950: 013 DISP QMB MKR 013 DISP QMB MKR 5000: 016 DISP QMB MKR, if desired. DISP QMB MKR DISP QMB MKR DISP QMB MKR DISP QMB MKR QMB Marker DMU-2000 D Page 23 ANAGEMENT...
-
Page 26: Using The Lbws (Limited Band Width Sweep) Function
[ 18 ( 6 )] [ F6 ( DEC )] [ KEY7 ( xxx )] [ 21 ( 7 )] [ F7 ( P.BACK )] [ KEY8 ( xxx )] [ 24.5 ( 8 )] [ DISPLAY ] Page 24 DMU-2000 D ANAGEMENT... -
Page 27: Using The Fix (Fixed) Mode
[ MENU ] button briefly. The radio will go back to its rotate the ( VFO-A )[ SELECT ] knob and select one of previous condition/situation. the SCOPE MENU items from MENU “131 SCP 1.8 FIX” to MENU “141 SCP 50.0 FIX”. DMU-2000 D Page 25 ANAGEMENT... -
Page 28: Audio Scope And Oscilloscope
“Function Keys.” This key permits adjustment of the Audio Scope at- Press and hold in this key to disable DMU-2000 con- tenuation. Set the appropriate value based on the re- trol, and return the key buttons to control the FT-2000/ ceived signal. -
Page 29: Using The Audio Scope
AUDIO IN jack on the rear panel of the DMU-2000. 3. Press the [ KEY4 ( ATT )] key repeatedly, to change the setting for the attenuator. The available settings are: 0.3 V .. -
Page 30: Using The Oscilloscope
Sweep Speed: 10/30/100/300/1000ms (adjustable) Time Base Indication: One frame: 10 divisions (20 gradations) “Sweep time / 20” 500 μ/1.5 m/5 m/15 m/50 m/DIV Signal Processing: AC Level Detection Synchronizer function Input Level: 1 Vp-p Input (ADC Max. value) Page 28 DMU-2000 D ANAGEMENT... - Page 31 UDIO COPE AND SCILLOSCOPE DMU-2000 D Page 29 ANAGEMENT...
-
Page 32: Log Book Function
Press this key to shift to the log line below the current “Function Keys.” one. Press and hold in this key to disable DMU-2000 con- [ KEY3 ( )] Key trol, and return the key buttons to control of the FT-... -
Page 33: Log Book Example
[ KEY7 ( SAVE/LOAD )] Enter key [ KEY4 ( CHECK )] [ KEY6 ( CONFIG )] [ KEY5 ( SUMMARY )] [ KEY6 ( SETTING )] DMU-2000 D Page 31 ANAGEMENT... -
Page 34: Config Setting
[ 21 ( 7 )] [ F7 ( P.BACK )] [ KEY8 ( xxx )] [ 24.5 ( 8 )] [ DISPLAY ] Advice: If no identification entry is performed, the log will register you as “USER1.” Page 32 DMU-2000 D ANAGEMENT... -
Page 35: Config Setting Mode Setup
The Logbook can be set up for two different formats. When set to DD/MM/YY, March 28, 2005 will be format- ted as 28/03/05. If the format selected is YYYY/MM/DD, the same date will be formatted as 2005/03/08. DMU-2000 D Page 33... -
Page 36: Log Book Data Input
[ ENTER ] key. In addition, when (for example) entering the “PREFIX” and pressing the key- board’s [ ENTER ] key, the “PREFIX SELECT LIST” will appear, and the “ENTITY” and “CQZ ” (or “ITUZ ”) will automatically be entered. Page 34 DMU-2000 D ANAGEMENT... -
Page 37: Log Book Previous-Qso Check (Check)
To erase data, use steps 1 and 2 above to select the data to be erased. Then press the keyboard [ ESC ] key; the data will be deleted. Press [ KEY4 ( RECORD )] to return to the screen depicted on page 34 and end this procedure. DMU-2000 D Page 35 ANAGEMENT... -
Page 38: Saving Log Data
( LOAD ) OADING You may load log data from a CF card into your DMU-2000 (for example, an archive copy, or a log from a different DMU- 2000 or FT 9000 Series Transceiver). Before starting, be sure the CF card containing the log data has been inserted into the CF Card Slot. -
Page 39: Summary Check
[ 18 ( 6 )] [ F6 ( DEC )] [ KEY7 ( xxx )] [ 21 ( 7 )] [ F7 ( P.BACK )] [ KEY8 ( xxx )] [ 24.5 ( 8 )] [ DISPLAY ] DMU-2000 D Page 37 ANAGEMENT... -
Page 40: Temperature / Swr Indication
[ KEY8 ( DISPLAY )] Key Press this key briefly to switch the Function key’s func- tion between the “Page Select Key” and the “Function Key.” Press and hold in this key to disable the Function keys (except this key). Page 38 DMU-2000 D ANAGEMENT... -
Page 41: Graphic Meter Displays
A), and you can change the bias safely even when you the graph indicating the frequencies that have been are using a linear amplifier. measured. In the FT-2000 (100 W version) and FT-950 , this indicator always shows “0 %.” DMU-2000 D Page 39 ANAGEMENT... -
Page 42: Swept Swr Display
[ 18 ( 6 )] [ F6 ( DEC )] [ KEY7 ( xxx )] [ 21 ( 7 )] [ F7 ( P.BACK )] [ KEY8 ( xxx )] [ 24.5 ( 8 )] [ DISPLAY ] Page 40 DMU-2000 D ANAGEMENT... -
Page 43: Using The Marker On The Swr Graph
[ DISPLAY ] we recommend corrective action be taken at the antenna itself. When you want to clear the measured SWR value at the marker test point, press the [ KEY2 ( MARKER )] key. DMU-2000 D Page 41 ANAGEMENT... -
Page 44: Great Circle Map / Rotator Control Function
Function key’s function to the “Func- tion Key.” In addition, when a Yaesu Rotator (G-800DXA, G- 1000DXA, or G-2800DXA) is connected to the trans- ceiver, the transceiver can control the direction of the ro- tation, rotation speed, etc. - Page 45 The following Menu Item must be set to match the starting point of your rotator control indicator needle. The default setting is zero (north). If your controller starting point is south, then the menu must be set to 180 degrees. If not set properly the DMU-2000 display will not show the correct direction. FT-2000: “012 diSP RTR STU...
-
Page 46: Manual Mode
5. Use the [ KEY2 ( CCW )] and [ KEY3 ( CW )] keys to ro- tate your antenna system to the direction just plotted on the Display. Page 44 DMU-2000 D ANAGEMENT... -
Page 47: Preset Mode
ONTROL FUNCTION PRESET M The Preset mode lets you set the desired heading of the rotator in advance, so you can automatically rotate your Yaesu rotator to the designated heading. Use of a Yaesu Rotator (G-800DXA, G-1000DXA, or G-2800DXA) requires the connection of the optional T9101556 cable to the connector located on the back of the transceiver. -
Page 48: "Memory" Mode
ONTROL FUNCTION MEMORY M It is possible to rotate the antenna automatically to headings, which you store into memory in advance. Use of a Yaesu Rotator (G-800DXA, G-1000DXA, or G-2800DXA) requires the connection of the optional T9101556 cable to the connector located on the back of the transceiver. -
Page 49: Using The Memory Channel List
“Page Select Keys” and the store the erased memory data, press this key again af- “Function Keys.” Press and hold in this key to disable DMU-2000 con- ter erasing the memory. trol, and return the key buttons to control of the FT- 2000/D, FT-950, or FT 5000 operations. -
Page 50: Erasing A Memory Channel/Restoring An Erased Memory Channel
When memory data is saved to the CF card under a previ- ously-used file name, the previous file will be overwrit- [ KEY3 ( GO )] Key ten, and the old data will be erased. Page 48 DMU-2000 D ANAGEMENT... -
Page 51: Loading Memory Data
[ KEY7 ( )] key. 2. Press the [ KEY3 ( GO )] key to commence loading of the memory data to the DMU-2000. If you wish to cancel the download, press the [ KEY2 ( CANCEL )] ... -
Page 52: Using The Menu Mode
SING THE The DMU-2000 can display the Menu Mode List of the transceiver on the display. Press and hold in the FT-2000’s [ DISPLAY ] key (or the [ ENT ] key of the FT-950 or FT 5000) for more than two seconds, white letters will appear in the tabs at the bottom of the screen to indicate various functions. -
Page 53: Memu Mode Configuration Changes
[ POWER ] Switch [ MENU ] Button the transceiver back on. Now, release the FT-2000/D [ MENU ] button. [ POWER ] Switch [ MENU ] Button FT-950 [ POWER ] Switch [ MENU ] Button 5000 DMU-2000 D Page 51 ANAGEMENT... -
Page 54: Saving Menu Configuration Data
[ F6 ( DEC )] [ KEY3 ( GO )] Key [ KEY7 ( xxx )] [ 21 ( 7 )] [ F7 ( P.BACK )] [ KEY8 ( xxx )] [ 24.5 ( 8 )] [ DISPLAY ] Page 52 DMU-2000 D ANAGEMENT... - Page 56 Copyright 2010 Printed in Japan VERTEX STANDARD CO., LTD. All rights reserved No portion of this manual may be reproduced without the permission of VERTEX STANDARD CO., LTD.
Need help?
Do you have a question about the DMU-2000 and is the answer not in the manual?
Questions and answers