Table of Contents
Advertisement
Quick Links
t
RAMSES 813 top Set 1
RAMSES 813 top Set 2
Ref. Nr. 813 9 401
Ref. Nr. 813 9 402
Bedienungsanleitung
Uhrenthermostat
Operating instructions
Clock thermostat
Mode d'emploi
Thermostat à horloge
Instrucciones de servicio
Cronotermostato
Istruzioni per l'uso
Cronotermostato
Gebruiksaanwijzing
Klokthermostaat
Manual de instruções
Termóstato de relógio
1
20
37
54
71
88
REC 1
105
RAMSES 813 top
REC 2
Advertisement
Table of Contents

Related Manuals for Theben RAMSES 813 top Set 1


Summary of Contents for Theben RAMSES 813 top Set 1
- Page 1 RAMSES 813 top Set 1 RAMSES 813 top Set 2 Ref. Nr. 813 9 401 Ref. Nr. 813 9 402 Bedienungsanleitung Uhrenthermostat Operating instructions Clock thermostat RAMSES 813 top Mode d’emploi Thermostat à horloge Instrucciones de servicio Cronotermostato Istruzioni per l’uso...
-
Page 2: Table Of Contents
Table of Contents Table of Contents Designated Use Designated Use Designated Use. . …………………………...…….……………..20 ® The RAMSES ® 813 top digital timer thermostat and receiver REC 1 868 Designated Use ..............15 The RAMSES 811/812 top is a digital clock thermostat Safety Instructions. -
Page 3: Description And Mounting
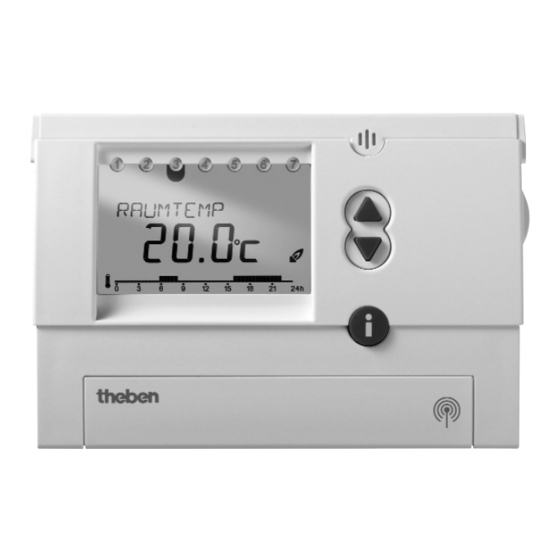
Description and Mounting Description and Mounting Device Overview Device Overview Hinged cover Hinged cover Icon bar for display of the Icon bar for display of the programming level (rotary switch positi- Display of the day of week Display of the day of week programming level (rotary switch on MENU) 1 = Monday, 2 = Tuesday etc.) - Page 4 REC 1/REC 2 Override switching C1 ON/OFF Status display channel C1 Level display for reception quality Antenna connection Status display channel C2 (only REC 2) Override switching C2 ON/ OFF (only REC 2) ENGLISH...
-
Page 5: Mounting And Electrical Connection
Mounting and Electrical Connection 3.2.1 Clock thermostat RAMSES ® 813 top • Wall mounting The thermostat can be mounted on an internal wall. For your safety: First test the reception quality. Ideal mounting height: approx. 1,5m • Free-standing in the living room: If the stand is used the controller can also be operated from the desk. -
Page 6: Installation And Operation
3.2.2 Connection examples REC 2/REC 2 Installation and Operation For installation of RAMSES ® 813 top, follow the sections 4.1 to 4.5. REC 1/REC 2 4.1 REC 1/REC 2 4.1.1 Alignment of the Antenna Assumption: The product REC 1/REC 2 is connected to mains voltage. For optimum reception, the antenna must be in a vertical position. -
Page 7: Ramses 813 Top
• Set the rotary switch to MENU. 4.1.3 Override Switching REC 1/REC 2 • Use the ▲ and ▼ keys to select SERVICE Switch ON/OFF channel C1: (press OK button to open the service menu). ->Tap briefly (approx. < 1 sec) on the C1 button. •... -
Page 8: Carrying Out A Reset
4.1.5 Clearing codes 4.1.7 Response to a fault Attention: Please cancel the previous code before fixing/coding Transient malfunction: The relay's switching status is not affected becau- the new one. se the switching commands are transmitted several times. -> Press the C1 (C2) button on REC 1 (or REC 2) for approximately 10 Transmission failure: The receiver switches to emergency mode after two secs. -
Page 9: Selecting The Language
Selecting the Language 3. The display changes automatically to Y e a r the date setting. 2 0 0 2 1. The display automatically shows the selected language Set the year, month and date one after Reset. M o n t h after the other. -
Page 10: Info Button
- Set display type, (i.e. which information is shown in the display, 4.5.4 Permanent comfort 4.5.4 Permanent comfort 3. The display changes automatically to also see chap. 5.4.2). Y e a r The room temperature is permanently regulated to the programmed com- the date setting. -
Page 11: Early Cancellation, Check Or Clearance Of The
1. Open the hinged cover and turn the rotary switch to the MENU 3. After 3 seconds, the display changes and shows the text C o m f o r t Early Cancellation, Check or Clearance of setting. Within 3 seconds, select the comfort or lower temperature Set display type, (i.e. -
Page 12: Holiday Program
Note: If a holiday program is already saved, you can choose if you These temperature values are programmed ex works. You can change these want to check or clear it. In order to save a new holiday program, the according to your wishes. already saved holiday program must be cleared. - Page 13 5.3.2 Creating a new temperature profile P3 5.3.2 Creating a new temperature profile P3 3 sec. N e w F r e e M o - F r M I N U T E L o w e r H O U R 1 6 : 0 0 1 6 : 3 0 S a / S u...
- Page 14 5.3.5 Displaying individual switch times and clearing them 5.3.5 Displaying individual switch times and clearing them back to back to no program stored in memory 1. Displaying the switch no program stored in memory 1. Displaying the switch times times P r o g r a m E m p t y see 5.3.1...
-
Page 15: Service Settings
Service Settings 5.4.2 Selecting the display type Service Settings 5.4.2 Selecting the display type 5.4.1 Overview "Service" menu 5.4.1 Overview “Service” menu D i s p l a y D i s p l a y Select the display type with the button ▲ or ▼. Confirm with the OK T A R G E T T E M P Select the display type with the button see 5.4.2... - Page 16 5.4.3 Selecting the language 5.4.5 Adjusting the controller behaviour 5.4.3 Selecting the language Characteristics of the PD controller F r a n c a i s E n g l i s h back to back to With suitable heating systems the PD controller is characterized by a D e u t s c h short setting time, scarce maximum overshooting and therefore a high L a n g u a g e...
- Page 17 Time/Date and Summer/Winter Time Time/Date and Summer/Winter Time 3 sec. E N D Setting the time and date: Setting the time and date: hour, minute, year, month, day. hour, minute, year, month, day. U S A / C A N Description see page 18.
-
Page 18: Maintenance And Repair
Maintenance and Repair Maintenance and Repair Control accuracy: Technical Data ± 0.2 K Temperature meas. range: O °C to 50 °C, resolution 0.1 °C With the exception of a regular replacement of the batteries for the With the exception of a regular replacement of the batteries for the Control type: RS type 2B acc. - Page 19 Theben AG Hohenbergstr. 32 72401 Haigerloch Tel. +49 (0) 74 74/6 92-0 Fax +49 (0) 74 74/6 92-150 Service Tel. +49 (0) 90 01 84 32 36 Fax +49 (0) 74 74/6 92-207 hotline@theben.de Adresses, telephone numbers etc. at www.theben.de...
Need help?
Do you have a question about the RAMSES 813 top Set 1 and is the answer not in the manual?
Questions and answers