Table of Contents
Advertisement
Quick Links
Advertisement
Table of Contents

Related Manuals for Genuine Scooter Company VENTURE 50


Summary of Contents for Genuine Scooter Company VENTURE 50
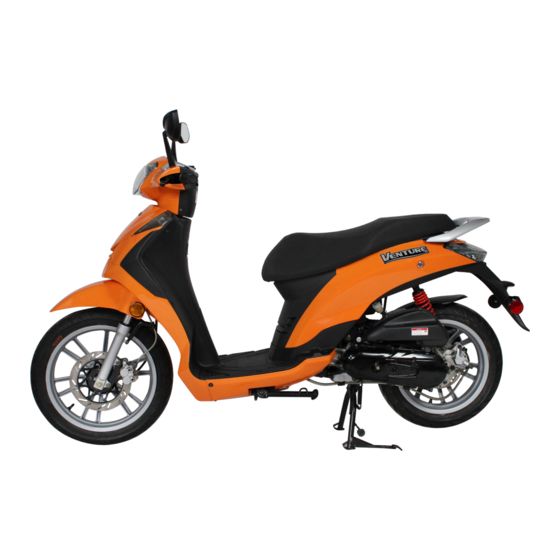
- Page 1 Owner’s Manual...
- Page 10 of time Two keys are supplied with your vehicle. Keep the spare key in a safe place.
- Page 12 Fuel Indicator an open open If the coolant temperature indicator (2) has reached the red area, the coolant temperature is too high indicating a problem. level to uel Grade if it has ed , become (minimum 93 octane) in this vehicle.
- Page 14 refueling coolant to the between the Low and Full indicators as shown above. Close when mixing with coolant...
- Page 16 Take this safety check seriously. Carry out maintenance activities before you start your ride or ask a specialized dealer to do so. This will provide you with the certainty that your scooter corresponds to traffic regulations. A technically sound scooter is a basic requirement for the safety of both yourself and other road users.
- Page 17 For the sake of your safety, use only original Genuine Scooter Company parts and acessories or products approved by us. DOT a We cannot judge whether each third- party product can be safely used in combination with your scooter. Nor can an official approval give such a guarantee in all cases, since the test The total allowable weight may not...
- Page 18 Fuel consumption, environmental Turn the engine off when waiting in Fuel consumption is also affected by traffic. pollution and wear of the engine, brakes conditions that are out of your control, Different riding conditions affect fuel and tires depend on various factors. for instance, poor road conditions, Your personal riding style is highly consumption.
- Page 19 250 miles Running-in new tires 500 miles New tires have a smooth surface and are often covered in release agent. The tires must therefore be roughened by carefully running them in at various slanted positions. Only then will the tire surface miles.
- Page 20 center Prop up the scooter with the parking stand. Operate the rear handbrake lever to avoid movement of the scooter. Avoid high engine rpm's while the vehicle is standing still, otherwise the either clutch will engage. The tank cap is located behind the rear part of the seat (1).
- Page 22 Washing the scooter or riding through water or rain can delay the braking effect due to wet or (in winter) ice-covered brake discs and linings. If the scooter is not used for a while, a rust film may form on the brakes and thus increase the braking effect.
- Page 24 Servicing the scooter / cleaning agents...
- Page 25 Servicing the scooter / cleaning agents Use of the vehicle in the winter can cause considerable damage due to the presence of salt on the roads. corrosion At the end of each ride, wash the scooter with cold water. - Thoroughly dry the scooter. - Treat parts liable to corrosion with wax- borne anti-corrosion agents.
- Page 26 Servicing tires Long-term Storage Storage If the scooter is not used for a long - Clean the scooter period, it is recommended to support the - Remove the battery scooter so that its weight is not on the - Observe the maintenance instructions. tires.
- Page 27 For approved accessories and original spare parts, see a Genuine Scooter Company dealer. He/She will also Technical changes to the scooter can We recommend using only approved ensure that they are professionally lead to cancellation of the warranty. accessories and original spare parts installed.
- Page 28 If the oil filter element also needs to be - Stop the warmed-up engine, wait for several minutes. replaced or cleaned, perform the following procedure. - Prop up the scooter on the parking stand. - Remove the oil strainer cover (1), spring - Remove the oil drain bolt (1) and drain (3) and Oil filter element (2).
- Page 29 Stop the warmed-up engine, wait for several minutes - Prop the scooter on the parking stand. - Remove the oil drain bolt (2). - Drain the transmission oil (completely). - Install the oil drain bolt (2). - Stop the warmed-up engine, wait for approx.
- Page 31 While the tires are cold: - Twist off the valve caps: - Check/adjust the tire pressure. - Twist on the valve caps. Tire pressure Front 2.0 bar Rear 2.25 bar Tire size The standard scooter is provided with the following tire sizes: Checking the tire profiles Recommended minimum profile depth: Front...
- Page 32 reservoir Checking the brake fluid Turn the handlebars until the brake- fluid tank (2) is level. WARNING Sudden changes in play or a spongy The brake fluid level (3) should be feel of the brake lever (1) can be Every two years, the brake fluid must between the minimum (MIN) and the caused by faults in the hydraulic be changed by a dealer.
- Page 33 system...
- Page 34 brake system Checking the brake fluid Turn the handlebars until the brake- fluid tank (2) is level. WARNING Sudden changes in play or a spongy The brake fluid level (3) should be Every two years, the brake fluid feel of the brake lever (1) can be between the minimum (MIN) and the caused by faults in the hydraulic must be changed by a dealer.
- Page 35 system (continued) disc...
- Page 36 Check the throttle cable for light - Slacken the lock nut (3) on the movement by turning the twist grip handlebar. (1) from closed to open position - Turn the setscrew (2) accordingly. - Move the handlebar to check whether - Tighten the lock nut (3).
- Page 38 Disassembly and replace - Remove the screws (7) and take - Remove the screws (9) and take off off the air filter housing (8) the air filter cover (10). - Remove the foam (11). - Check air filter element (12) If damaged or dirty, replace.
- Page 39 Never run the engine without an air filter. - Dust deposit is one of the major causes of reducing output horsepower and increasing fuel consumption. - Change the air cleaner element more frequently to prolong the engine's service life if the scooter is often ridden on dusty roads.
- Page 43 negative (-) ositive (+) attempt...
- Page 45 - Remove the headlight. - Remove the rubber cover (1). - Pull the position light (5) with the bulb - Remove the bulb socket (2) by holder carefully out of the position turning to the left. light housing. - Remove the head light bulb (3). Installation takes place in reverse order to disassembly...
- Page 49 Remove the screws (7). The rear direction indicator / tail / brake light - Remove the bolts (6). is LED. - Pull the lamp connector (8). Please change the whole lamp. - Carefully remove the tail / brake lamp. Installation takes place in reverse order to disassembly.
- Page 50 Start the scooter and run the engine. - Activate the dipped beam. If you have problems adjusting the headlamps, see a specialized dealer. - Use a screwdriver to adjust the An incorrect adjustment is punishable by Position the scooter on a level floor 5m screws (1) for the vertical and law.
- Page 51 L J1P38MB 2.0 hp at 7 rpm (restricted) 1.5 ft-lb 6500 rpm Deni PD18J Air Filter:...
- Page 52 Venture 29 psi R 33psi...
- Page 53 s / 1.8 Gallons Gear...
- Page 54 78.3 in 27.6 inches with 44.5 inches 56.6 in 31.5 in 210 lbs 218 lbs 553 lbs 30 mph (restricted)
- Page 55 !“Õ–¤›Ã!—“ –‘fl“ CAUTION …ARNING For safety reasons, do not alter or !- .ø0ª ±3 -±-Û.±56¥8ø-.ª ¨:ª ©øÆÆø-¨ß adjust the scooter components or ©8¥¥ æª.±5ª -´¥¥ ø-º ™±8ºÚ chassis in a manner that exceeds Genuine Ã"ª ™øÆ(±´+ ø,¨(™(¨(ª+ ,øÆÆ(ªº ±´¨ øƪ ¥(+¨ ªº design restrictions.
- Page 56 1500 miles 300 miles 7500 miles 500 miles...
- Page 57 1500 miles 300 miles 7500 miles 500 miles...
- Page 58 5000 Miles 1500 Miles 3000 Miles 500 Miles 15,00 Miles 7500 Miles 10,000 Miles 12,500 Miles...
Need help?
Do you have a question about the VENTURE 50 and is the answer not in the manual?
Questions and answers