
Related Manuals for SOUNDMASTER UR411


Summary of Contents for SOUNDMASTER UR411
- Page 1 DEUTSCH ITALIANO ENGLISH NORSK FRANÇAIS ČEŠTINA NEDERLANDS Hersteller Wörlein GmbH Tel.: +49 9103/71670 Gewerbestrasse 12 Fax.: +49 9103/716712 D 90556 Cadolzburg Email. info@woerlein.com GERMANY Web: www.woerlein.com UR411...
-
Page 2: Table Of Contents
Contents Important Safety Instructions .................. 2 Safety ..................................2 Identifying the Parts ....................4 Main Unit ................................... 4 Remote Control ................................. 5 Preparations ......................6 Prepare the Remote Control ............................. 6 Replace the Remote Control Battery: ........................6 Install Batteries ................................. 6 Connections ...................... -
Page 3: Important Safety Instructions
Important Safety Instructions The lightning flash with arrowhead symbol, within an equilateral triangle, is intended to alert the user to the presence of uninsulated RISK OF ELECTRIC SHOCK “dangerous voltage” within the product’s DO NOT OPEN enclosure that may be of sufficient CAUTION: TO REDUCE THE RISK OF ELECTRIC magnitude as to constitute a risk of electric SHOCK, DO NOT REMOVE COVER (OR BACK). - Page 4 18 The ventilation should not be impeded by covering the ventilation openings with items, such as newspapers,table-cloths, curtains, etc… 19 No naked flame sources, such as lighted candles, should be placed on the apparatus. Caution: Use of controls or adjustments or performance of procedures other than those described herein, may result in hazardous radiation exposure or other unsafe operation.
-
Page 5: Identifying The Parts
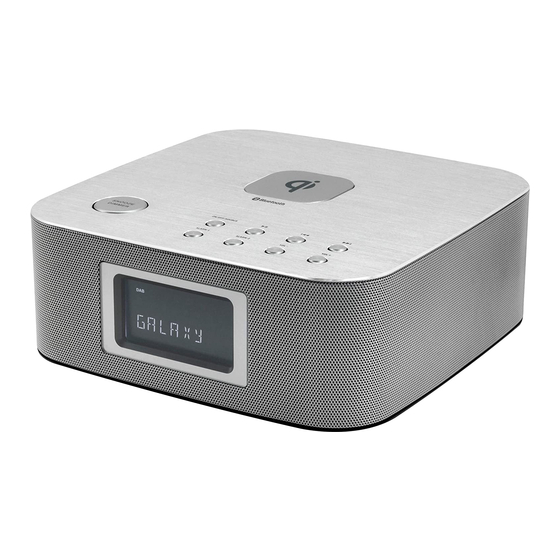
Identifying the Parts Main Unit 1 SNOOZE/DIMMER 5 ALARM 1/ALARM 2 - Repeat the alarm. - Set the alarm timer. - Adjust the display brightness. - View alarm settings. - Enter into time setup. 6 VOLUME +/- 2 ON/OFF/SOURCE - Increase or decrease the volume level. - Switch the unit between ON and Standby 7 Display Panel mode. -
Page 6: Remote Control
Remote Control - Switch the unit between ON and Standby mode. 2 DIMMER - Adjust display brightness. 3 SCAN - Scan for radio stations in either DAB or FM modes. 4 INFO - View information of FM/DAB radio stations. 5 MENU - Displays menu screen. -
Page 7: Preparations
Preparations Prepare the Remote Control The provided Remote Control allows the unit to be operated from a distance. Even if the Remote Control is operated within the effective range (6m), remote control operation may • be impossible if there are any obstacles between the unit and the remote control. If the Remote Control is operated near other products which generate infrared rays, or if other remote •... -
Page 8: Connections
Connections Connect the FM/DAB antenna • Connect the supplied antenna to the DAB socket on the rear of the unit by turning the antenna’s screw cap clockwise. Do not over tighten as this could damage the antenna. • To avoid noisy interference, keep the antenna away from the unit, the connecting cord and the power cord. -
Page 9: Set The Clock
• Use USB Charging socket Connect a USB cable (not supplied) to USB socket to charge your smartphone or tablet PC. • Uses of Qi (wireless charging) This function only works with mobile devices that support Qi technology. Put your device with the backside to the logo, the device screen is informing you about the charging status. Note: It can be happen that the DAB &... -
Page 10: Set The Alarm Timer
Set the Alarm Timer Before setting the alarms ensure the time shown on the clock is correct. 1. Press and hold the ALARM (1 or 2) buttons in standby mode for a few seconds and the hour digits will flash. Press the buttons on the remote control or the / buttons on main unit to set the hour you wish to woken. -
Page 11: Select Modes
Select Modes • Press the ON/OFF/SOURCE button on the main unit or SOURCE button on the remote control to select between LINE IN, BLUETOOTH, DAB and FM mode. Set the Sleep Timer This unit can switch to standby automatically after a set period of time. 1 Press the SLEEP button repeatedly to select a set period of time (in minutes). -
Page 12: Bluetooth Operation
Bluetooth Operation Pair Bluetooth-enabled Device The first time you connect your bluetooth device to this player, you need to pair your device to this player. Note: - The operational range between this player and a Bluetooth device is approximately 8 meters (without any object between the Bluetooth device and the unit). -
Page 13: Radio Operation
To skip to a track, press the / buttons. Radio Operation Auto Scan and Save Preset Station 1 Press the ON/OFF/SOURCE button on the unit or press the SOURCE button on the remote control repeatedly to select FM mode. 2 Press and hold the button on the main unit or press the SCAN button on the remote control to activate automatic programming. -
Page 14: Dab Operation
DAB Operation • Your DAB radio will automatically tune to all available stations when the unit switching to DAB mode for the first time. • To retune, or search for new stations, press and hold the button on the main unit or press the SCAN button to perform a full scan. -
Page 15: Troubleshooting
Troubleshooting To keep the warranty valid, never try to repair the system yourself. If you encounter problems when using this unit, check the following points before requesting service. No power Ensure that the AC cord of the apparatus is connected properly. Ensure that the unit is switched on. -
Page 16: Specifications
Specifications General Power Supply ....................AC 220-240V~ 50/60Hz Power Consumption ........................25W Output Power ........................... 5W x 2 USB Charging ........................5V, 2.1A Total Harmonic Distortion ....................1%(1kHz, 1W) Audio Input Sensitivity ......................500mV Frequency Response ...........
Need help?
Do you have a question about the UR411 and is the answer not in the manual?
Questions and answers